


Rustic Orb Wood Accent DIY

I am in love with these decorative orbs. Most of the time you see them in light fixtures but I wanted to make one for a home décor accent piece, for my side table. Did I mention I like unique items that not everyone has, that are simple. So here is another super easy project that has that farmhouse chic look. It will also take less then 10 minutes of your time!
Supplies you'll need:
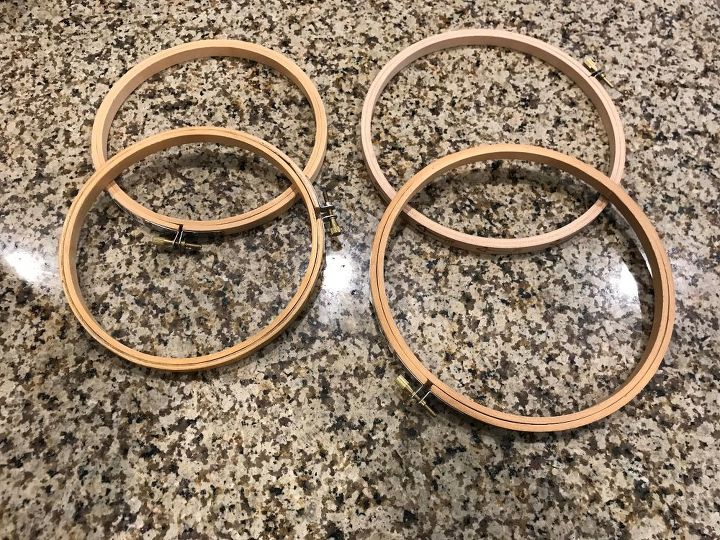
Embroidery Hoops 2 set of 6" 2 set of 7"
Thumb tacks
this is the only 2 items, it doesn't get easier then this!
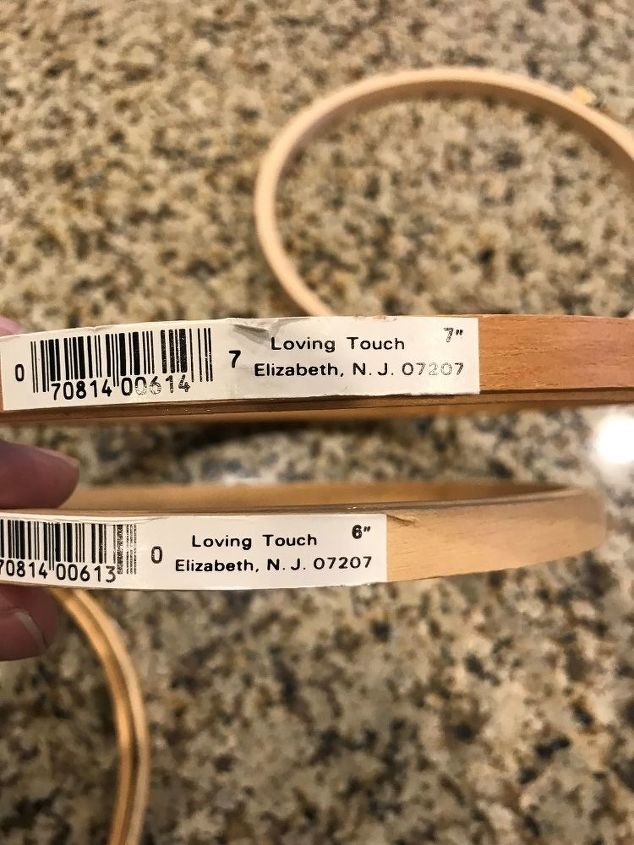
I'm going to make two so you'll need two sets of 6" and 2 sets of 7" (that will be 4 of each) now you can make any size but I didn't want large ones for my table top. So first you'll need to remove the labels
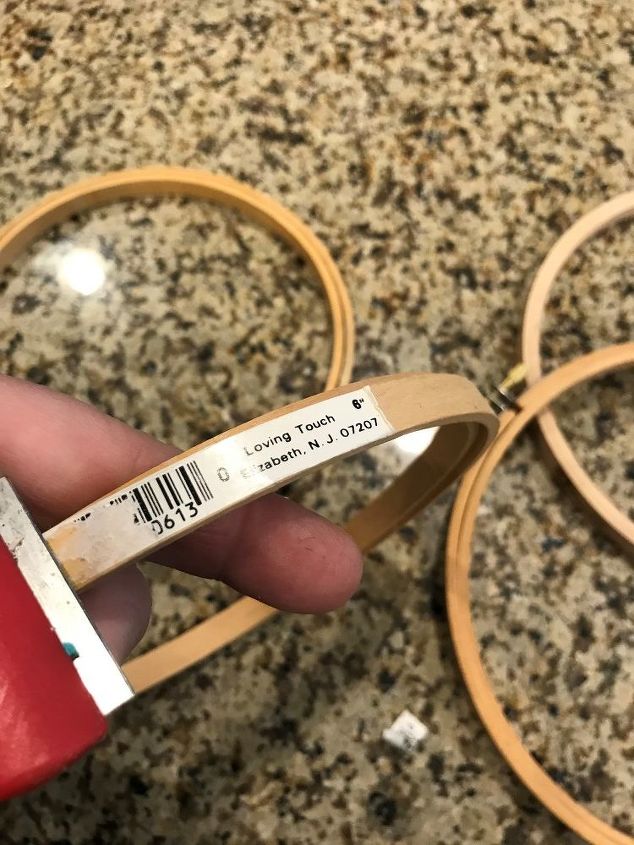
I did this by using a razor blade however it wasn't really working, it was a trial and error experience. So I decided to just run them under hot water and it came right off. (safer also)

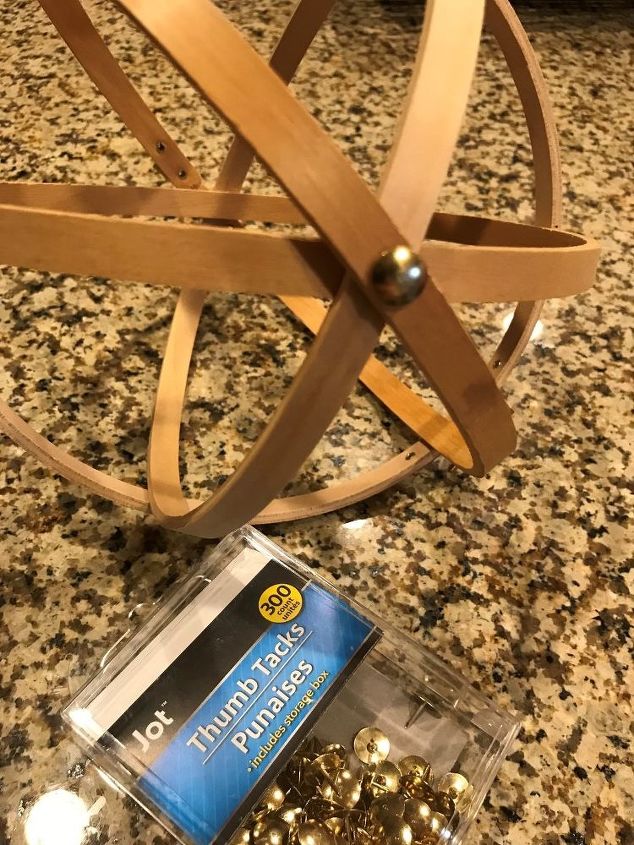
Next you need to make an x with the first two hoops. Then cross over the x you just made with the 3rd hoop. With the 4th one go right around the circumference of the orb. You will want to make sure the screws are all tight. From there you will have the shape you need. To secure them get a thumb tack and push right through the center that all rings cross so it will hold them together.
Both are done. I chose not to paint or stain mine. However, you could before you assemble them. I liked the natural look.
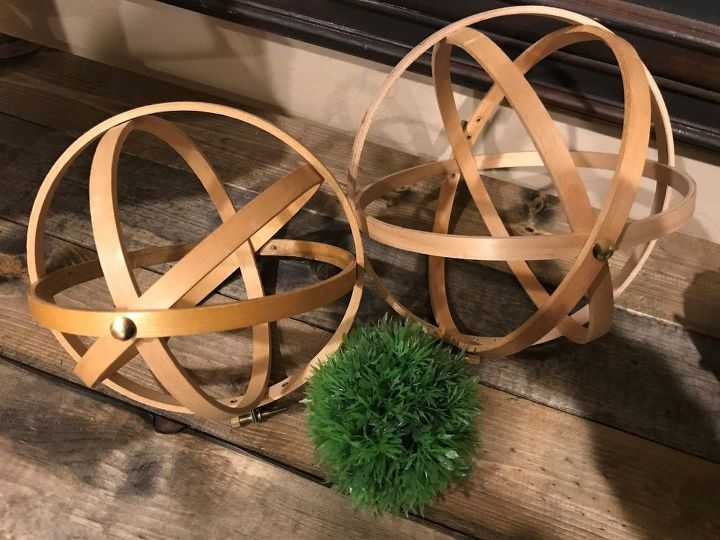
Here are both of them done this was really less then 10 minutes. I picked them up at a local thrift store one set for $.75 and the other set for $.50 and the thumb tacks at my local dollar store. This was an easy farmhouse chic look for $2.29 including taxes.
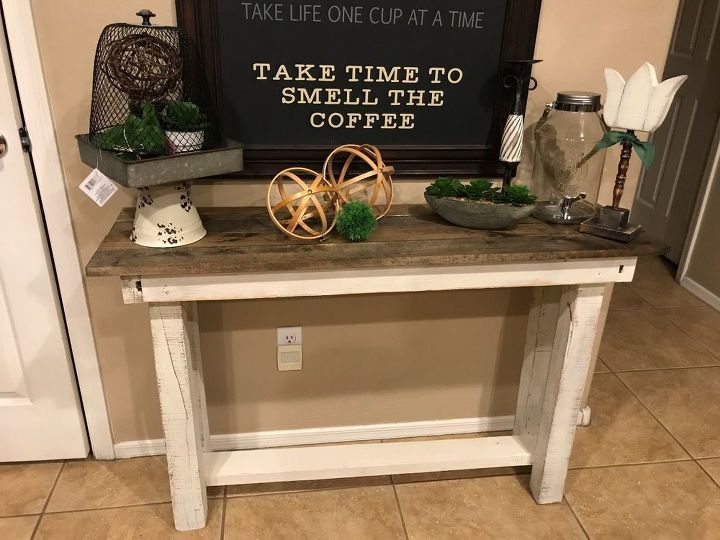
Here are my finished orbs / spheres on my side table. I think they came out great. I love the contrast of the light wood on my dark wood table. I loved the price even more. This was seriously the easiest project I think I have ever done. You know with projects how they always take longer then expected? Well not this one. It was nice and easy as well as fast. The best part, I didn't even have to paint or stain it which sometimes takes forever!
Resources for this project:


Comments
Join the conversation
-
First thing I thought of was putting a spiced orange inside the hoop.
-
These look lovely. So clever.


Frequently asked questions
Have a question about this project?
They are really nice but I don’t understand what you did with the embroidery hoop connectors?
they look really nice!
i have one question, though what you did with the connectors of the embroidery hoops?
Do you bend the point of the thumbtack down or just stick it through?