2.12M Views
Easy Grout Cleaner (and Swiffer Hack) for Under $8
by
Elena K, Hometalk Team
(IC: homeowner)
12 Materials
$8
60 Minutes
Medium
If you’ve read my other posts, you know by now I’m into DIY green cleaners: easy to make using household ingredients. I’m sure you’ll also notice I like to reuse and upcycle. Why purchase a new swiffer when I can turn the old into new? With that in mind, I decided to tackle a long due bathroom project: A DIY Tile & Grout Green cleaner to make my floors shine again! Read on to learn how to make yours.
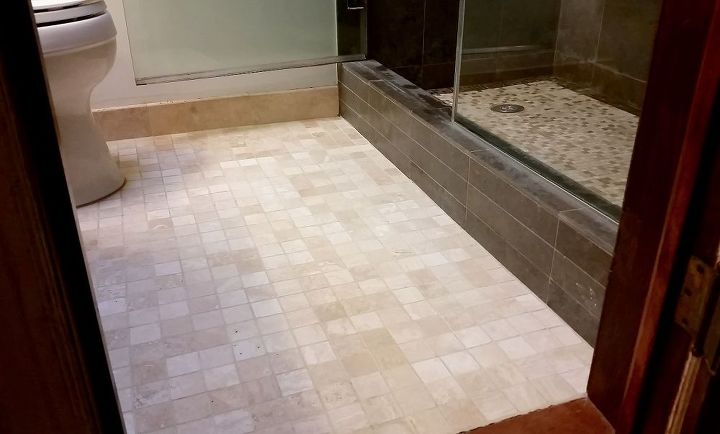
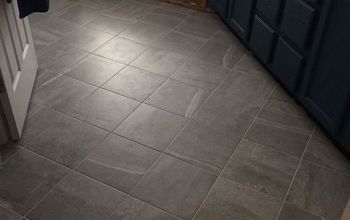
Ya’ll know how hard to clean grout is, right? Add the fact that we have stone tiles - light marble, to be specific - far more delicate than regular tiles. My first challenge was to come up with a green cleaner, gentle enough not to damage the stone but effective to get the dirt out of the off-white grout. In other words, vinegar (one of my favorite all-time cleaners) was a no-no.
I adapted an online recipe to suit stone and gave it a try. I’ll also give you a variation that you can use in ceramic, or vinyl floors. WOW. I can’t believe the results! And really, quite easy except for the elbow grease that the job demanded. Ready? Let me show you how I did it.
STEP 1: SWEEP & VACUUM THOSE FLOORS Before you apply the cleaner make sure your floors are well swept and vacuumed or you may end with wet dust, harder to remove. So grab a broom and start sweeping the floor. Use the vacuum cleaner in corners and hard to access - like behind the toilet.
STEP 2: GATHER YOUR INGREDIENTS Let’s start making the DIY cleaner, to ensure the borax has dissolved well into the water before we use it. INGREDIENTS: - Distilled water: 1 cup - Rubbing alcohol, ideally 70% Isopropyl Alcohol or higher: 1/4 cup - Borax: 1/8 cup - Dawn soap (I used the classic, blue color): 1 tablespoon - Essential oils (optional): lemon, lavender, or pine are good choices: 12 drops total. TIP: If you can’t find Borax, replace it by baking soda. Keep in mind borax is a cleaner booster, so you may not end up with the same results. You’ll also need: - Tablespoon - Small pot to mix ingredients - Spray bottle - Towel, clean old gym socks (preferably white) - Brush and old toothbrush - Funnel (suggested) ALTERNATIVE RECIPE: For regular floors, replace 1/8 cup of borax with 1/4 cup of vinegar and keep all other ingredients to the same proportions. If you’re planning to use this alternate recipe cleaner in your wood floors mop cleaner soon after you apply, to prevent the vinegar from staying in the wood for long.
STEP 3: GET THE WATER + BORAX AND LET’S GET STARTED! Start by adding 1 cup of distilled water to a pot. TIP: Warm your water on the stove for a minute or two so the borax melts more easily. You don’t want boiling water, just lukewarm. Get the water off the stove and add borax: 1/8 of a cup is enough. TIP: You can use your fingers to get rid of clumps before pouring into the water.
STEP 4: ADD ALCOHOL & DAWN LIQUID SOAP. Next: measure 1/4 cup alcohol and add it to the water & borax. Then add 1 tablespoon of dawn - classic blue is preferred - to the mix to finish it off! TIP: in Europe, you can get Fairy instead. For a nice scent, add essential oils next - either one or combining fragrances - to make up to 12 drops. This time, however, I decided to pass on the oils! CAUTION: Do not use castile soap instead of Dawn: it’s oil based and more likely to leave streaks on the floors. Also, make sure you use 100% PURE ESSENTIAL OILS and not fragrance oils instead. If you’re not sure, leave them out. TIP: You can use the same spoon to stir ingredients. Once ingredients are well mixed, pour the cleaner into the spray bottle. TIP: If your bottle has a small opening, use a funnel to avoid spills.
STEP 4: MAKING A DIY SWIFFER IS EASY To make your own, you’ll need: - Old Swiffer - Sponge - Small towel, rag, or sock - preferably white - 2-4 straight sewing pins, or needles Get an old Swiffer and - unless the sponge is in good condition - remove it, because we’re going to use our own. Have the sponge ready and next to the Swiffer. Finally get a small towel, rag, or sock and wrap it around the sponge and the swifter. Use the sewing pins to hold it in place. TIP: Cut the towel if it’s too large, or if you’re using socks cut them open before pinning. I like white so I can tell how much more cleaning is needed after a first application. TIP: make sure your cloth is lint free. If you want to get fancy, get a microfiber cloth for best results.
STEP 5: TIME TO START SPRAYING! Get the spray bottle and apply a layer of your DIY cleaner. TIP: If your floors are really dirty and you want TO CLEAN THE GROUT go to STEP 6. Otherwise, keep reading. For a light cleaning, mop the cleaning solution with the DIY swifter and allow floors to dry. No need to rinse. You can let it air dry or use a rag or towel to dry it (see STEP 11). To mop hard-to-access areas where the DIY Swiffer won’t fit, see STEP 9. TIP: Or if you have young children crawling on the floors, you can use just plain water to rinse the residue off.
STEP 6: WANT TO CLEAN THAT GROUT? ELBOW GREASE IS YOUR FRIEND! If you’re reading this, you’ve probably tried a few things to make your grout nice again. I certainly did! From bleach to Ajax, grout cleaner, even an enzyme spray that promised to bring the lustre back to our light colored grout. Guess what? Nothing helped as much as the DIY cleaner! So, after you spray the floors, grab that brush and start scrubbing. I found it easier to go on my knees - Hey. Who said this would be easy? ;-) TIP: Use circular movements to scrub the floors. Let the foam love to grow in your tiles and do its job!
STEP 7: A NICE TOOTHBRUSH WILL GET THE GRIME OUT! Next, grab the toothbrush and scrub back and forth in direction of the grout, to get that cleaner into the grooves. TIP: Use a back and forth movement for better access to the grout grooves.
STEP 8: READY FOR A QUICK COFFEE? Yes, it’s that time again! Let the DIY cleaner sit for a few minutes before you mop. So get that coffee or tea, and relax - I have my chocolate ready! We’re not done yet so don’t go anywhere.
STEP 9: ALMOST DONE, LET’S DO THE FLOORS NOW! Repeat STEP 5, 6, and 7 (i.e. Spray and scrub, with brush and toothbrush) to get the DIY cleaner deep onto your floor tiles and grout. To access SMALL AREAS where the Swiffer won’t fit, slid a sock in your right hand (I’m a righty) and mop.
STEP 10: USE YOUR DIY SWIFFER TO MOP LARGER AREAS And to mop larger areas, just use the DIY swiffer. Feel free to rinse the towel or sock if gets really dirty, or just change it. TIP: To rinse or clean, unpin the top first and resin to replace or put back in place.
STEP 11: WANT THE FLOORS TO DRY FASTER? USE A TOWEL! You can let your floors air dry, but if you prefer to finish faster get a towel and hand dry as you mop. Or, replace the rag or towel in your DIY swiffer by a clean one, and mop the floors all at once.
STEP 12: NEED TO DO IT AGAIN? USE THE TOOTHBRUSH! If you are a perfectionist and want to do an A+ job, feel free to do a second pass on the areas that still need a little more cleaning. TIP: Use the toothbrush to focus on the details and to save some time later with the mopping. Granted, this was quite a job but it did yield results! So pleased that I’m going to seal the floors now, to keep the grout shining for a long time. To get sparkling Glass Shower Doors check my previous post - http://www.hometalk.com/diy/clean/bathroom/3-ingredient-green-diy-soap-scum-remover-for-your-glass-shower-doors-21433429 - to make DIY Love Fizzy Bombs for your toilet go to http://www.hometalk.com/diy/clean/bathroom/love-fizzy-bombs-to-clean-your-toilet-and-laundry-in-no-time-19208798 and for updates on recipes and DIYs, follow me. Happy cleaning! Next week I’ll be cleaning the hood and taking care of those greasy kitchen hood filters. Stay tuned!
Enjoyed the project?
Any price and availability information displayed on [relevant Amazon Site(s), as applicable] at the time of purchase will apply to the purchase of this product.
Hometalk may collect a small share of sales from the links on this page.More info
Published October 5th, 2016 7:58 PM
Comments
Join the conversation
2 of 326 comments
-
Nan88897453 on Apr 08, 2024
Buy the little red power wand with different size brush attachments. Will save you so much time. Very powerful. Has many uses but my whole house is tiled with beige grout. Grandkids, dog, and men in boots are in and out all day. Twice a week I was spending days scrubbing the grout with a broom and various brushes then mopping. Too much😵💫
For me. The electric brush has speeded up the process and gets into the tiny crevices I use Dawn with a bit of oxi cleaner and water spray. I add lavender to the mop on the final pass.
-
-
Gig69451122 on May 26, 2024
I would hire a professional. I realize it would be more costly. But, I have larger areas. Not just a bathroom floor. Plus, they guarantee their work. And, because of their powerful machines. It stays cleaner longer.
-
Frequently asked questions
Have a question about this project?
I would use a scrubbing brush rather than a toothbrush, as it covers more surfaces and won’t take as long
How do I clean linoleum during yellow to get the yellow off
how to clean carpet the dog went on