


Magnet Display Board Introducing A DIY For Collectors

by
Janet
4 Materials
$20.00
4 Hours
Easy
How To Display Magnets
I have collected souvenir magnets for years. It is a fairly inexpensive way to remember our travels.
Until our new home, I had them on a couple of magnetic dry erase boards and on the refrigerator. In the new house, we have all stainless appliances. The appliance store was pretty adamant that magnets should not be used on said appliances. I didn't really have a good place for the dry erase boards where I thought they would look good.
So, my collection was stored in the garage for a couple of years :-(
I Did My Research
I spent a bit of time researching my options. There are magnetic display boards available at Amazon and other retailers. The problem is they were too expensive (I am a frugal spender) or not attractive to me.
I found many ideas and I finally decided on how to make one. Unfortunately, I did not take pictures during the process, so I can only show the end product.

I Decided To DIY A Magnet Display Board
I started with this Galvanized Sheet Metal from Home Depot. It is available in two sizes, but the 24" X 36" worked great for me.
Next, I purchased some material in a chevron pattern. It is a cotton blend and was thick enough to cover the sheet metal and not too stiff to make it hard to attach.
For the size that I used - 24" X 36". I had to get enough material to have 4"-6" on each edge.
The Construction Process
You will need a flat surface work area. I picked our dining room table. Just a note of caution - cover your work area in packing paper or some other way to avoid damaging your work area.
I added a piece of foam board to the back for stability. I just glued it to the sheet metal with E-6000 glue.
I washed and ironed the fabric. Then I placed it good side down on the table and cut it to the size of my sheet metal (plus extra 4"-6"). The sheet metal with foam board was then placed down on the fabric.
I am a bit OCD, so the placing step took me several tries. I wanted the chevron design to look as even as possible :-)
Of course if you use a solid material or less exact design, you won't have to worry as much about it.
I then used painters tape to hold the fabric in place until I was ready to permanently attach it.
The fabric was pulled taut and folded to make neat corners.
I glued the fabric on the back, again with E-6000 glue.
I did not put glue between the fabric and metal. I hope that makes sense. I just didn't want anything between the fabric and the steel.
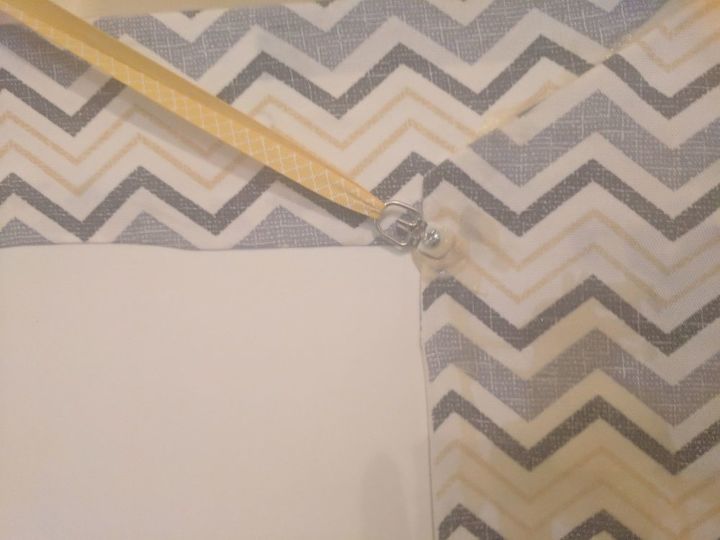
Then I used small screwed in hangers to hold ribbon as a wall hanger.
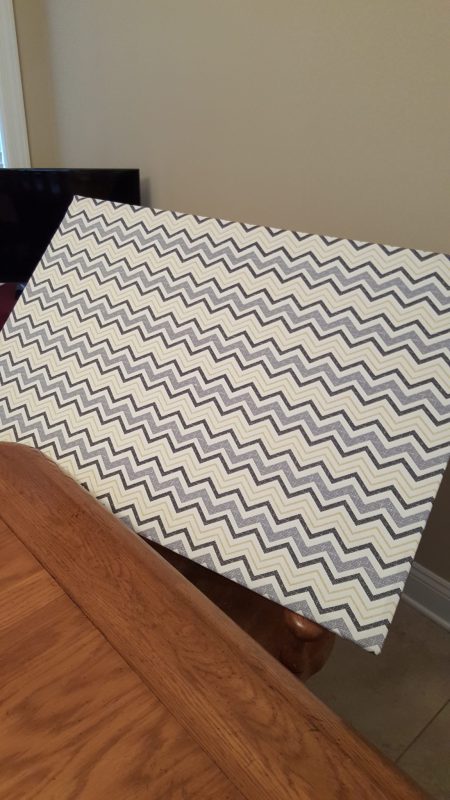
This is what the finished product looked like before adding my magnet collection.
Putting the Magnet Board To Use
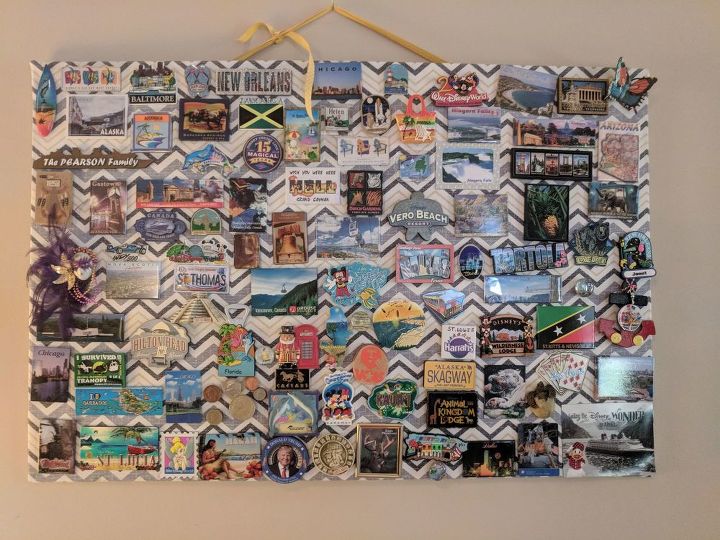
I was finally able to dust off my collection and display it.
If you look closely at the picture, you will see that I also improvised on magnets. I attached heavy-duty magnet circles to one side of some coins I brought home from the UK. I used E-6000 glue to attach the magnets and so far it is holding up just fine.
(I always keep E-6000 glue on hand  )
)
)This board process can be used for other things such as a magnetic memo board and the size is totally up to you, as the sheet metal can be cut. Note of caution: the metal has sharp edges, so be careful.
This board would make a nice gift. If you cut the sheet metal to 24" X 18", you could make a couple memo boards as gifts for around $20.
Show Off Your Magnet Collection With Class!
I am proud of my DIY Magnet Display board! The only problem I have now is I am running out of room on my board. So, I will eventually need to make a new board or stop traveling... OK, off to Home Depot!
Resources for this project:
See all materials


Any price and availability information displayed on [relevant Amazon Site(s), as applicable] at the time of purchase will apply to the purchase of this product.
Hometalk may collect a small share of sales from the links on this page.More info
Want more details about this and other DIY projects? Check out my blog post!


Frequently asked questions
Have a question about this project?