


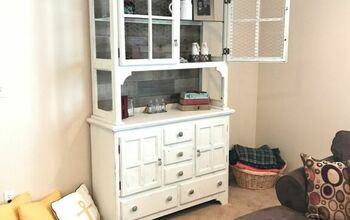
Wood Shelving With Chicken Wire
I’ve been searching high and low for the perfect shelving in my office. I looked and looked. Nothing I saw really struck me with that GOTTA HAVE IT feeling. So I decided I would just make this idea that I had in my head come to life and I’m so glad I did!
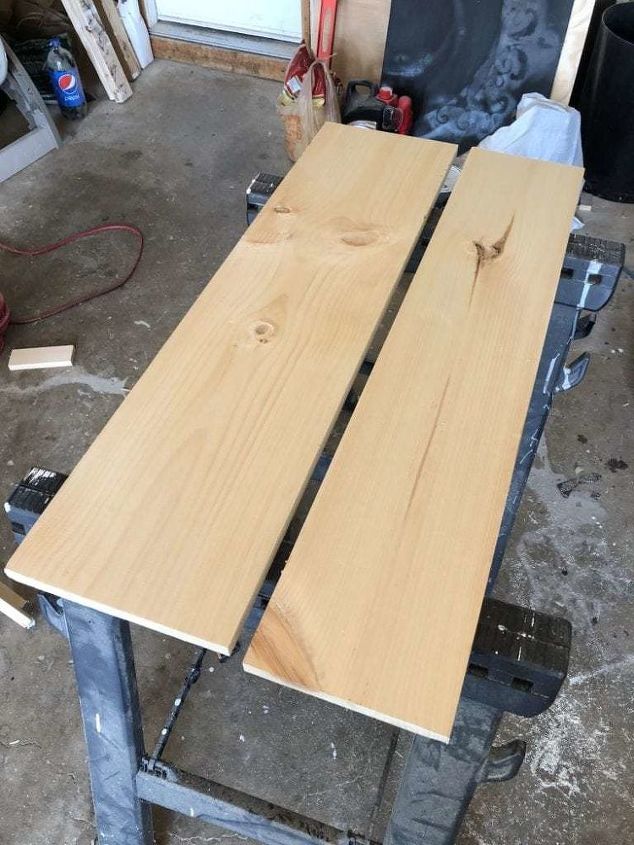
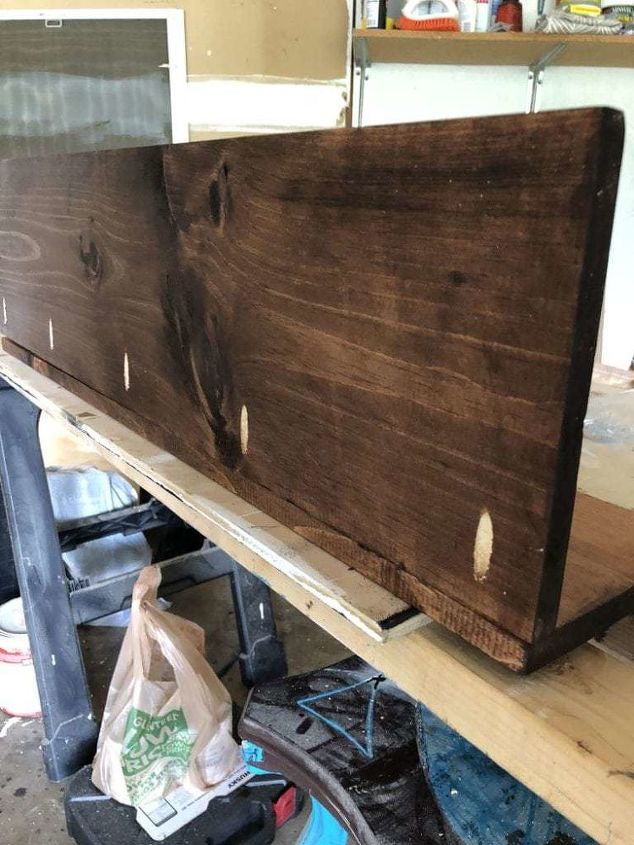
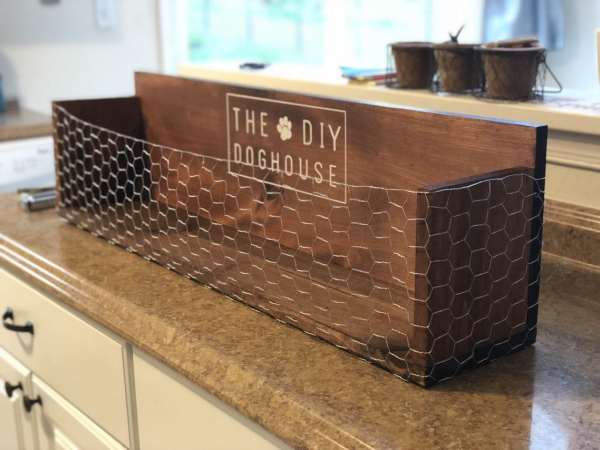
The wood on the left (36 x 9 1/4) will be the back of the shelf that hangs against the wall. The wood on the right (36 x 7 1/4) will eventually be attached to the back and serve as the base of the shelf. Once you cut the wood to size you can stain them the color of your choosing.
Real life disclaimer: I built these shelves to clear space on my desk. The books and greenery are for these pictures and your benefit only. I was looking for something that had a deep shelf, but sometimes I’m a little clumsy and messy and I don’t want things falling off the shelf. Enter the chicken wire. This was a brilliant brain child of mine (if I do say so myself). I get 100% visibility of what’s on the shelf and I don’t have to worry about anything falling off. So no matter how cluttered these shelves are going to get, they will always have that little chicken wire fence to keep all the clutter jailed in! WIN.
Want to know how to build these for your own home? Keep reading!
Materials (for one shelf):
- One 36 x 9 1/4 wood board
- One 36 x 7 1/4 wood board
- Two 6 1/4 x 7 1/2 wood boards
- Wood Stain
- 5 Screws
- Chicken wire
- Two D Hooks
Tools:
- Circular Saw
- Kreg and Screws
- Drill
- Nail Gun
- Wire Cutter
- Staple Gun
First you’ll need to cut your wood down to size. To do that, you can mark 36 inches and use the circular saw to make your cuts.
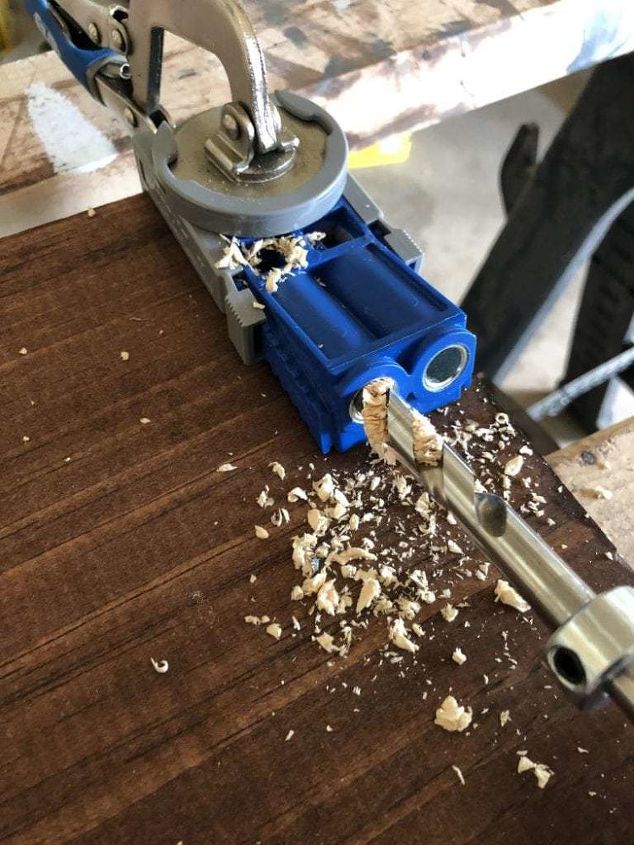
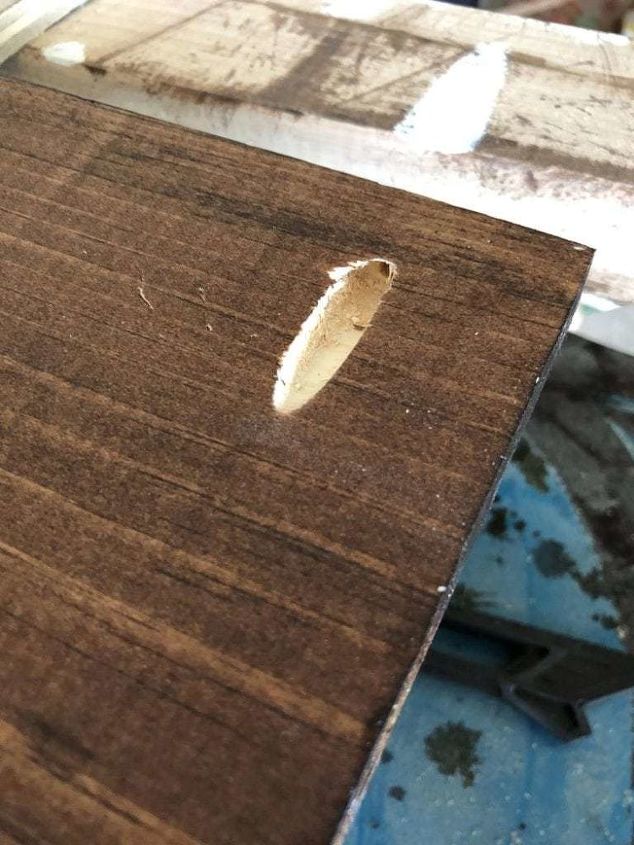
Once the stain has dried, you can use the Kreg to drill pocket holes into the wood. You’ll need to do this to mount the back shelf to the bottom shelf. First, set and clamp the Kreg on the end of the wood. Next choose your depth to drill on the drill bit. That wide silver ring will prevent you from drilling too far. Then, you can put the drill bit in the Kreg and make your pocket hole. The Kreg will guide the drill at the perfect angle every single time. Repeat this 4 more times across the back of the wood!
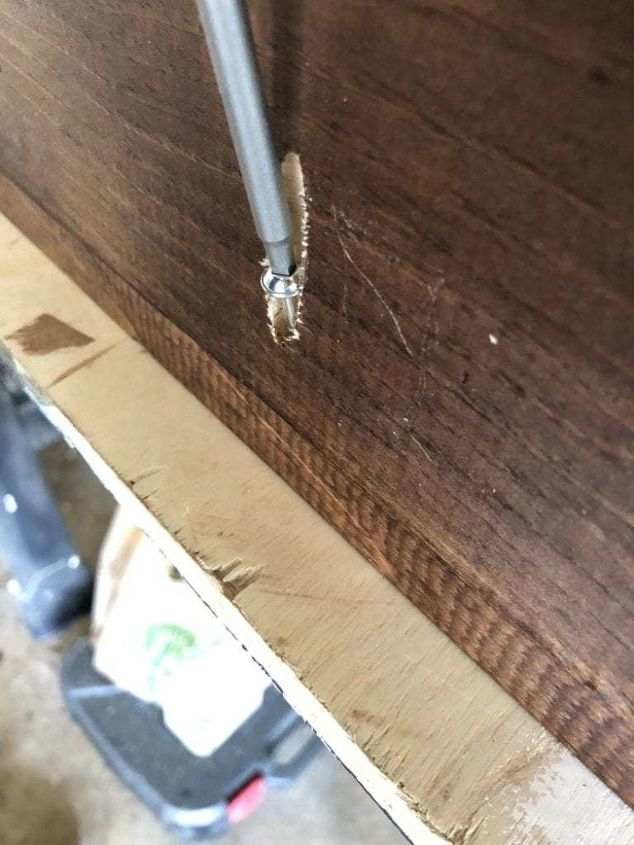
When you’re finished making your pocket holes, drill the screws in the holes to attached the back of the shelf to the bottom. I recommend doing the two end pockets first, then going back to fill in the middle pockets.
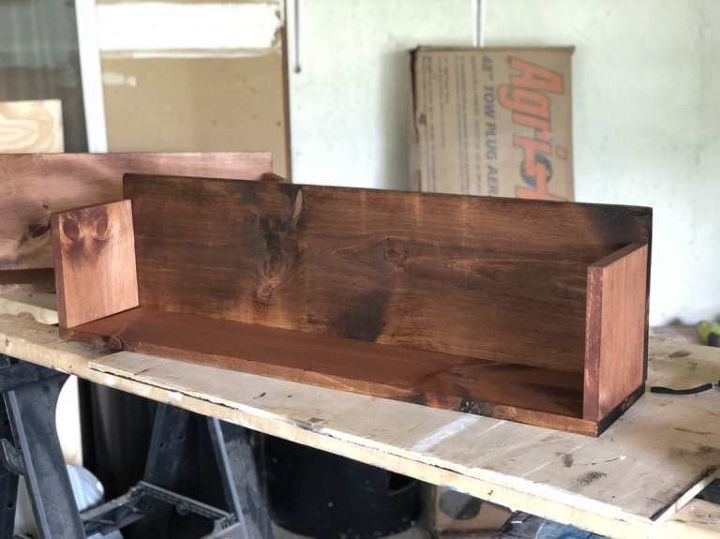
Once the back of the shelf and the bottom are secure, you can add the side support pieces.
Standing on its own!

Put the two 6 1/4 x 7 1/2 wood boards in place on each end of the shelf and secure them with a nail gun! (This nail gun is by far my favorite tool in my workshop)
Once the shelf is assembled, you’re ready for the chicken wire. This part is optional, but like I said before, chicken wire provides function for what I was looking for. I ordered a roll from Amazon. I have a lot left over, but I’m sure I can find another project to use it for!
I cut a 55 inch piece of chicken wire and laid it out across the shelf.
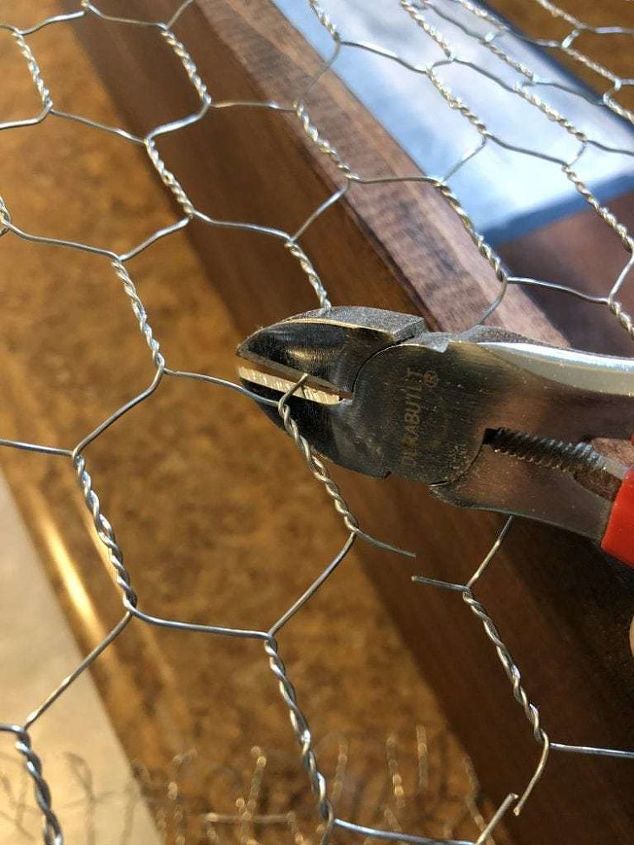
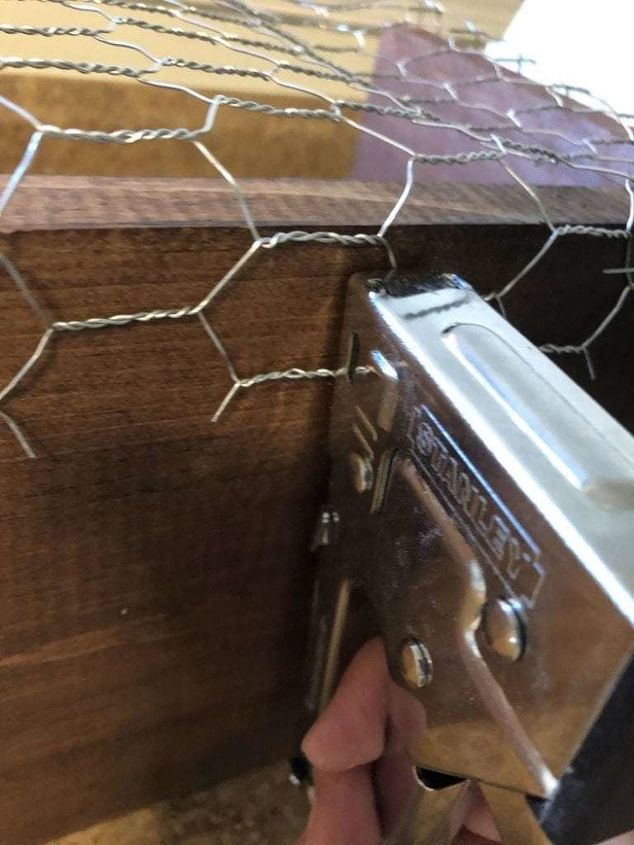
I did a little pulling and bending once I cut the wire. Since the wire was rolled up tightly, it needed some help getting straightened out. Once you get it to a position that you like, you can use the nail gun to fix it in place.
When you’re finished stapling the chicken wire into place you can cut away any excess. Then you can add the hanging hardware on the back. I used two D Rings at both ends of the shelves!
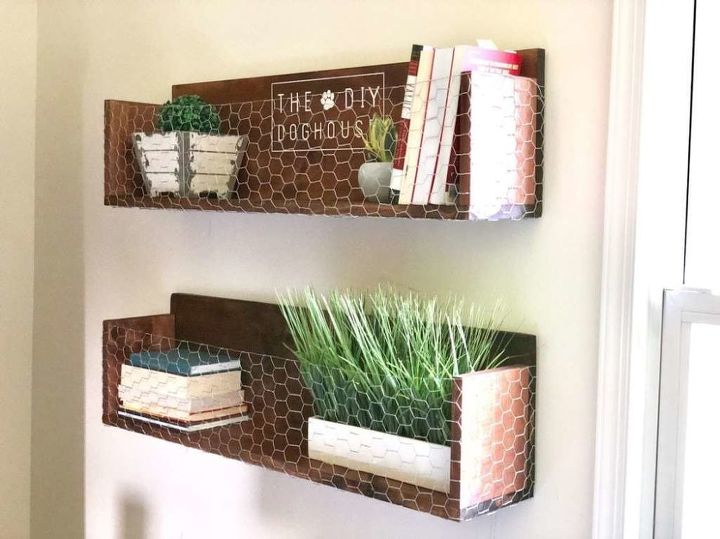
I added my logo to the top shelf! This was Brian’s idea and I’m so glad he thought of it!


Comments
Join the conversation
-
These would be great for a bathroom.
-
Awesome shelves !!! I love the Chicken wire added to it really cool !!!! Thanks for sharing your project !!!,...And great step by step instructions !!!


Frequently asked questions
Have a question about this project?
Love Love Love the look of these shelves. You have some mad skills with power tools. . Are you planning on selling these ?
How much weight will one shelf hold?
I need you site to buy you signs from! I can't find it anymore. Want one of them about home. Can you post your site so I can get back to it, please?