


Easy Upgrade for Your Flush Mount Ceiling Light

I had a very basic flush mount ceiling light in our laundry/half bathroom, and wanted to upgrade it inspired by a beautiful Shades of Light pendant- but on a very minimal budget. Total cost? Less than $10!
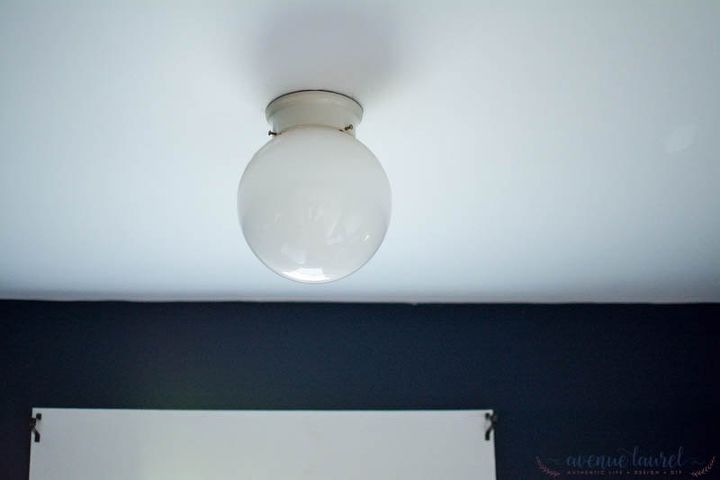
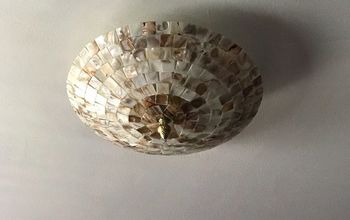
Here is the before- it was a very basic light fixture. I used a can of spray paint, some wiggle eyes (you'll see why in a minute), and glue to upgrade it in the simplest way.
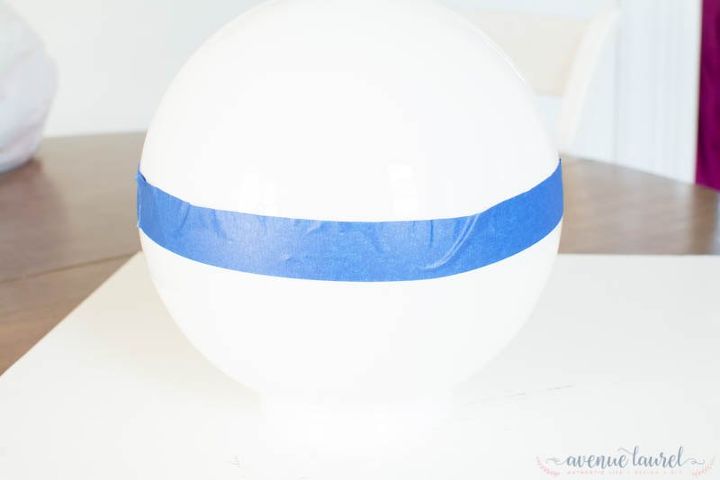
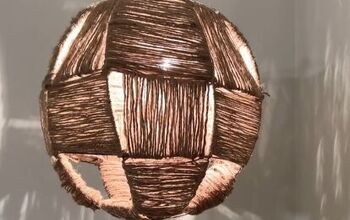
First, put tape around the middle of the fixture, and then spray paint the bottom half.

Next, glue your wiggle eyes to the globe. I used fabric glue because that's all I had on hand, but any glue will work. Check out the blog post to see my method for accurate spacing of the wiggle eyes!
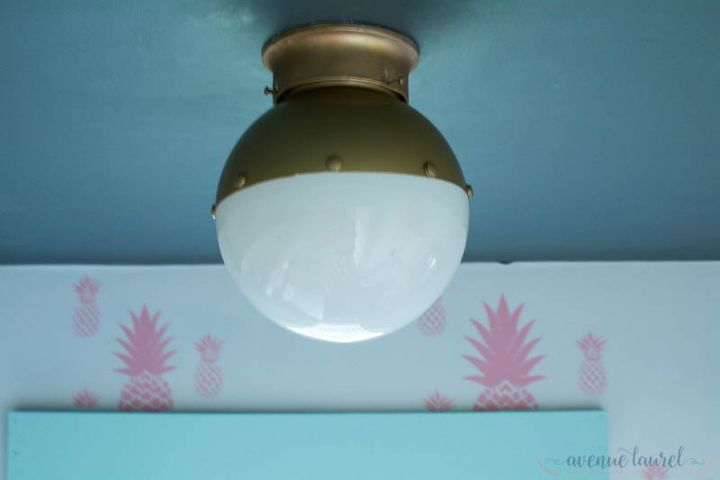
Once all your wiggle eyes are in place, spray paint the eyes and the base, then rehang the globe. That's it- you have a beautifully upgraded fixture for less than $10!
Want to see the reveal of the laundry/half bathroom this fixture is in? Check it out here! And, check out the blog post for an epic fail on this project :-)
Resources for this project:
See all materials


Comments
Join the conversation
-
CLEVER!
-
How did you paint the collar close to the ceiling. I need to do that without taking it down.


Frequently asked questions
Have a question about this project?
Love the pink buffalo check wall. Is that paper or fabric?
This is VERY clever -but I wonder -what does it look like with the light on? Are there tell- tale "spray paint" passes?
Have the wiggly eyes ever melted inside the globe fro the heat of the light bulb? Have they ever moved from heating up/slippage of the glue? Can you really see them when the light is on?