


Plaster Easter Egg Vase

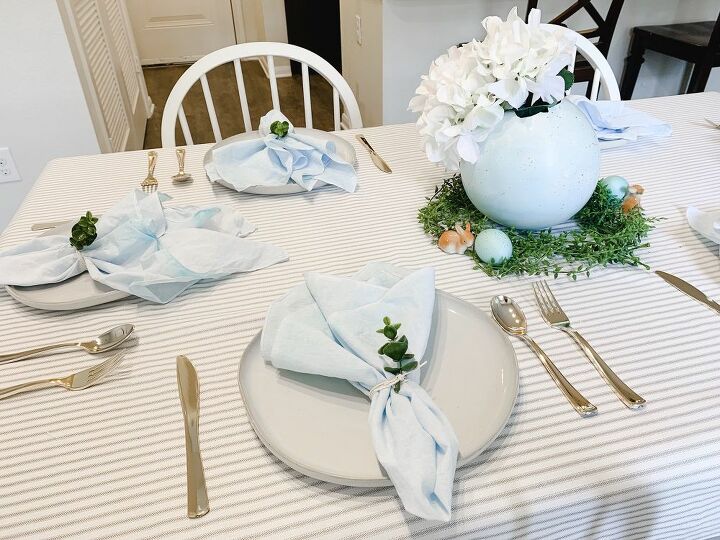
This year I'm starting spring off right with this super cute Easter tablescape that I am thoroughly proud of. Matthew and I recently moved into our first apartment with a dining room, so this is the first tablescape I've decorated in my own home which is exciting (for literally just me 😜)
In addition to the plaster egg centerpiece, I also made the tablecloth from some Hobby Lobby fabric, dyed the napkins ($1 white bandanas from HobLob!) with the same blue dye as I did the eggs and the plaster, and used greenery from -YOU GUESSED IT... HobLob- to decorate the table.
But as for the plaster egg centerpiece, here's how I did it! (and be prepared to make LOTS and only get a few usable finished products... but in my opinion it's worth it!)
What you'll Need:
- Plaster
- Water
- Funnel
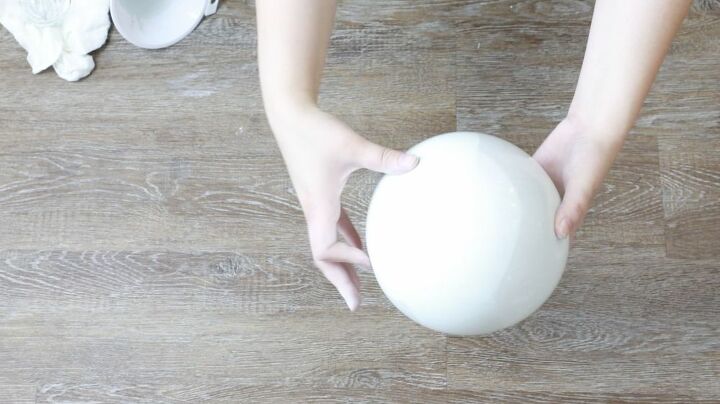
- Clear Balloons
- Gel Food Coloring
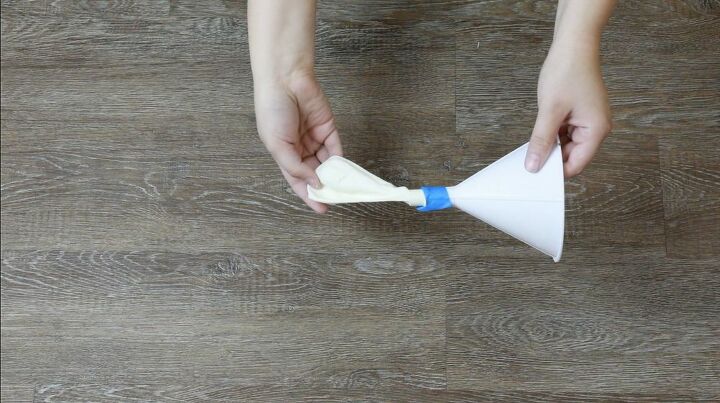
Step One:
Blow up the balloon 2-3 times, this will stretch it out and allow it to hold more plaster. Then tape the balloon to the end of the funnel to keep it from moving.
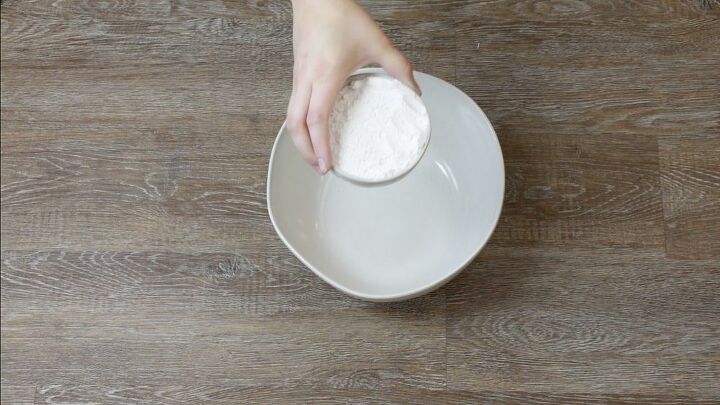
Step Two:
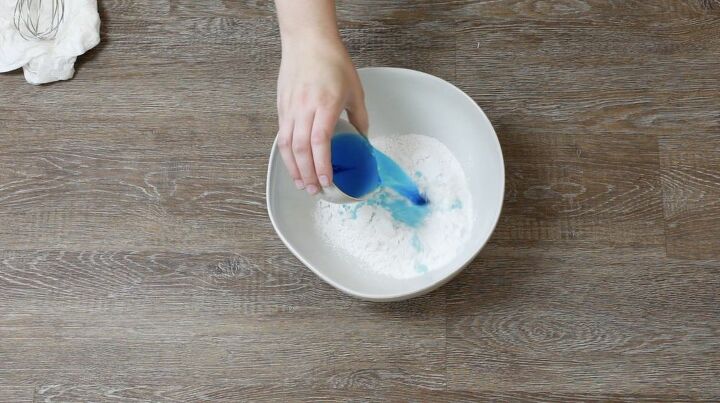
Pour 1 cup of plaster into the mixing bowl and 1/2 cup of water (with food coloring premixed into it.)
The ratio is always 2:1 plaster to water. BUT be very cautious with this, the plaster needs to be liquidy to swish it around the balloon and it sets fast. So I recommend making one balloon at a time.
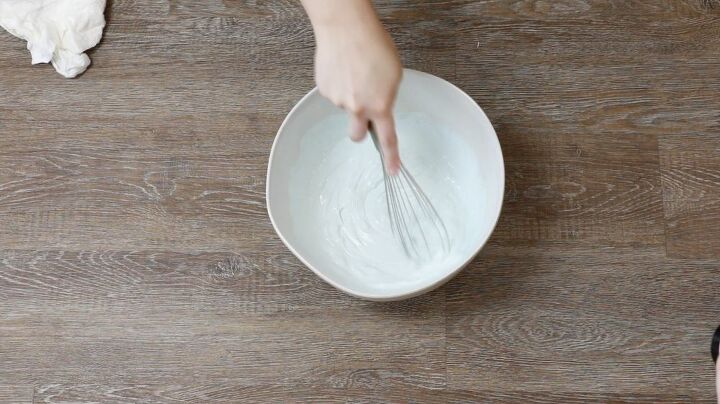
Step Three:
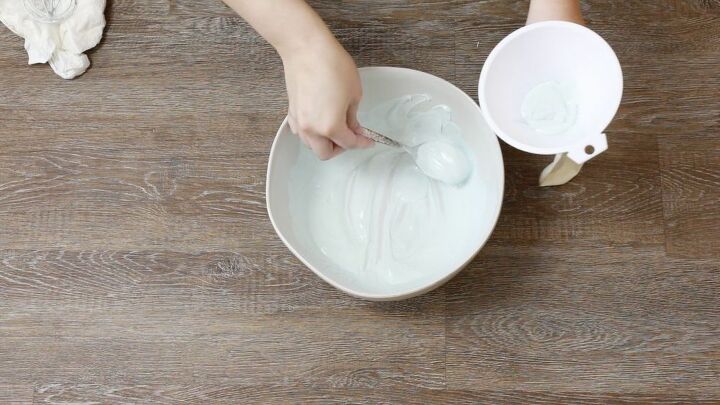
Mix the plaster well until there is no lumps. Don't overstir though, as it will start to set if you don't work quickly. Then transfer the plaster to the funnel. (You can pour, this bowl is just heavy so I opted for a spoon to avoid a mess.)
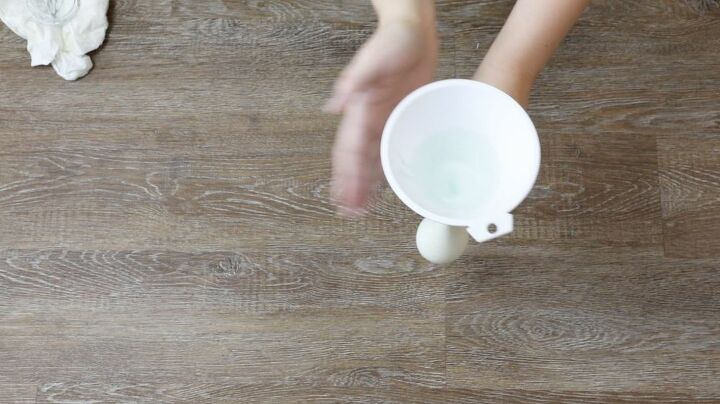
Step Four:
Tap the funnel and tug on the balloon to release air bubbles and allow the plaster to fill the balloon. This might take a while, be patient!
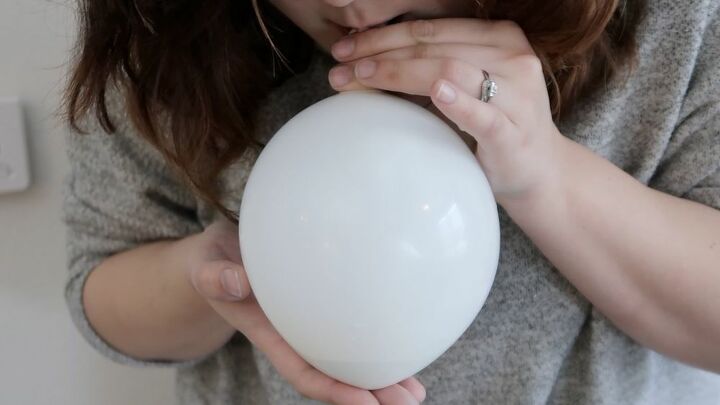
Step Five:
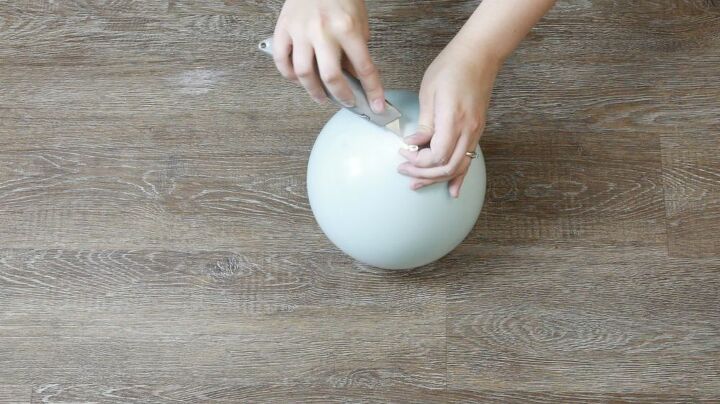
Once the balloon is full remove it from the funnel. Pinch the end and run the opening under the faucet. Be sure to really pinch, to prevent much water from getting in. You just want to wash away the plaster from where you'll put your mouth.
Then blow up the balloon to the desired size and tie it up, beware the bigger the vase the more fragile!
Step Six:
Swish, shake, and rotate the balloon to ensure that the inside of the balloon is fully coated with plaster.
Step Seven:
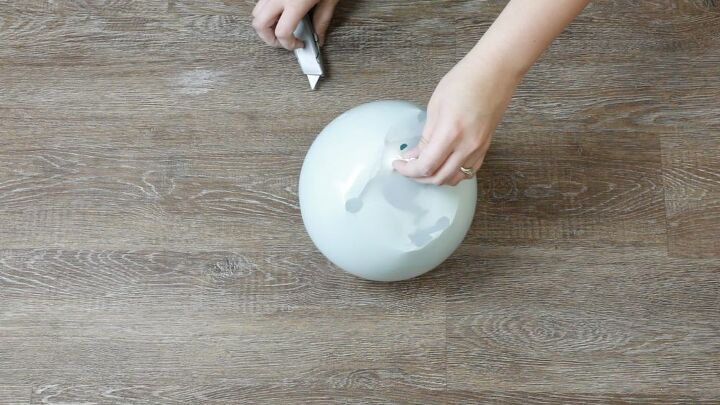
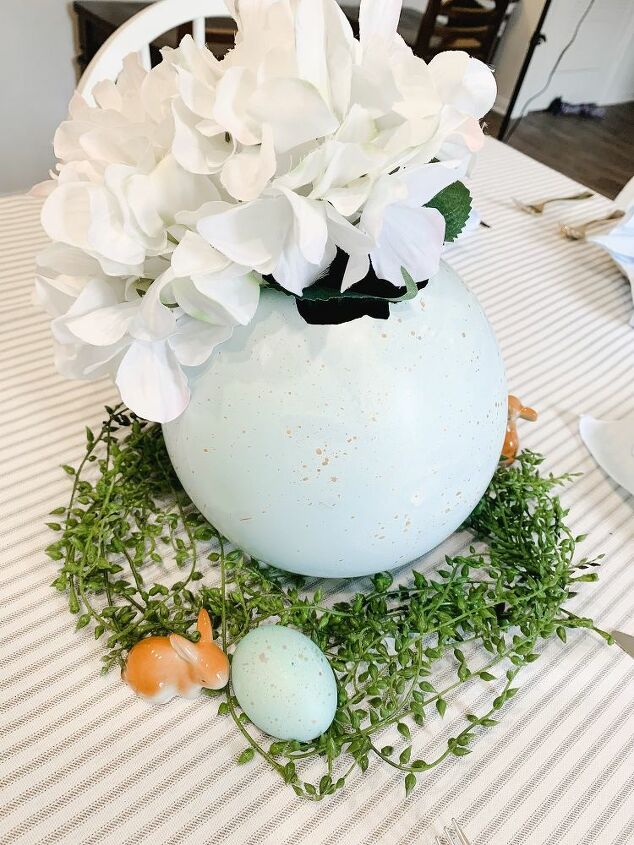
After letting the balloon dry overnight, take scissors or a knife and cut the balloon. This will cause a break at the top that will look like a hatching egg! I recommend making these in batches, since they all break, you're looking for the prettiest break. And sometimes the break can go the side or be too big, etc. Better safe than sorry! In this batch I made 6.

Step Eight:
Finally, take a chip brush dipped in gold paint and flick it at the vase to get this speckled effect!
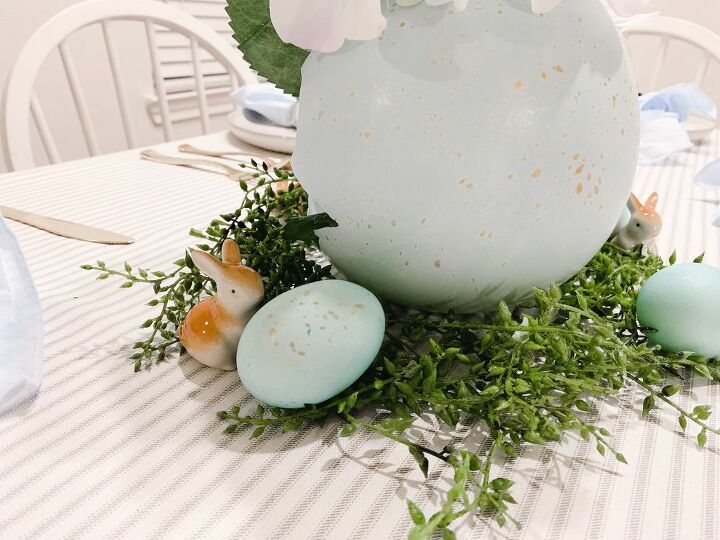
I also speckled some eggs dyed with the same dye as my plaster.
Overall I love the way this came out! I've never been huge on seasonal/holiday decorating but now that I've made this adorable table... I may have caught the bug. Not that I'm complaining, I'm all for any excuse to get crafty! If you have any must-try Spring decor ideas please let me know in the comments!

If you'd like to see more projects like this, cute farmhouse goodies, and yummy recipes check out my blog here!
Resources for this project:
See all materials


Comments
Join the conversation
-
Hi Hayley, love this project too but also want to let you know you my idea to make a easter egg vase like this. Blow up a balloon and tie it shut. Then rub it completely with Vaseline then rub it with instant wall filler. You can apply the wall filler with your hands or with a brush or sponge. Let it dry for at least 24 hours by hanging the balloon or placing it on a bowl or something similar. In the latter case, turn the balloon over so that all parts become dry. You can then paint and/or treat it with sealer if desired. I live in the Netherlands and buy the wall filler at the Action, (equivalent to your Dollar tree store) as well as the brush. Paint and painter's tape section.
-
Hi Kim, yes it is. I think I used the wrong word because I translated it literally from Dutch to English. I'm sorry.


Frequently asked questions
Have a question about this project?
Adorable! What a great table for your guests to ouuuu and ahhhh over. How long do you think these cuties will last? I would think you could even put a small glass inside for real flowers if you want to do that type of decor. Love all you didi though.
Could you pour quilters to us outside?
I want to save this project, but the ads on the bottom of my phone will not let me get to the heart. I just realized - after months - this ❤️ is for saving projects. Do you know how to get in touch with Hometalk & let them know that I am having this problem? Surely I am not the only one.