


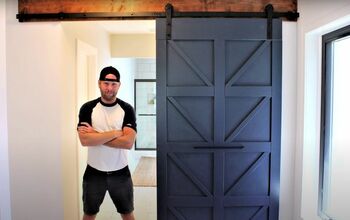
Build a Barn Door With a Modern Twist

I have always loved barn doors.
They are so beautiful I have always thought they elevate the room they are in, adding a new level of interest! I also have always wanted one! Until my most recent master bedroom makeover, I didn't really have a good place to put one or a good reason to learn how to build a barn door.
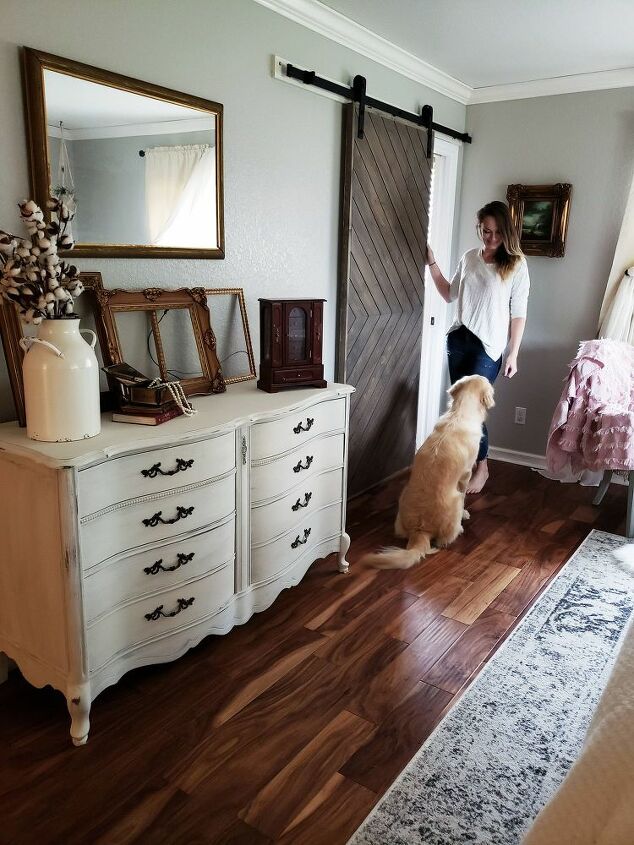
However, I saw the opportunity in my master bedroom transformation. We have an en suite master bathroom, but the door between it and our room was a grungy old pocket door. I could have just cleaned it up, I suppose, but I seized the barn door opportunity!
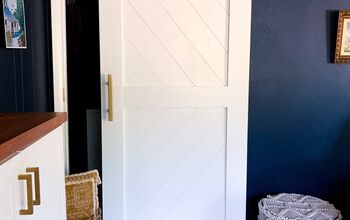
Now, while I was going for French Country in our room, I did want to incorporate a few modern elements. So, when I saw the barn door tutorial from Angela Rose Home, I knew I wanted it! She had painted hers in a stunning black, which really brought the modern feel. I wanted to blend it with the older vibes of the French Country style, so I opted to use pine boards to replicate the pattern while bringing in some of the natural wood tones.
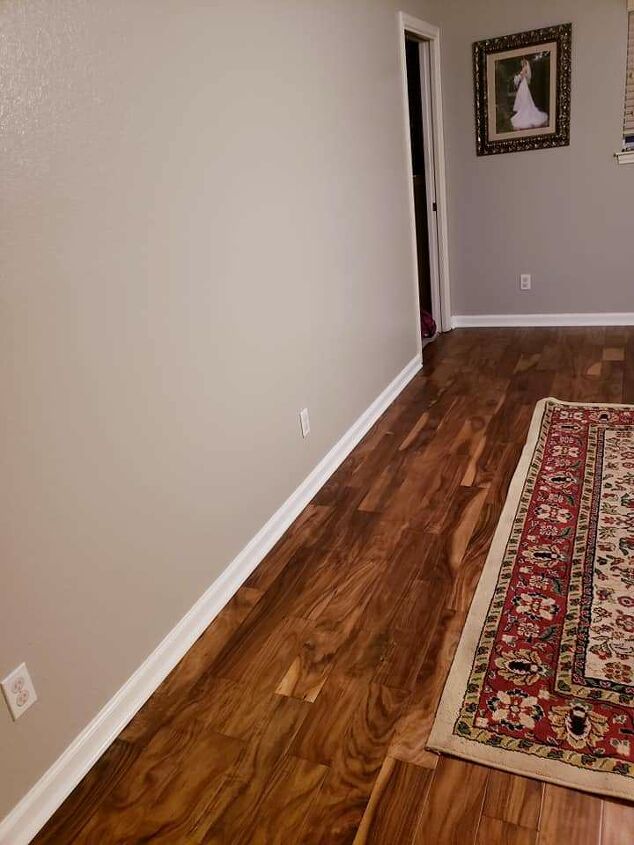
While my dresser is not in place in this picture, you can see the empty, sad wall and the pocket door opening close to the back of the bedroom.
Step 1: Measure Your Door
You will first measure your door opening, width and height, and add two inches on each side for overlap.
Example: Door opening width + 2 = Width of your barn door without trim. If you want to add trim, like I did - you would only add 1/2" to your measurement.
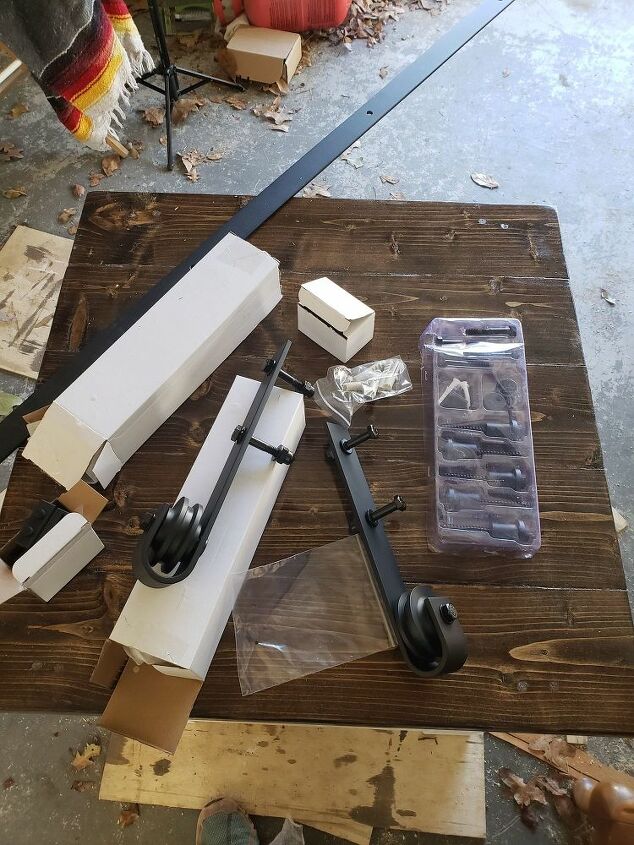
Step 2: Purchase Materials
- 3/4 thick MDF Particle Board 4ft x 8 ft sheet - have them cut this to your desired door size.
- (10) 1 x 4 @ 8ft pine boards for the front pieces.
- (3) 1 x 2 @ 8ft pine boards for the trim pieces
- (Roughly 20) 1/4" plywood small strips for spacing (or alternative material)
- Wood glue
- Finishing nails
- Wood filler
- Paint or Stain
- Barn door hanging hardware - I used the one Angela Rose recommended and it was only $60! I have linked to the hardware in my blog post over at Breakingdownthebox.com.
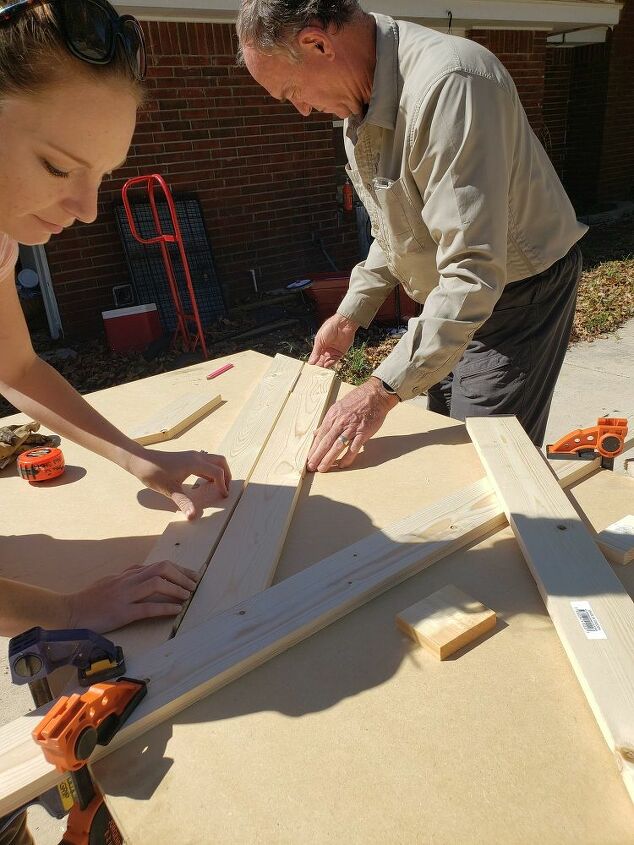
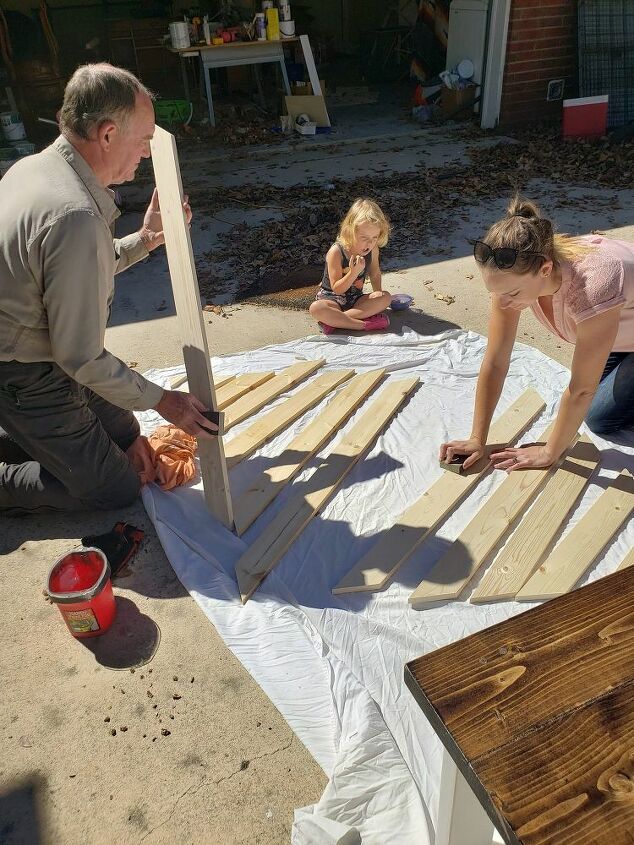
Step 3: Start Cutting for the Diagonal Pieces
She recommended finding the middle of the door first and clamping a straight board across the center line to help you dry fit the diagonal pieces - this was a GREAT suggestion!
I measured the length of the door and divided in half, making a small mark at that point on each side. Then, I placed the board on those marks and clamped it into place.
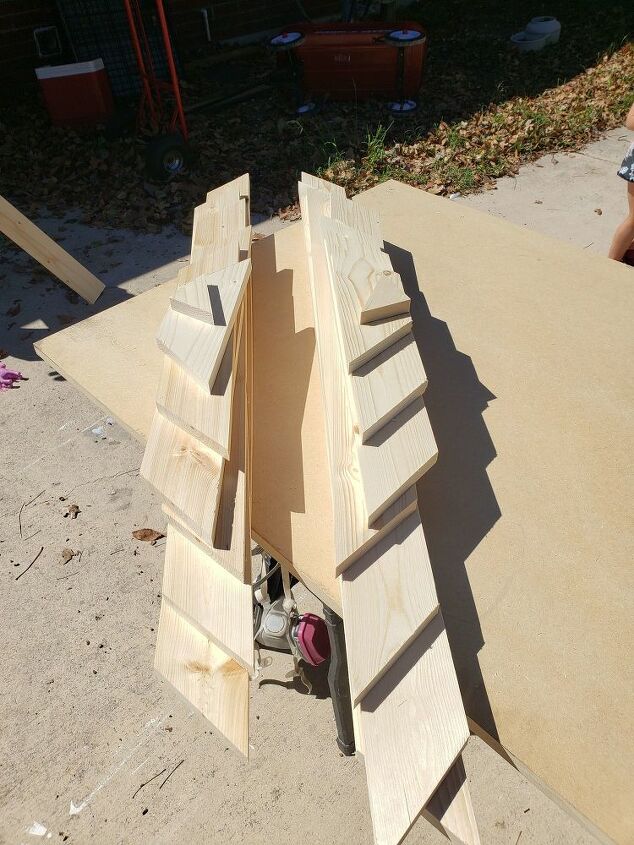
From there, I used a bunch of 1/4" plywood spacer boards that I had leftover from a previous project. to start dry fitting the diagonal boards in place.
All cuts will be at a 45 degree angle. Starting with the longest board, cut the side that will be against that center alignment board first. Line it up where you want it and mark the cut on the other side using your pencil or pen.
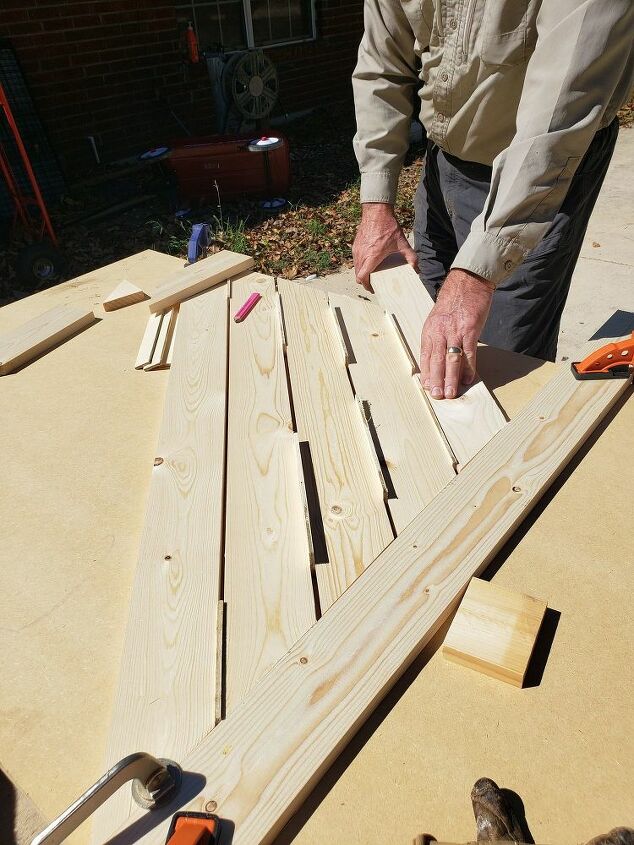
Once it is cut, clamp it down to provide stability for the placement of the rest of the boards. From there, use the spacers to place additional diagonal pieces - each cut at 45 degrees against that center board. Continue to mark the cuts and cut them - we numbered them so that we could remember where they went on the door.
Step 4: Stain or Paint
We chose to stain the boards and the MDF before attaching them so that we wouldn't have to worry about staining inside of the tiny cracks.
First we sanded each piece down to get it ready for staining. Clearly, my daughter was over sanding at this point - haha!
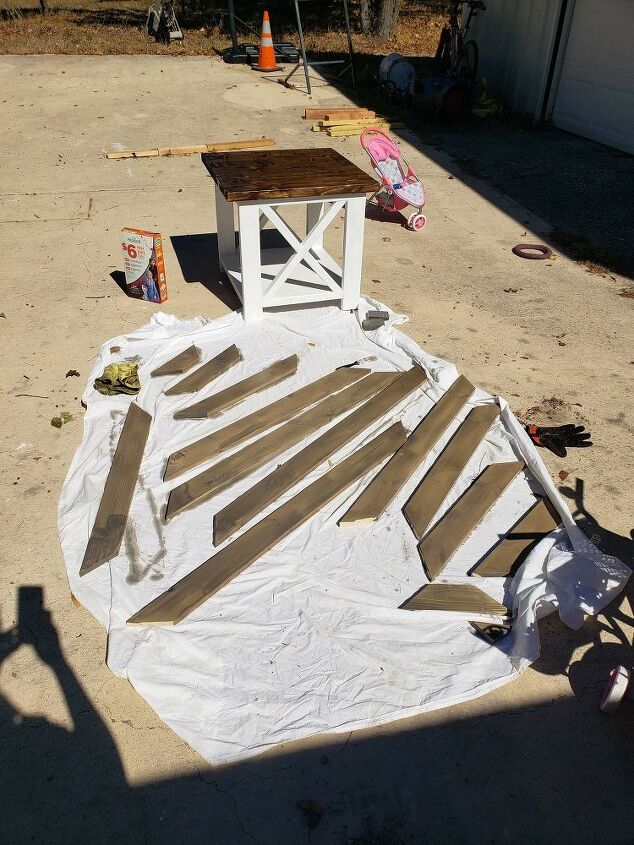
I mixed two stains to achieve the shade I wanted for the barn door. I used 25% Minwax Jacobean and 75% Classic Gray to achieve a grayish brown that would match the room style.

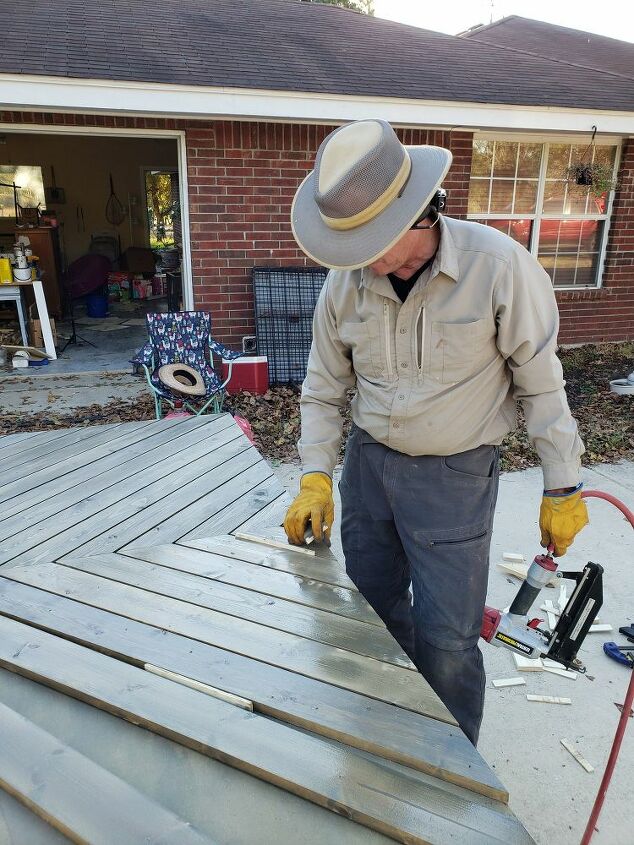
Step 5: Attach Your Diagonal Pieces
This was made MUCH easier using a pneumatic finish nail gun, or even a cordless nail gun. We used 1 1/4" long 16 gauge nails and it went pretty quickly.
Lay down a line of wood glue, place your first board and clamp into place. Nail that one in and move down the line, using your spacer boards between each diagonal piece.
When your first half is complete, you can remove that center alignment board and repeat steps 3-5 for the other side. Now, your real diagonal boards will be there to help with your alignment.
If you are like me, you will be getting pretty excited about how it's turning out! 
It looks like a piece of art!
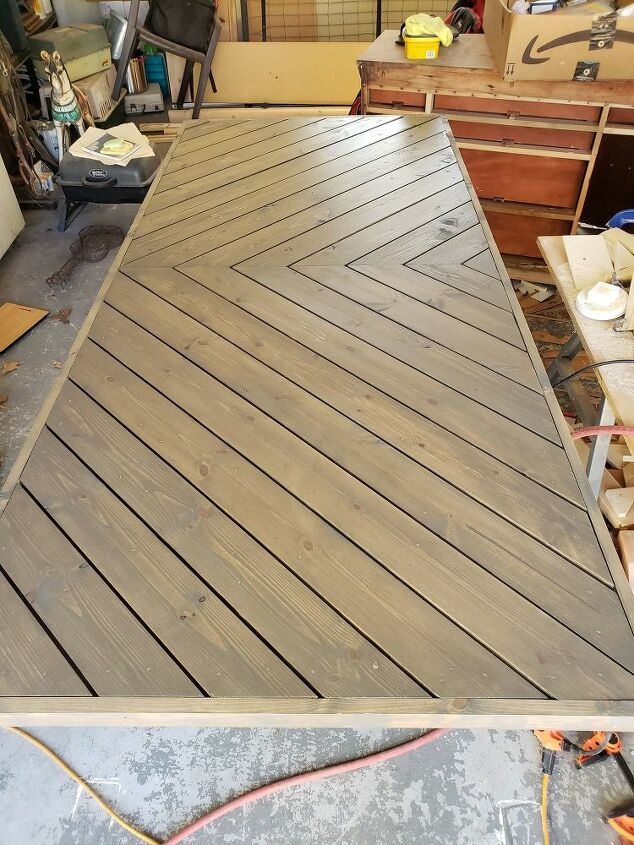
Step 6: Cut and Place Your Trim Boards
Once all of your diagonal pieces are in, take your 1x2 pine boards and cut them to fit the door edges. You will need to cut a mitered 45 degree joint at each corner so they fit nicely together. Secure with glue and finish nails - here is an important thing to remember with this step.
At the bottom of your door, you will need to cut a track for the guiding foot included in your barn door hardware set. The guiding foot keeps the door from swinging back and forth while opening/closing it. Keep this in mind when you are deciding placement of your finish nails on the bottom of the door. It was not fun cutting through our nails and then having to re-nail the segments on each side of the track.
Step 7: Finish the Door
Fill all nail holes with wood filler if you are going to stain it OR spackle if you will paint. Sand that down and stain/paint those areas. If you used stain, paint on a few layers of polyurethane. I went with a water-based ultra matte finish poly and absolutely love it. It keeps the door looking raw, but still protects it!
Step 8: Hang the Barn Door
This is probably the hardest section of the entire project! Follow the directions on the barn door hardware to hang the door, but take your time and get a helper. This door is HEAVY! I dropped it on my foot while we were cutting the track and thought for sure I had broken it.
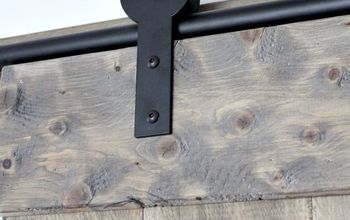
The first thing we did was to set up the header board above the door frame. I used a 1x4 pine board, cut it to the length of the track and then painted it white. Using a stud finder and lag bolts, I pre-drilled into the header board and stud, using a socket wrench to screw in the lag bolts.
Make sure your board is completely level because if it's not, you will have a phantom opening door. It took us making a few mistakes to get it right, but I will just fill in those holes - I mean there are so many things to stress about in life and mess up holes in my projects aren't one of them for me.
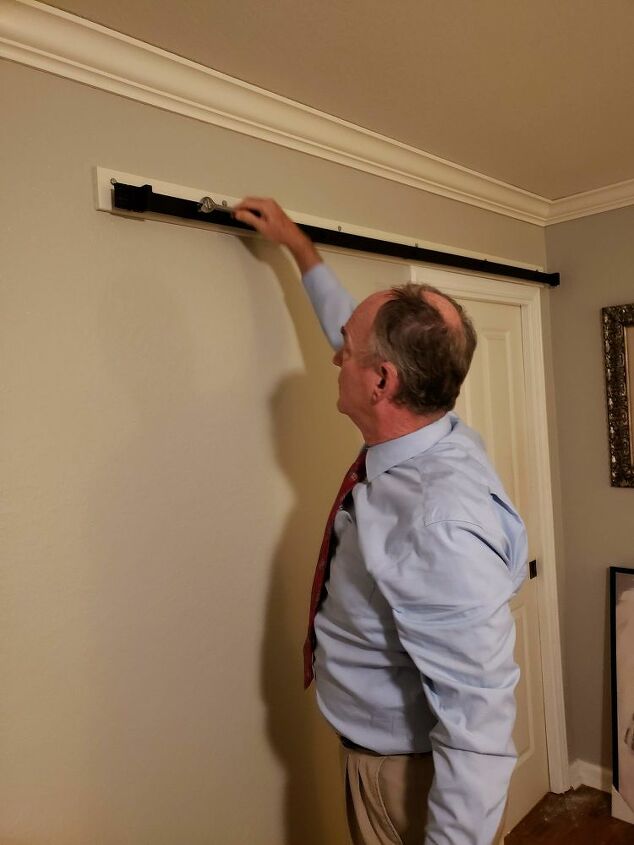
Luckily, my dad was there to help me - we didn't take too many pictures of this process because we were both really wanting to finish it quickly - it was late at night and the One Room Challenge was in a day or two.
Once your track is up, it is time to focus on the door modifications. First up is the track at the bottom of your door. We measured for half of the width of the bottom and drew a straight line from one end to the other. Next, we used a circular saw to cut that chunk out so that the guiding foot could fit comfortably. We also sanded that track so that it wouldn't get caught up on any rough edges while sliding it open and closed.
Then, add your hardware to the top of the door and carry it (carefully) in to hang on the track. Adjust your track hardware as necessary to dictate how far the door should open.
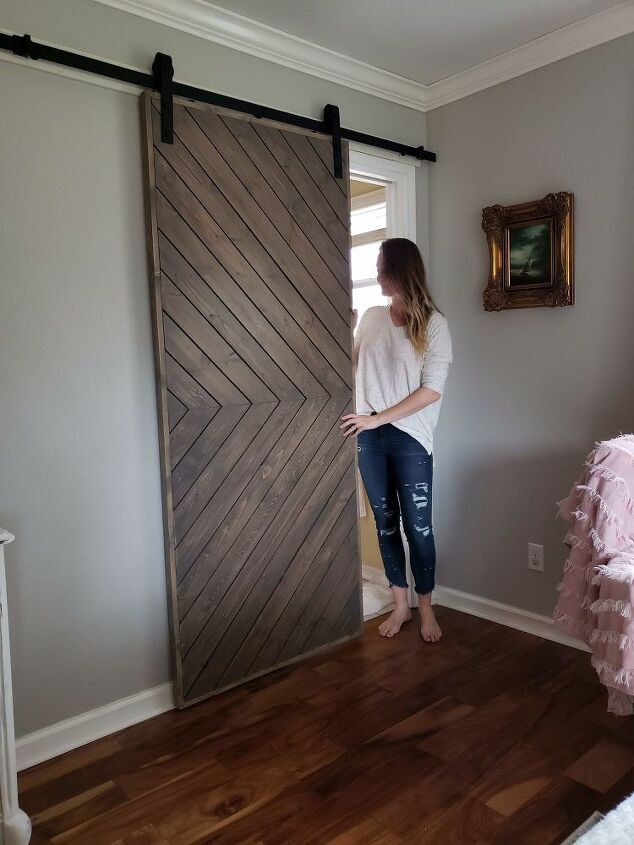
This is the nicest door in the house and I wish I could have more of them hanging around! Maybe for a future kitchen reno I can think of a few places to incorporate barn doors?
Affordable Home Upgrades
Resources for this project:
See all materials


Comments
Join the conversation
-
I have been lucky. 6 pocket doors. 36 years old. All still work.
-
Beautiful good work


Frequently asked questions
Have a question about this project?
Looks great but did you change your wedding picture out?
What’s the other side look like??? Also it looks wield with the long header looks like its going to bang against the trim and the dresser?????
Looks great with beautiful floors ... 💙💙