


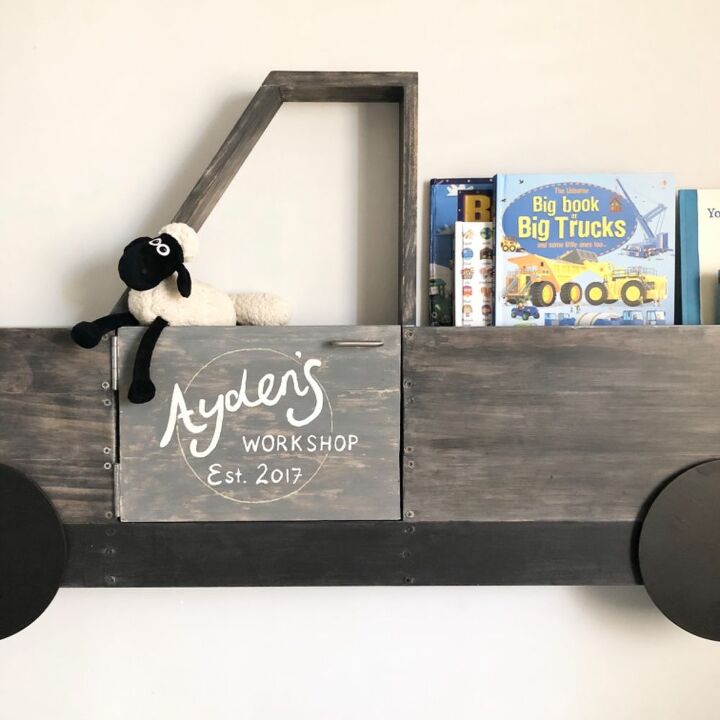
Car (Ute/Truck) Bookshelf

For my sons 3rd birthday I wanted to make him a bookshelf, something super cool that would double as a storage for his favourite toy cars.
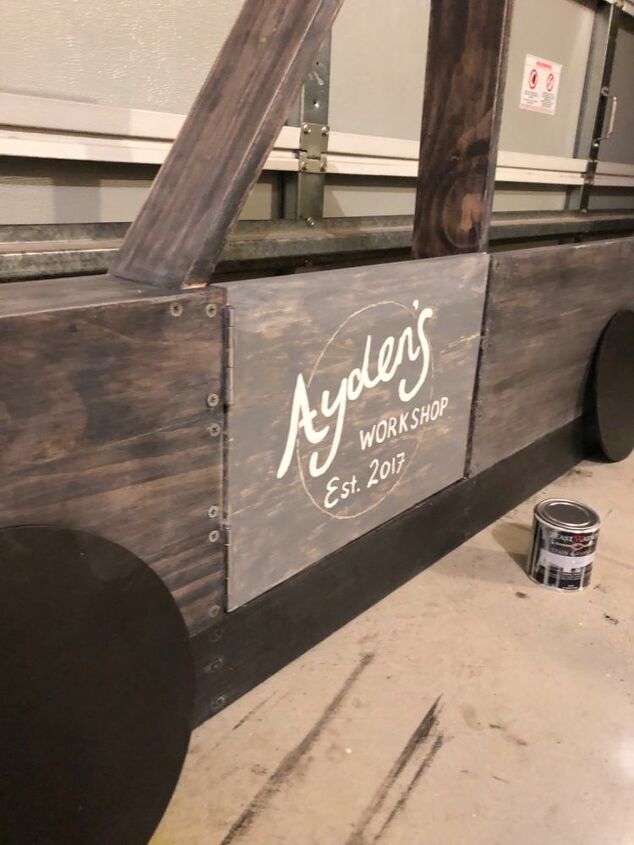
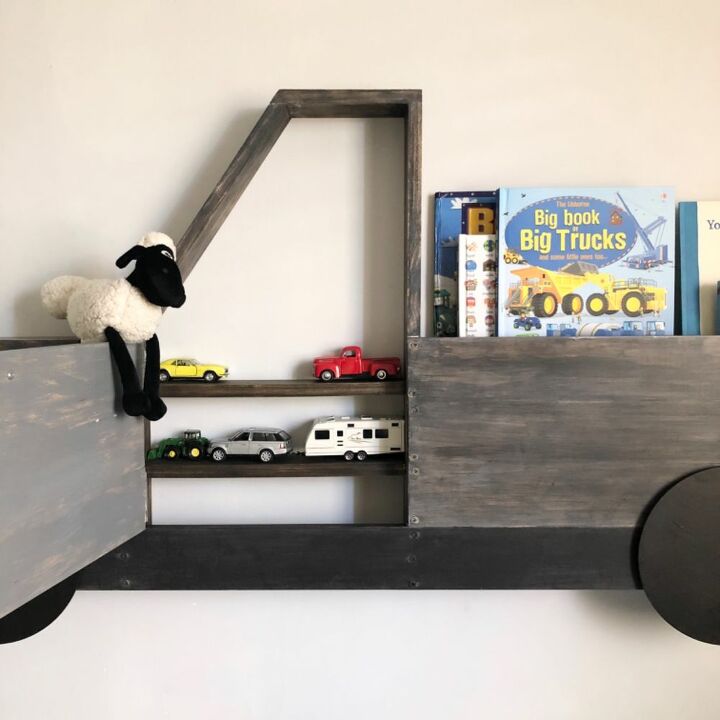
After some brainstorming, I decided on a Ute (as we call them in Australia) or truck structure, with a door that would open to storage and then a shelf in the back tray to hold his books. 🤩
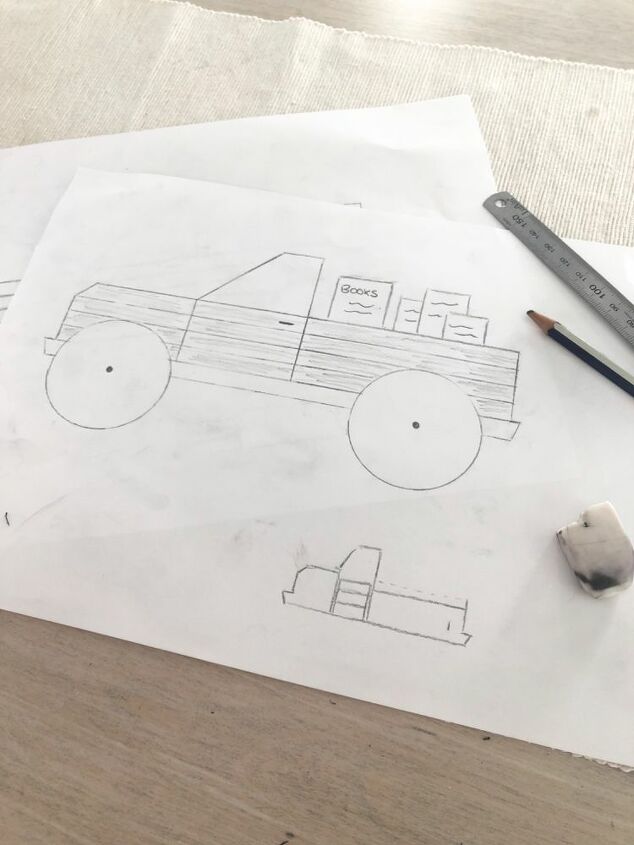
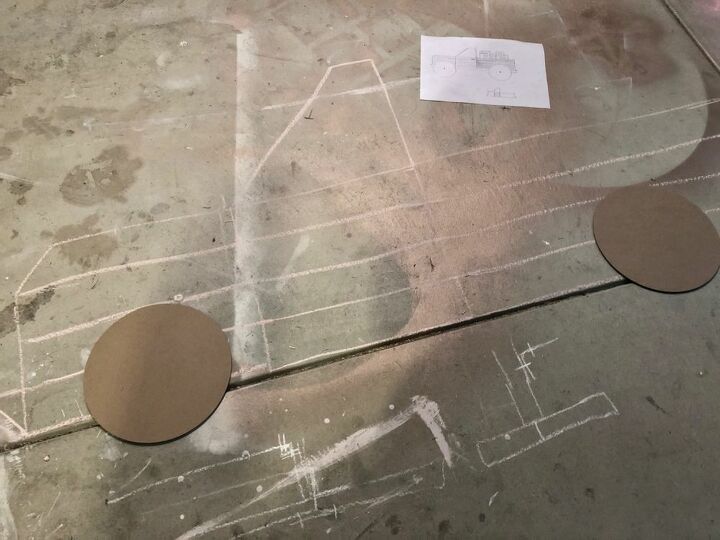
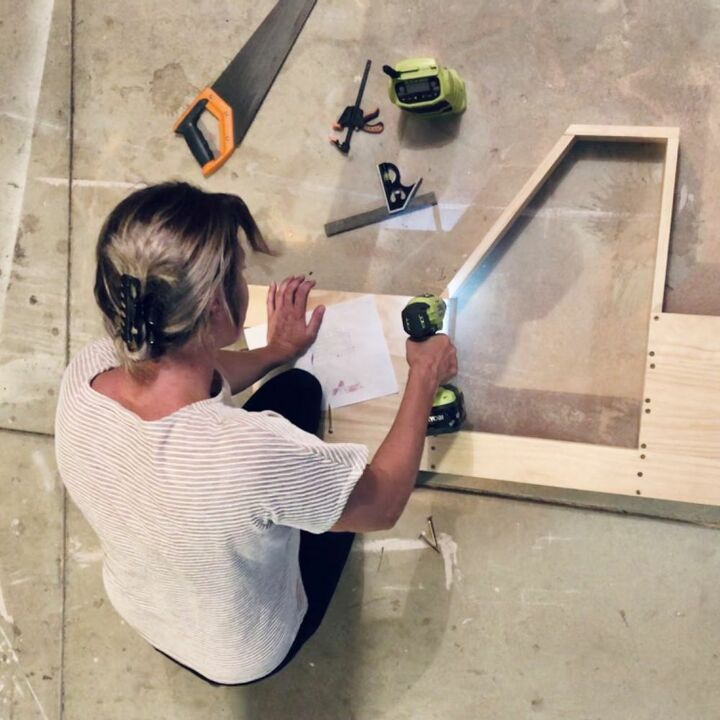
I drew up a design and then measured out the space where I wanted it in my sons room to work out what size to make the structure. With the measurements and using my original drawings as a guide, I then sketched out the design to its actual size on the floor with some chalk to make sure everything looked in proportion.
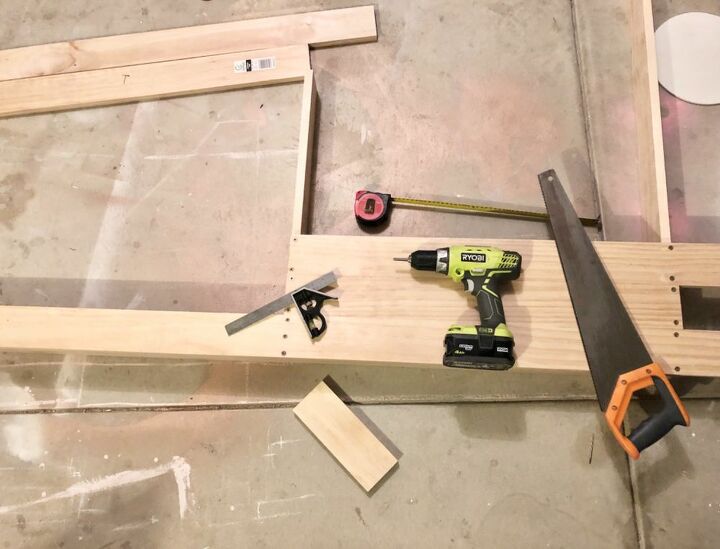
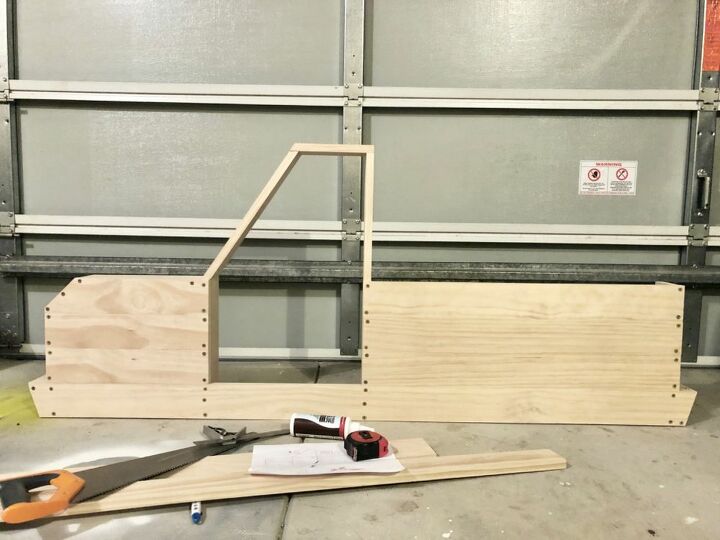
Next, was a trip to Bunnings (our local hardware store) to get all of the materials. Once I had all my materials I started cutting up the wood to size and screwing it all together. I made sure to constantly use my square & tape measure to check that everything was straight.
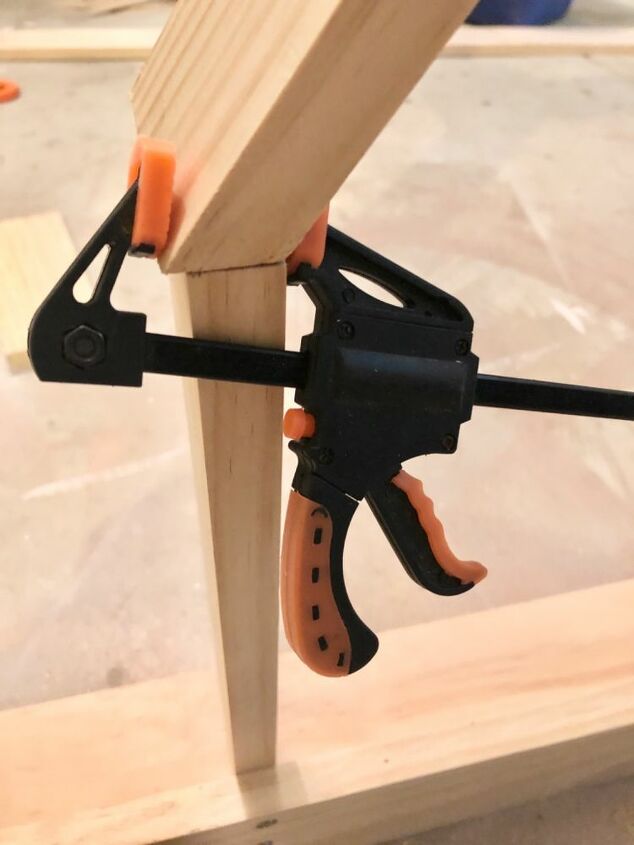
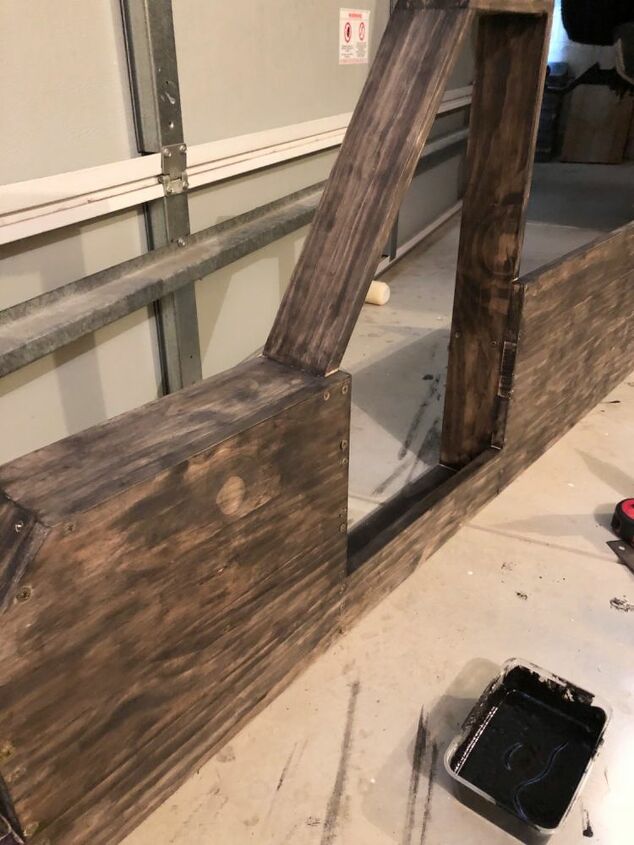
For the windscreen and the door I used wood glue, clamped it and left overnight to dry.
For the back tray I left the top panel off to create a ‘pocket’ for the books, and then added a shelf further down (behind the front panels) for the books to sit on.
Once the structure was complete I gave the whole thing a light sand and clean to prep it for the stain.
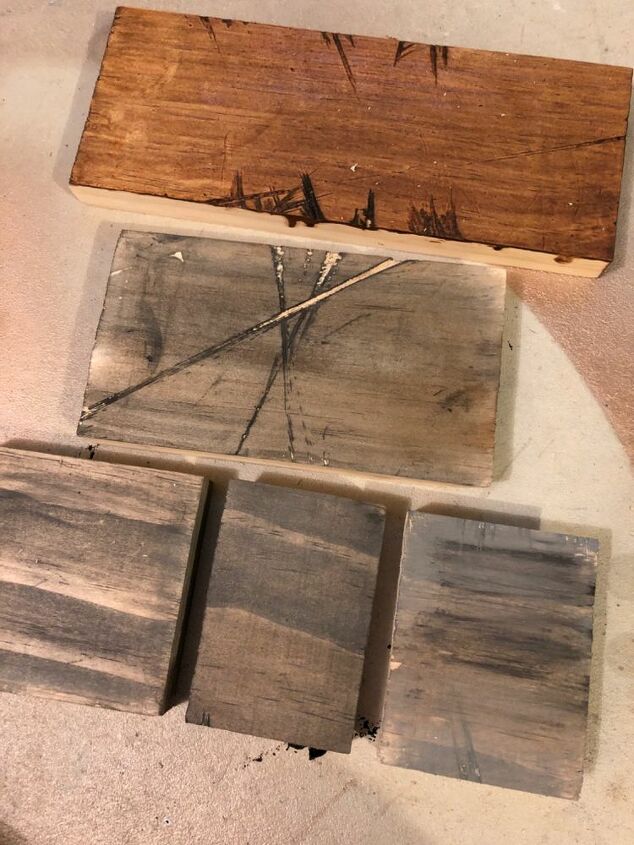
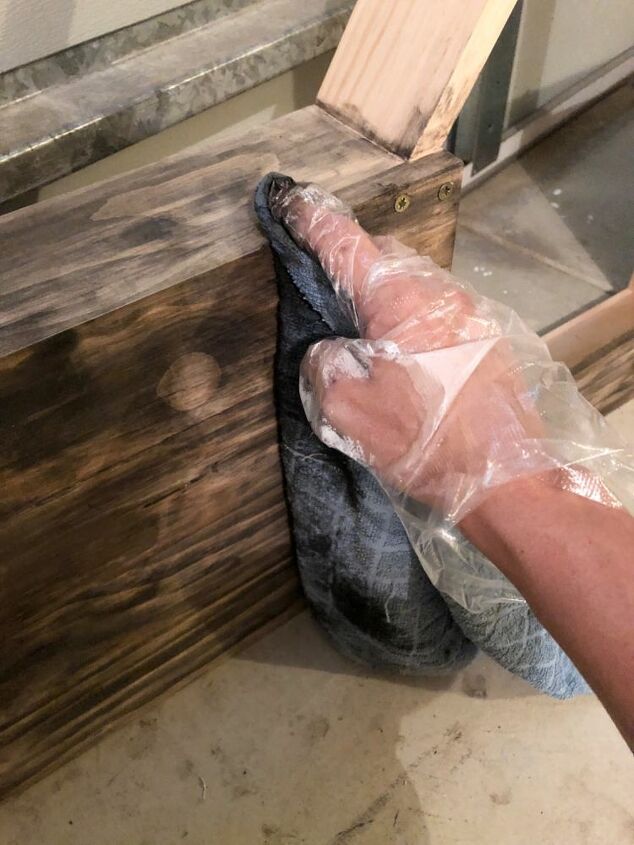
Originally I was going to use a walnut stain but after testing the colour on a scrap piece I wasn’t too keen on it, I was after more of a black/grey look.I’ve white washed a lot of furniture in the past so I decided to try the same affect but with black. I simply mixed some black paint with some water (I did around a 50/50 ratio), and then used a rag to rub it onto the wood. For the bottom panel (the bumper), I added a little extra paint to my mixture to get a darker affect.
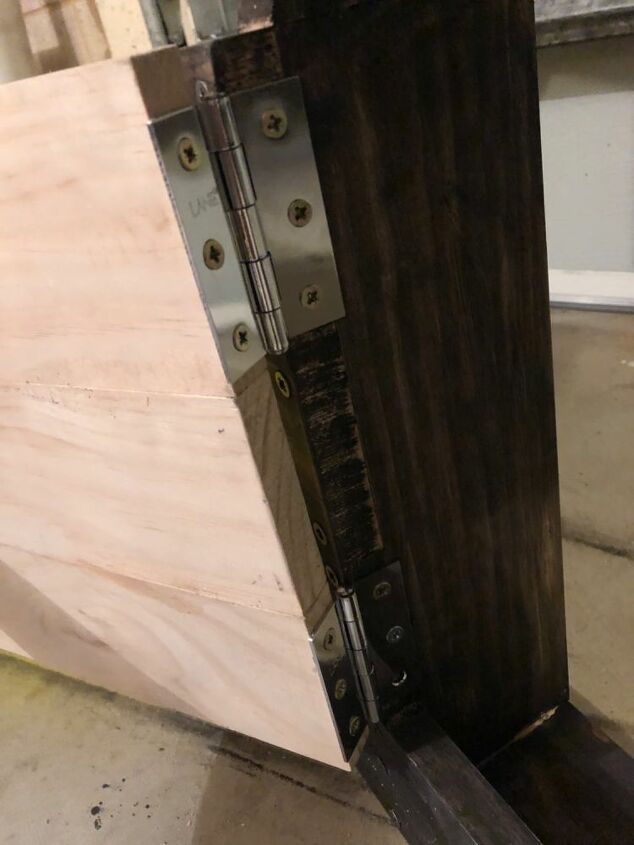
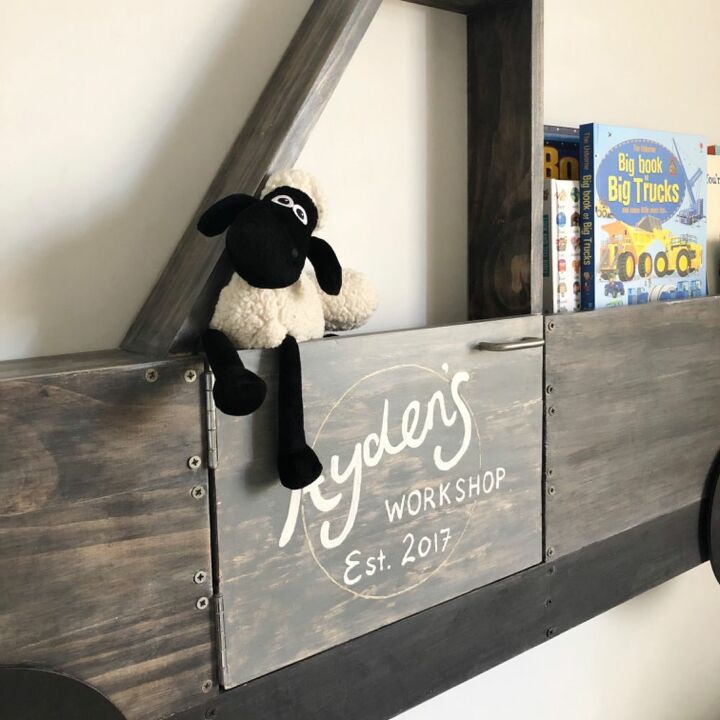
Next, I attached the door using some small hinges and then did the same ‘wash’ affect on it except I added some white paint to the mixture to make it grey.Note: I removed the door again to paint it, however I wanted to make sure it fit and closed properly before I painted it, just incase I had to recut or sand it.
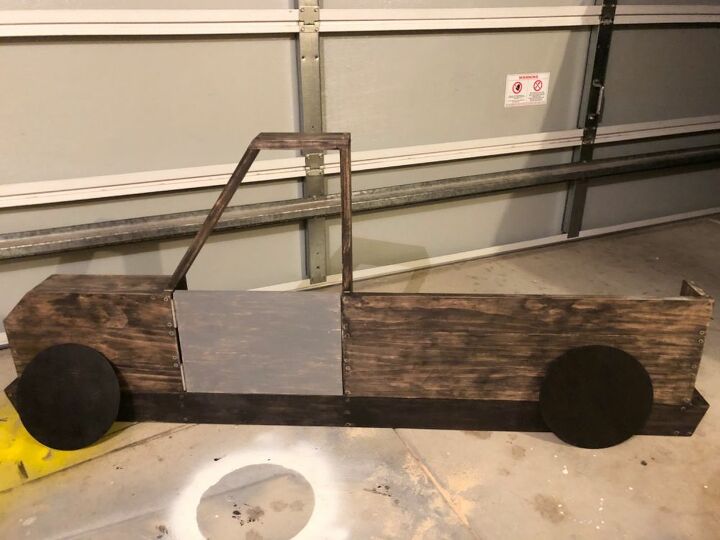
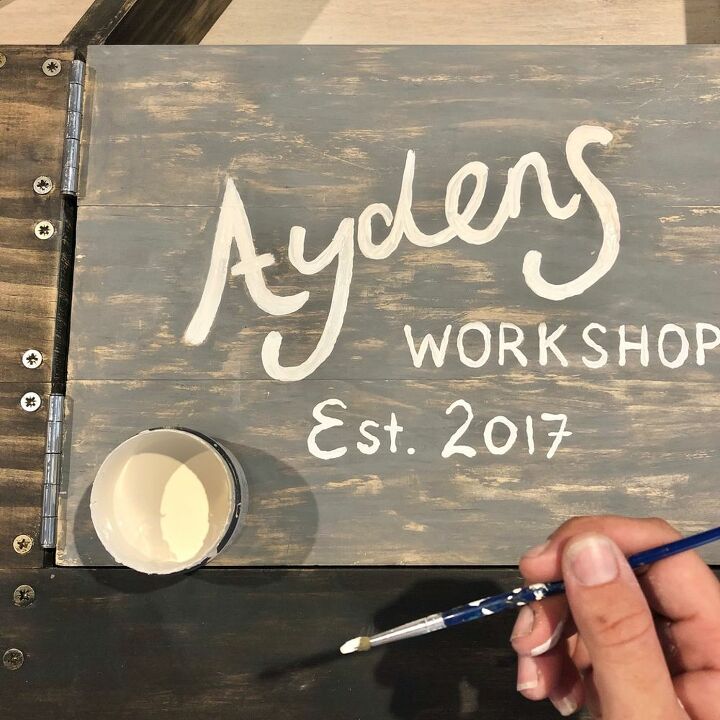
Once the door was attached, I cut up some more wood for the shelves. I used the same type of wood but with a smaller width to allow that extra room for the door to close. I stained them with the black/water mixture and then attached them to the inside of the door frame.Next, I used white wall paint and a fine brush to do the writing on the door.
Once all the painting was done, I sealed it with a liming white sealer/stainer to get that extra ‘weathered’ wood look. I used a rag to apply it, lightly rubbing it in over the entire structure.
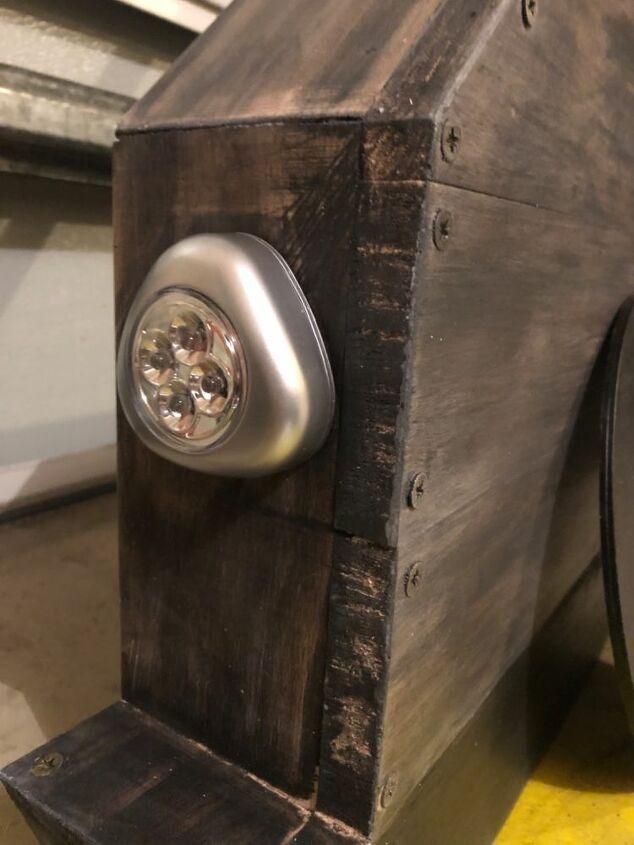
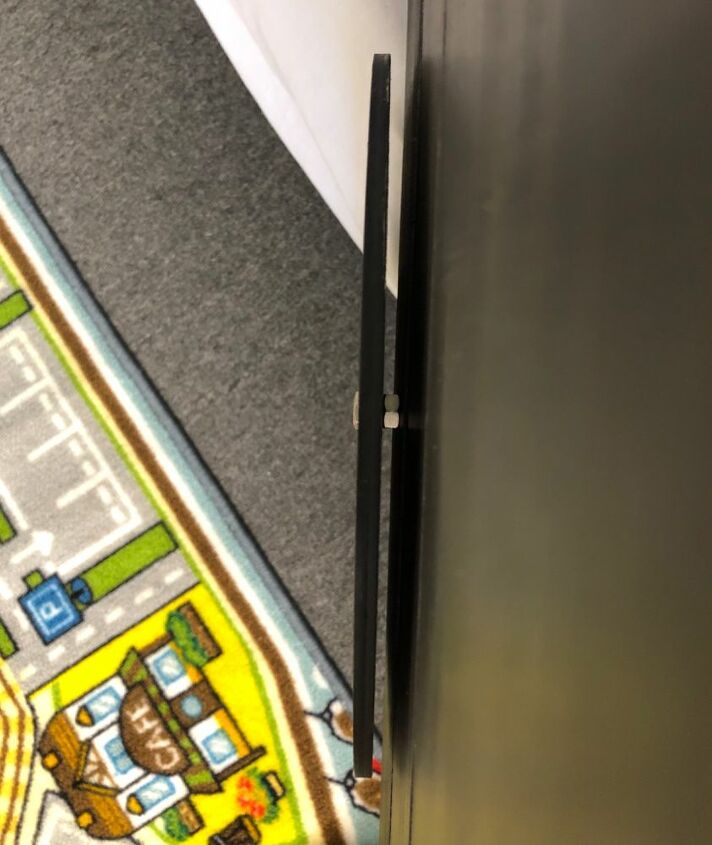
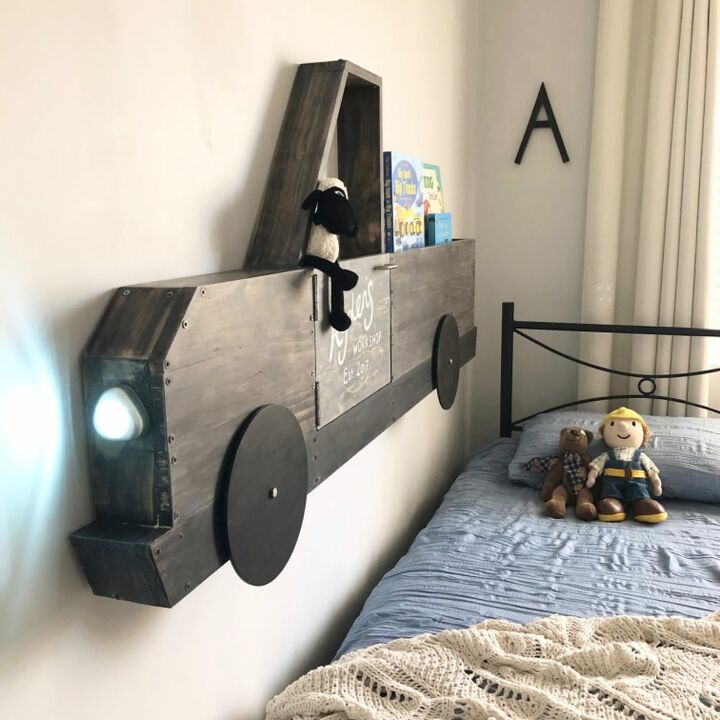
I then added some stick on ‘push’ nightlights, one at the front and one at the back. These I bought from Bunnings again, they have adhesive strips on the back, and to replace the batteries you just twist the front cover off.

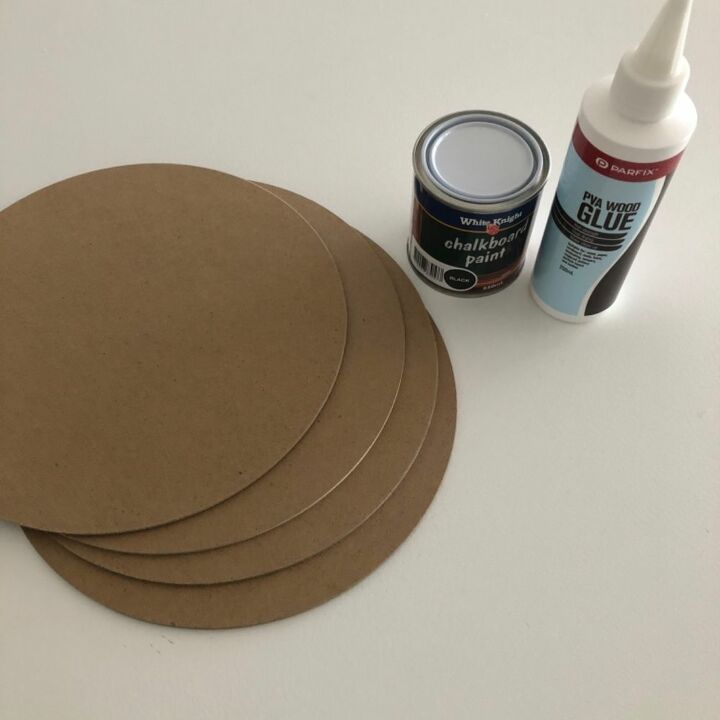
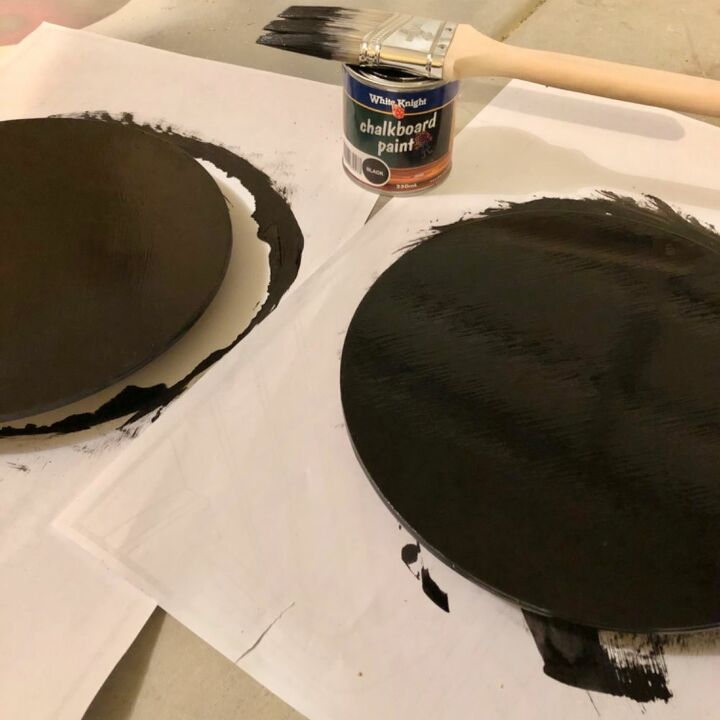
For the wheels I used some mdf place mats I found at Bunnings. I glued two together to add some thickness and then painted them with chalkboard paint. It probably would have worked out cheaper to buy a small sheet of mdf and cut the wheels out myself but I figured for a only a couple of extra dollars this option would save me a lot of time.
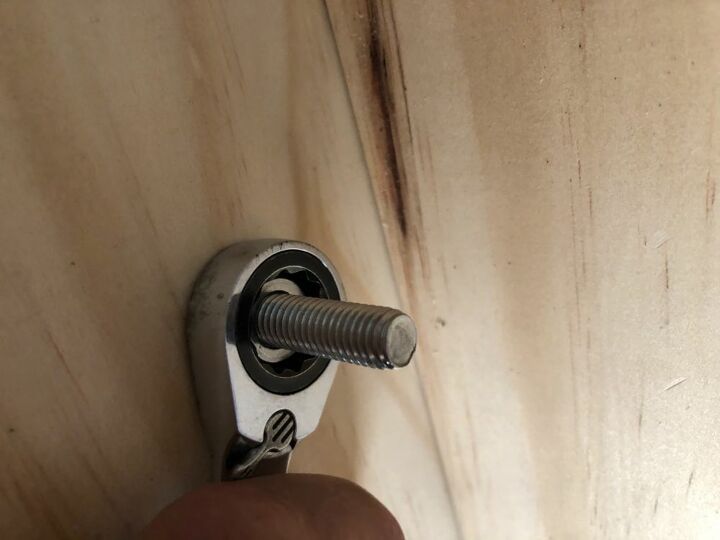
I then drilled a hole into the centre of the wheels and in the bottom panel of the structure. I attached the wheels using long bolts with two nuts on each, one on each side of the panel, leaving a small space from the head to allow the wheel to spin.
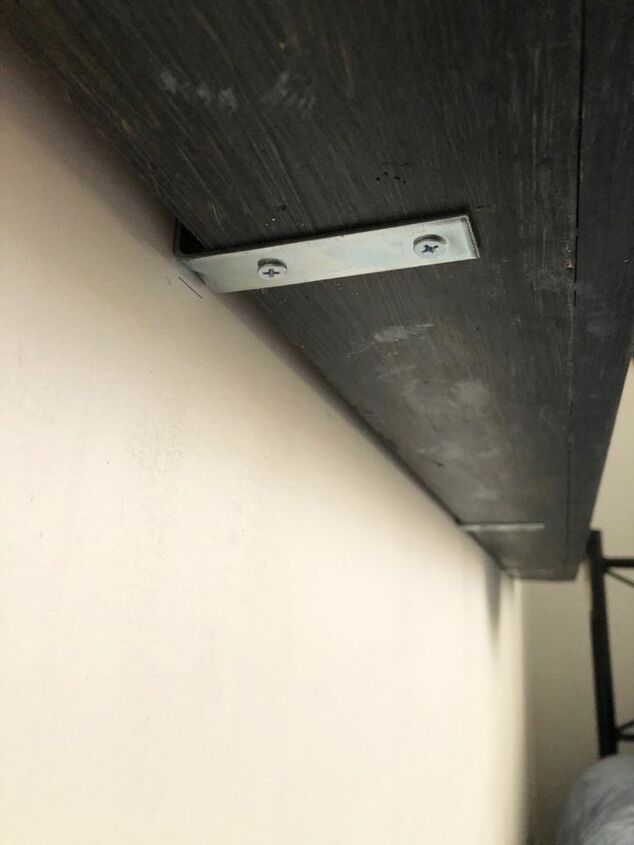
Lastly I added a door handle (I almost forgot it) and then it was finally ready to be hung it on the wall.To do this I used a total of 6 heavy duty angle brackets, 3 at the bottom and 3 at the top (behind the door and in the tray so that they are not visible).
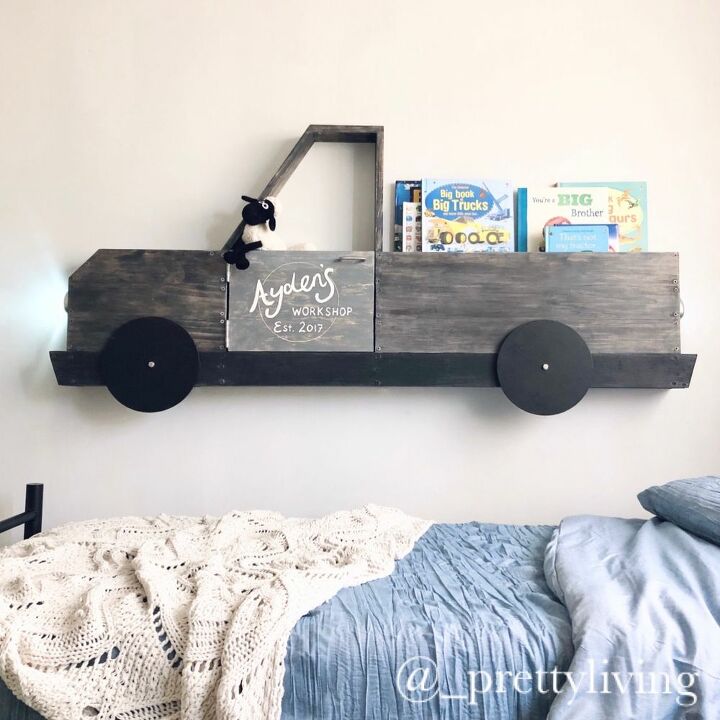
My project was now completed and ready to be filled with books and cars! 👌🏻Check out my instagram page @_prettyliving for more of my projects 😄
Resources for this project:
See all materials


Comments
Join the conversation
-
This is awesome, you did a wonderful job, and I am sure your son will enjoy it for years, in fact, I hope he grows to appreciate it so much that he moves it from home to home as he grows. In other words, I hope you see it in his home when he is an adult, perhaps with children of his own.
-
That is just sooooo Stunning!!! Your son must be so proud of you ! I bet he loves it! I don’t have any kids in my house now, they’re all up and left…but I’m sure if I was clever enough to make what you’ve just made, I think my sons would love that Fantastic bookcase as well! You’re a marvel with a saw! Xxx🌹


Frequently asked questions
Have a question about this project?
Very Very cute especially the headlight. Just curious why you didn't use finishing nails instead of screws.
Sooooooo cute
Where do you get those stick on lights?