


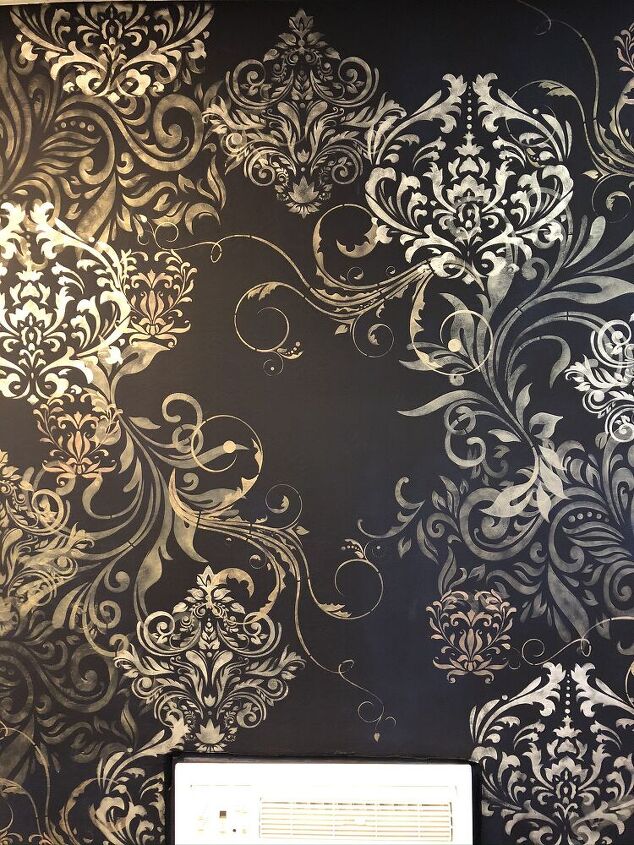
Stenciled Graffiti Wall
This Stenciled Graffiti Wall has been one of my favorite projects I have created in the past few years! I was totally inspired by a few canvases that I had created with a similar look and I wanted to take this look to the wall!
I wanted a fun texture in the background of this finish, so I started with my Texture Medium and the Tiger Skin Roller. Using a Japanese Trowel, I troweled on one section at a time and while the texture was wet, I rolled the tiger roller through it in different directions making it look more organic. I then cleaned off the side of my trowel and using a soft hand, I knocked down the high points to give it even more organic look.
I continued across the wall until it was completely covered with the Texture Medium and tiger roller patter. You would never know that this was the Tiger Skin Roller, it just looks leafy and organic.
Once your texture medium is dry...
Check to make sure there aren't any rough spots that need to be sanded down. There may be a few and you can smooth them out with some sandpaper.
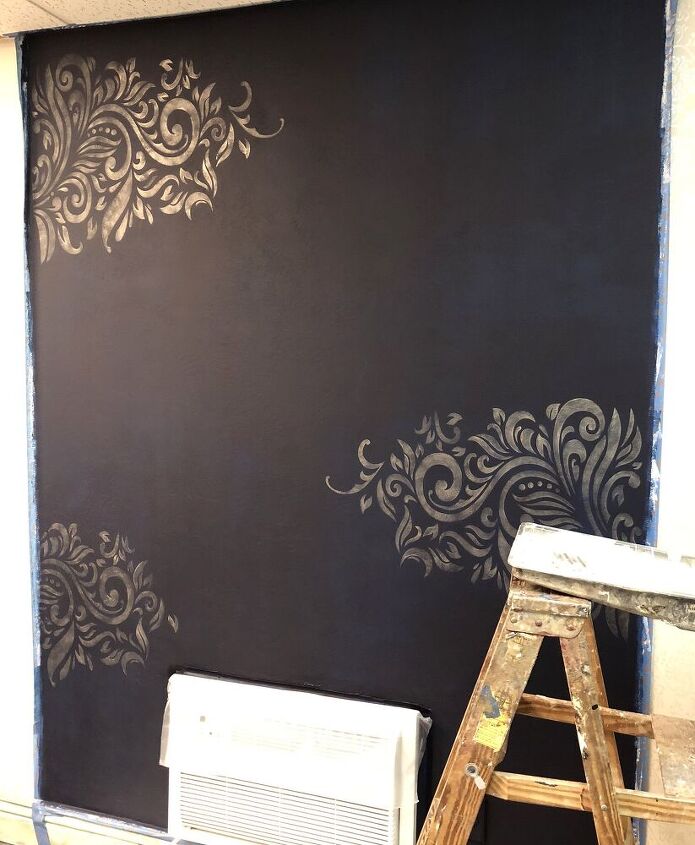
Then you will grab a can of Rust-Oleum Milk Paint in Navy and roll it on. It will take a few layers, as does any dark color, to achieve the darkness needed. Three coats later and it will look fabulous! Dark base colors really make metallics pop!
Now For The Fun Part
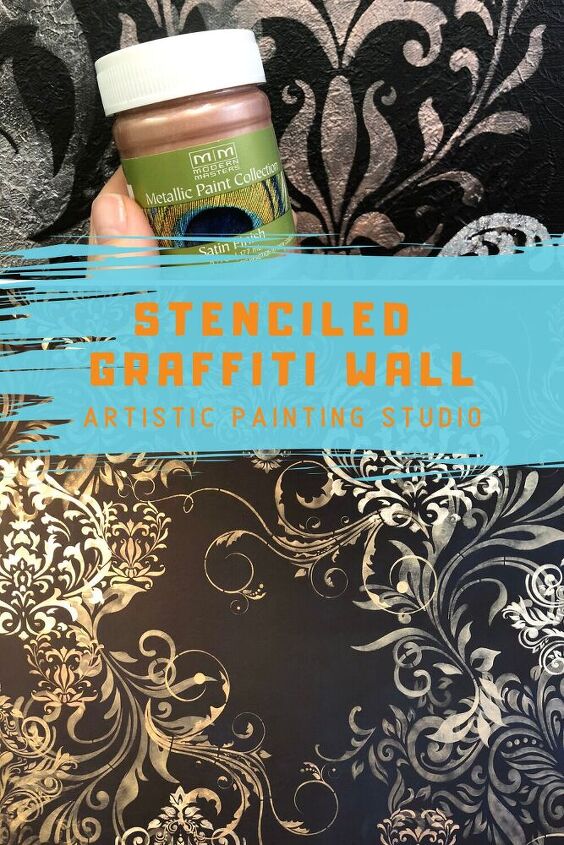
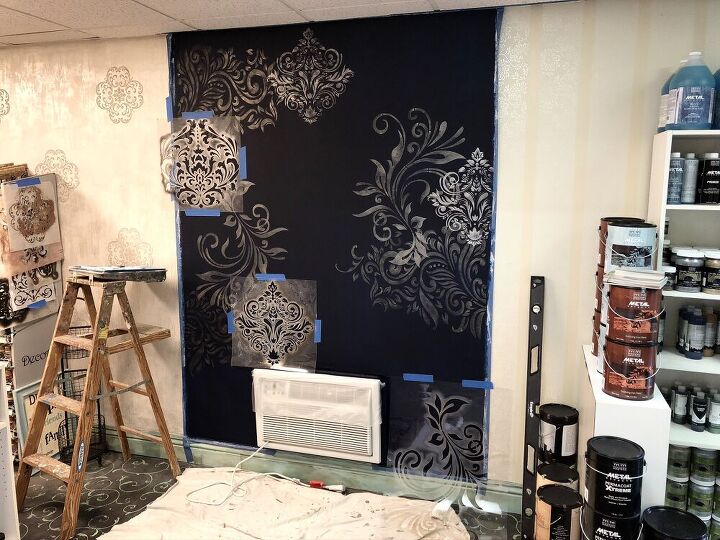
Picking out stencils for this project was so much fun. We actually just added some new designs to my collection. For my stenciled graffiti wall I chose the following designs: La Provence, Harlow, Donatella Damask, Splendor, and Sultan Swirl.
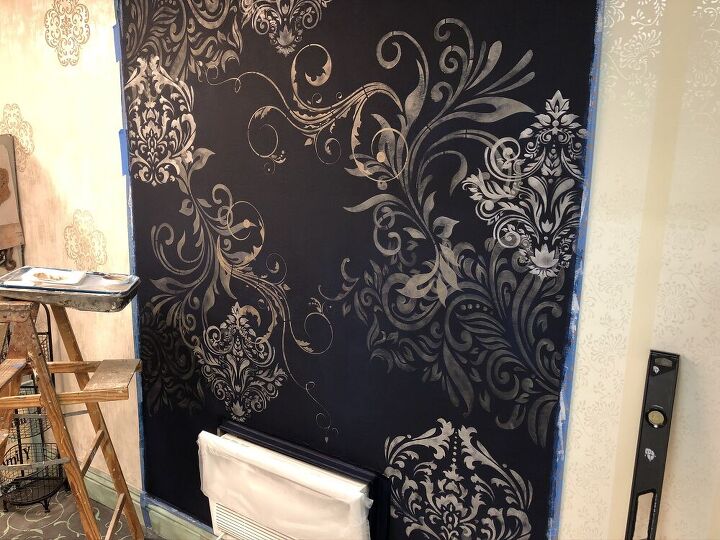
You will add each design, one at a time, using different Metallic paint colors from Modern Masters. Silver, Warm Silver, Champagne, Rose Gold, and Nickel are the colors I chose. I used some of the lighter colors in the background stencils and layered the darker colors over the top.
Place one stencil at a time, step back to see the placement, and stencil in the openings. Make sure to use a dry brush technique to make sure you don’t bleed under your stencils.
Keep layering one stencil at a time until you are happy with the look. This is a great look for a focal point wall, a statement room, or can be a fabulous canvas project!
Resources for this project:
See all materials


Frequently asked questions
Have a question about this project?
I love it, you are truly inspirational! But please tell me those ceiling tiles will be getting an update soon?!?! They detract from all the gorgeousness. I’ll be hopefully getting a home of my own soon and I guarantee you will be my inspiration!