


How to Make a Stenciled Welcome Mat
Dress up your front porch with this simple tutorial using a door mat, paint and stencils.
If you like simple DIY projects for your home be sure to follow Creative Ramblings here on Hometalk. You can also find creative ideas on Creative Ramblings.

Here are the supplies you need to make a colorful welcome mat for your front porch.
- Ikea coir door mat
- Large stencils
- Craft paint
- Sponge brush
- Painters tape
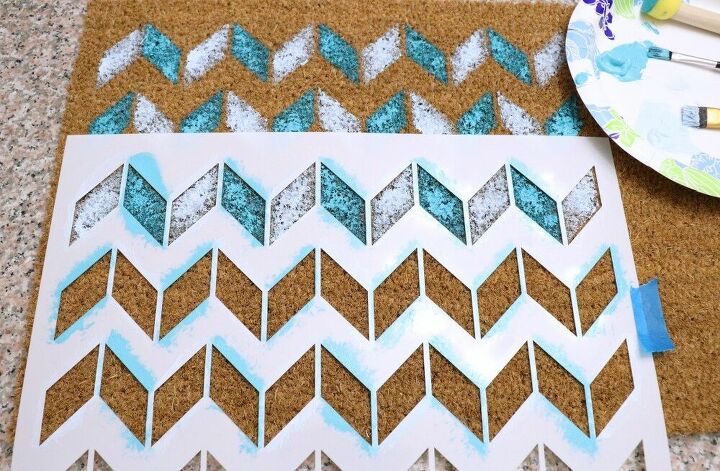
I chose this herring bone stencil for my door mat and opted to use white and teal paint. I positioned the stencil on the mat and used a generous amount of paint with my sponge brush. I moved and re-positioned the stencil as needed to fill the mat.

Once the paint was dry, I cut a welcome stencil using my Cricut and used black paint to add this word over the herringbone stencil.

To fill in the gaps created by the stencil, I went back with a fine brush and black paint to connect all the letters.
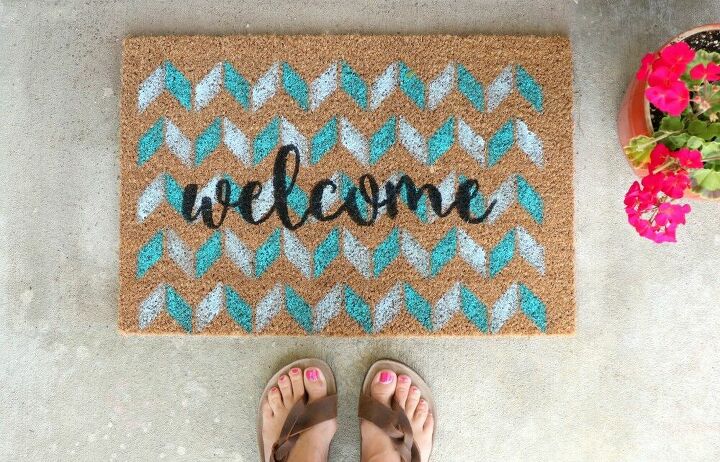
This welcome mat adds color to my front porch adn looks great even after a few years of use!
A few tips if you don't have access to a large stencil.
- Pick a pattern you like and free hand it with paint. Practice on paper first to get the hang of it then paint it onto the mat.
- Add words over the dry paint using a paint marker.
If you like this, you'll love the rest of this colorful Spring porch!
Resources for this project:
See all materials


Comments
Join the conversation
-
I will definitely have to try this. Love the colors, love your sandals. Thank you for sharing!


Frequently asked questions
Have a question about this project?