


My #1 Industrial Farmhouse Transformation.
WHEN WE MOVED FROM A TRADITIONAL HOME TO THE FARMHOUSE, I HAD A FEW PIECES OF FURNITURE THAT I COULDN'T LEAVE BEHIND EVEN THOUGH THEY DIDN'T EXACTLY HAVE A FARMHOUSE LOOK! Here's what I did to one such piece and it is my favorite industrial transformation. For more inspiring furniture transformations click here!
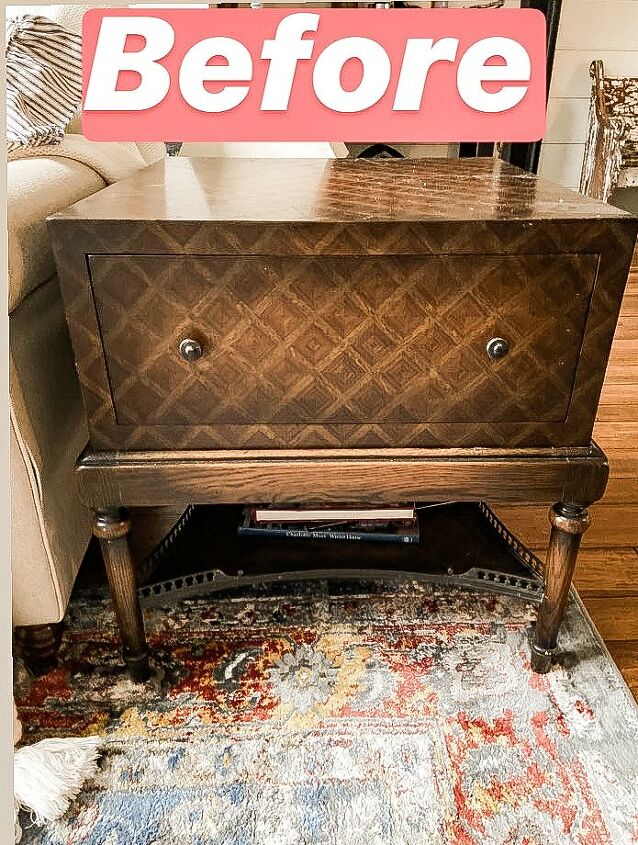
Traditional Side Table that had worked perfectly in my previously traditional home.
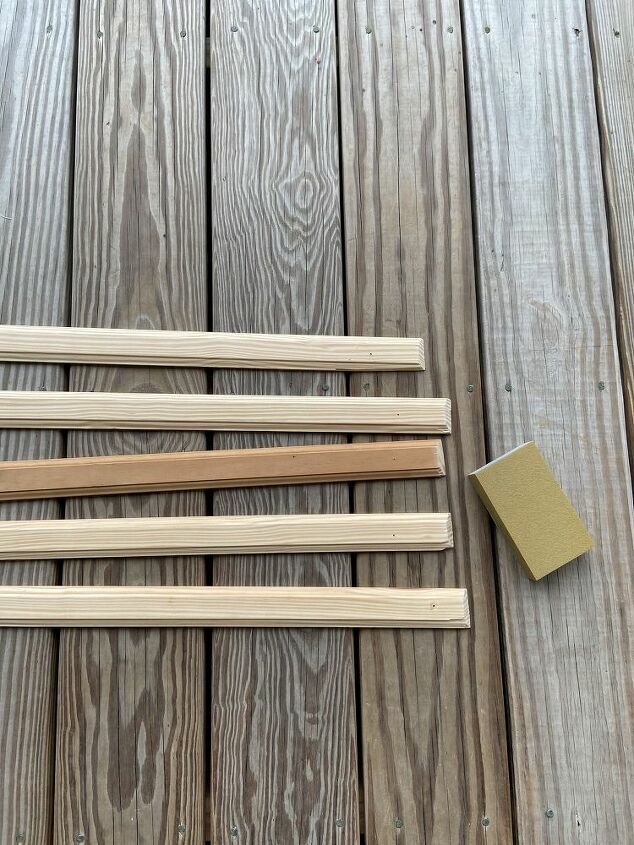
5 stripes of 1 1/2 " Interior Pine Wood Casing cut to the length of the drawer front. First of all, my husband helped me cut the casing allowing for a 45 degree angle on the ends to match the shape of the casing. Then I drilled small pilot holes in the trim to allow for the small screws. I also sanded the edges and around the pilot holes with a fine grit sanding block
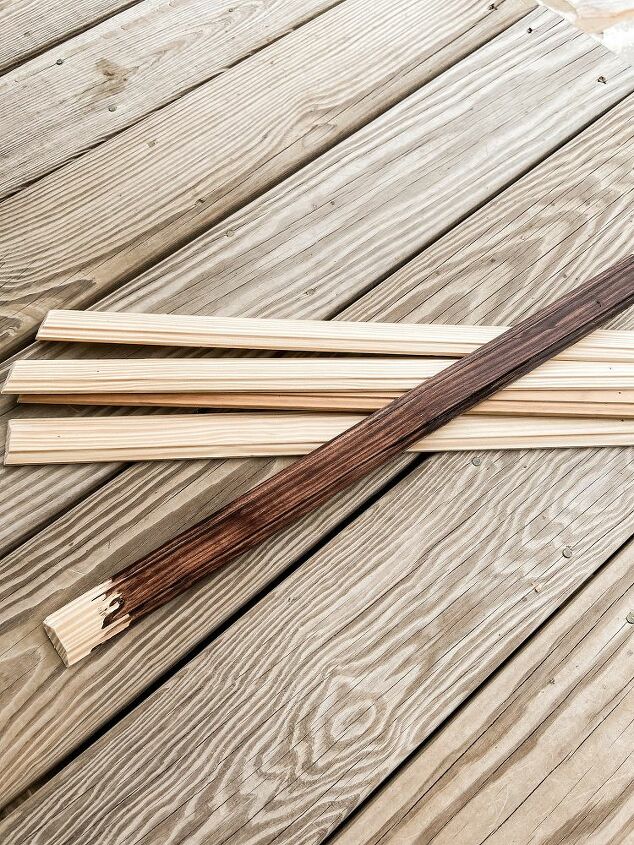
Because I wanted the new wood trim to match the original table stain, I applied a Walnut Gel Stain to the raw wood. Although it wasn't a perfect match, it will work perfectly for the paint technique I have planned.
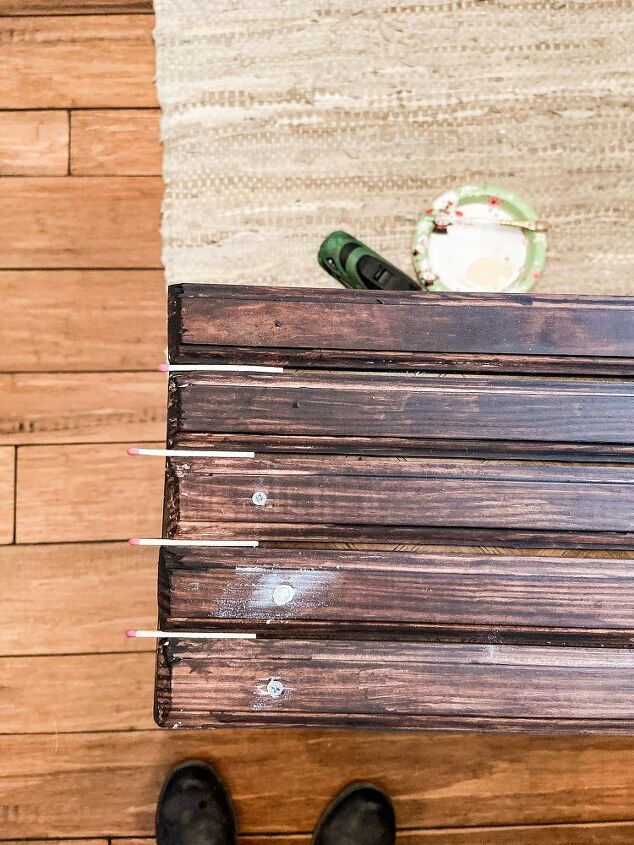
Now it's starting to get exciting. I applied a small amount of wood glue to the back of each strip and aligned the wood molding on the drawer front using match sticks as spacers. This was not the most professional spacer, but it's what I had on hand. Then I used small screws to attach the molding to the drawer front. Once the screws where in place, I used a small amount of wood filler to cover over the screw heads.
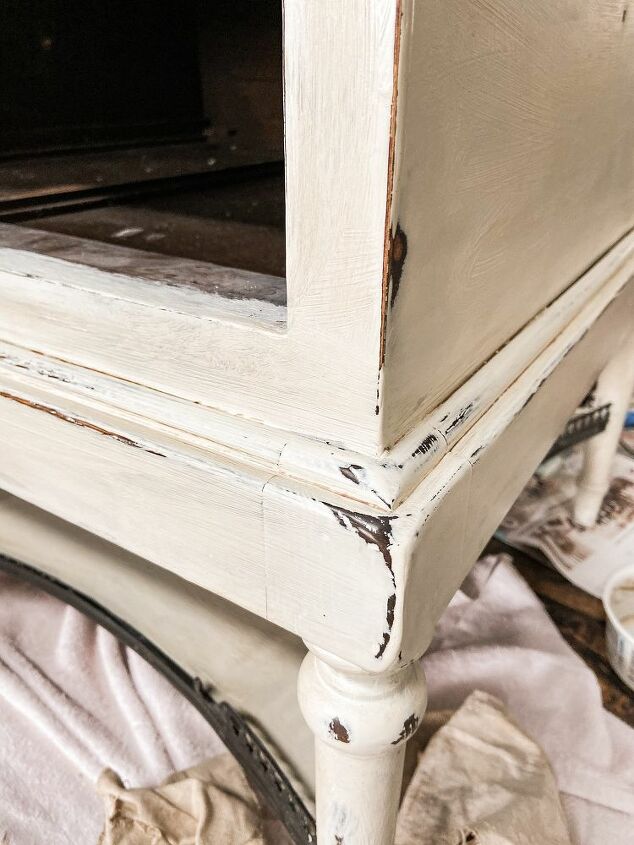
Once the stain and wood filler had dried completely, I painted the entire piece with two coats of Annie Sloan Chalk Paint in Old White. Using my sanding block, I sanded away paint from the edges for a distressed look. This is the reason I stained the molding stripes to begin with. As a result, you see some of the original stain through the chalk paint.
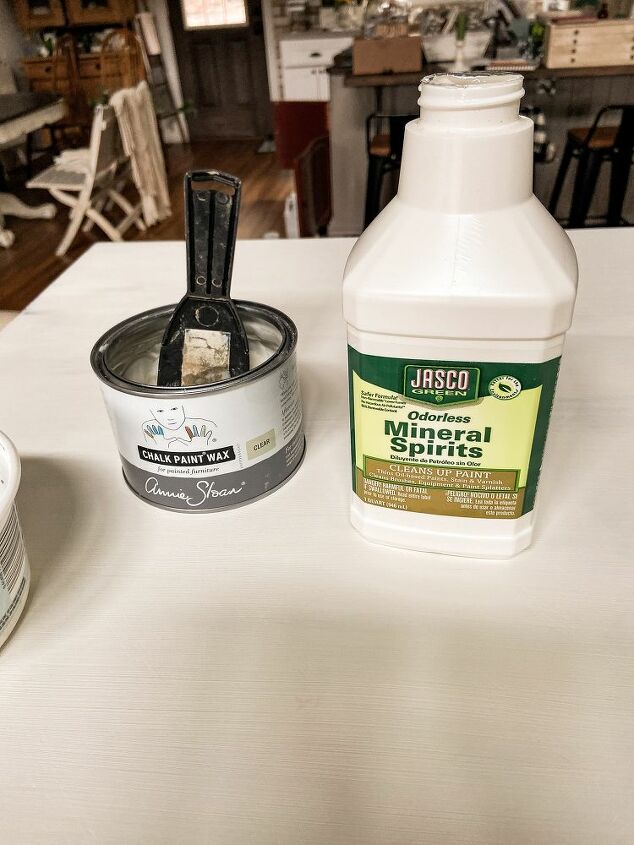
Next I used Annie Sloan Clear Wax with a mixture of mineral spirits. I made a mayonnaise consistency mixture and used a chip brush to apply to the painted piece.I used a soft cloth to remove any excess wax and allowed the wax to dry. Then I used a piece of scrape drop cloth to buff out the surface.
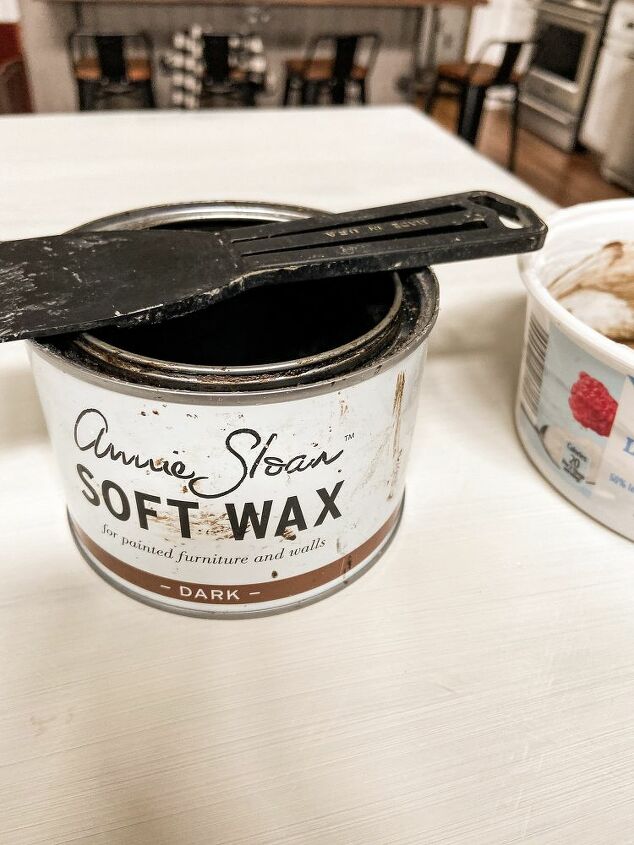
Finally, I added a coat of dark wax. Since the surface had already been waxed once, this was quick and easy. Just wipe of excess and buff once again. Note: In hindsight, I would have mixed a small amount of the dark wax to the clear originally to achieve this finish.
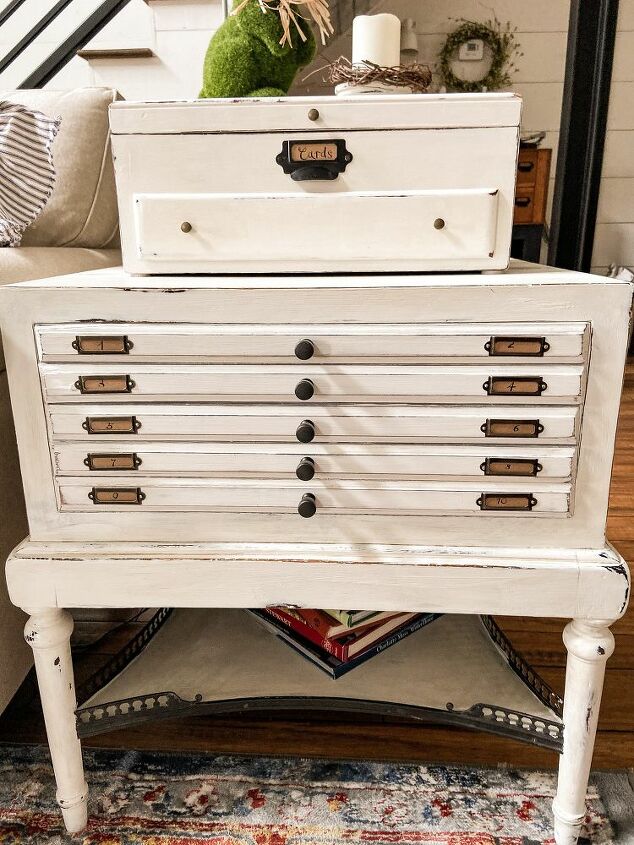
Finally, it was time to add the hardware to the front. The front drawer now looks like 5 small drawers. I purchased the drawer pulls and label holders from D. Lawless Hardware. Using some craft paper card stock that I had on hand, I hand lettered the numbers for the label holders. See the transformed silverware box here!
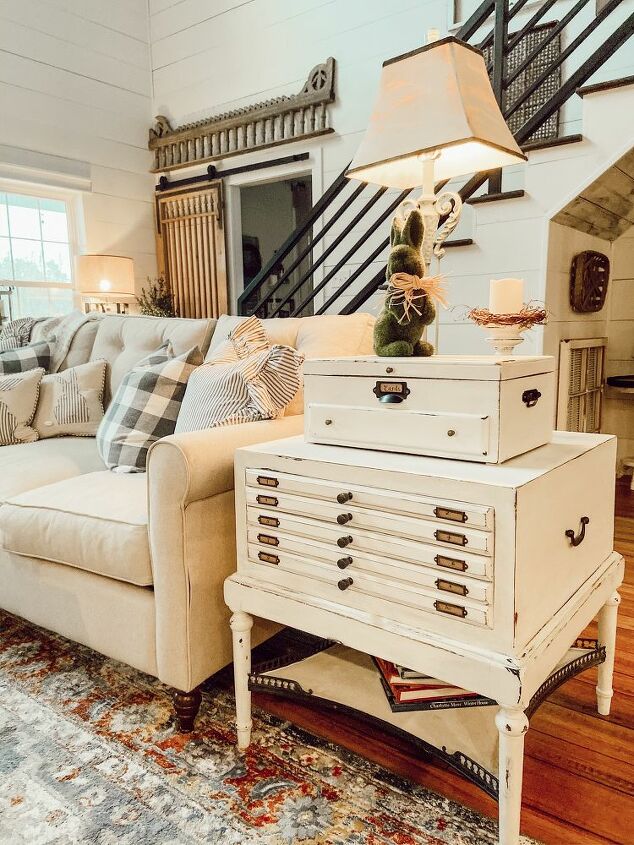
Now the color is a warmer shade of white. Don't be afraid to make mistakes when attempting a project. This one still turned out to be my one of my favorites. Thank you for stopping by! I hope this will inspire you to look beyond the obvious when searching for the prefect decor piece. Rachel
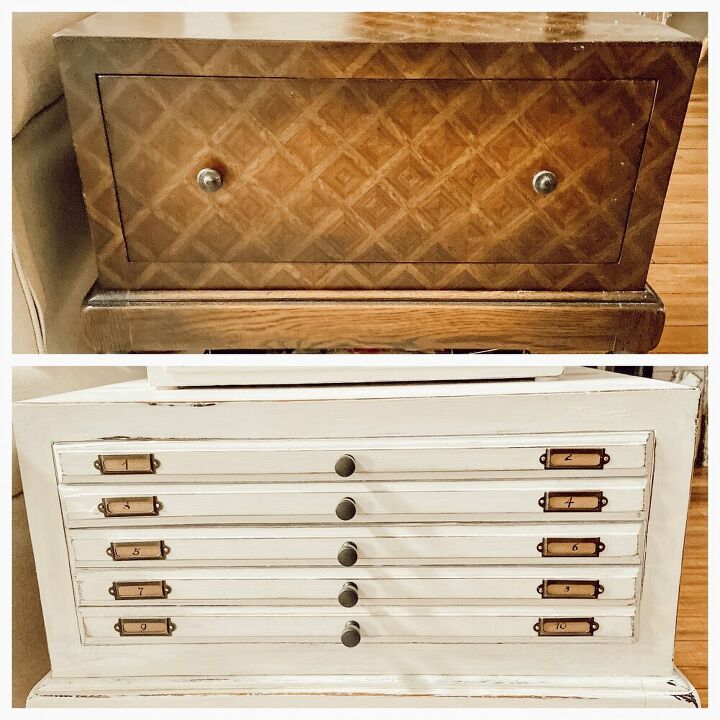
Before and After!
Resources for this project:
See all materials


Comments
Join the conversation
-
Fantastic!
-
Absolutely love it! Is that a trunk on top? Definitely going to try this one! Thanks for sharing!!! ❤️


Frequently asked questions
Have a question about this project?
Curious why you mixed “Mineral Spirits” with your clear wax?
By the way, it’s beautiful! Love the New, Fresh look!!
The 'new' chest reminds me of the map drawers that libraries used to have years ago. Anybody else remember these?
You did a nice job. However I've gotta say something: how does industrial and farmhouse even fit into the same sentence? Cold and factory-like with warm and organic?