


Upcycled Bookcase

What do you do when you have the tops of a couple bookcases left over from another project? Make a new bookcase, of course!
Hometalk Recommends!
Step 1
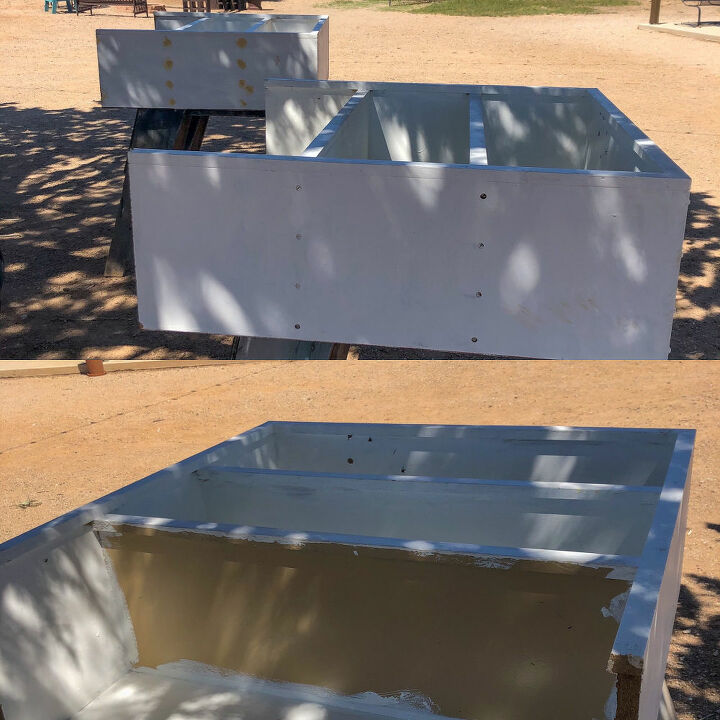
These are what I had to start with. I had been given some bookcases from our old church library that were 6 feet tall about six years ago. I did not need that height for the project I was doing then and so we cut them down to the size I wanted at the time. It left me with the tops of the bookcases and I used them, stacked on top of each other in my closet, for years. I have been working on remodeling my closet and took these tops out where they have sat on my porch for an entire year. I finally decided to do something with them...and clean my porch off at the same time! Talk about a win-win!
Step 2
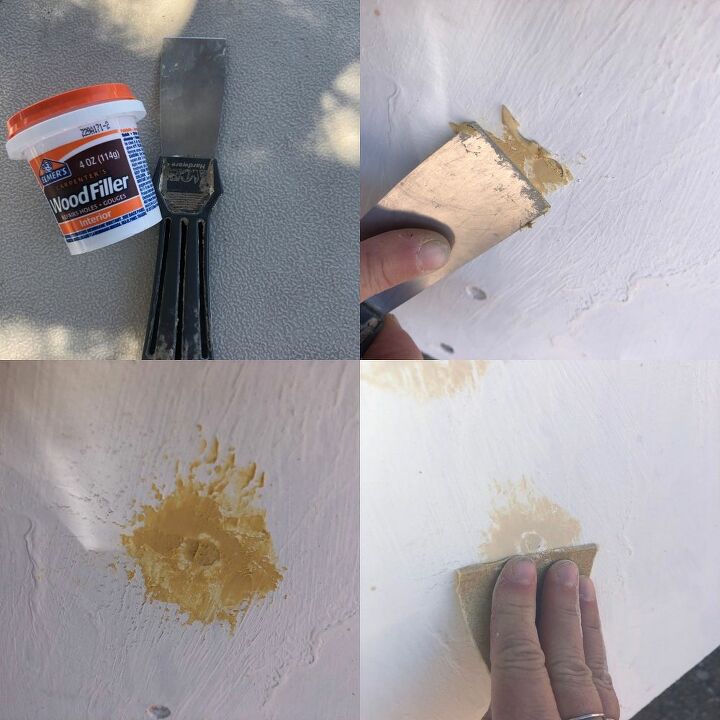
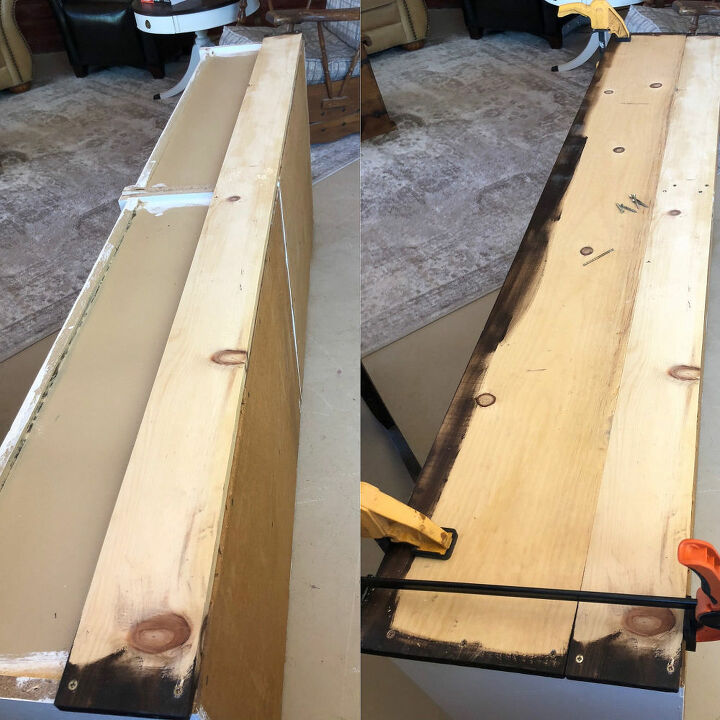
I needed to fill the holes on the sides of the bookcases. After the wood filler dried, I sanded the spots smooth. I neglected to take pictures of the next step (so sorry) but I decided to cut the bookcases down so that they had a good shelf bottom and to accommodate the height I was trying to achieve. For that part, I used my framing square to get a nice straight line and my circular saw. Once they were cut down to the size I wanted I scuff sanded them with 220 grit sandpaper to prepare them for painting!
Step 3
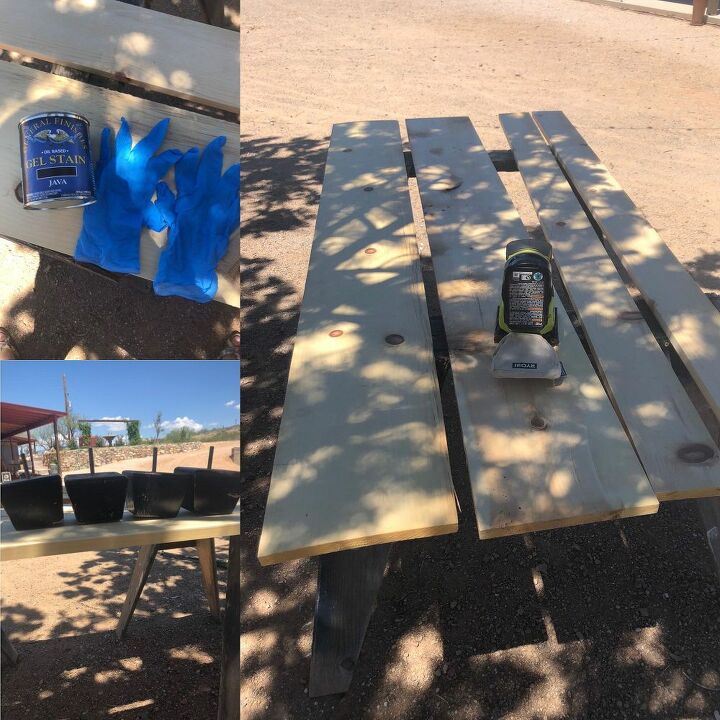
Prepping and staining the wood for the top and bottom was the next step while the paint was drying on the bookcases. First, I sanded the 1x10's I had out in our wood pile so that they would be smooth and not give anyone splinters. For that part, I used 150 grit sandpaper and my cordless hand sander. Once that was done, I used General Finishes Java Gel stain, with a pair of gloves to protect my hands, to stain the wood for the top and bottom of the bookcase.
Step 4
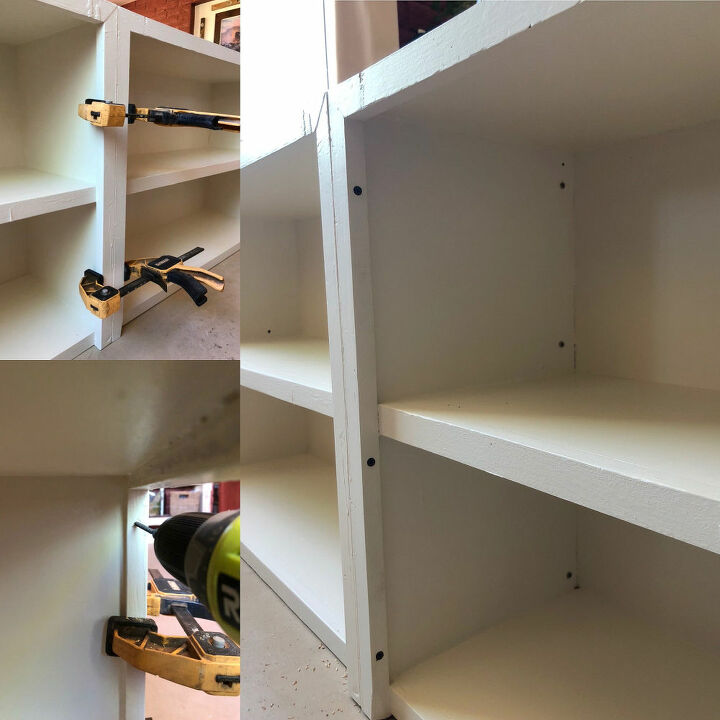
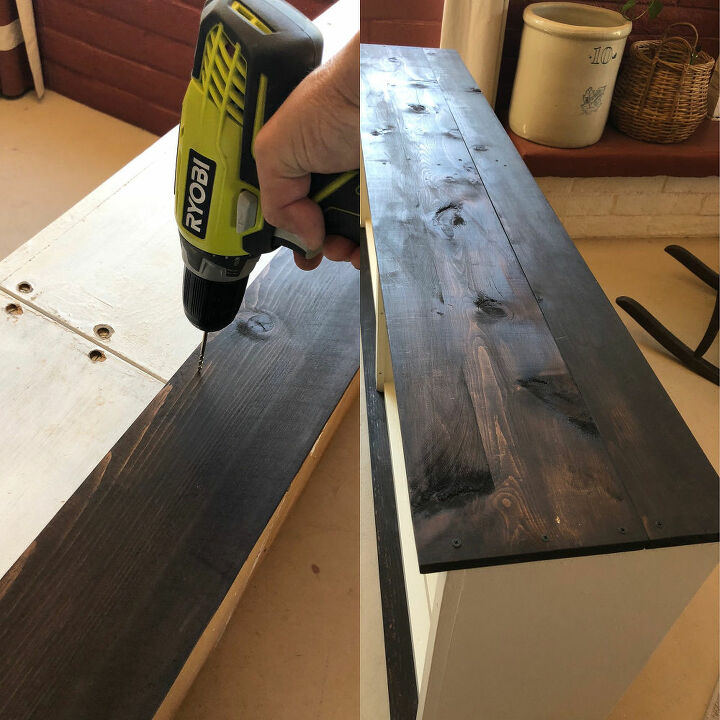
While the stain was drying outside, I joined the two sides of the bookcase together. It was important to make sure the bookcases were plumb front to back and top to bottom. To help me achieve that, I used clamps to hold them together and keep them from moving while I pre-drilled and then screwed them together. Using clamps is like having an extra pair of hands and can be so helpful.
Step 5
To attach the stained 1x10's, I wanted to start with the bottom so I flipped the bookcase over. I know this looks weird, but since these ones are on the bottom, I did not stain the bottom of the boards...this will make more sense when you see the finished product. I used clamps again but this time it was to make sure the boards were straight (it helped take a little bow out of them and insure a straight seam between the two pieces). I pre-drilled the holes and secured the boards with screws.
Step 6
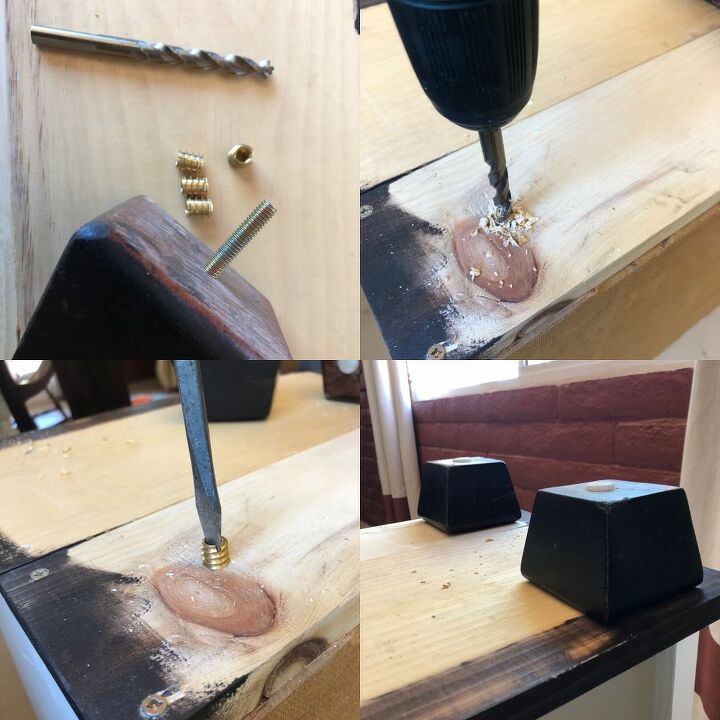
Adding bun feet to the bottom was the next step in creating the height and look I wanted to achieve. I salvaged these bun feet from another piece of furniture several years ago. I pre-drilled the holes for the threaded inserts that would allow me to attach the feet. Once the holes were drilled, I used a large flat head screwdriver to screw them into the wood on the bottom of the bookcase. At that point, I was able to attach the feet and turn the bookcase right side up.
Step 7
The last step was to attach the top two stained boards to give the bookcase a finished look. I used the clamps again, pre-drilled the holes for screws so I didn't crack the wood, and attached the boards with screws.
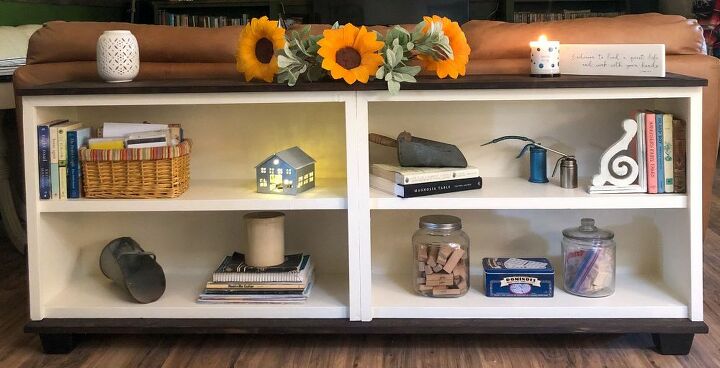
Here it is, an upcycled bookcase made entirely from scrap stuff I had on hand! I love how it looks like a high-end piece of furniture that was basically free minus my time!
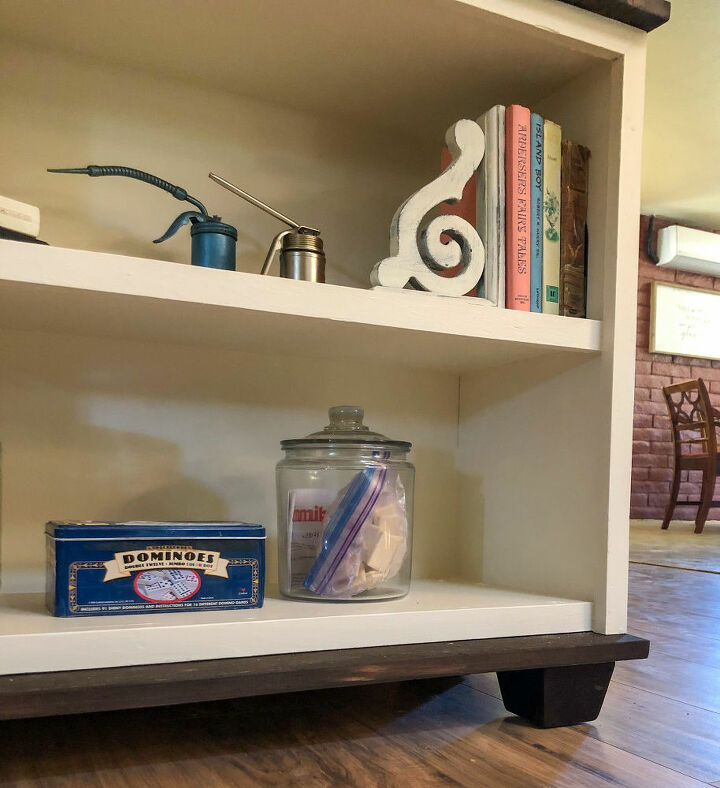
The feet really help add that high-end furniture look.
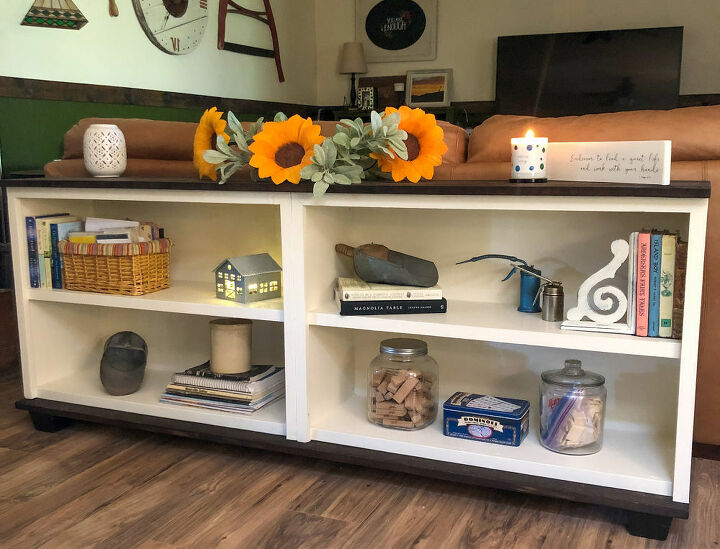
I am really pleased with how this turned out and I like having it behind my sofa for now. It is a great height and width in this area and can help hold a few extra games for the family. I know at some point, it will get moved somewhere else in my home but for now, it is right where I designed it to fit!
Resources for this project:
See all materials


Comments
Join the conversation
-
Brilliant it looks ace, you've given me an idea, I have a cupboard I was going to tip. But after seeing yours I'm going to up cycle. Thankyou
-
Exactly what I was thinking for a really, really well loved (?) old bookcase now living in my dusty utility room. Tall and a bit wobbly and well you get the picture. Now have a wonderful diy and scrap wood left for more fun 😊!!! Pinned!!


Frequently asked questions
Have a question about this project?
In step 6 you pre-drill the holes for the screws and put the inserts in and screwed them in with a flathead screwdriver. Then you added the bun feet. How??? Am I making this harder than it is? What are bun feet? Maybe that should be my first question. Please help. Btf, I really love the finished product. Truly beautiful.