


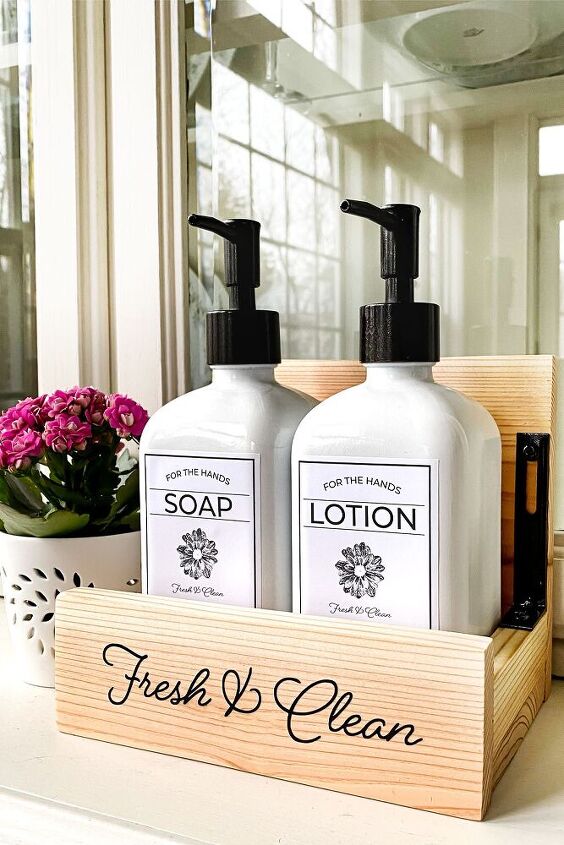
How To Make A DIY Kitchen Soap Tray To Organize Your Dispensers

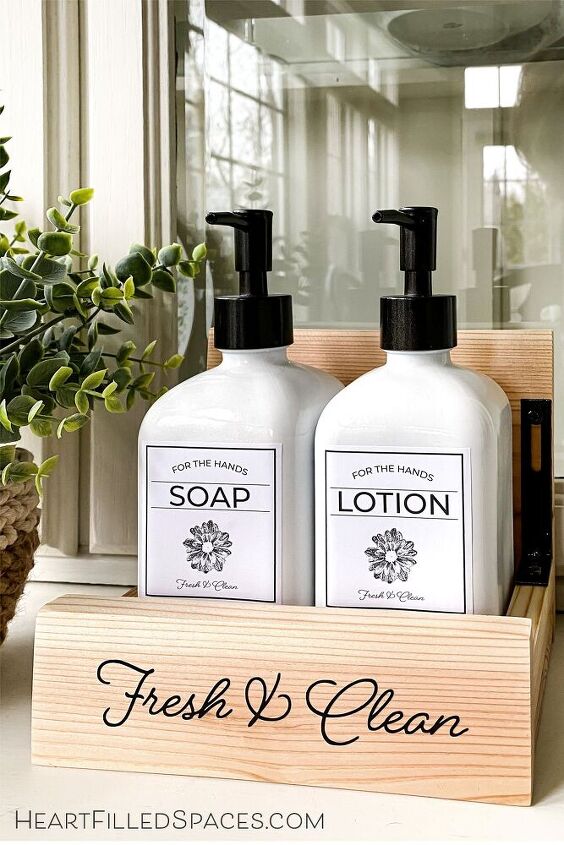
Since spring has arrived, I’ve been focused on kitchen organization. In an effort to tidy up my kitchen sink area, I decided to make this DIY kitchen soap tray to hold my liquid soap and lotion dispensers. My dispenser bottles also received an upgrade with paint and labels.
I had most of the supplies on hand for this project. If you only need to purchase the wood and corner brackets, you should come in under $10 for this project. If you need to purchase all of the supplies, it might make more sense to be a savvy shopper and buy a soap tray. 
I made this DIY kitchen soap tray from a cedar fence picket. Cedar, in general, is an expensive wood to purchase. Buying it in the form of a fence picket makes it more affordable. It has a natural resistance to rot, so I figured it would be a good choice to use around my kitchen sink.
The drawback to using a fence picket is it will need to be sanded. Breathing in dust from cedar can be bad for your health, so be sure to work in a properly ventilated area and use a respirator rated for saw dust. Always use eye and hearing protection as well.
This project is perfect for a beginner. It involves a few simple cuts and most of the joinery is done with corner braces. I measured my soap bottles and then built the wood tray to accommodate those dimensions.
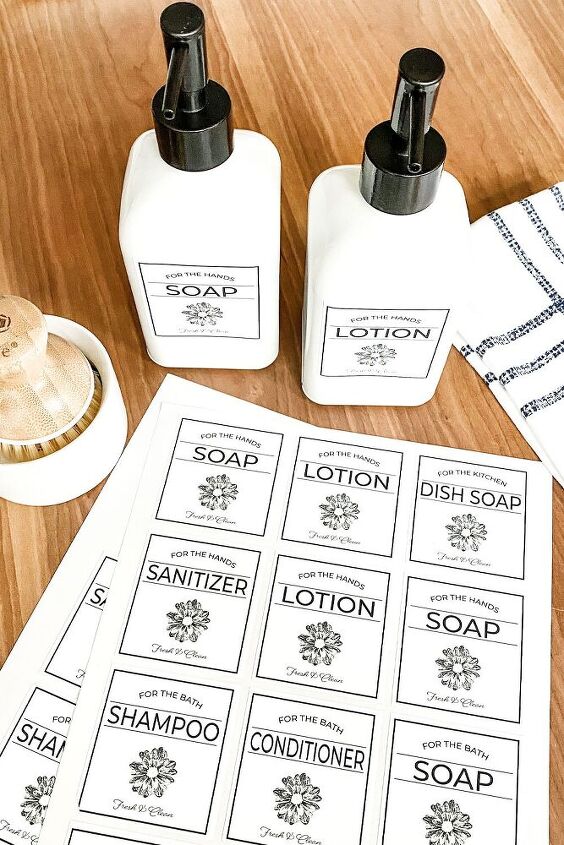
To download the (Fresh and Clean) words and dispenser labels, visit Heart Filled Spaces and subscribe. You will be sent a welcome email with the password to my free library of over 60 printables and cut files. These files are available as a PDF, SVG, and Silhouette Cut File.
I recommend using printable vinyl sticker paper that is waterproof for these labels.

It’s easier to sand your fence picket before you cut it in smaller pieces. Use a random orbital sander with a 80 grit sanding disc to take down the rough finish on the fence picket. Then follow up with a 180 grit paper and finish with 320 for a smooth finish. Again, always wear a mask to prevent breathing in saw dust.
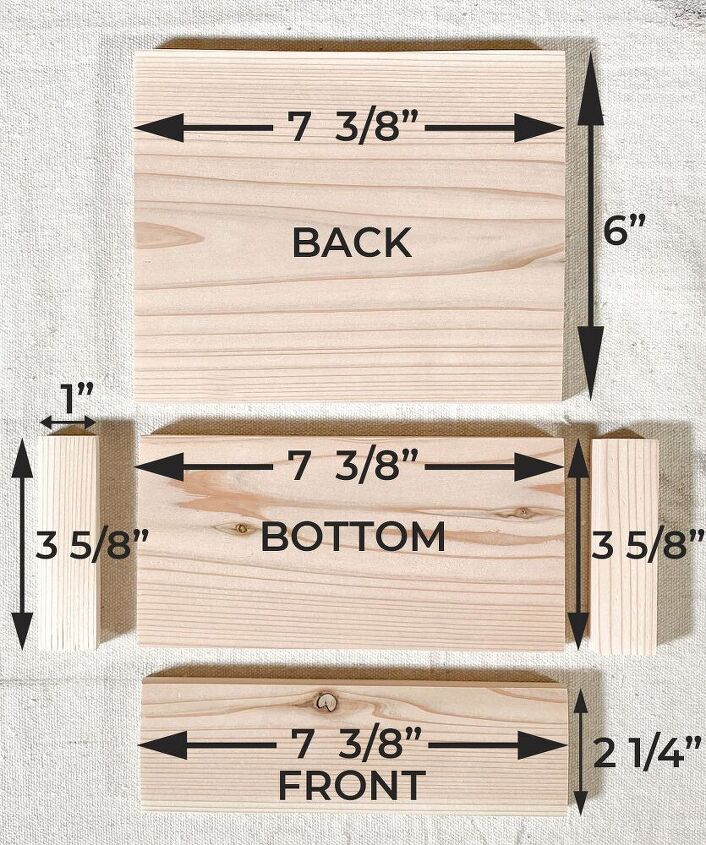
All soap dispenser bottles are different sizes. Measure your soap dispenser bottles and cut your boards accordingly. Add an extra 1/4 inch to the front and sides to accommodate for your corner braces. I used a miter saw to make all of my cuts.
It’s important that your cuts are precise. Be sure to measure twice and cut once.
Back Piece: 7 3/8 X 6 inches
Bottom Piece: 7 3/8 X 3 5/8 inches
Front Piece: 7 3/8 X 2 1/4 inches
Two Side Pieces: 3 5/8 X 1 inch
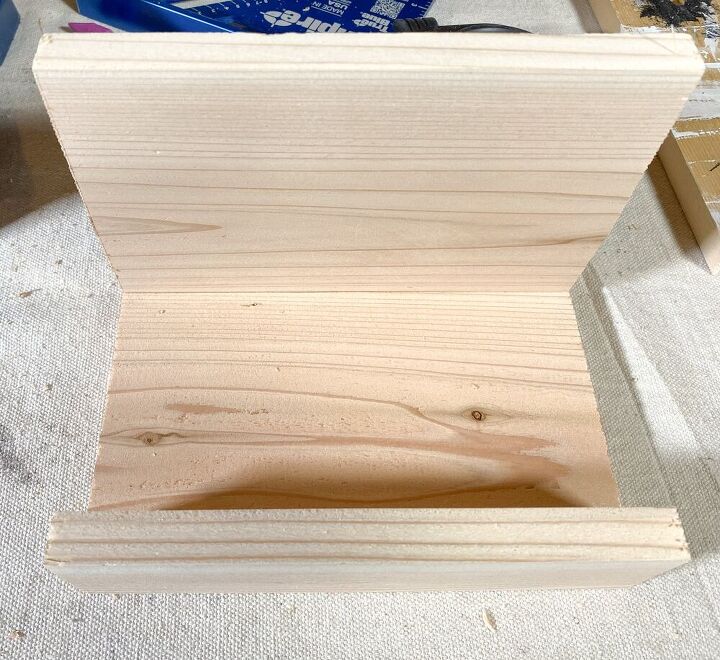
Dry fit your soap holder together to ensure all your cuts line up. Now is the time to make any adjustments to your cuts. Then, using a sanding block, smooth the ends of your boards and remove any rough edges.
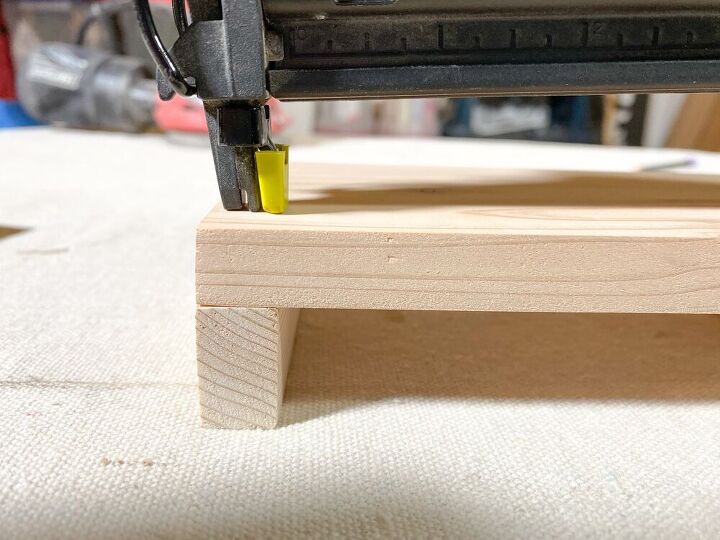
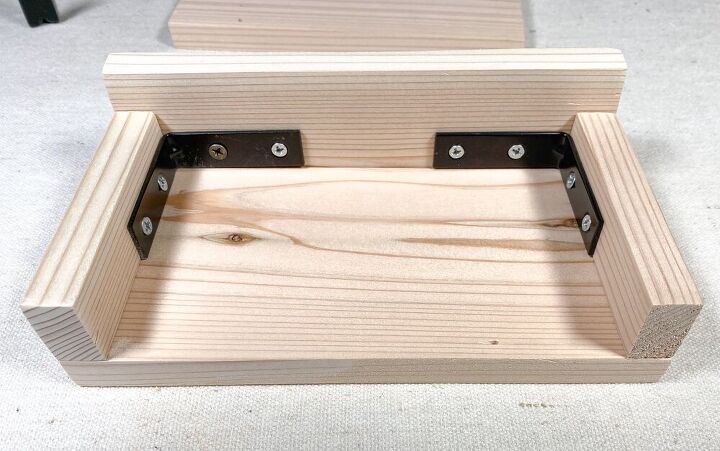
Place your side pieces on a flat surface and run a bead of wood glue along the edge. Then lay your bottom piece on top. Line all of your edges up and make sure they are square. Then, using a brad nailer with 1 1/4″ brad nails, place two nails in each side. Insert the nails from the bottom, like the image above.
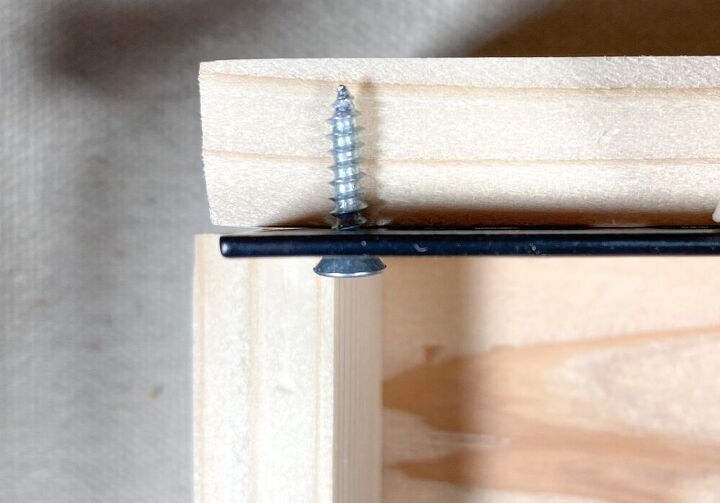
Be sure to use wood screws that are shorter than the board thickness.
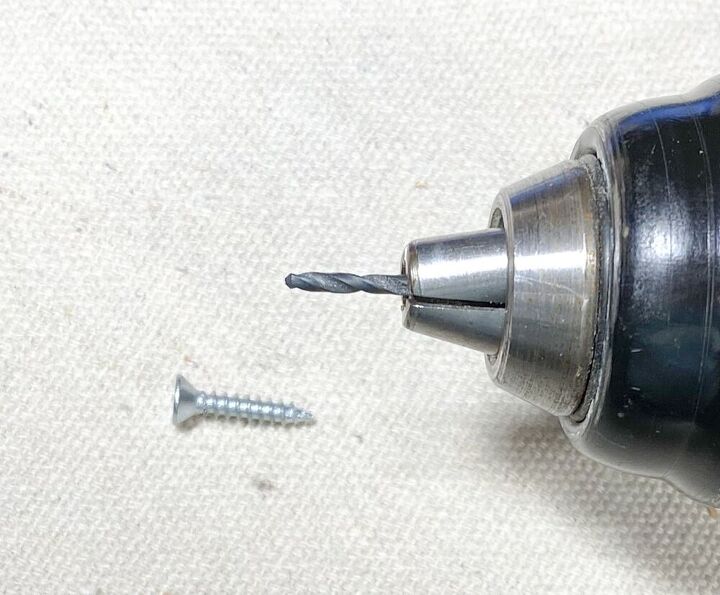
You will want to pre-drill the holes to avoid splitting the wood. This also makes the assembly easier. Choose a drill bit smaller than your scew and insert it into the drill to match the depth of the hole you want to drill.
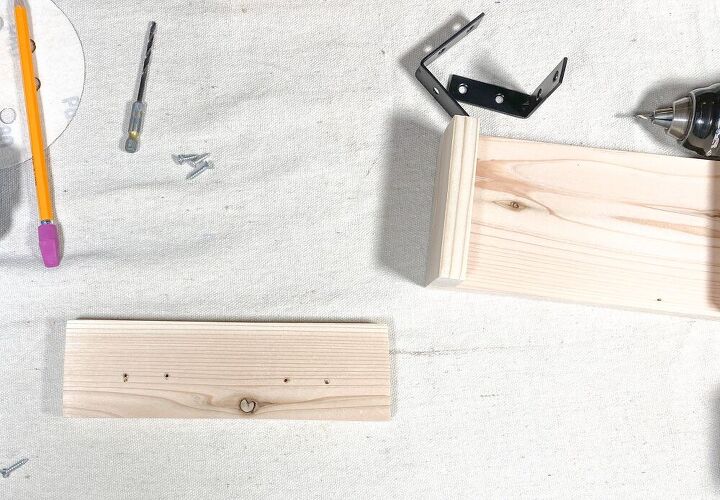
Hold the front panel up to the bottom panel and line it up. Then place the corner braces on the inside corner of the side panel and front panel. While holding the project together, mark the location of your corner brace holes with a pencil. Then remove the front panel and drill your holes.
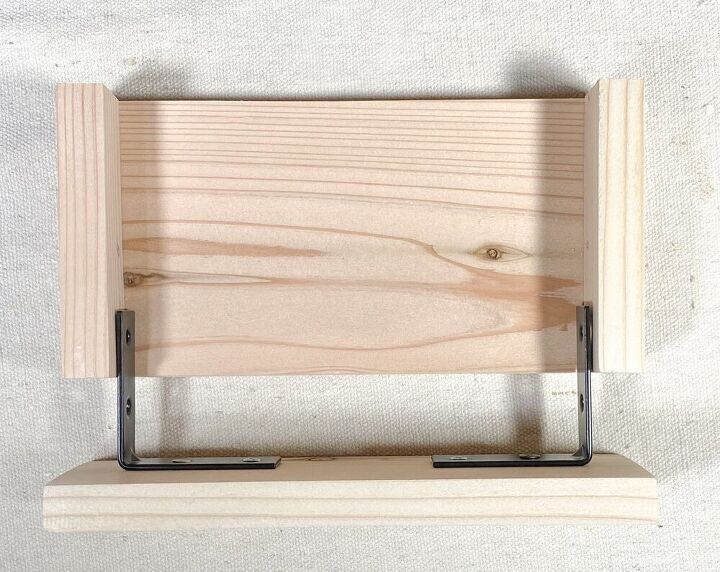
Attach the corner braces to the front panel with a screw driver. I recommend doing this by hand, so you don’t over tighten the screws. Then slide the front panel into the side panels. Attach the corner braces to the side panels with screws.
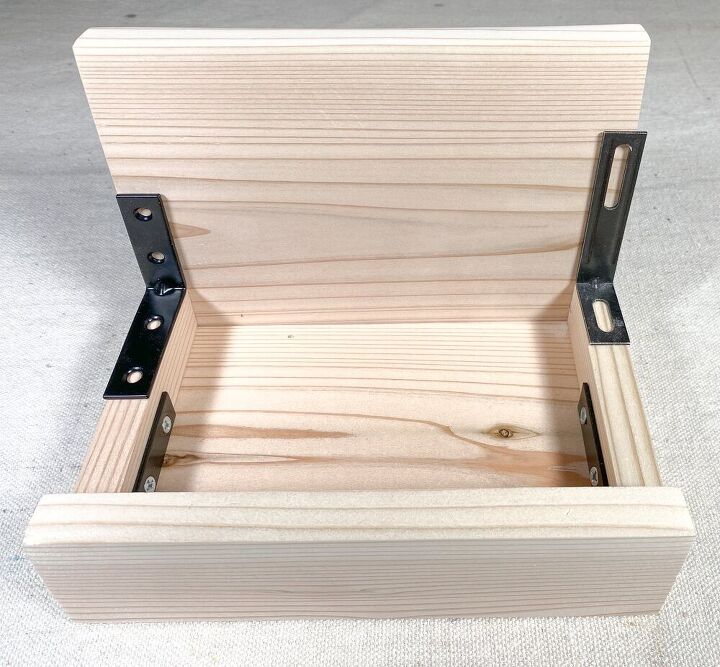
This is how the inside front panel will look, when finished.
I used 1 X 3 inch corner braces left over from an Ikea project and painted them with Oil Rubbed Bronze spray paint. However, the 2 X 2 and 3 X 3 inch corner braces are available in black and also work well for this project.
Place your back panel against the bottom and side panels. Then mark your holes with a pencil. Pre-drill the holes and add wood screws.
For extra support, I added three brad nails to the bottom back panel into the edge of the bottom board.
Fill all the nail holes with wood filler, let dry and lightly sand. Use a light colored wood marker to color the wood filler. Wipe your project down to remove any dust. Then add a protective top coat to your project. I used three light coats of Krylon Acrylic coating. Let your project dry over night.
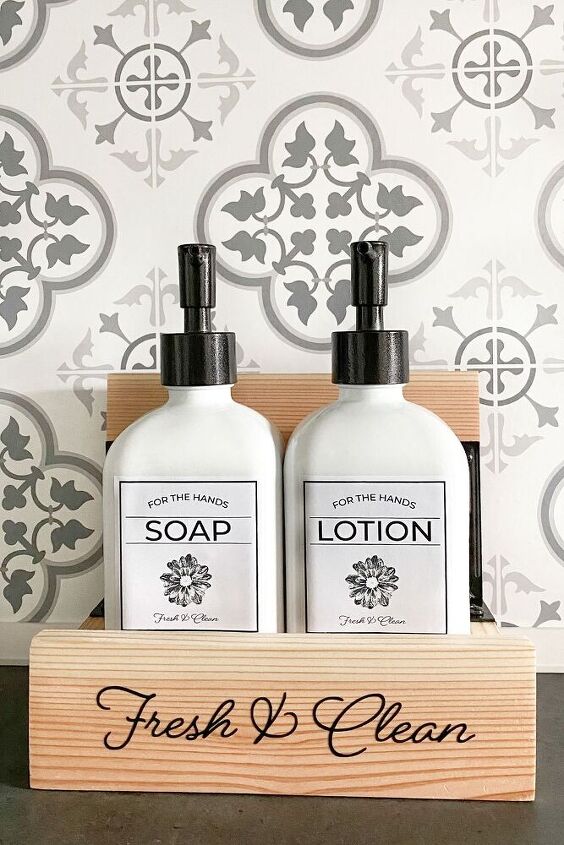
I purchased my soap and lotion bottles from the dollar spot at target. They were only $3 each and were black glass. I spray painted the bottles using Krylon Color Master Paint + Primer, Gloss, White. This spray paint works great on glass. You need to clean the glass and wipe it down with rubbing alcohol to remove any fingerprints. Work in light, thin coats to avoid runs. Then add a top coat of Krylon Clear Coat. Finally, let the paint dry and cure for a couple of days. Then you can add your labels. I often use this process for glass or ceramic thrift store finds.
If you have an electronic cutting machine, you can cut out your vinyl words and add them to the front of your tray.
Thanks for taking the time to check out my project. Hopefully you found some inspiration here. If you'd like other easy wood projects, you can find them here.
Blessings,
Laura
Resources for this project:
See all materials


Comments
Join the conversation
-
I like the exposed brackets.


Frequently asked questions
Have a question about this project?