


Marilyn Monroe Vanity 2

I’ve done a few Marilyn pieces.. This might even be three?
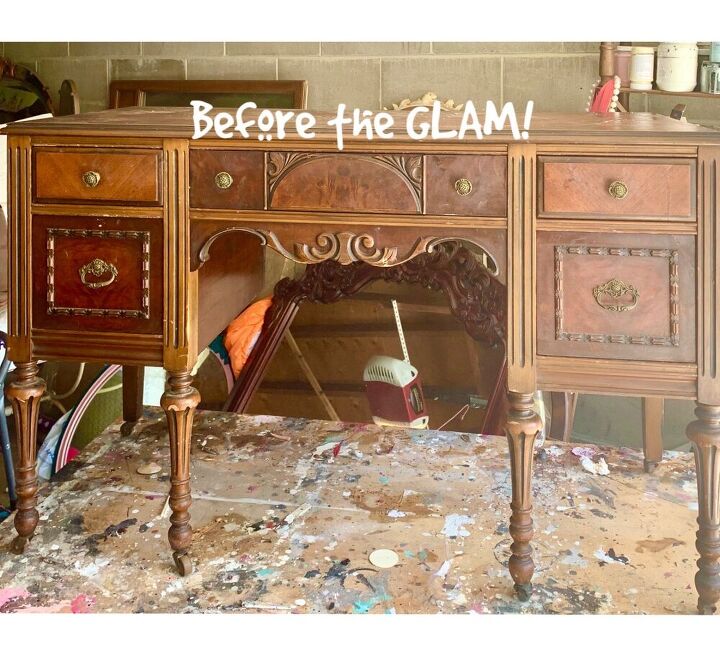
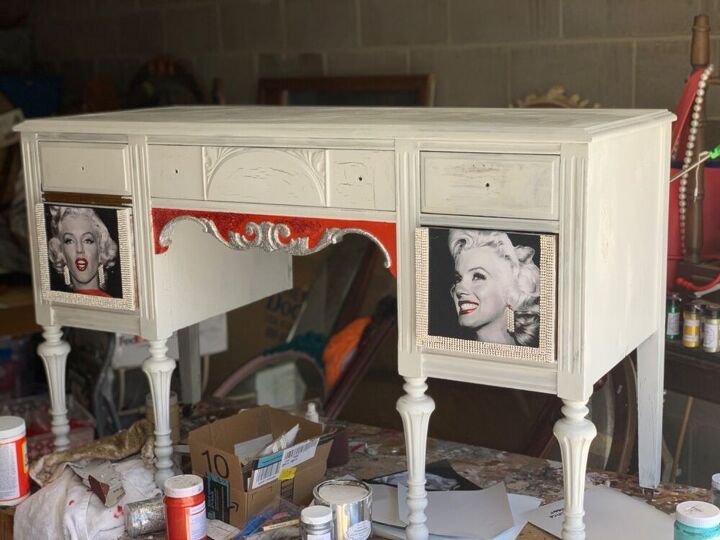
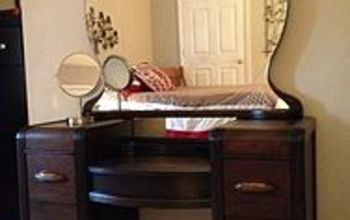
I know that some of you love it like this. But it was unloved out here on Long Island.
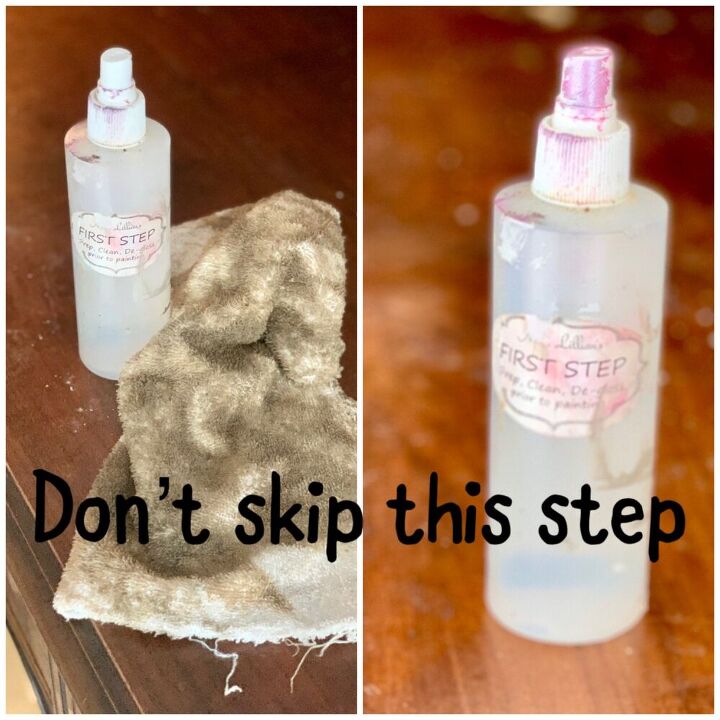
Do you see that dirty rag!? There was another to follow. Don’t forget to clean your piece really well. That dirt will surface later and make you cringe.
This is a MUST. The very last thing you want is to spend time and effort on painting and see Tannins bleed through later.
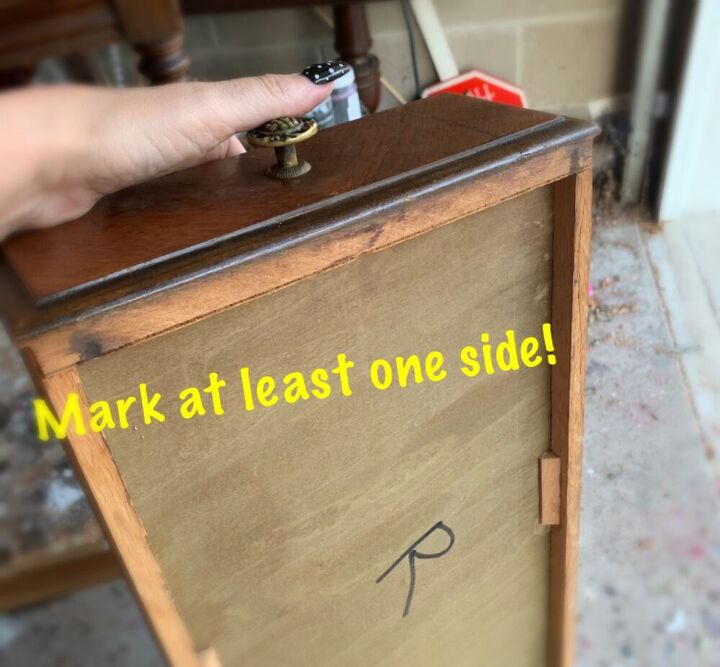
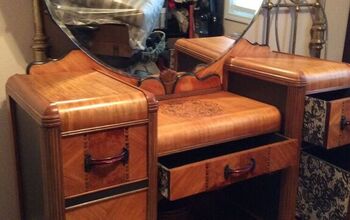
I only needed to mark up one side (yeah- there’s just two)- but old furniture is never universal. The drawers each have their designated spot. I painted an eight-drawer lingerie chest once and felt like I was playing Rubiks Cube. Lesson learned.
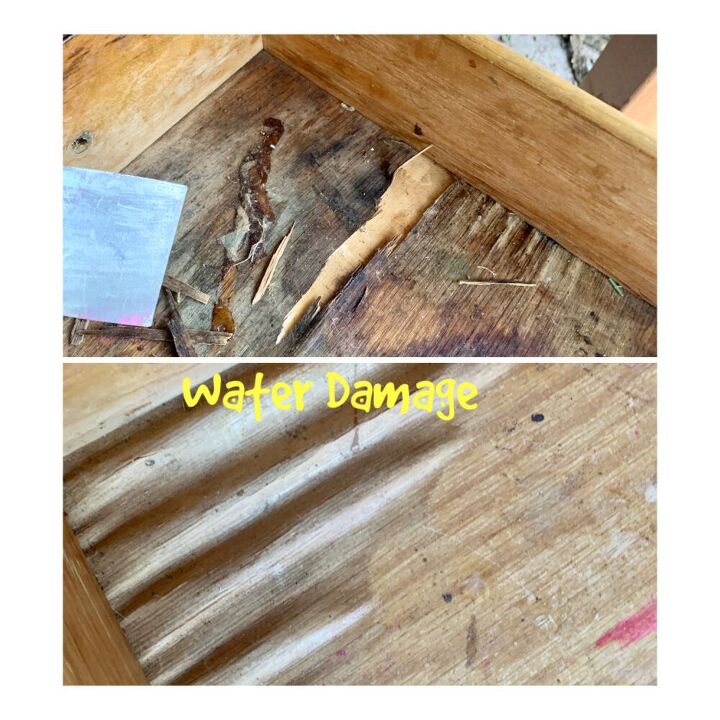
It may have looked FAB on the outside, but some of these drawers had severe water damage. I stripped away the damaged layer and sanded them flat. As I write this- I am still uncertain about them.
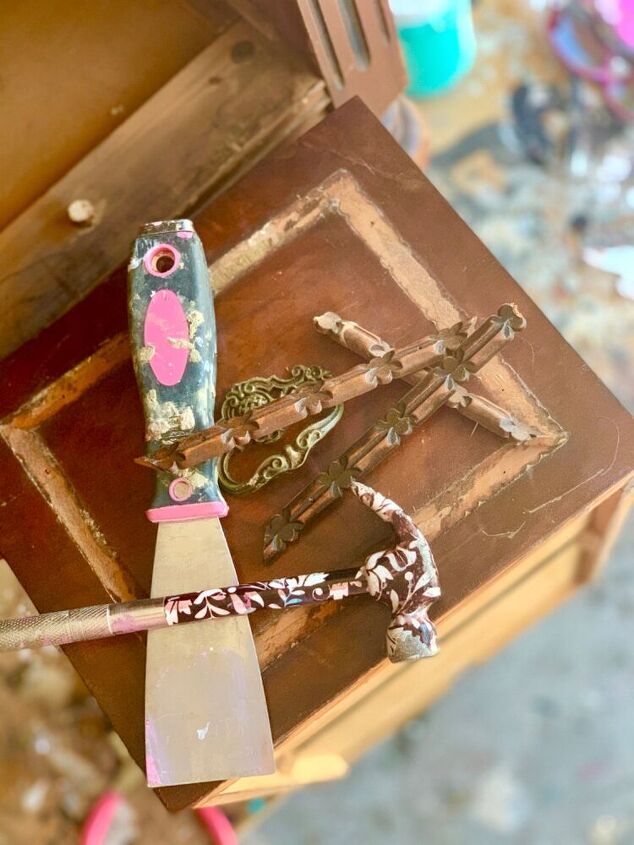
With an aged piece, these were easy peasy to remove. Usually, they are pinned down with a single nail on each piece. I just used a flat putty tool and hammer and they lifted right up. I wanted a larger “face” on the drawers.
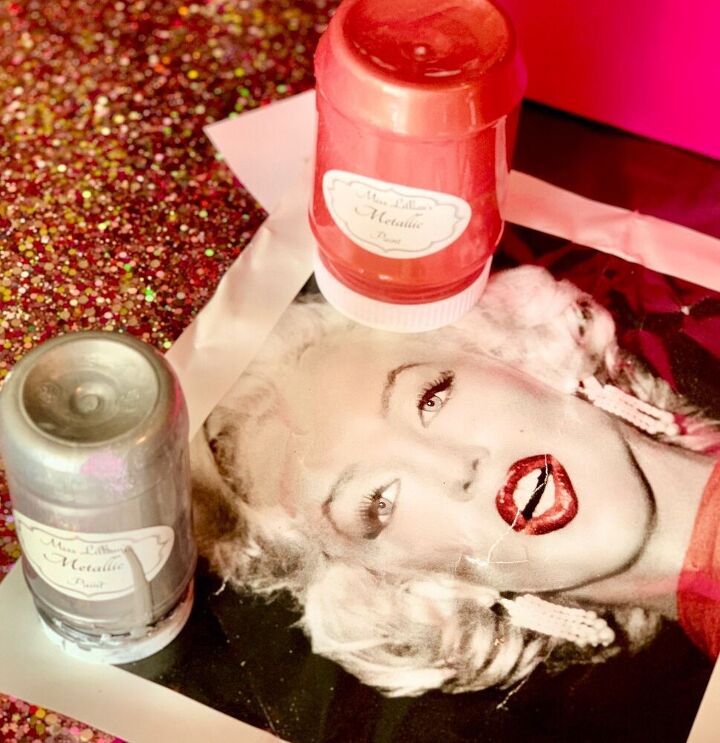
That face, right? This was my inspiration. I’m still not clear on the finished product at this point, but I had the prints done from Piece Prints and I knew I’d be using Million Dollar Red Metallic Paint from the Miss Lillian Line and also some silver. But I’m still pondering.
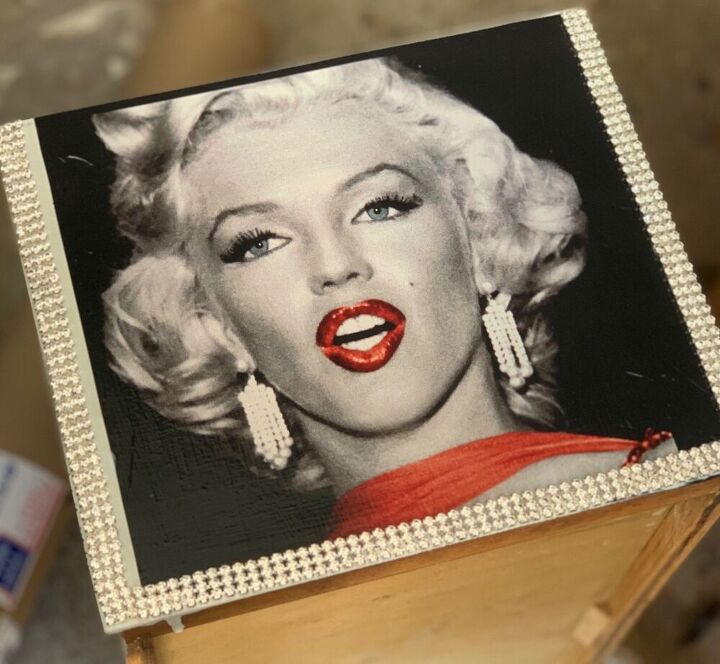
The transfer from Piece Prints went on like “Buttah”....I’m from NY. I left the top row free from rhinestones because I was waiting on the drawer pull. A second row of gems came later....
I still have no clue about the end product/ but here’s a start.
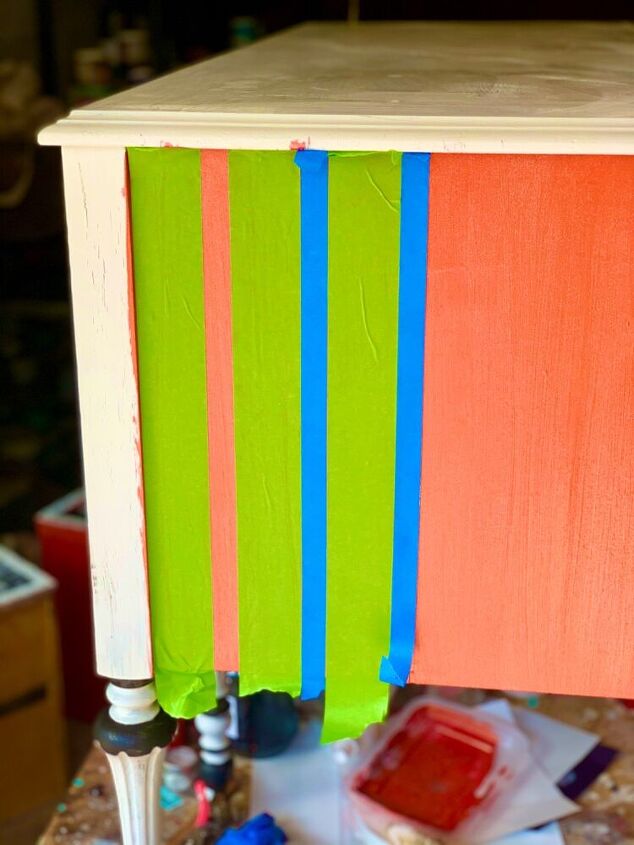
I decided that I wanted some thin silver stripes on the side. Using two sizes of painters tape, I started prepping. That Million Dollar Red looks orange in the pic- but it’s RED! I also added silver paint sparkles to it for some extra glam. They are also from the Miss Lillian line and they come in a ton of colors. We all know already how I feel
about glitter, sparkles and glam.
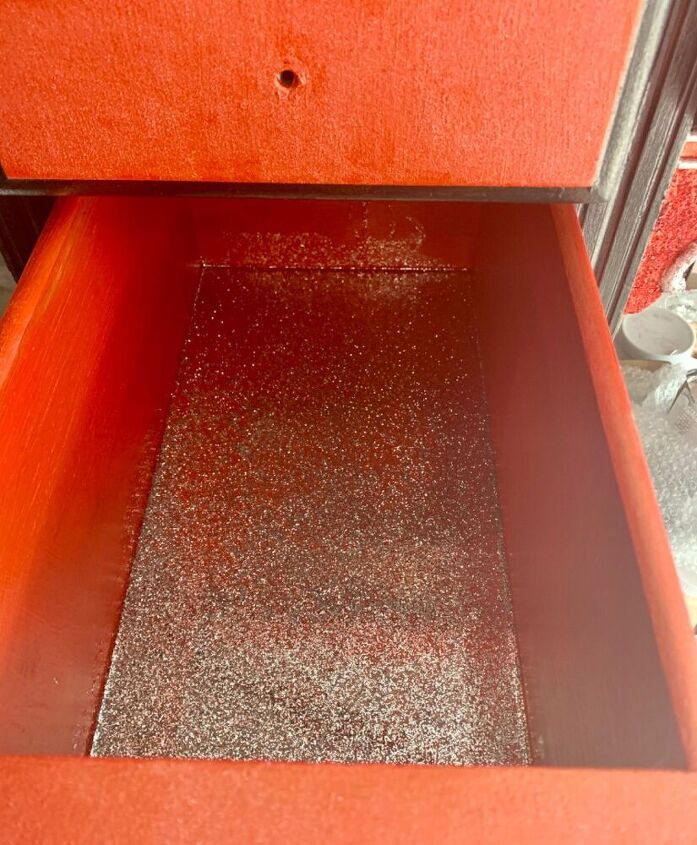
Remember the water damage at the bottom of the drawers. Despite my best efforts, I couldn’t get them to meet my standards. I opted for a glitter resin pour and the bottoms of all of the drawers are now like glass. Pure Hollywood.

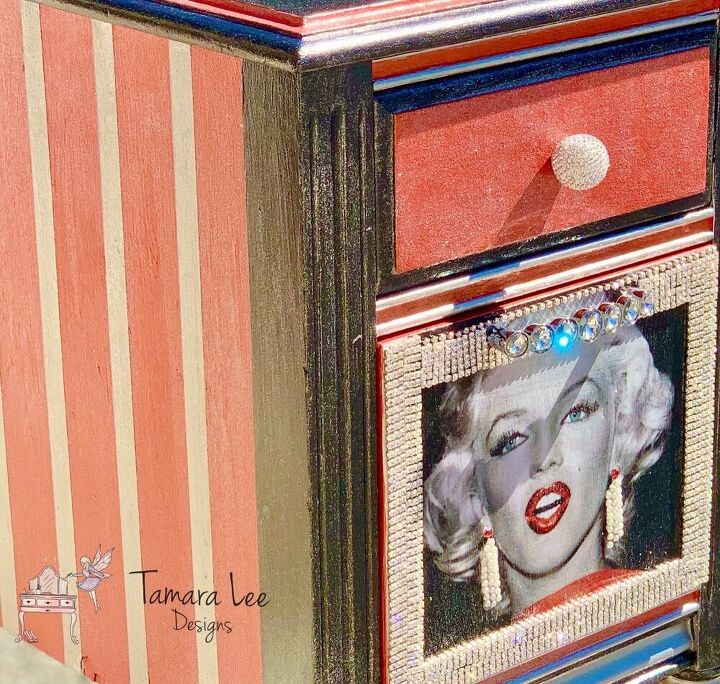
Since the bottoms were so fancy, I decided to add a surprise to the sides of the drawers.
Yup. This happened. This is “Jet” .... a metallic black from the Miss Lillian’s paint line. The kind of color that goes with EVERYTHING
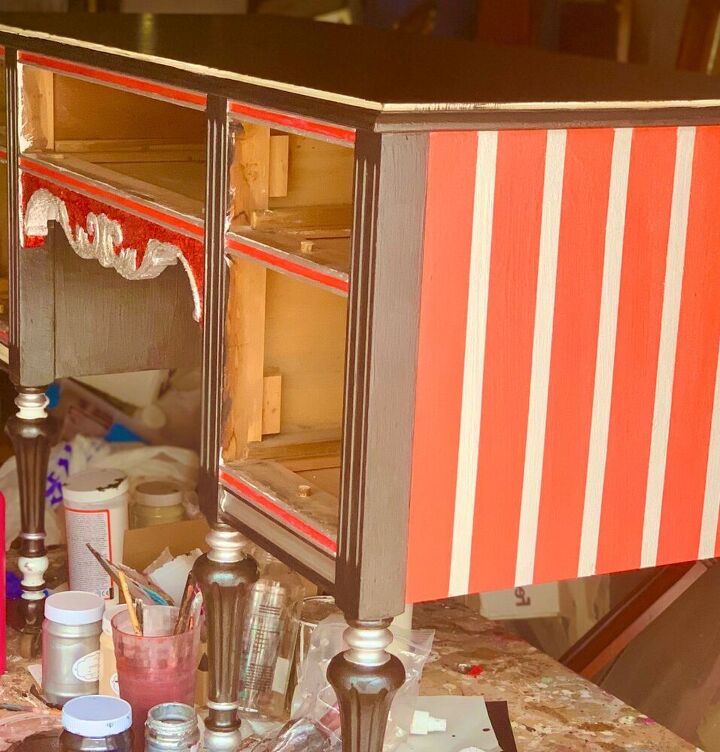
I showed you the tape earlier. Here’s the silver metallic stripes. We are almost done!

I used a furniture overlay from piece prints fir the signature and outlined it with pearls. And glitter. And glitter.
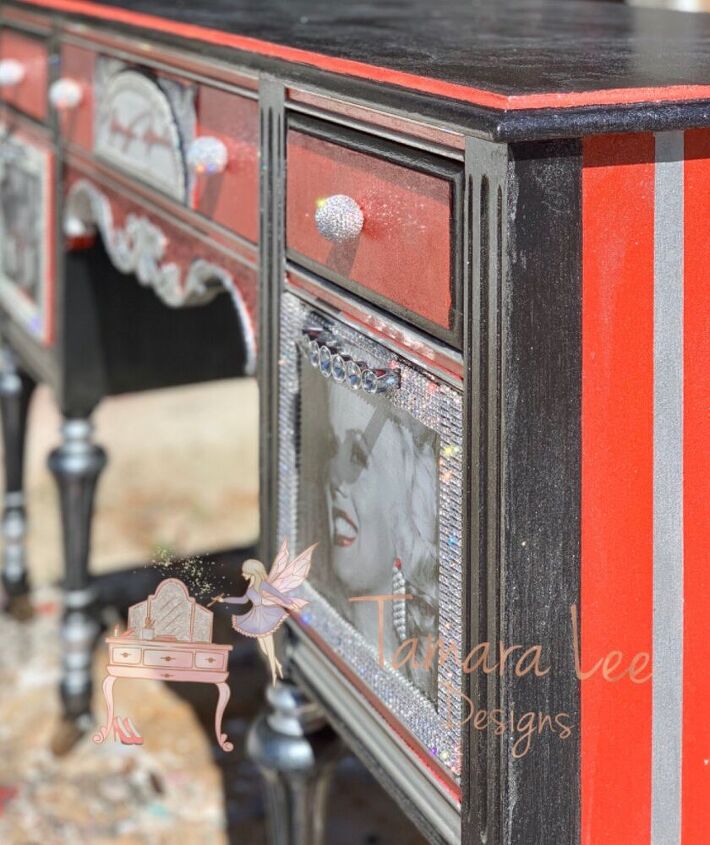
I added rhinestone knobs to the smaller drawers and some crystal pulls to the large drawers... finished off those marilyn drawers with the matching rhinestones. She has real pearl earrings with a red crystal at the ears..
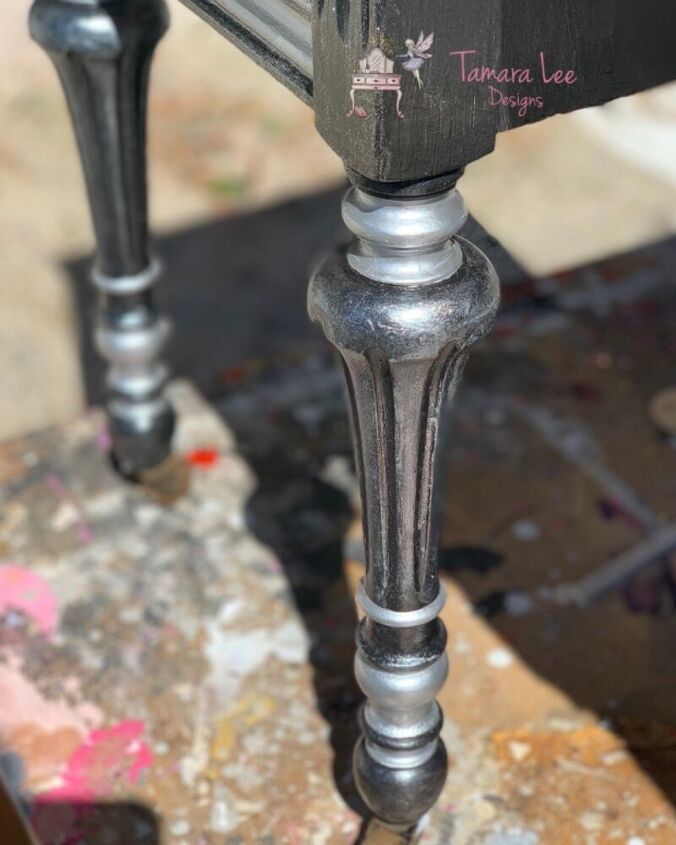
A little dry brushed silver to soften the black legs..
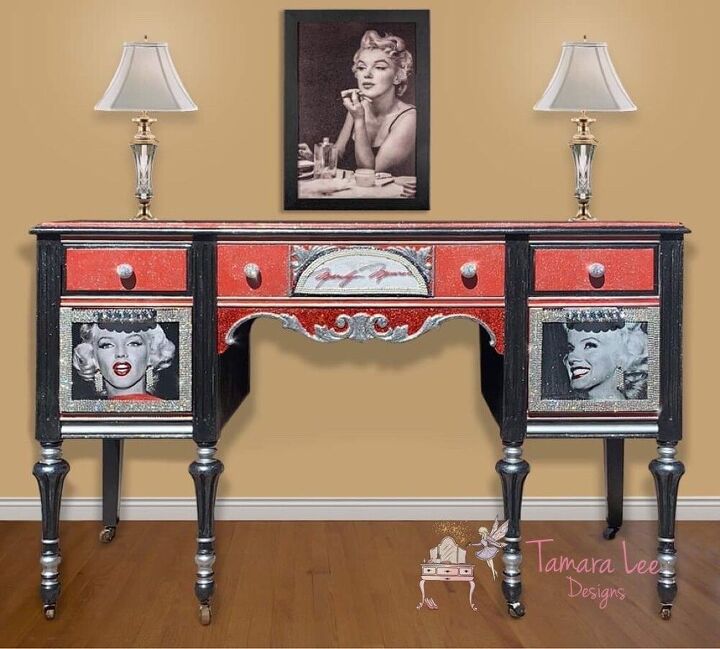
Here’s a front view and the final shot. Thanks for reading and staying with me until the end. She’s for sale on my Etsy site. And you can also find Tamara Lee Designs on Facebook and Instagram. I’d love a few new followers.
cheers!
Tamara


Frequently asked questions
Have a question about this project?