


Easy Rustic Ladder Tutorial
HEY Y'ALL, I DECIDED THAT A RUSTIC LADDER WAS JUST THE THING I NEEDED TO HANG PLANTS AND BASKETS IN THE GREENHOUSE. SINCE I DIDN'T WANT TO TAKE MY VINTAGE LADDER OUT OF THE HOUSE, HERE IS WHAT WE DID.
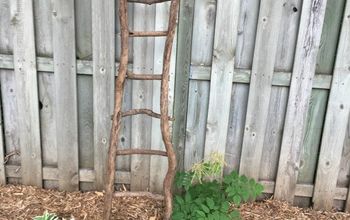
Today's tutorial is how to build an Easy Rustic Ladder. This was very inexpensive and super easy to do. My husband was helpful in using his tools, however I think I could have handled these easy steps myself.
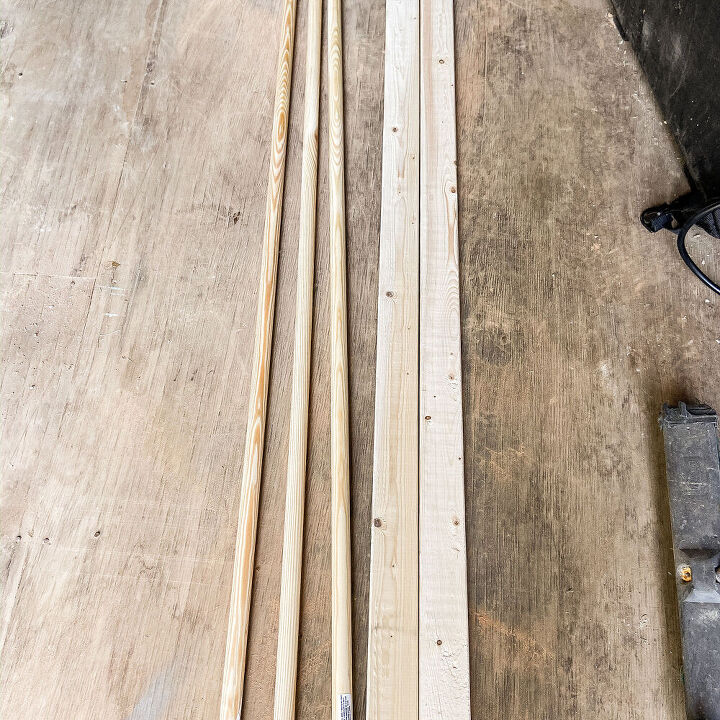
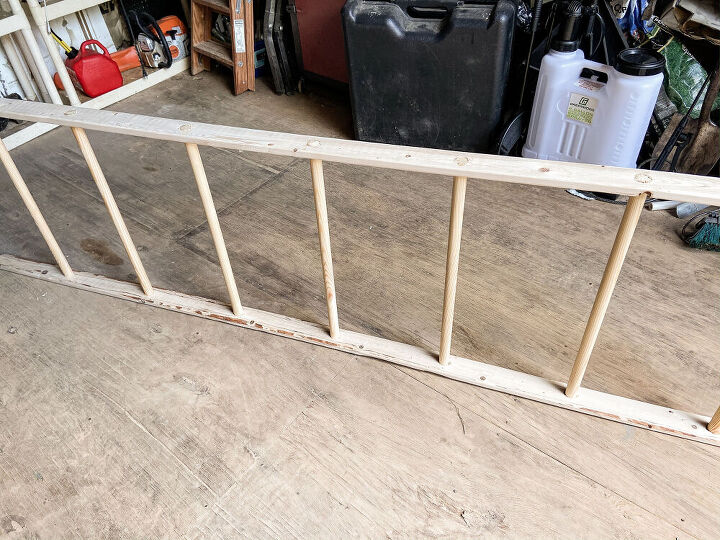
First, you need to determine the length and width of your ladder. Since this ladder was going into the greenhouse, it's a little wider than I'd recommend for other uses. The overall dimensions of this ladder are 8' x 2', therefore 2 - 8 ft long 1 x 3 inch Spruce Pine Boards were used as the side rails.
In addition, 3 - 1 x 1 x 6 dowel rods were need to allow for 7 rungs that were 2 feet wide each. The only other supplies needs are wood glue, stain and/or paint, depending on the look you prefer for your rustic ladder.
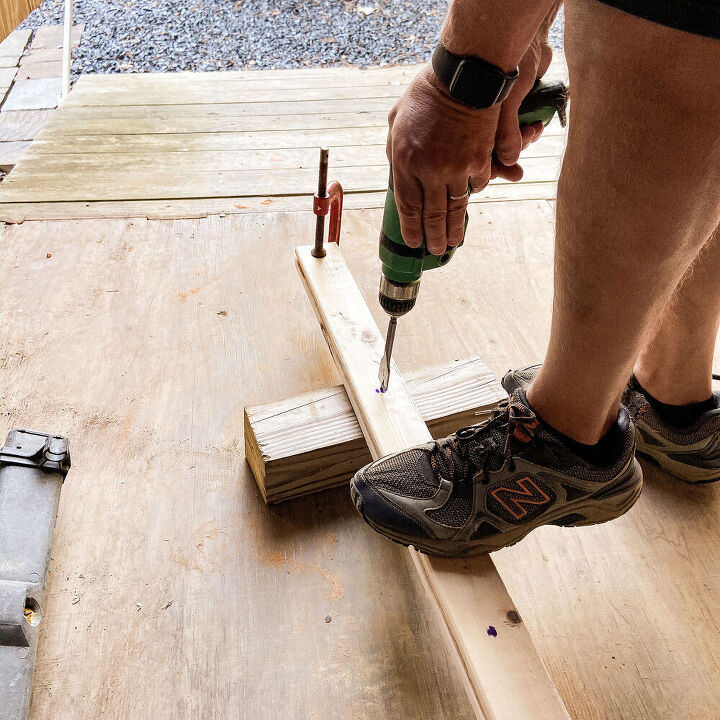
For this project, the rods were placed 2 feet apart. After carefully measuring the distance, clamp both pine boards together and drill a 1 inch hole through both boards using a cordless drill and a 1" drill bit.
Since this was a rustic, primitive ladder, we allowed the hole to go completely through the side rails. As a result, the ladder has a primitive pegged appearance.
However, if you prefer a less rustic feel, you should drill the hole without allowing the drill bit to go completely through the wood. In addition, you will need to drill each side rail separately for this application.
Note: You may also prefer to use a thicker side rail. Drilling a shallow hole within a 1" board is difficult.
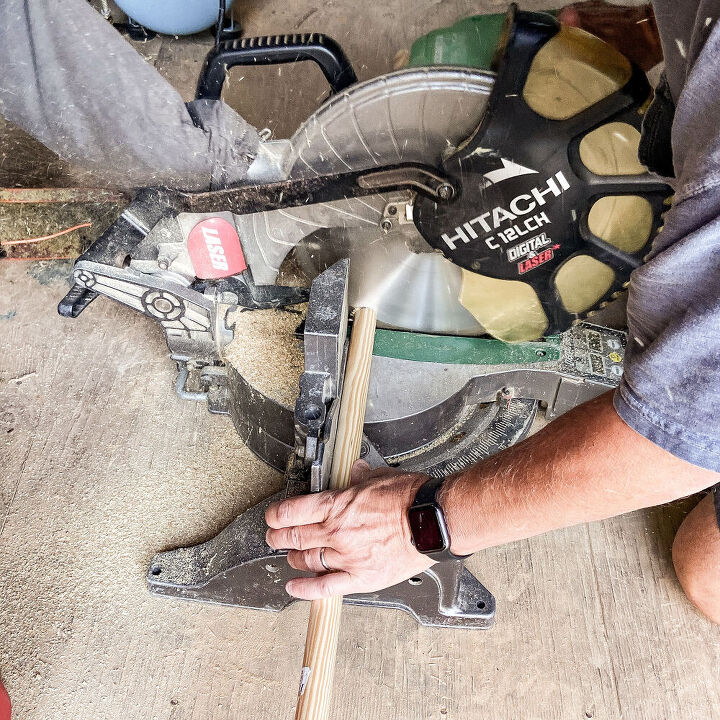
Next, measure and mark your dowel rods and using a saw, cut each rod to the exact same size. Once again, we choose to make the ladder 2 foot wide, therefore the rods were cut at exactly 2' each.
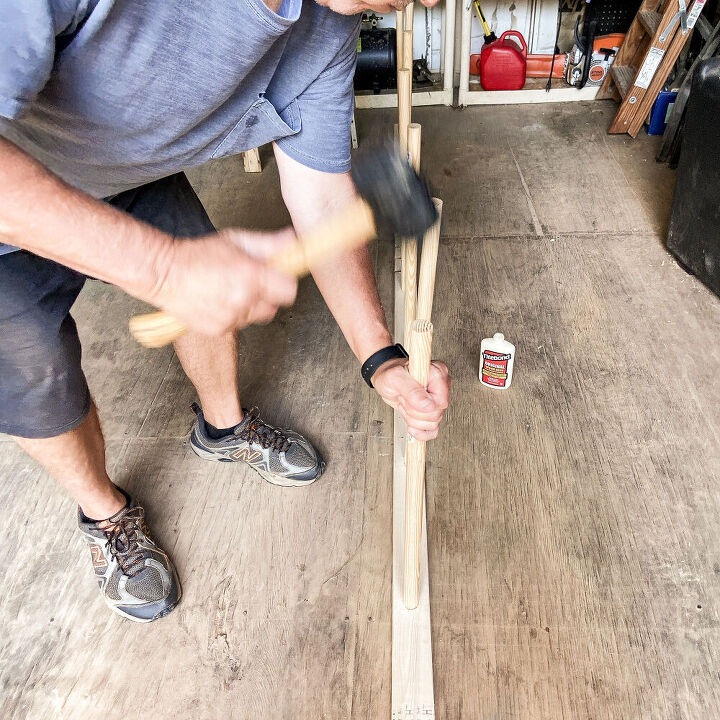
For the final step, a small amount of wood glue was applied to the inside of each drilled hole. Then, using a rubber mallet, the dowel rods were gently hammered into the side rails. Once the first side was completed, attaching the second side rail required lining up all the dowels with the holes before hammering into place.
After allowing the glue to set, you ladder is ready to use for decorative purposes only.
Warning: The materials used to construct this ladder are not intended for anything other than decorative use. If you want a functioning ladder that you can step up on, you would need to use hard woods and should consult another tutorial.
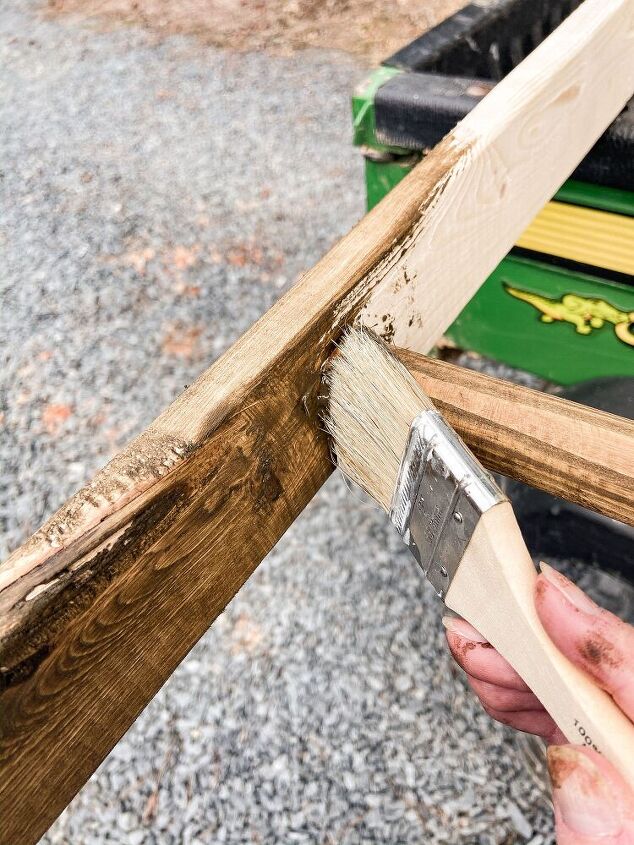
Finally, you can choose to leave your ladder natural or apply a stain or paint, depending on the look you prefer. Because I wanted the ladder to add some character to the greenhouse, I didn't want it to disappear once installed. Therefore, I choose an easy to use gel stain for quick application and it was easy to dry.
Because the wood used is very ruff in texture, applying the stain using a chip brush was the best option. Once the surface is covered, then use a dry cloth to wipe off any excess stain.
You can choose to seal the stain or leave it as is. For a more rustic, primitive look, we choose to leave the finish unvarnished.
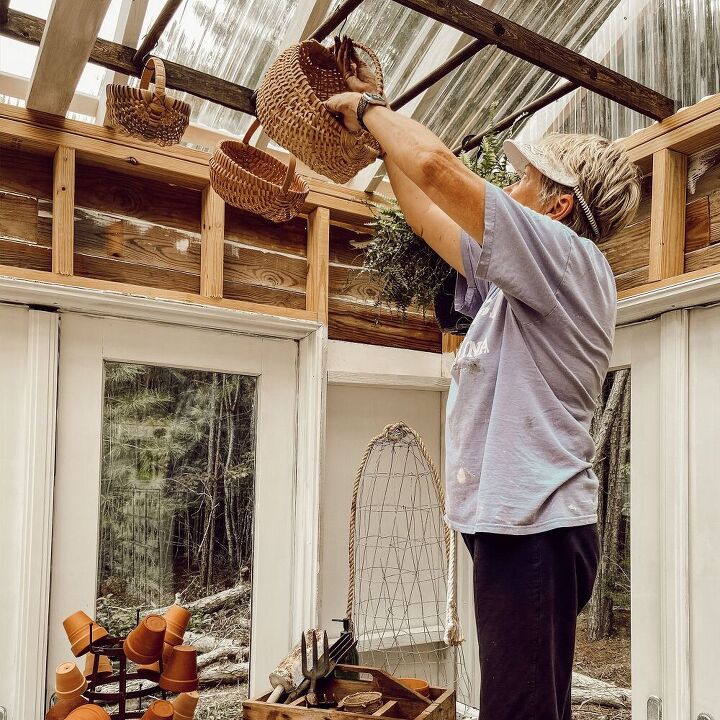
Next, it was time to install the ladder and add a few baskets and ferns. As the weather becomes colder, all my ferns will find a spot on this handy ladder.
You can see all the details about the DIY Greenhouse here. In addition, it includes how to get your t-shirt to look like this. LOL
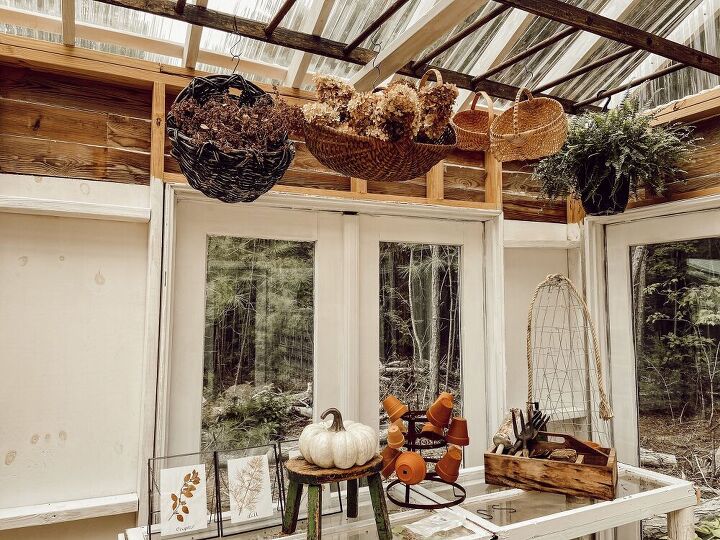
This project only cost $23.00 and the ladder is perfect for the greenhouse. See another DIY Tutorial Here.
Resources for this project:
See all materials


Comments
Join the conversation
-
Great project! I've seen ladders used over the kitchen island to hang pots.Yours would be a classic improvement over bought ladders. Just suspend the ladder from the ceiling with chains and use S hooks for the pots.
If we ever get the greenhouse repaired (Hurricane Zeta), I want to do this using sturdy limbs instead of dowels. The southern wall is 16' long and I can make all kinds of hanging baskets for herbs.
-
I am planning on doing something similar over a bar sink area. My husband didn't want a second cabinet over the bar sink but I did want a tile backsplash. Because our house is old we had decided long ago to not have cabinets to the ceiling because old also = not very level, plumb or square. I didn't want the tile to go to the ceiling. I asked him to make me a "frame with dowels across" that we could take across from the one upper cabinet and over to the corner as a fake ceiling to give a place to stop the tile and to allow us to hang things over the sink high enough that his head was protected.


Frequently asked questions
Have a question about this project?