


Galvanized Bucked Upcycled to a DIY Footed Planter

With Spring finally here, I was inspired to finally complete a project that I have considered for some time.
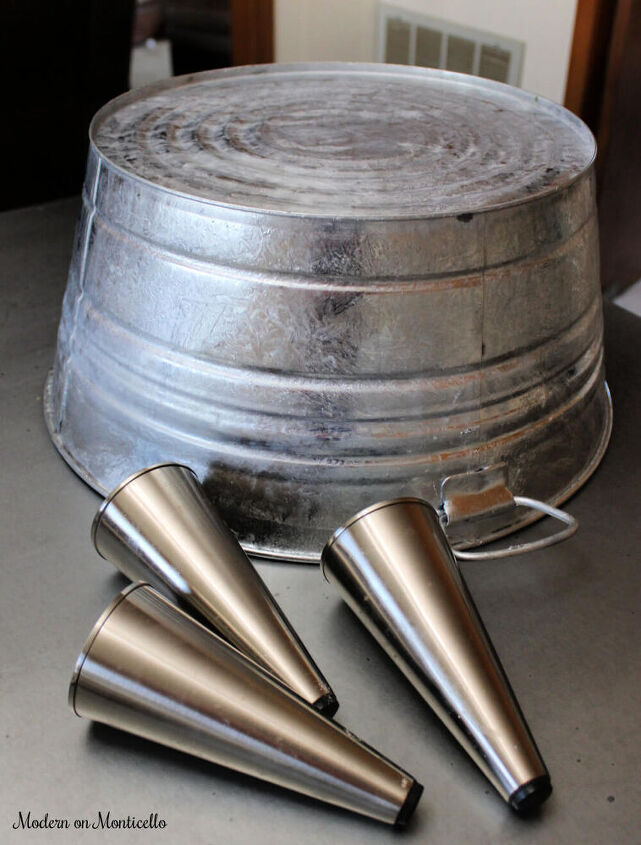
Reusing a galvanized bucket from my daughter's wedding and modern metal legs removed from an old sofa, I created a DIY Footed Bucket Planter.
I bought a mid century inspired modern sofa about 16 years ago.
With teenagers and dogs in the house, the fabric on the sofa became stained, dirty, and worn out over time. My husband finally convinced me to throw it out and get a new sofa and recliner.
One thing I loved about that old sofa was the modern metal legs.
When my husband and my future son-in-law were taking the old worn sofa out of the house, I impulsively removed all of the metal legs and stored them in a box for a couple of years until I found a project to reuse them on.
This DIY footed bucket planter was just the project for them.
To start the project, I removed the original screws from the tapered legs. My husband looked through his stash of hardware in the garage and found screws, washers and nuts that would fit and better hold the legs in place on the bottom of the bucket.
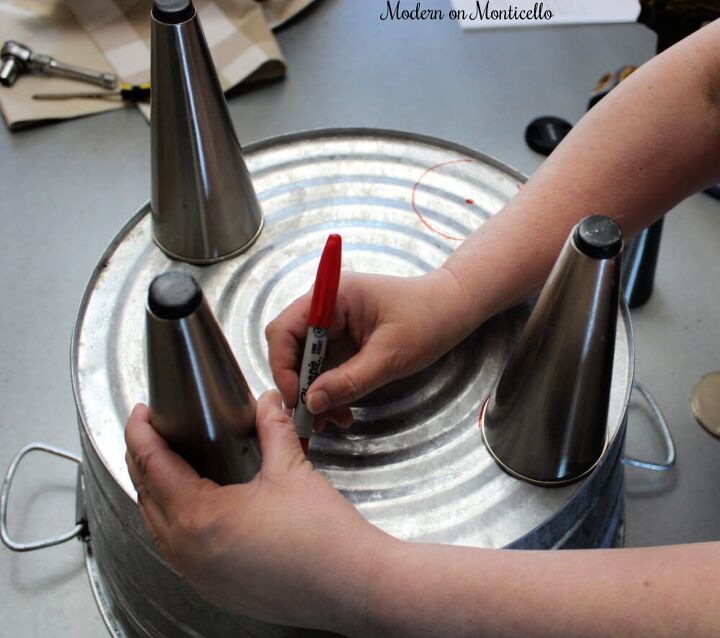
We also removed the top plate on one of the legs to use as a template for the placement of the legs on the bottom of the bucket and as a guide to where to drill the holes (my husband's idea).
Using a sharpie marker, I traced the outline of the metal plate and the screw hole locations on the bottom of the bucket.
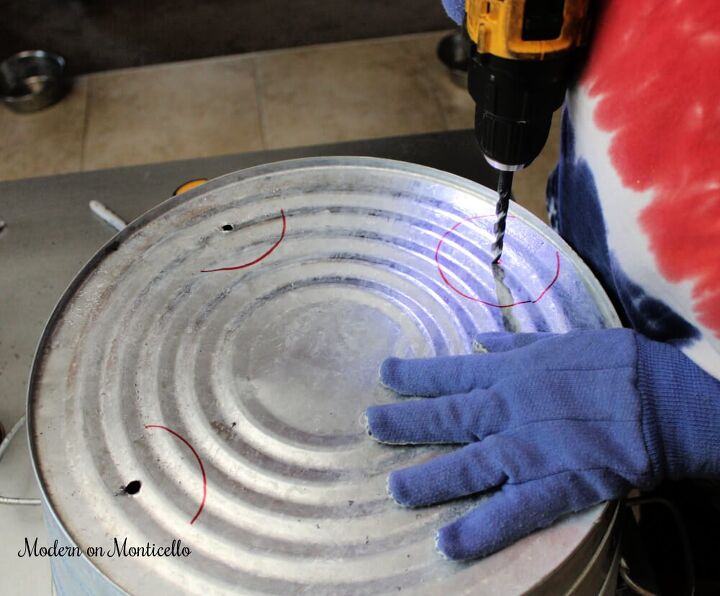
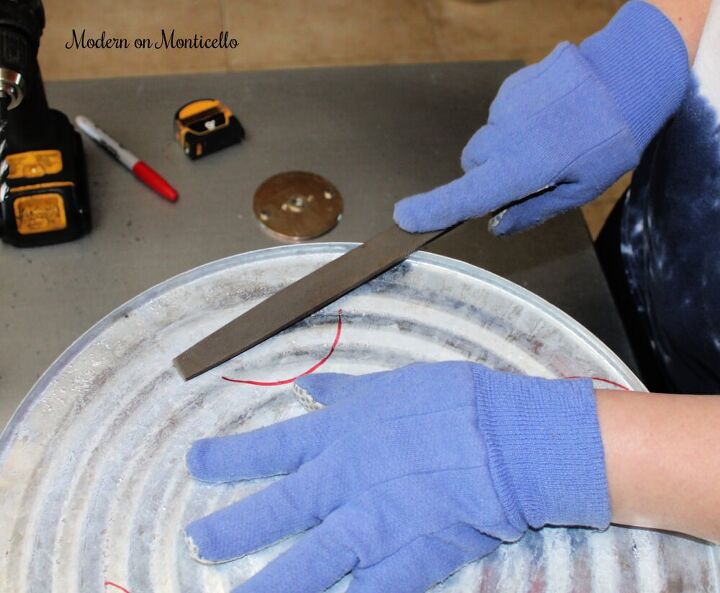
Then I drilled four holes in the bottom and used a metal file to remove the sharp bent edges of the galvanized metal of the bucket.
I made sure to wear gloves and safety goggles for this part!
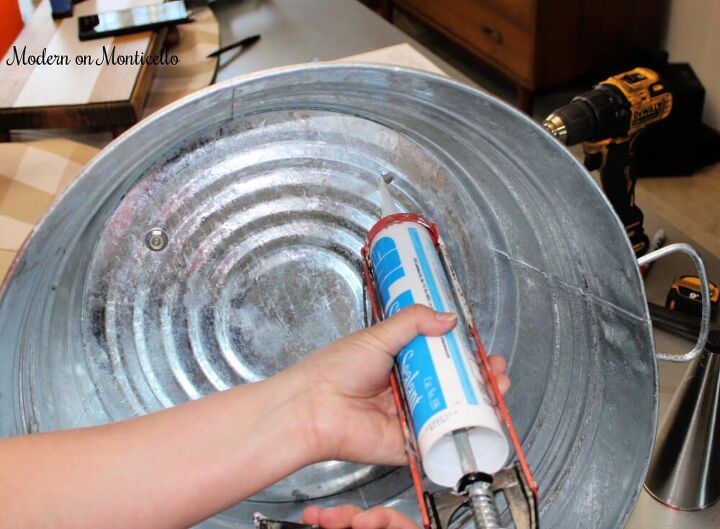
Before inserting the screws and attaching the legs, we applied a layer of silicone to each drill hole to seal the opening and secure the screws in place.
This should also help to keep the planter from leaking and rusting out the screws and legs.
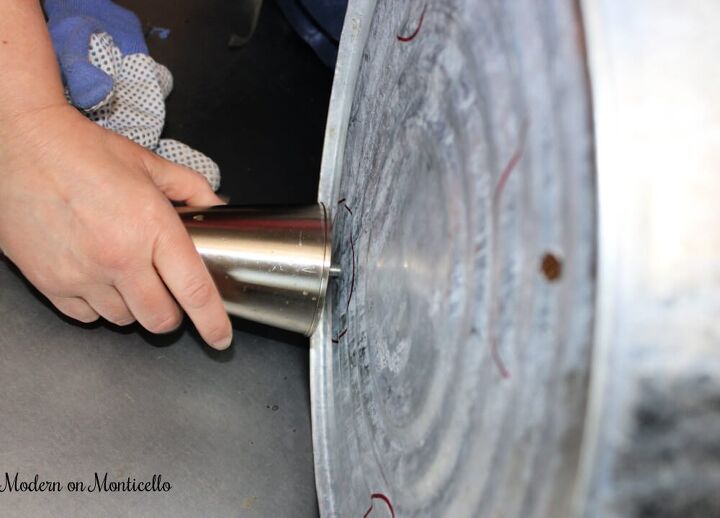
Then we attached the legs with the nuts and bolts on the inside to hold them in place.
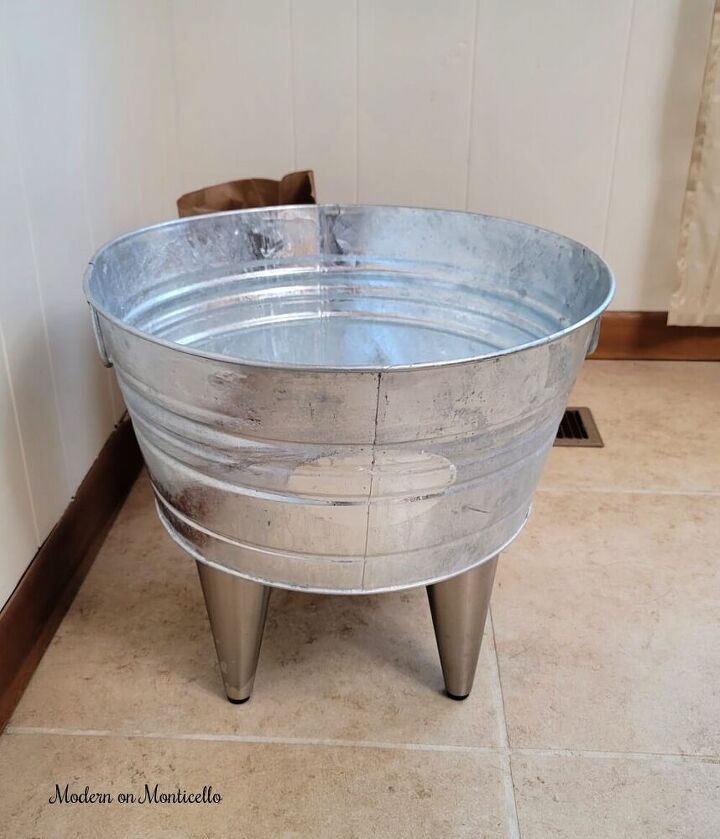
The combination of the galvanized bucket and the shiny tapered modern legs is a good look for my modern sunroom.
But I still wanted it to have a little bit more character.
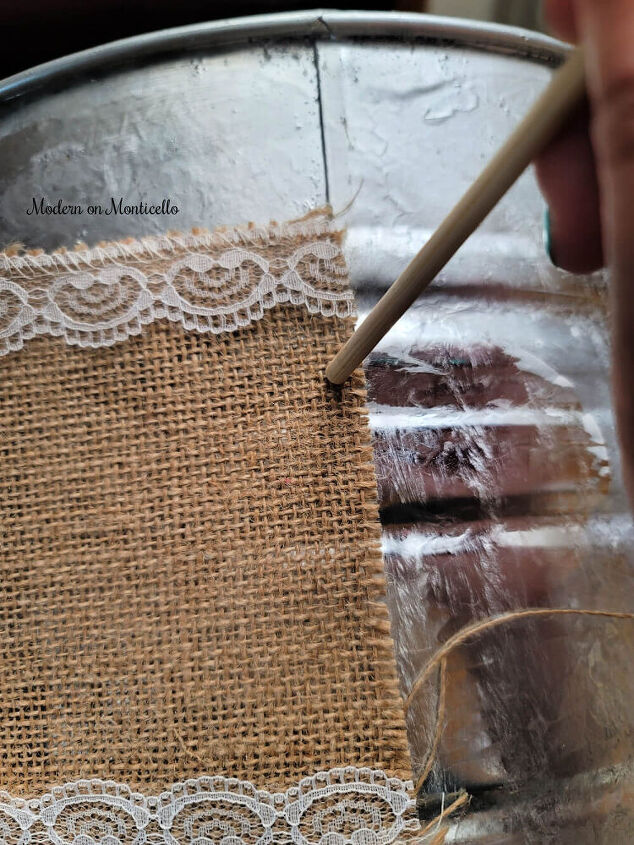
Using hot glue and some decorative burlap ribbon and jute twine I added a rustic flair around the perimeter of the bucket for added details.
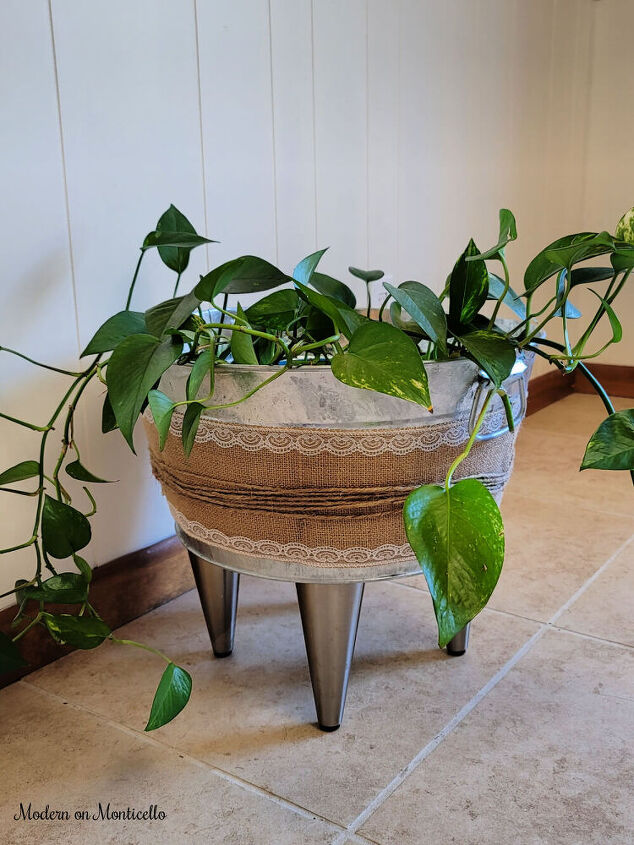
For these photos I just added some simple vine plants to the bucket but plan to use this DIY footed bucket planter to hold a large fern when my sunroom is complete this month.
Resources for this project:
See all materials


Comments
Join the conversation
-
Love this however I like it without the burlap. Going to try and make one.
-
Love it. This is on my to do list but I prefere to omit the burlap. I like the metal look.


Frequently asked questions
Have a question about this project?
Did it eventually leak when watered??
Are you planning to plant directly in this galvanized pot or put a potted fern in it that you move elsewhere to water and let drain? I ask because I don't see where you drilled drain holes. Thanks.