


Create Your Own Salt Wash Paint

by
Katie Tennis
7 Materials
$25
1 Hour
Medium
Furniture & wood pieces that have ages beside the salty sea for years have a unique character. You can achieve the same look by making your own Salt Wash style paint at home.
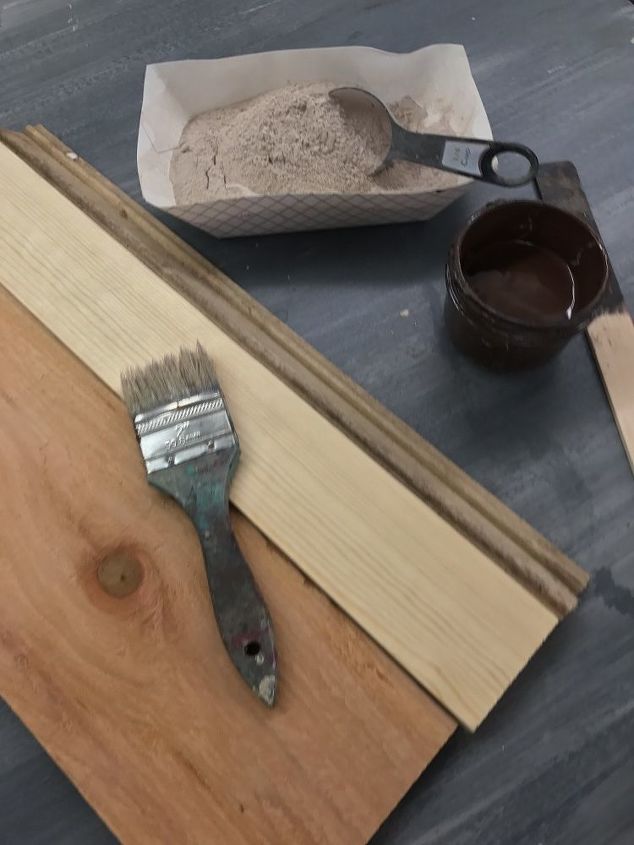
Step 1: Gather supplies for this project
- Wood of your choice for base of your sign
- Old chip brush
- Paint of your choice
- Stir stick
- Un-sanded grout in a neutral color
- Metal Word
Step 2: Prepare the wood for your sign base
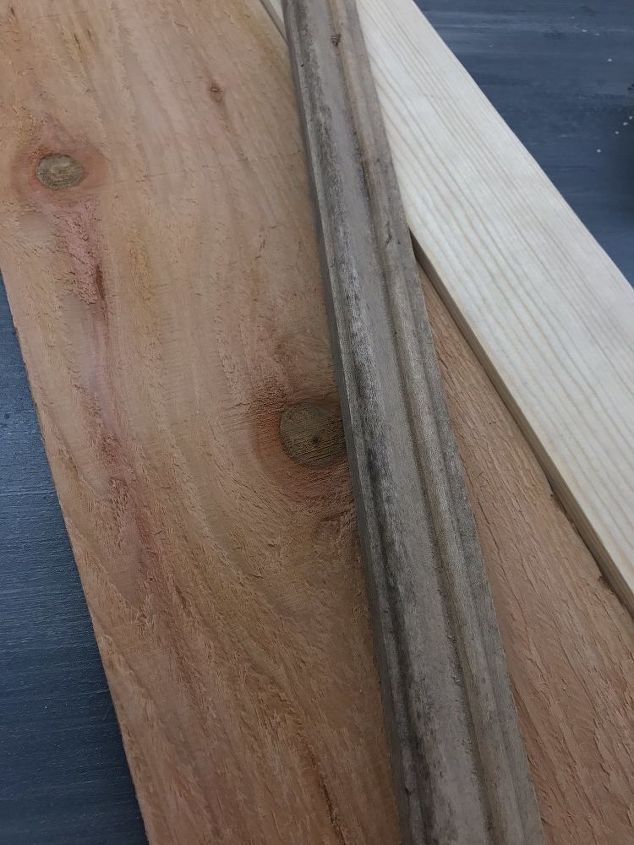
For the specific sign I created, you'll need a variety of wood cut to 18" long. I was able to use scraps and trim pieces mostly from my local Habitat for Humanity REstore, making this sign also super affordable! The mix of textures and widths of the wood make the finished sign even more interesting.
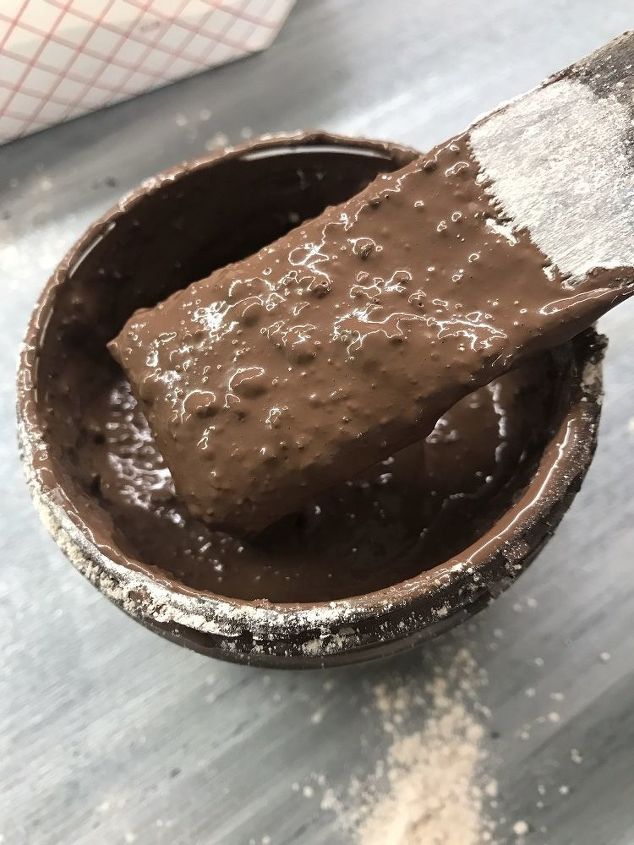
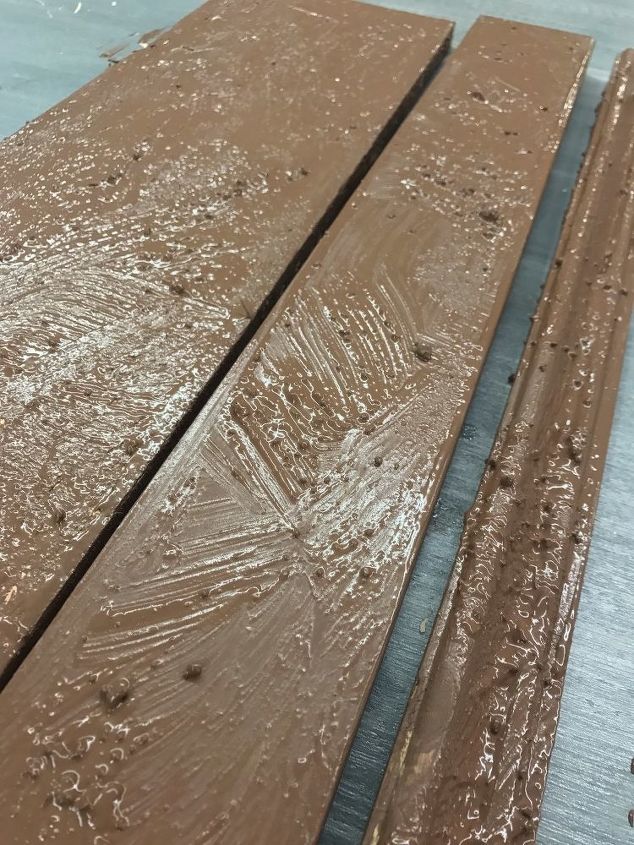
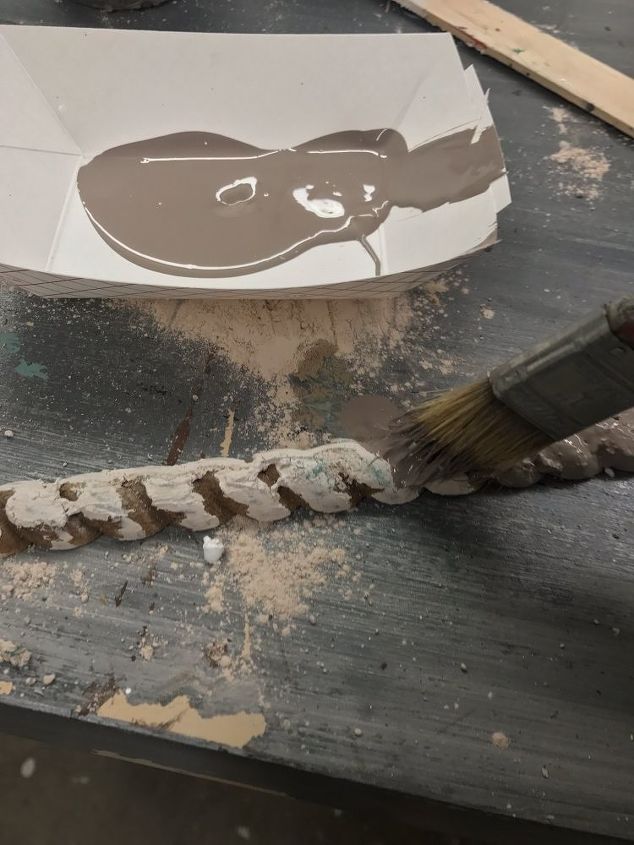
Step 3: Mix the un-sanded grout with your selected paint color
It does seem strange but what you're creating is a lumpy thick mixture which will be the base coat of your sign. I started with about a 1/2 cup paint and 1/2 cup of un-sanded grout for each of the colors I was using. Stir together with a stir stick until you get the desired thickness.
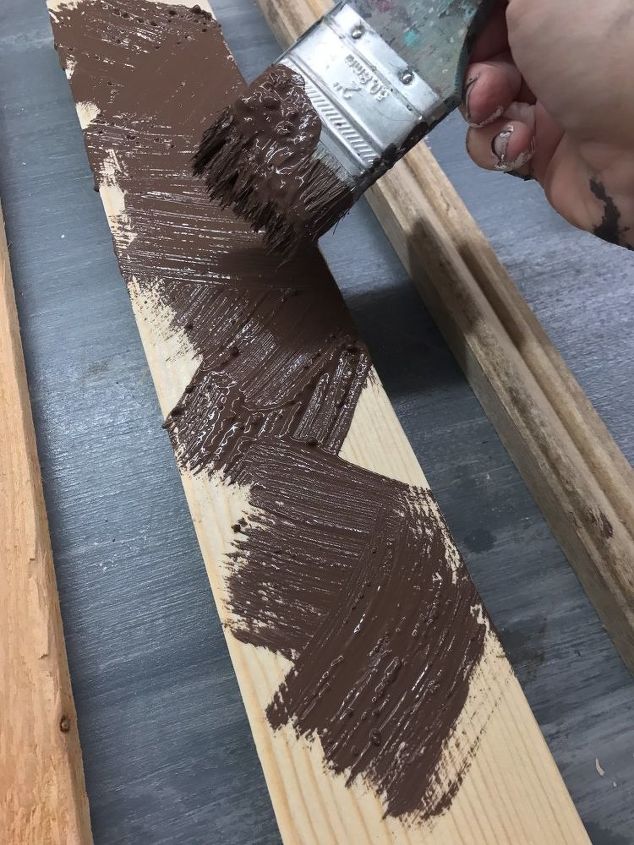
Step 4: Paint your base coat
Apply the paint mixture, using a chip brush, to each board using a cross hatch motion. Do not try to overly smooth as you want the texture and strokes to show when the piece dries.
Step 5: Allow the base coat to dry thoroughly before moving onto your next step.
Step 6: Top coat paint
Apply a top coat of paint to each piece. You can use the paint of your choice, flat or chalk paint would be my recommendation, it just needs to contrast to the base coat you applied. For the pictured piece I used a cream base coat of the un-sanded grout mixture, then applied a grey top coat.
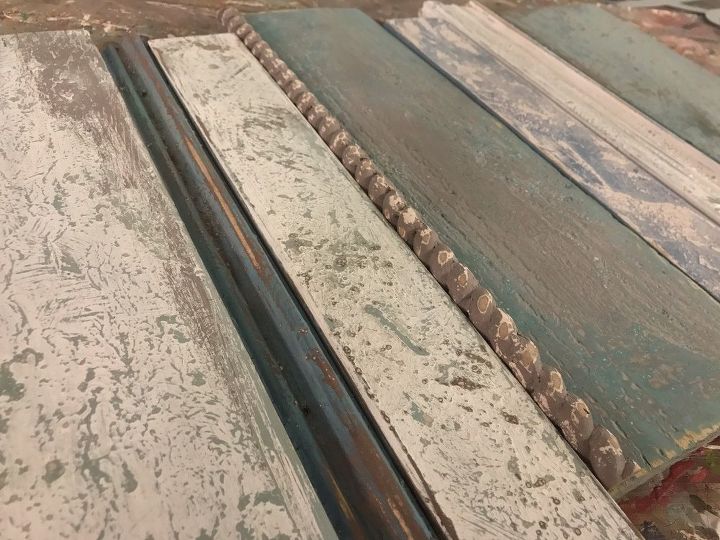
Step 7: Sand your sign to reveal the sea worthy look!
After your top coat of paint has dried then you can sand each board to achieve the salt washed look! This is the fun part and you can you a rotary or mouse saner or a heavy grit sand paper to work on each piece until it looks just the way you'd like.
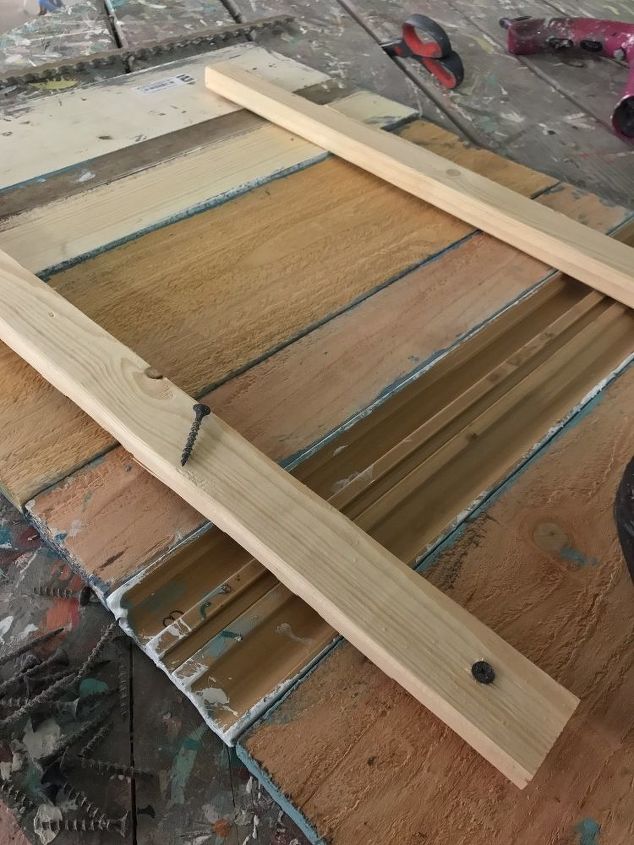
Step 8: Assemble your sign base
Cut 2 strips of wood to fit the length of your sign. I used 1x2 firing strips.
Flip over you boards in the order you'd like them to be on your completed sign and drill a screw into each board, top and bottom to secure each piece.
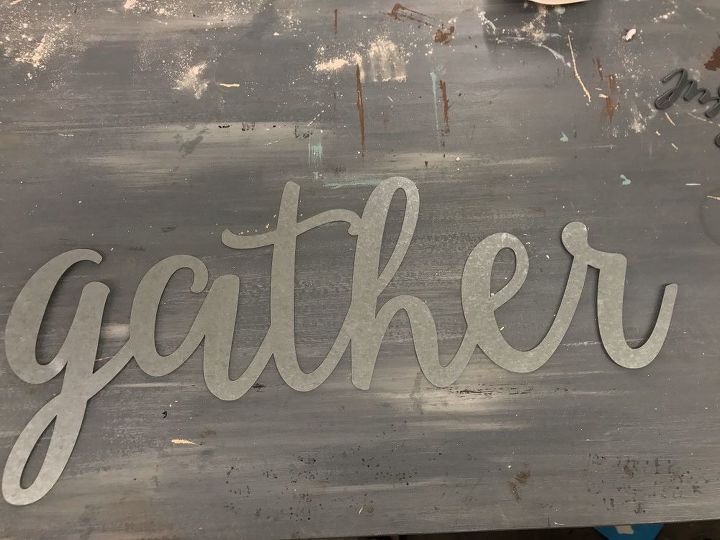
Step 9: Add the metal embellishment to your sign.
While I used a metal word I found at Hobby Lobby, there are lots of possibilities for how you can embellish your sign. I recently picked up some 3D wood cut out words that would work great for this or you could event add some metal bulldog clips to make yours hold photos or prints.
My metal piece had 2 d-rings on the back which made it super easy to hang onto the front of my sign. If your selected item doesn't, I'd recommend e6000 for permanent adhesive.
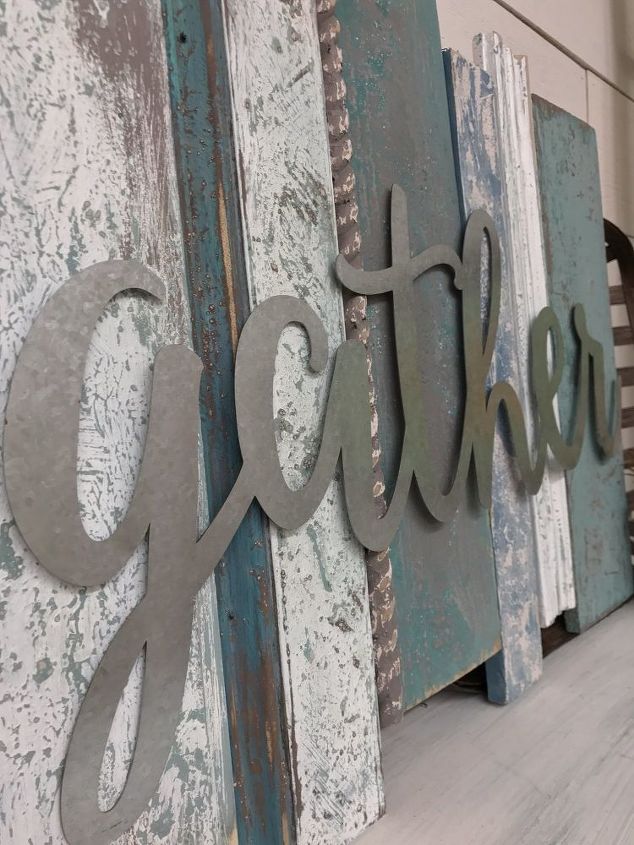
Enjoy your one of a kind piece!
If you try out this technique to make your own sign or paint furniture I'd love to see it! Email me at katie@junque2jewels.com

We want to help you DIY, so some of the materials in this post are linked to sellers. Just so you know, Hometalk may collect a small share of sales from the links on this page.


Any price and availability information displayed on [relevant Amazon Site(s), as applicable] at the time of purchase will apply to the purchase of this product.
Hometalk may collect a small share of sales from the links on this page.More info
Comments
Join the conversation
2 of 37 comments
-
Thank you so much I'm very excited to try this technique!!!!!
-
I had very similar results, by mixing sand into flat based paint of choice. Idk, but this was quick & easy. One application was all it took.


Frequently asked questions
Have a question about this project?
The question about the type of grout used wasn't answered - the project said un-sanded grout but the link has sanded grout. Then when you were telling someone the difference you explained how to make sanded grout with sand. Which was used for this project? Sanded or non-sanded grout?
On the strip of trim it looks white with gray on top... instructions said you used brown?????
I have a leather ottoman that is cracking.
can I paint with chalk paint