


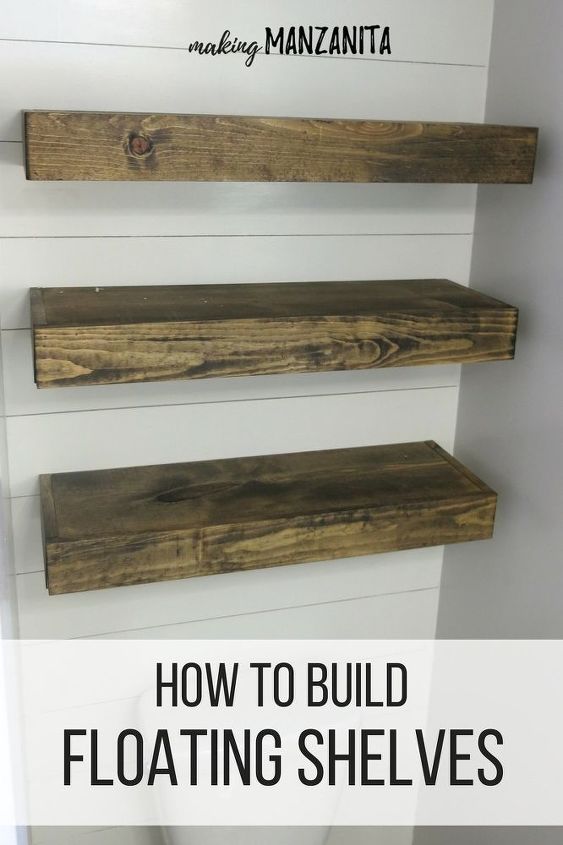
How To Build Floating Shelves For Extra Bathroom Storage
If you love this project, grab your quick start DIY guide & subscribe to our blog!
No matter the size of your bathroom, you could always use more storage, right? It is the same thing in the kitchen, right?! Bathrooms and kitchens always need more storage for some reason! We had some (hideous) shelves in our bathroom before we started this farmhouse master bathroom renovation that you will see below. They provided some bathroom storage, but I knew I had ditch them. So we decided on adding floating shelves for extra bathroom storage. I love that they give us that farmhouse style we desperately needed!
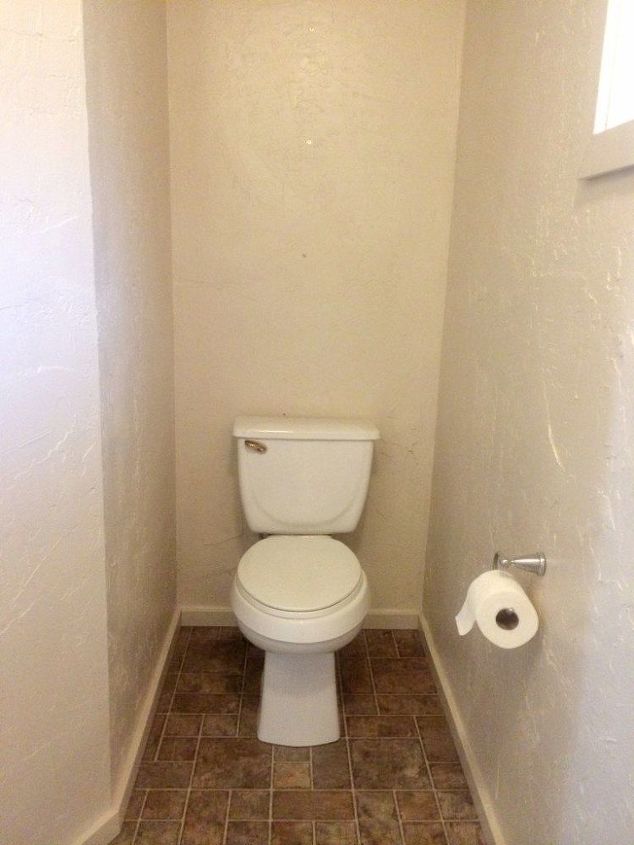
The ugly bathroom did get a little (and I really mean little) better when we skim coated (made the texture smooth), painted, and put in some wire shelving.
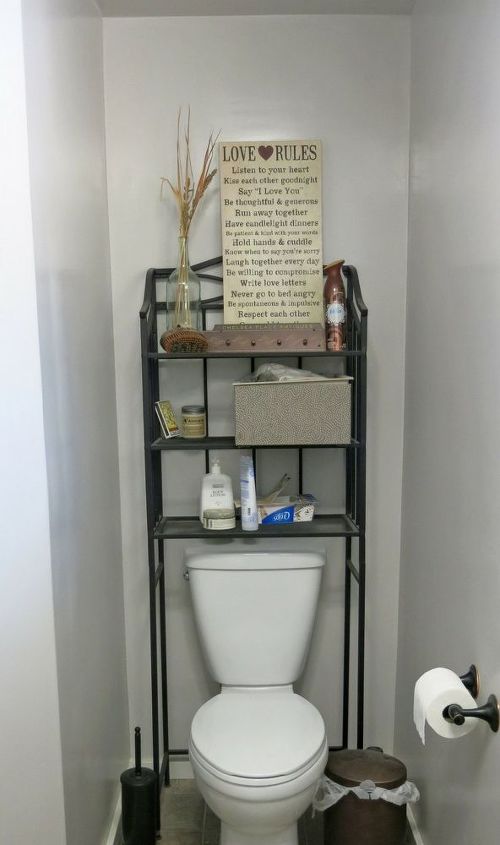
But, I hated those shelves. And because I hated those shelves, I also hated styling them. I just couldn’t get them to look cute. They always looked outdated and cluttered.
The master bathroom really started to transform when we added the faux shiplap wall! Don’t you think?
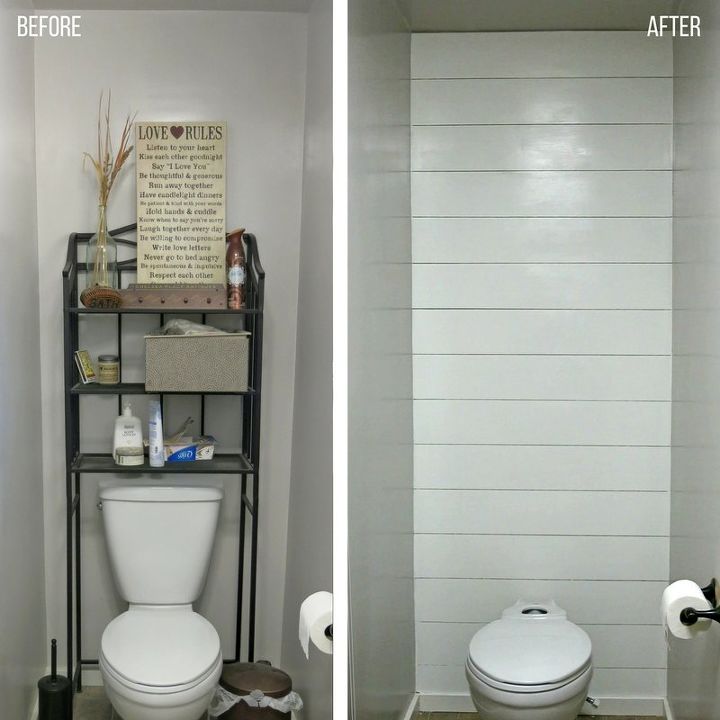
But, we definitely need some storage!!
Are you ready to see how to build floating shelves for extra bathroom storage?
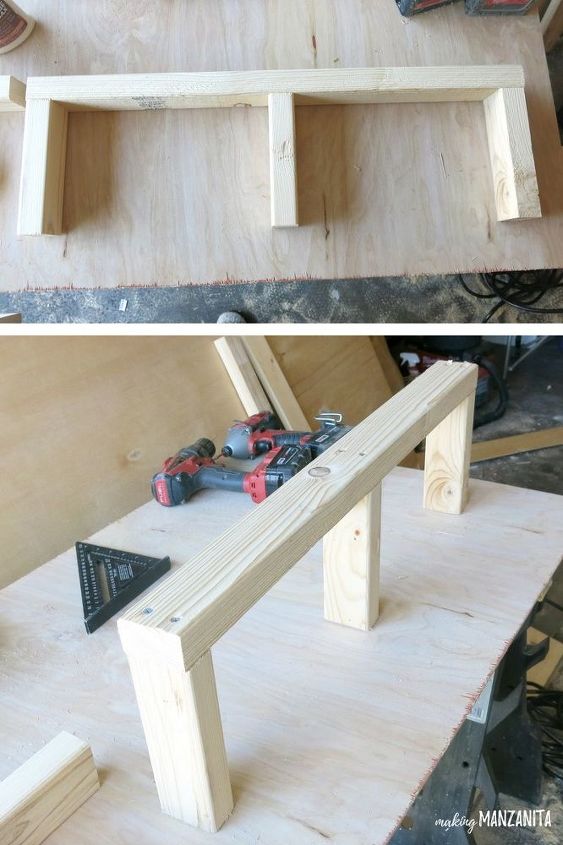
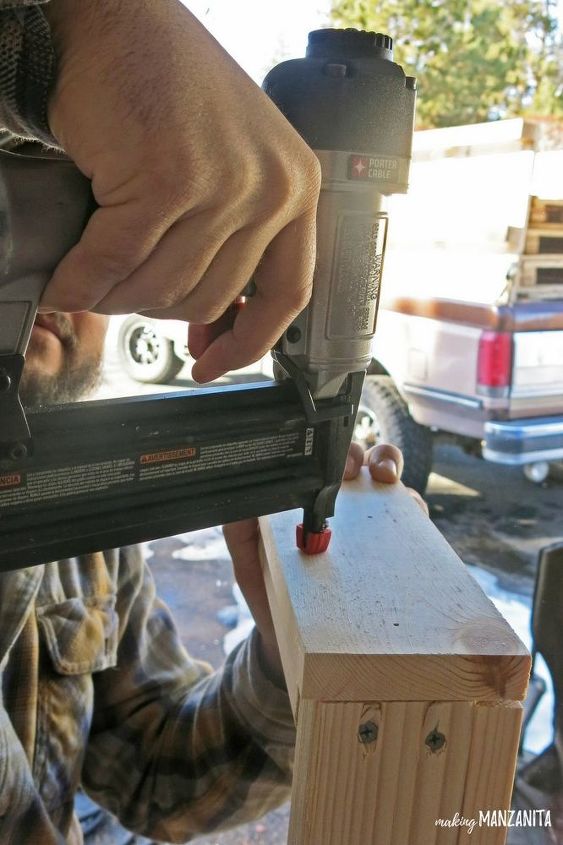
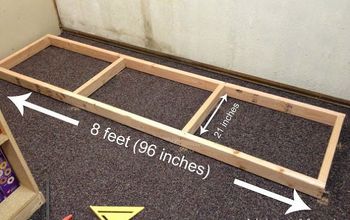
Step 1. Build your base.
Using 2x3s, first you will build the base of your shelves. For each shelf, cut the 3 boards to the approximate desired depth of your shelf and 1 board to the width of your shelf. Attach the three boards on each corner and one in the middle using 2.5 inch wood screws and some wood glue. Be sure to use a square to make sure everything is lined up accurately.
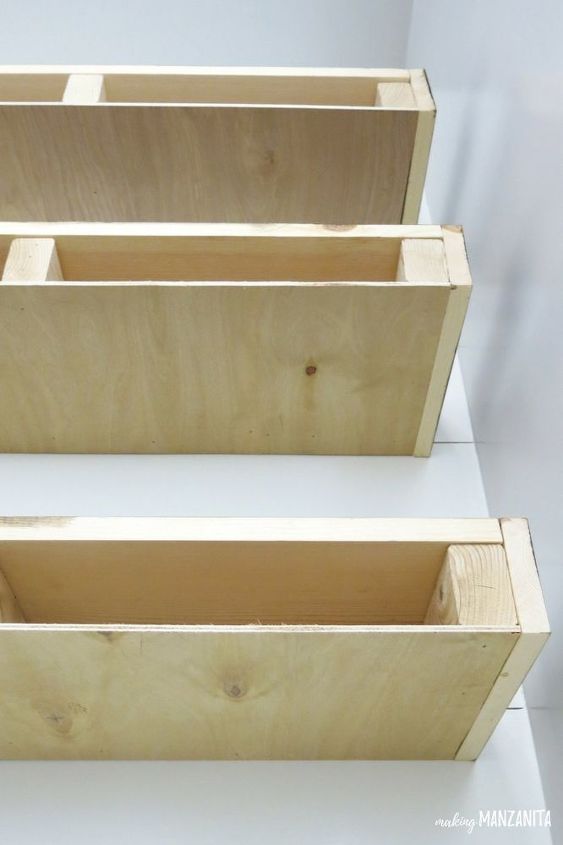
Step 2. Cut and attach sides and top to the base.
Cut two side pieces from 1×4’s and the top from common pine board. Next, you can add a little bit of wood glue to the top of the base. Next, you will attach the top of the shelf using a brad nailer with a few nails where the top of the shelf meets the base. Then, you can attach the side boards of the shelf with the nail gun. The side boards should hang over the bottom edge of the base about 1/4”. This is because once you attach the bottom to the shelf, it will be flush.
After you’re done nailing them in, fill the holes with wood putty and scrape or rub smooth.
Step 3. Cut boards for bottom and front panel.
For each shelf, you will need to cut 1 piece of 1×4 for the front panel of the shelf. Once cut, set this piece aside.
For each shelf, you then will need to measure the opening on the bottom between the side boards (already attached to the base). Cut the bottom from 1/4” underlayment. Once cut, set this piece aside. This is for the bottom panel of the shelf.
Step 4. Sand.
Using a hand sander and 220 grit sandpaper, give both the shelf base with the sides and top attached, as well as the boards you cut for the bottom and front panel a good sanding. Definitely make sure you get the places where the wood putty is on the nail spots really well so the surface is smooth. After you’re done sanding, wipe down the wood with a slightly damp rag to get all the sanding dust.
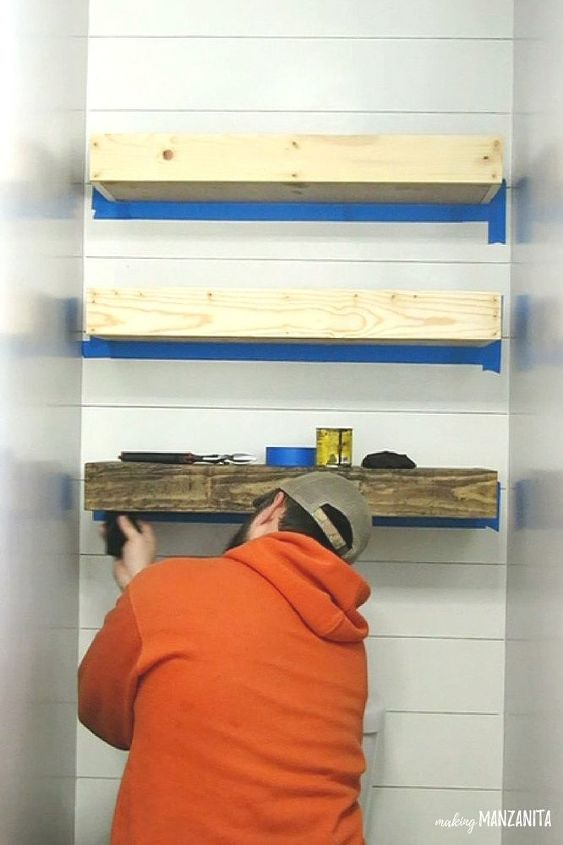
Step 5. Stain.
Using a stain rag (or just a piece of cut up old t-shirt), you will stain the shelf base with the sides and the top attached. You only need to stain the top and sides, of course.
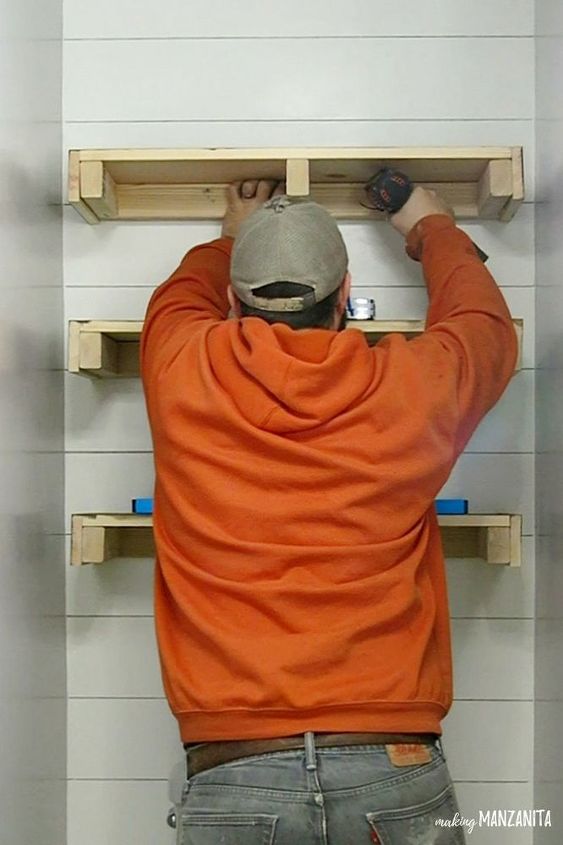
Step 6. Attach shelf to wall.
Now it all starts coming together, it’s time to get the shelf on the wall! First, you definitely want to find the studs in your wall and then screw the base into the wall using 2.5 inch wood screws (about 2 screws on each stud).
Step 7. Attach bottoms and front panel to the shelf.
Next you’ll move on to the unstained pieces for the bottom and front panels to the shelf. Attach the bottom first by just lining it up on the bottom of the shelf and adding some nails using a brad nailer.
The front panels will go on to the shelf in the same way, with the brad nailer.
Once everything is nailed, fill in each nail hole with wood putty and lightly sand the area until it’s smooth.
Step 8. Stain bottom and front of shelf.
First you will tape off the wall on the sides and bottom of the shelf using painter’s tape. Then apply the stain to the front panel and bottom of the shelf using a stain rag. You may be wondering “why in the heck didn’t we stain the bottom and front of the shelf before we attached them to the shelf?!” That’s a great question!! You probably COULD, but once you add the nails, there will be a hole where the nail went in that needs to be filled with putty. By staining the front of the shelf last, there’s an even color to the front…so nice and pretty!
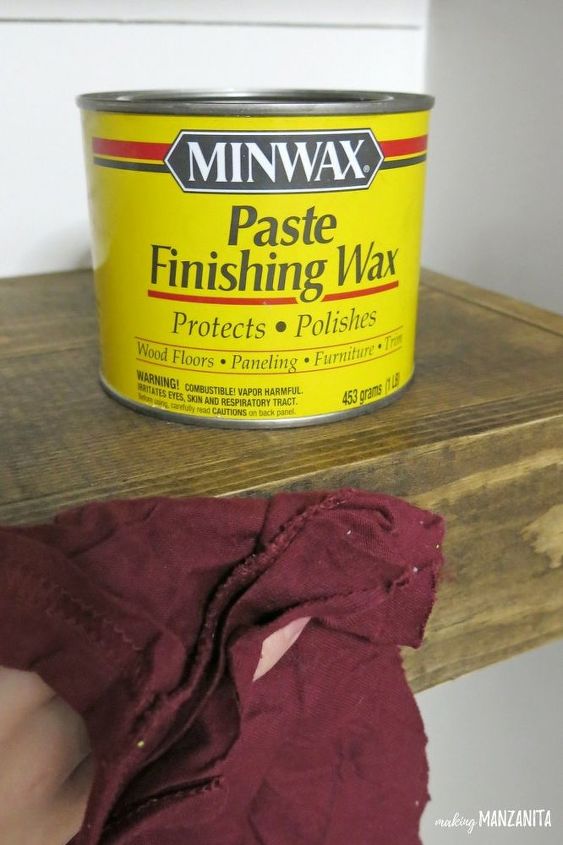
Step 9. Seal with finishing wax.
Lastly, I sealed the shelves with a finishing wax.
The farmhouse style floating shelves in our master bathroom provide that extra bathroom storage and, of course, a place to decorate! Hop on over to the blog post (link below) to see the full reveal of our farmhouse floating shelves. I love how they turned out.
Resources for this project:
See all materials


Comments
Join the conversation
-
Great job what a statement love everything
-
Yes. Looks great


Frequently asked questions
Have a question about this project?
I have a question I need some ideas for. I have a great tub with jets as well as a big walk in shower. I am not able to use the tub and would love to be able to use it for hidden storage as a n have a bench on top for seating when I come out of shower to sit in dry off and lotion up. Is it possible to just shut water off to the tub? I am looking to make this master bath into something femine but very functional. I have pink Roses I wish to decorate with. Any ideas?
What are the measurements of one shelf
How much weight will each shelf hold?