


Just in Case: A Suitcase Vanity
11 Materials
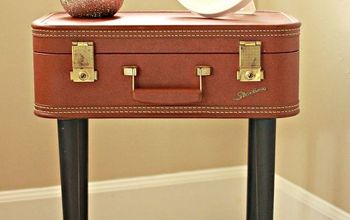
I had a big idea for a thrift store suitcase: a table when it’s closed and a vanity when it’s open. You know, “just in case” I need to freshen up.

Be still my heart! Two wooden suitcases at Goodwill for six dollars each! (Fumigation not included.)
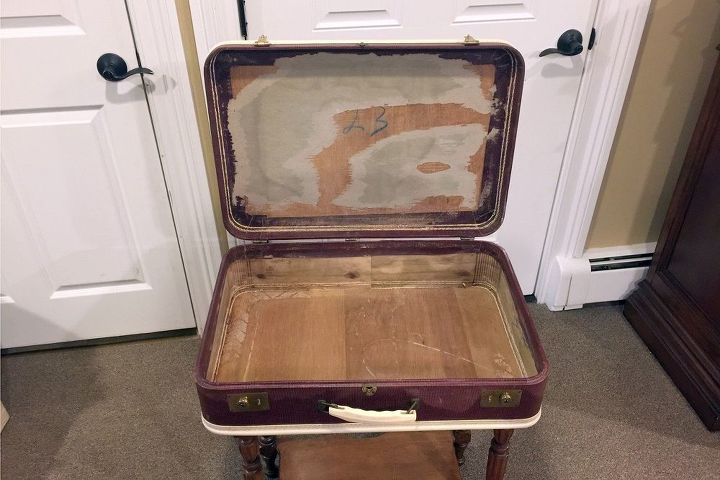
Stripping the inside of the suitcase involved experimenting with a few cleaning products. Goo-gone won first place in glue removal BUT it soaked through in some spots and darkened the exterior. Decision made. Paint!
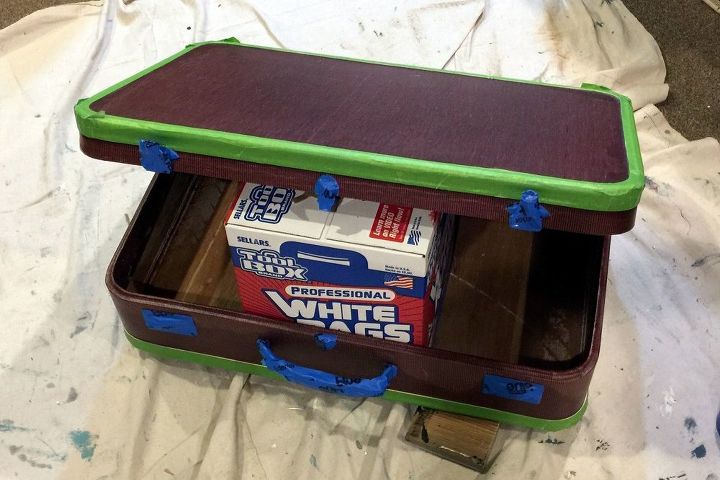
Magic Eraser did such a good job cleaning up the trim and handle that I decided to leave it as is. Before painting, I taped the trim and the hardware.
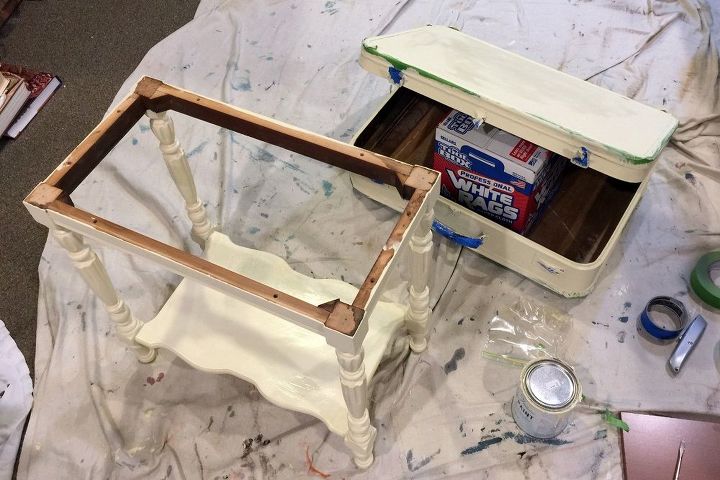
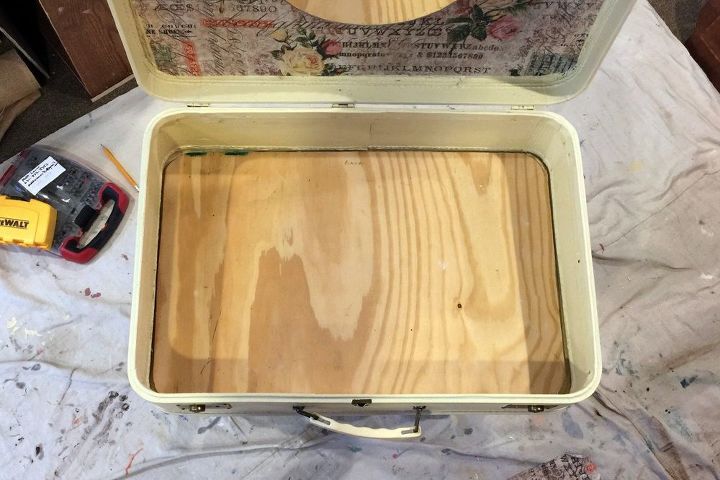
I paired the suitcase with a table waiting for the perfect partner. The table and the suitcase, including the interior sides, were graced with two coats of Annie Sloan Cream. In this “case,” I didn’t need the tabletop. I removed it and saved it for a future project.
To attach the suitcase to the table base, I needed a sturdy piece of plywood that fit inside the bottom. I was excited to break open my brand new jigsaw but I waited until my brother Jim was available for some lessons and guidance. I screwed the table base into the plywood from underneath.
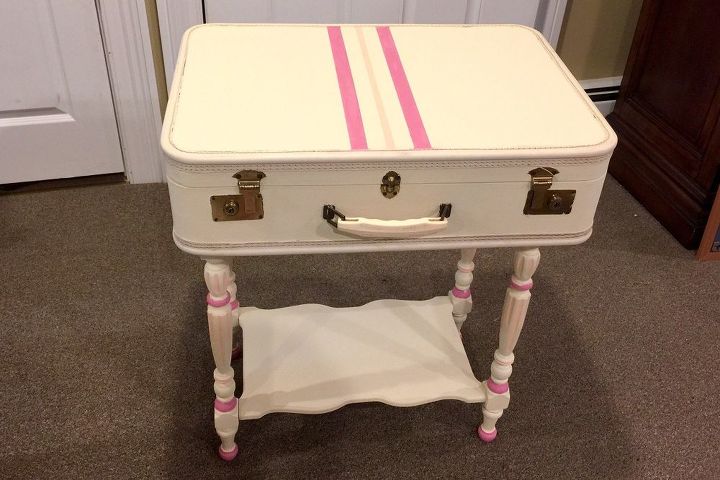
I taped off stripes on the suitcase and added pink and peach highlights to the table. The pink is a combination of Annie Sloan Emperor’s Silk and Cream and the peach is a combination of Barcelona Orange and Pure White. I don’t know the proportions. I just mixed until I liked the color.
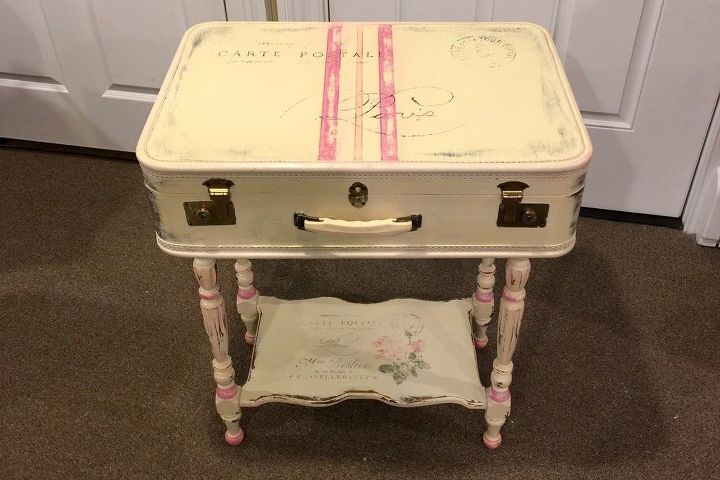
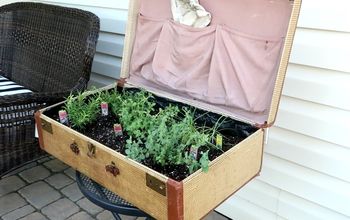
It looked a little stark so I did some distressing, and also added images, courtesy of the Graphics Fairy. The complete transfer is on the bottom shelf. I enlarged some of the elements for the top of the suitcase. Heirloom Traditions 1gel is a great transfer medium.
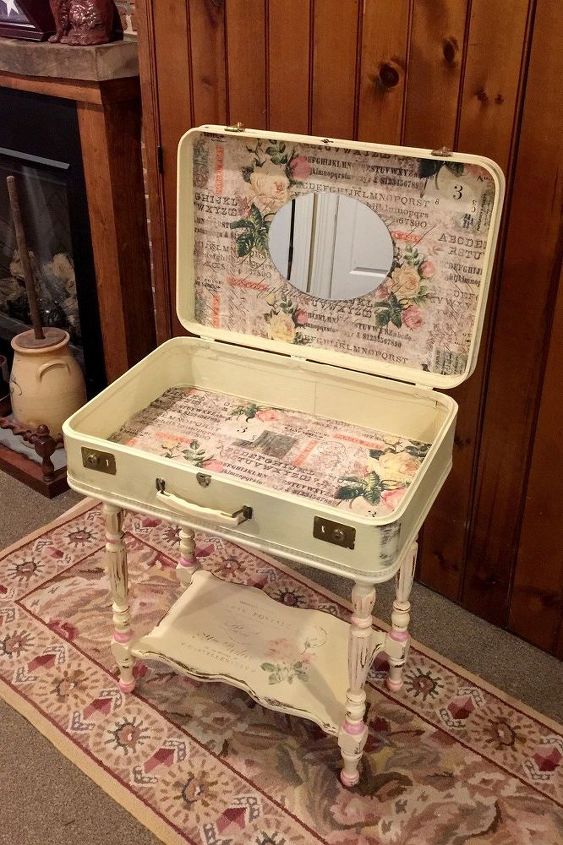
I had some beautiful fabric and used a craft paper template to cut it to fit the back and the bottom. I brushed the fabric with Mod Podge before the final cut. That made it easier to get a true cut without loose threads and it also helped align and decoupage the fabric to the surface.
I found a beveled craft store mirror, and Gorilla Glue held it beautifully.
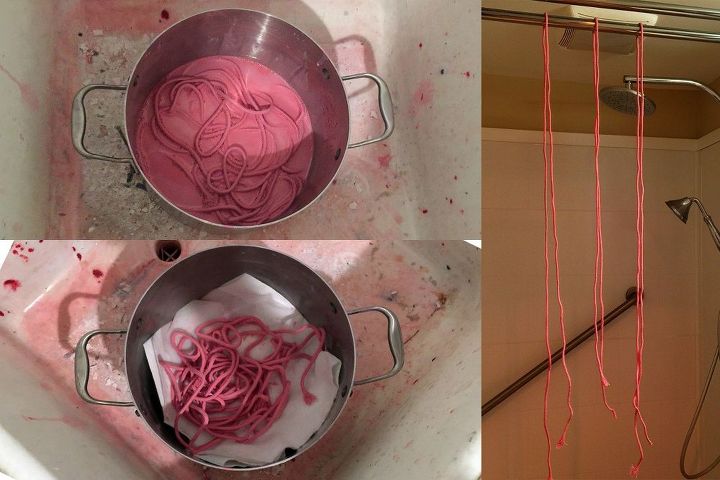
For the trim, I soaked clothesline in water, then soaked it in chalk paint, and hung it up to dry. I felt like Willie Wonka on the cusp of inventing bubble gum licorice.
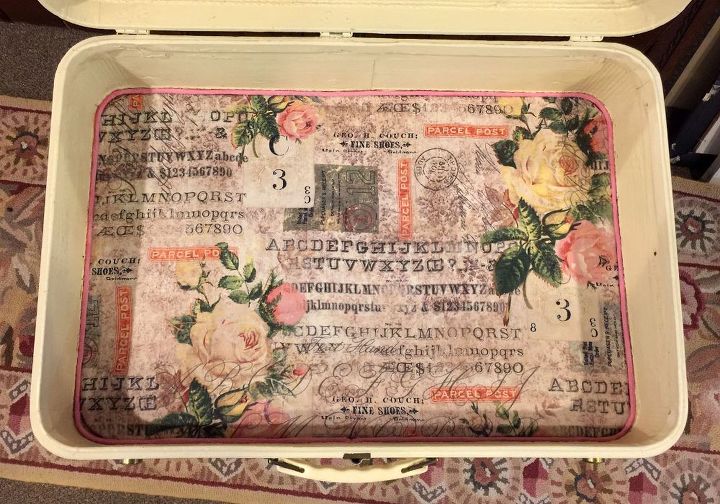
With a little help from Beacon Fabri-Tac, pink trim! I gave the whole interior a coat of 1Gel. 1gel is much more expensive but I find it leaves a harder, more protective top coat.
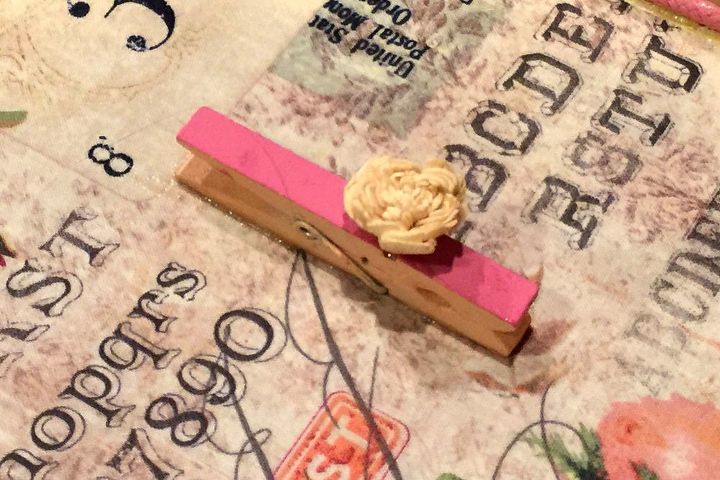
Because I'd repurposed a clothesline, repurposing clothespins seemed the right choice for some handy hooks. Gorilla glue here too. This glue needs some pressure initially (a stack of books worked for me) and time to set.
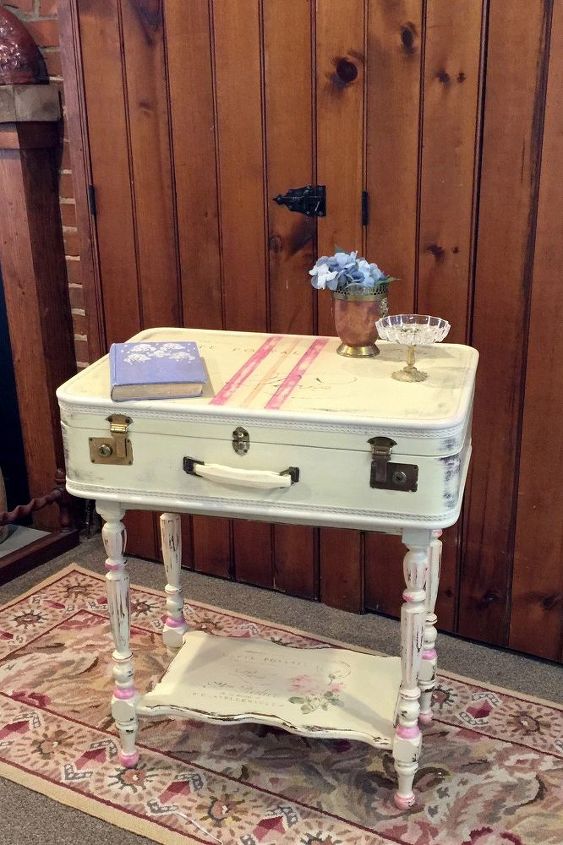
After I applied a coat clear wax to the exterior, I had a suitcase side table…
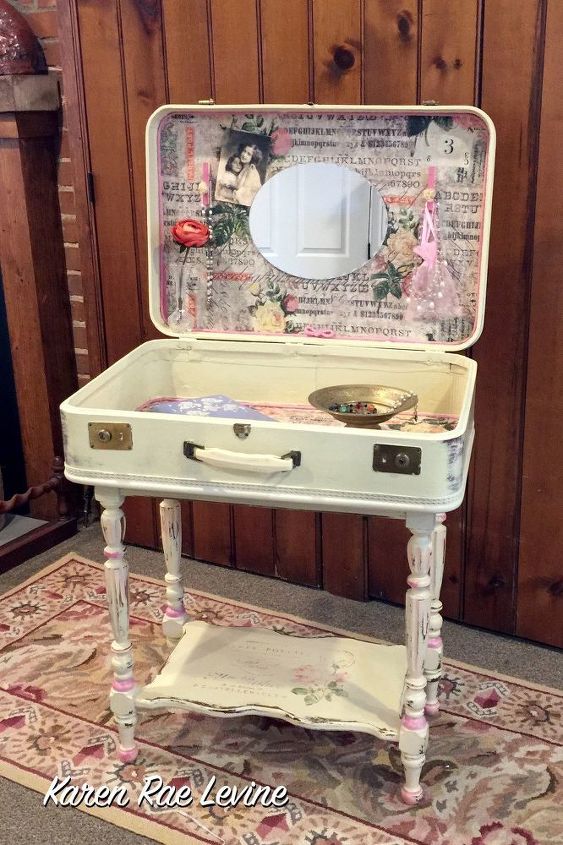
...with a surprise inside.


Any price and availability information displayed on [relevant Amazon Site(s), as applicable] at the time of purchase will apply to the purchase of this product.
Hometalk may collect a small share of sales from the links on this page.More info

Want more details about this and other DIY projects? Check out my blog post!
Comments
Join the conversation
2 of 273 comments
-
WOW, stunning. I love the artwork you added and the distressed look. Thanks for the great ideas!
-
I have started one at my daughters request. I love the old suitcased


Frequently asked questions
Have a question about this project?
I love this. How to cover all hardware
This is adorable! Can I ask how for more details on how you screwed the plywood into the table base? Thanks.
Yes I will. I'm wondering why you removed the top of the table instead of just attaching it to the bottom of the suitcase??