


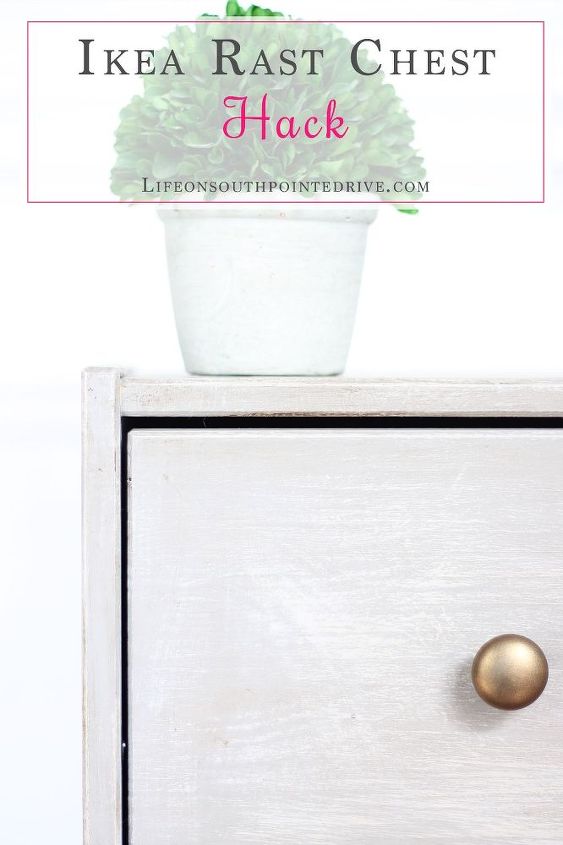
Ikea Rast Chest Hack

by
Holly Conway
7 Materials
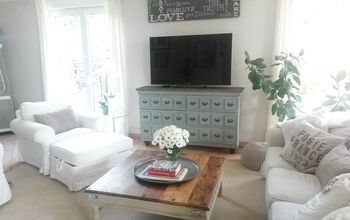
One thing I wanted to keep in mind when I was working on my most recent Home Office Makeover, is that I wanted it to be very budget friendly but still have the outcome that I am looking for. Since I am a huge lover of DIY, that is usually where my mind goes when I think about a room renovation. I first think about what I can do myself and try to go from there. My go to for inspiration is Pinterest and I seem to always find something I want to tackle. For the home office I was looking for an affordable solution for storage other than my built-ins, but that still fits into the feel of the room. I have seen so many people hack Ikea furniture and I thought I would give it a try. I picked the Ikea Rast Chest. I went to Ikea, picked up 2 Rast Chests and made my own spin on an Ikea Rast Chest Hack!
I absolutely love Ikea! You can’t beat the prices and with all the hack ideas out on the internet you can really make anything fit your style and vision. You also can’t beat the price. I went in and picked up 2 of the Ikea Rast Chests at $39 a piece and knew that if for some reason I messed this up I was out only about $80.
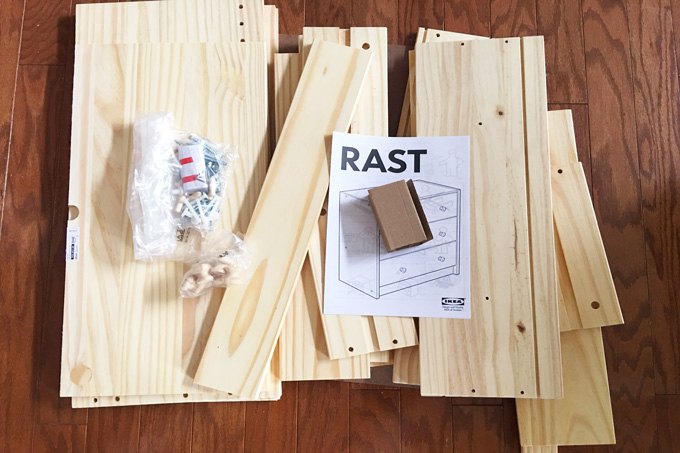
At this point, I feel like I am a gold medalist in putting together Ikea furniture. I have had many Ikea pieces and I will say that these chests were by far the easiest to put together. I put both of them together in under an hour….I call that a win!
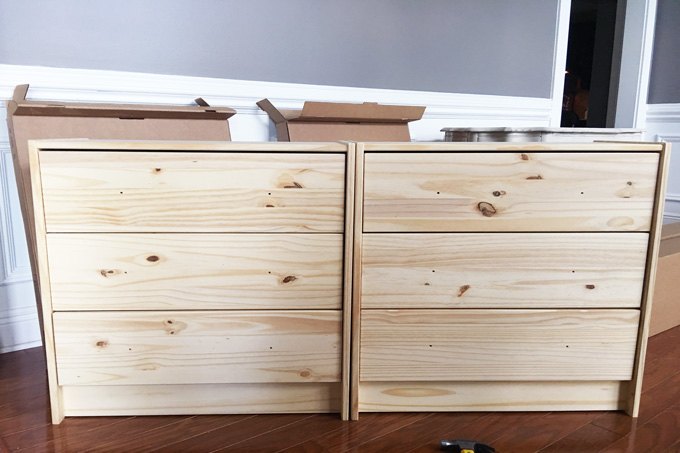
These chests feel very sturdy and the wood feels like it is high quality, and they didn’t feel as manufactured as some of their pieces. After working on them for an hour, here is what they looked like completed.

My next move was to give them a really pretty paint job. The look I was going for was the same Restoration Hardware worn gray look that I am trying to incorporate into the office. I didn’t want them to clash with the darker gray walls so I wanted to make sure I made these a bit lighter so they would stand out.
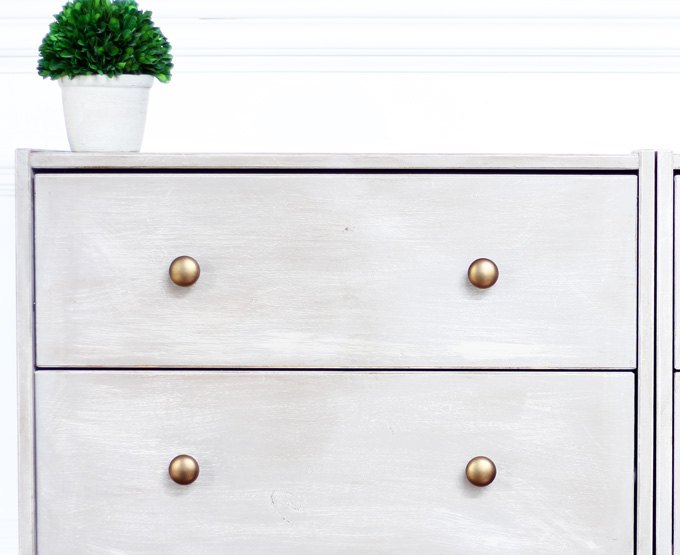
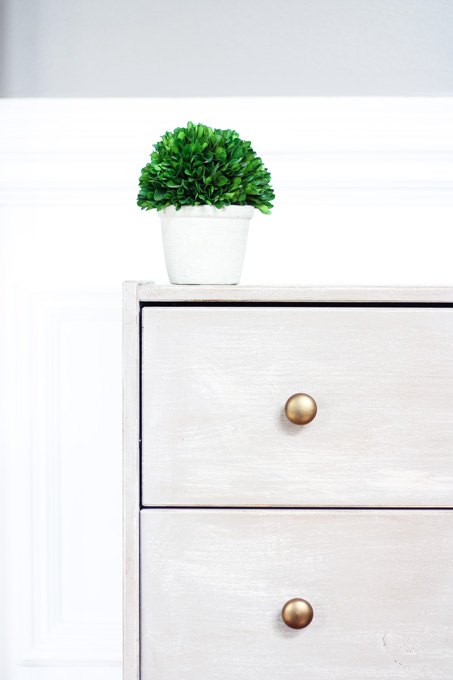
I ended up giving both of the chests 2 coats of Annie Sloan chalk paint in French Linen. The first coat I just painted straight out of the can, but I made sure to add a bit of water to my second coat to make it not so thick and glide on a bit smoother. I really didn’t bother with making sure the paint job looked perfect. That is the great thing about chalk paint, it is made to be able to see the brush strokes which I really like and I also knew I was going over it with some dry brushing and dark wax.
As you can see from the picture above, I even left a few spots where the wood beneath was bleeding through to make sure I got a good worn look for the piece.
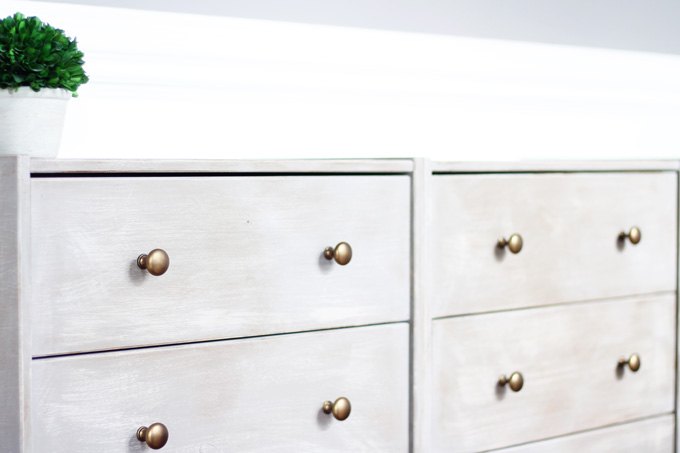
After I let this dry for about 24 hours the next step was to go over the piece with a little dry brushing. Dry brushing is the technique of antiquing a piece without sandpaper. I took a little of my French Linen paint and mixed it with a small amount of my Annie Sloan Old White until I achieved a very light gray color. I then wiped away all the excess paint from my brush and started dry brushing, really just hitting the high points in very long horizontal strokes. I would then (without putting anymore paint on my brush) would swipe my brush in all different directions to achieve that antique worn look. Dry brushing is very hard for me to explain so if you’re looking for a great video on how to dry brush I highly recommend checking out Rachel from Shades of Blue Interiors here. I learned a lot of my paint techniques from her, she is awesome!
After I was done dry brushing I then applied my Annie Sloan clear wax. I made sure to work this in small sections. Before I let the clear wax dry I then went over the same section with dark wax and immediately wiped it off with a rag. This way it would give me enough of the dark wax to give it that worn look on the edges and in certain spots without leaving the whole piece a dark brown color.

I was very pleased with the way the coloring turned out. After everything started to dry, the next day I put new knobs on the dresser and then the chest really started to come to life. I picked up these knobs from Lowe’s, but you can really go with anything here that fits your look.
The next step for this chest is to somehow hook the two pieces together and maybe attaching a new top. I am still trying to decide which way I want to go with this, but will be sure to post an update when I have decided!
Resources for this project:
See all materials


Any price and availability information displayed on [relevant Amazon Site(s), as applicable] at the time of purchase will apply to the purchase of this product.
Hometalk may collect a small share of sales from the links on this page.More info
Want more details about this and other DIY projects? Check out my blog post!
Comments
Join the conversation
6 of 27 comments
-
I agree. Some of the projects require so little imagination and effort. Turn a garbage bin upside down and wallah we have a table.

-
Hi Michelll
I like your attitude some of the projects are mind boggling never in a million years would I have them in my home
 My wallah was good ole auto correct.


Frequently asked questions
Have a question about this project?
Can you share approximate cost?
So pretty,,,great transfermation!
Did you remove the drawers to paint or just paint the fronts while closed in the chest?