


IKEA Hack Platform Bed DIY

by
Chris Heider
11 Materials
$480
2 Days
Medium
In this project, I turned seven standard kitchen cabinets from IKEA into a platform bed for my daughter. The total cost was around $480 for the cabinets, lumber and supplies - not including the bedding, which she already had. There is a huge storage area under the mattress which is accessed through one of the cabinets that has no back.
{
"id": "3671977",
"alt": "",
"title": "",
"video_link": "https://www.youtube.com/embed/vai8xV6jD60",
"youtube_video_id": "vai8xV6jD60"
}
{
"width": 634,
"height": 357,
"showRelated": true
}
The entire process is covered in this video in greater detail, but this post will give you the highlights if you're in a hurry. More information and blueprints are available at the link at the bottom.
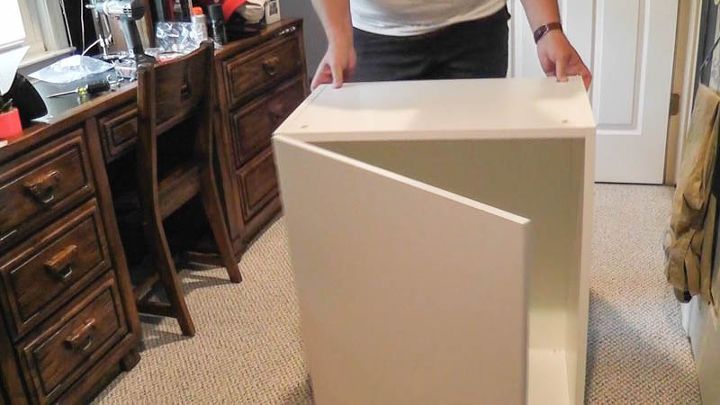
Step 1: Assemble the cabinets
I bought ready-to-assemble cabinets from IKEA because they were inexpensive and provided a lot of storage. These wall cabinets are called SEKTION in the US and METOD elsewhere, but you can use just about any kind of cabinets or bookcases to outline the bed.
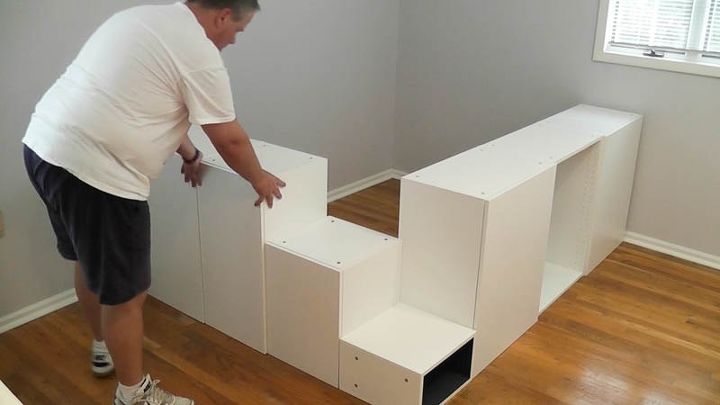
Step 2: Layout
Using the dimensions of the full-size mattress, I placed the cabinets along the outside edge of the platform. I used varying heights to form steps. See that cabinet without the door? I assembled that one with no back so I can use all the space under the bed for storage.
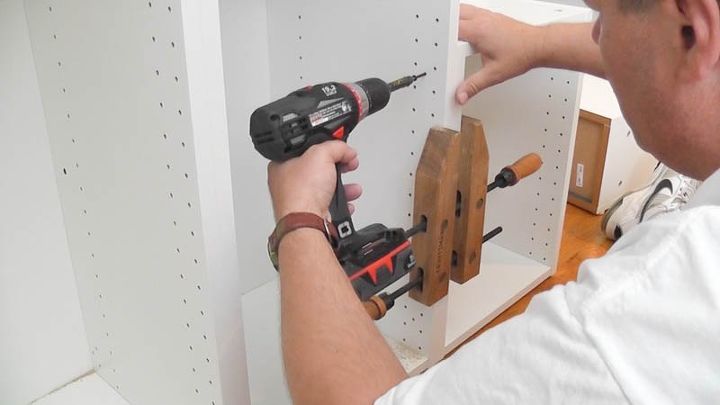
Step 3: Attach everything
I added 1/4" nylon chair glides to the bottoms of all the cabinets to hold them off the floor. Then I clamped and screwed all the cabinets together to ensure everything stayed tight and looking good.
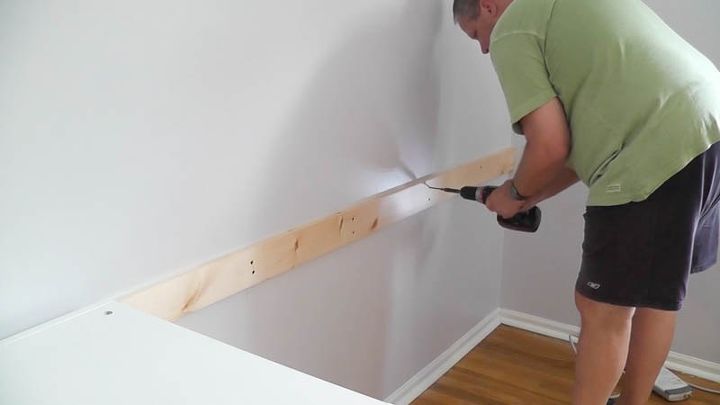
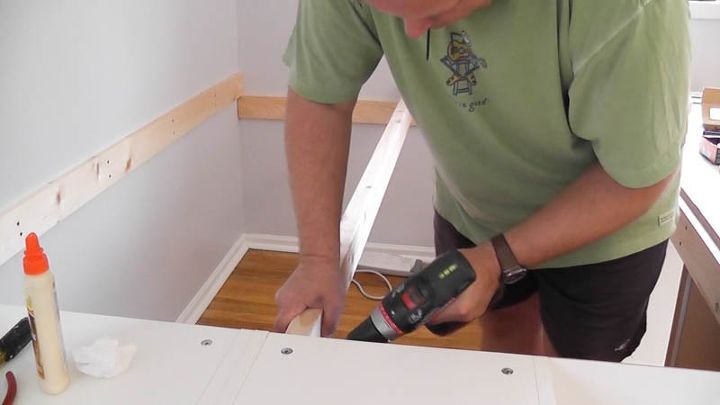
Step 4: Frame the platform
I attached 1x4 pine to the two walls and backs of the cabinets to support the platform. If you can't attach anything to your walls, I have an alternative free-standing version of this bed on my website (follow the link below).
Step 5: Add a center support
Slats alone would be insufficient to support a full-size mattress with adult occupants. So I added a 2x4 down the center to bear most of the weight.
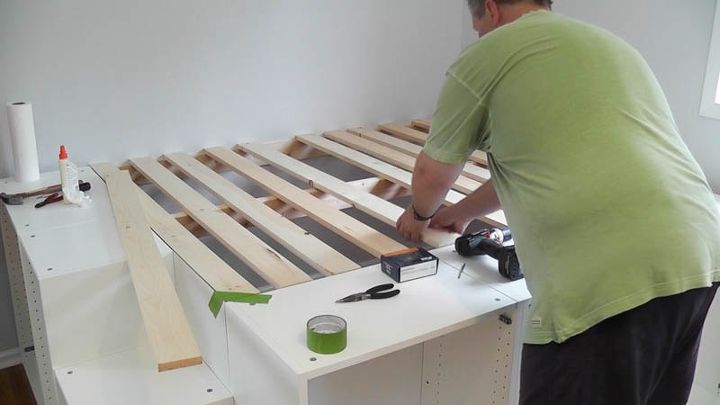
Step 6: Install the slats
I installed a dozen 1x4 pine slats with three screws. The slats are spaced 3" apart, which is maximum for most mattresses.
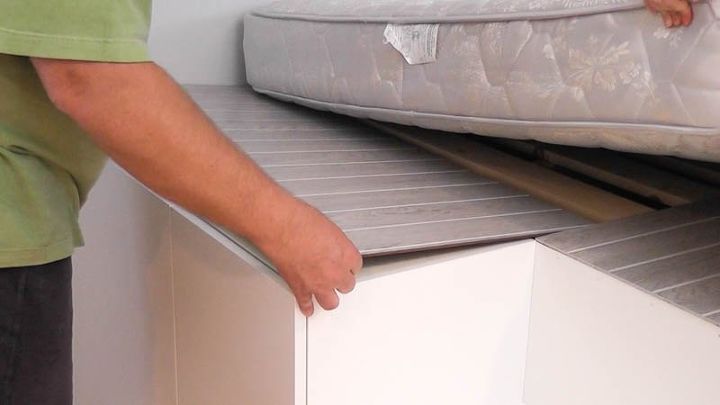
Step 7: Finishing touches
I dressed up the tops of the cabinets with gray paneling held in place with double-faced carpet tape and screws. I also cut a rubber-backed rug to cover the steps so they wouldn't be too slippery.
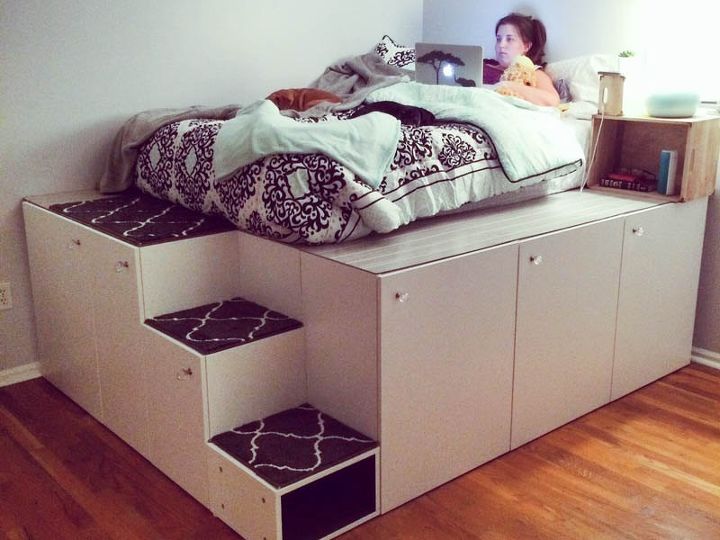
Step 8: The finished product
My daughter added a crate to act as a nightstand, and she used a twin size comforter so it didn't hang over the edge too far. Her dog, Reese (laying in this picture near the wall), has no trouble climbing up and down the steps.
{
"id": "4098336",
"alt": "Alternative version",
"title": "Alternative version",
"video_link": "https://www.youtube.com/embed/SbwLn02Q55g",
"youtube_video_id": "SbwLn02Q55g"
}
{
"width": 634,
"height": 357,
"showRelated": true
}
This video shows an alternative version that has a smaller footprint and isn't attached to the wall. Take a look!
Be sure to subscribe to my YouTube channel and social media @HandyDadTV.
Resources for this project:
See all materials


Any price and availability information displayed on [relevant Amazon Site(s), as applicable] at the time of purchase will apply to the purchase of this product.
Hometalk may collect a small share of sales from the links on this page.More info
Comments
Join the conversation
2 of 522 comments
-
Incredible! Great job!
-
I love the design. Just need something basic. I'm not very good at 62. Lol


Frequently asked questions
Have a question about this project?
What size is that bed ?
Do you have any trouble with the mattress moving / Sliding away from its original position
Do you have a plan that does t use cabinets? I just need to make a box around my bed to keep my animals from going under it and being naughty.