


IKEA Rast Hack

by
Love & Specs
8 Materials
$100
4 Hours
Easy
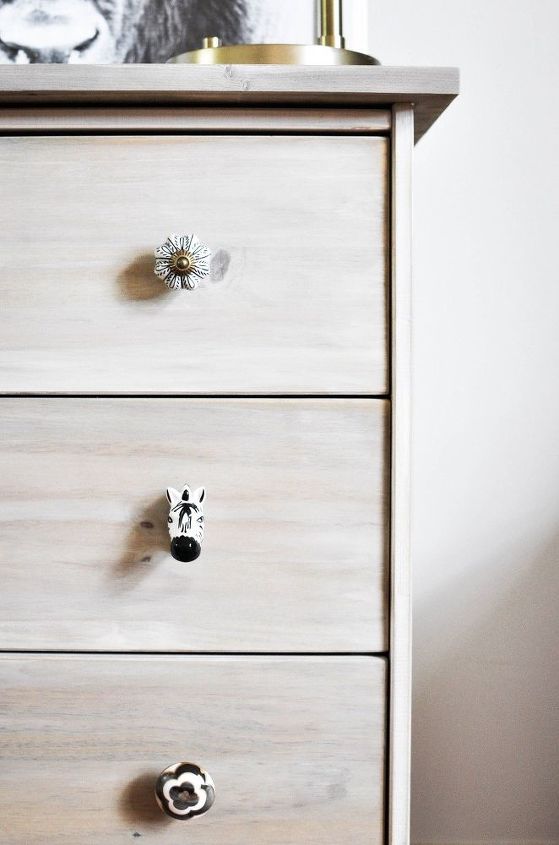
This IKEA "Rast" hack was so easy to execute and gave me the cutest, Scandinavian farmhouse-chic nightstands! All I did was stain the nightstand with Driftwood stain, whitewash them with chalk paint, add some bun feet and a pine board topper and some mix and match knobs from Anthropologie and it was done! Check out the link to my blog for the before photo!
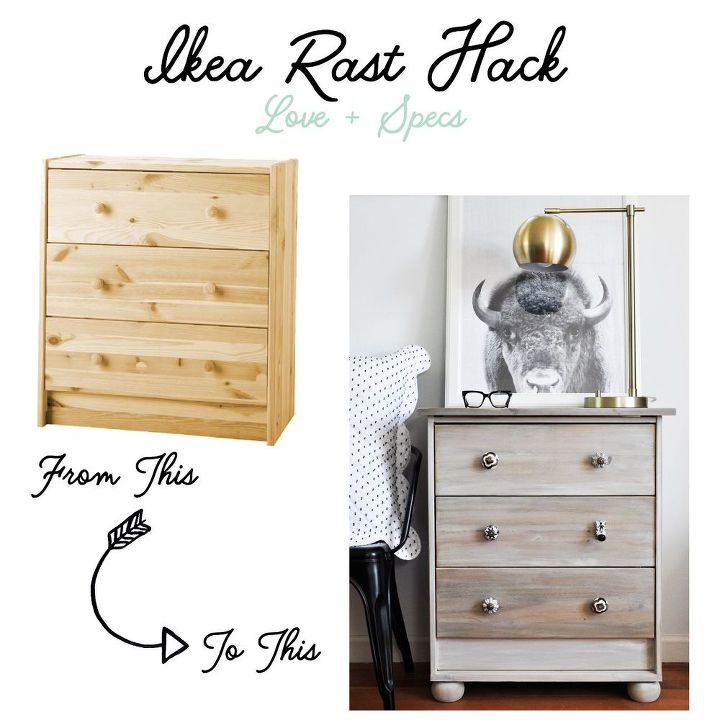
After sanding both nightstands and making sure to wipe off any dust left behind, I stained the natural pine of the Rast with Driftwood Weathering Wood stain. This was a stain I had seen used by another home blogger, and I loved the the look. I also stained the bun feet we attached to the bottom of the nightstand, and the pine topper we attached to the top of the nightstand. To use this stain you mix one packet of the powder with one cup of water. Mix the powder until it dissolves.
Apply your stain with a soft-bristled paintbrush, running your strokes in the same direction as the grain of the wood. I used a larger brush to make it easier to cover the entire nightstand. This stain is pretty runny but dries quickly, so be careful of drips when you apply. Luckily, you can't really mess this stain up either - true driftwood has a bit of variation naturally, so it's going look good no matter what. One more tip about this stain: You can take the blue tones out of the stain by adding a pinch of baking soda to the solution. But be aware that a little goes a long way with that. I put in a really tiny pinch and that was enough to extract most of the really harsh blue tones out of it without yellowing the stain at all, giving it a nice, natural gray finish.
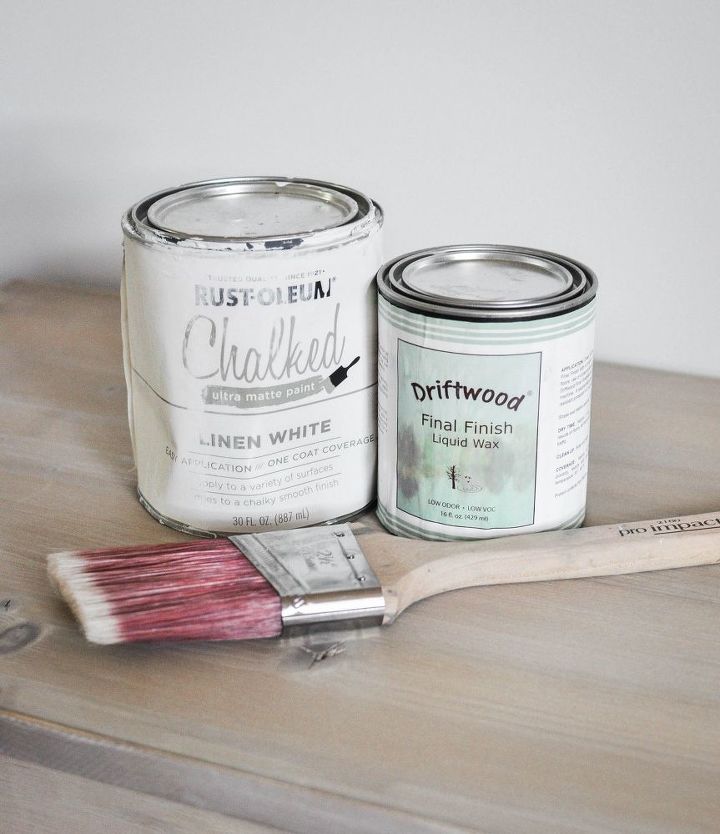
Once the stain dried (give it about 24 hours), I was ready to make my whitewash. For the whitewash, I mixed equal parts Rustoleum Chalked chalk paint in Linen White and warm water. Mix the paint with a paint stick until it's all completely mixed, and you're ready to apply! You can apply the whitewash with a specific chalk brush, or just any large soft-bristled brush you want. Apply your whitewash in even strokes running in the same direction as the grain of the wood. I also applied the whitewash to the bun feet and the pine topper as well.
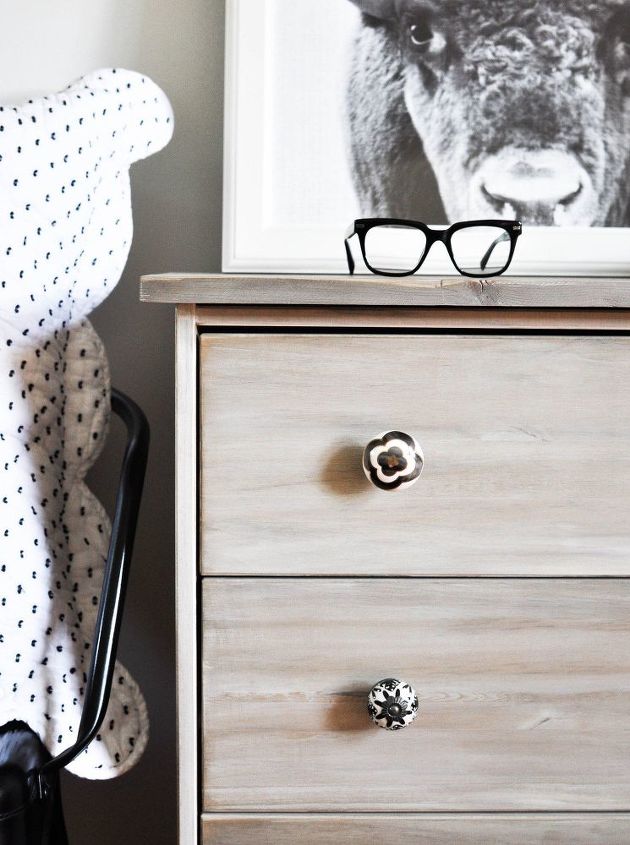
I wanted the driftwood stain to peek through the whitewash ever so slightly, so I waited one minute after each section I whitewashed, and quickly wiped the whitewash off with an old, clean, soft T-shirt. And again, make sure the T-shirt is not only completely flat over your hand as you're wiping, but that you're wiping in the same direction as the grain of the wood. This gives the wood such a cool weathered look, and I highly recommend using this technique.
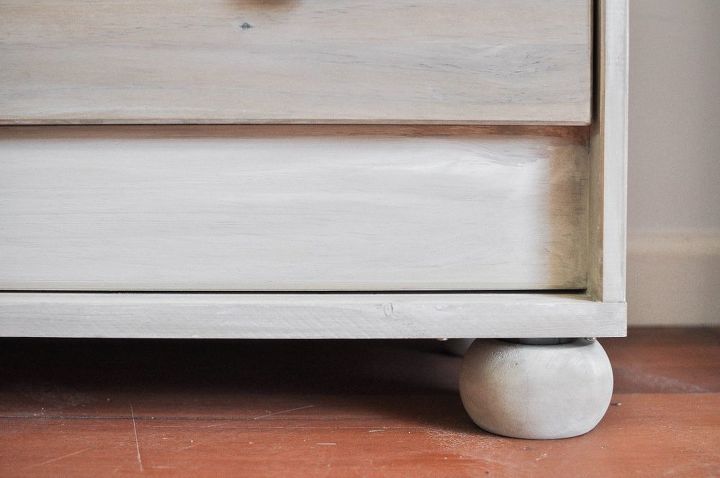
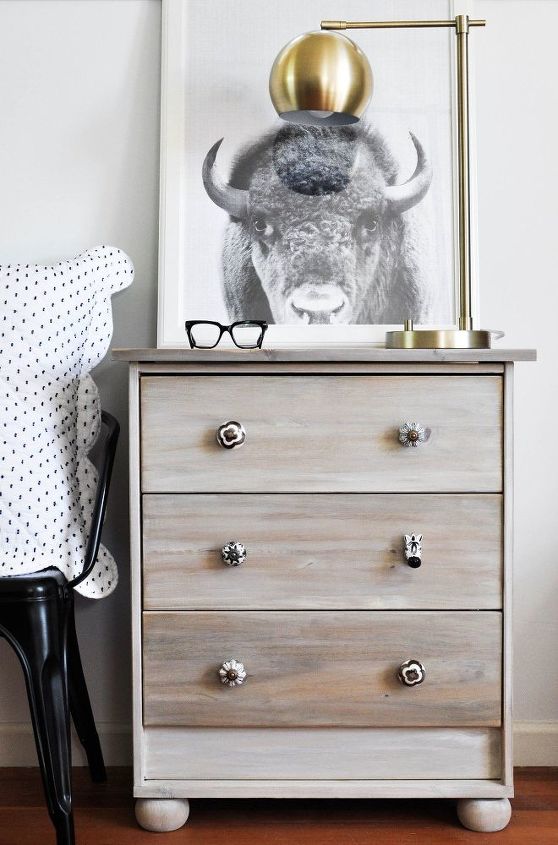
Once the whitewash and the nightstands were completely dry (I'd wait 24 hours), we attached our bun feet, which are the little spherical wood feet you see on the bottom of the nightstand. Chris was cracking up that the four bun feet actually cost more than the entire chest itself, but hey, it's totally worth it! We attached four top plates to the bottom of the dresser at the four corners, and the bun feet just screw in/twist into those. It's a really simple process.
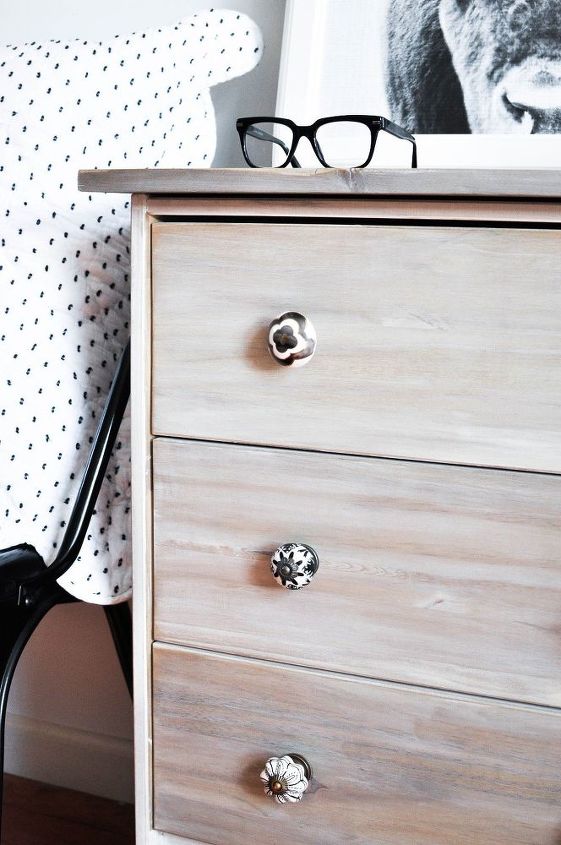
Next we applied a 16" x 26.5" pine board to the top of the nightstand using wood glue. This was another really simple step. Obviously the board was already stained and whitewashed as well, so we just applied a thin line of wood glue to the top of each side of the nightstand and laid the pine board on top of it, pressing firmly and looking underneath the board for any excess glue that may have squeezed out the sides, and just wiped that with a cloth. Then we set heavy objects (planters in our case) on top of rags (don't want to scratch the top!) on each side of the top of the board where it meets the nightstand, and let it sit like that for a few hours just to make sure it was secure.
My next step was putting a wax finish over the entire nightstand, and especially on the top of it where we'd be setting things down, to give it a durable topcoat. I used the Driftwood Final Finish Liquid Wax, which can be used not only on the raw Driftwood Weathering Wood stain, but can also be used over chalk paint and purports to keep both of those things in tact and not darken them, which I think rang true when I used it. It aded slight variations to the whitewash, which I actually think I love, so it's all OK by me. I applied two coats with an old soft T-shirt, and the process went really quickly.
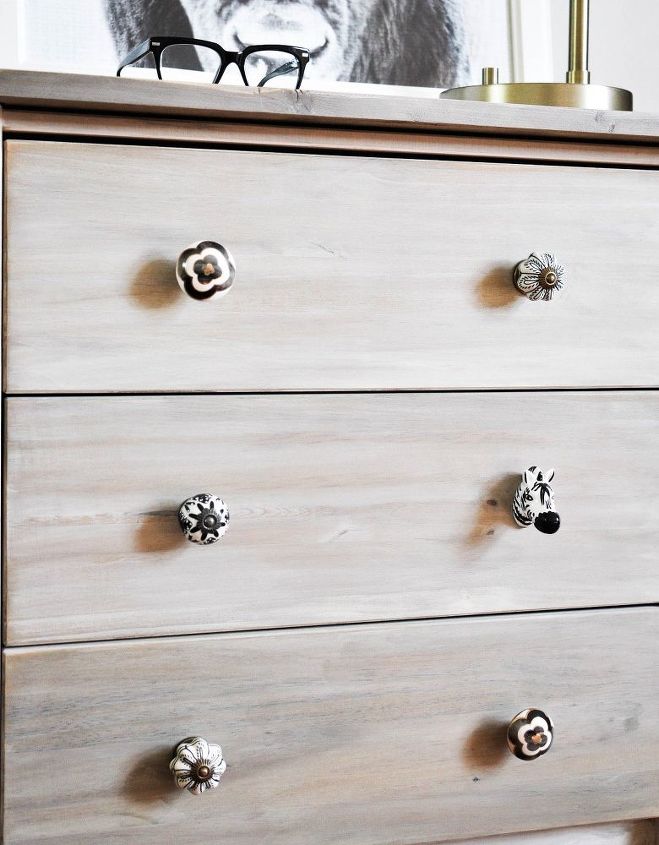
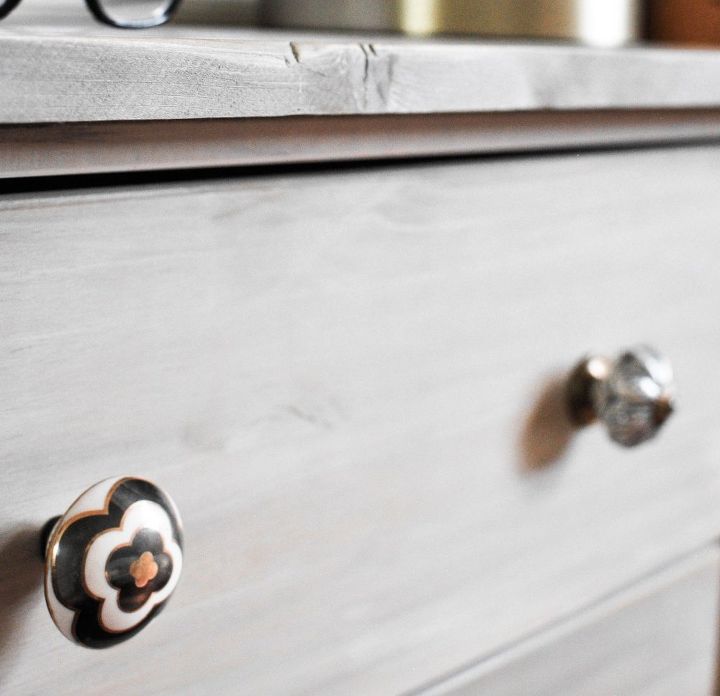
Now for the fun part! I was having the hardest time deciding what kinds of knobs or pulls I wanted to add to this, and thought seriously about doing a nice brushed brass cup pull. But then Chris insisted we go check out the knobs at Anthropologie and what luck, they were giving 20% off of your entire purchase that day and Chris had the genius idea to mix and match different knobs with white and black patterns. So fun! And I couldn't love them more. It definitely adds a little boho "Anthro" vibe to these nightstands!
Want more details about this and other DIY projects? Check out my blog post!


Frequently asked questions
Have a question about this project?