


DIY Modern Art Wall Mount Hanging Jewelry Holder With Dowels
This modern art hanging wall jewelry holder DIY is a cinch to make in mere minutes, practical for storage and organization as well as artful on its own.
Dowels are amazing, they're incredibly useful and can be artful as well. Just a few supplies, simple tools, and in minutes you've got some super handy storage and organization for jewelry!
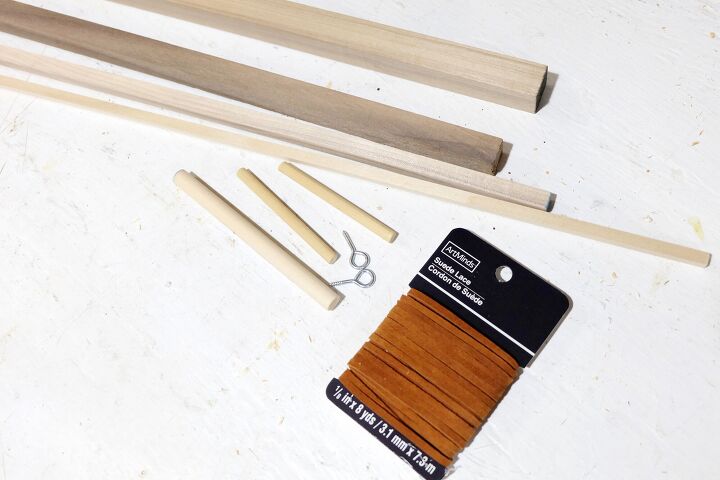
Here I've used:
various shaped and sized dowels
eye hooks
leather cord
glue
After grabbing a handful of dowels from my second home, the hardware store, a layout popped into my head.
What's great about this project is that it's versatile, customizable, it can be finished in any manner, it comes together in minutes, and it looks like a sculptural piece of modern art on its own. Too, this makes use of every space available in a small space.
Be sure to swing by Flipping the Flip for more details about this project!
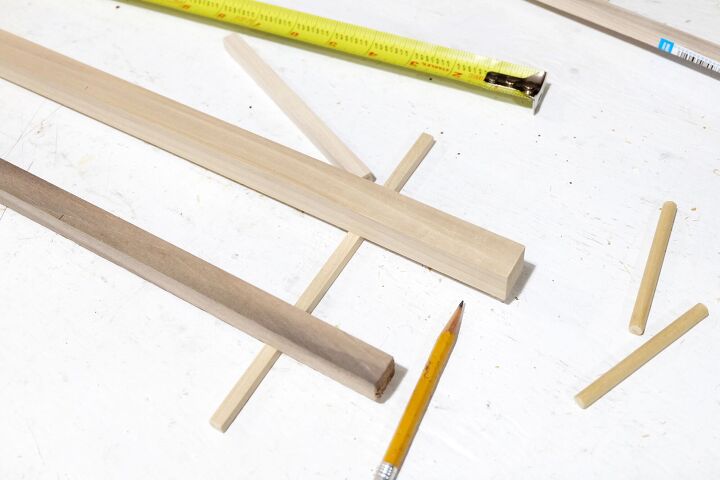
Of course the design and assembly is completely up to you depending on your needs but here I have two longer vertical pieces cut to random lengths and then I cut a horizontal to hold them together.
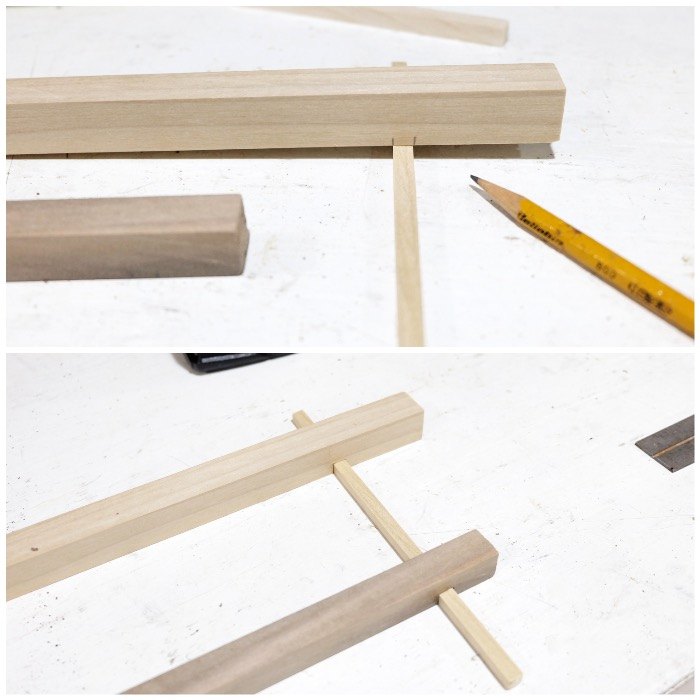
Notching out for the horizontal, a few dabs of glue since I over-notched a hair, and the dowel fits right in. I used my band saw but this can be done with a hand saw too.
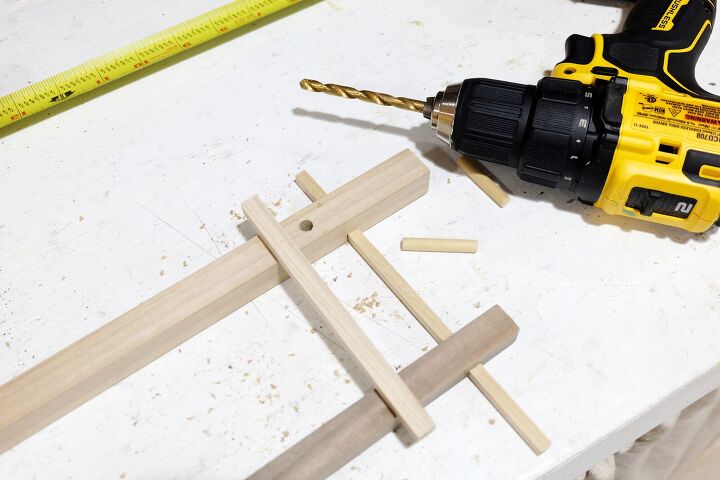
I cut a few more pieces of different dowels then drilled out for some pegs.
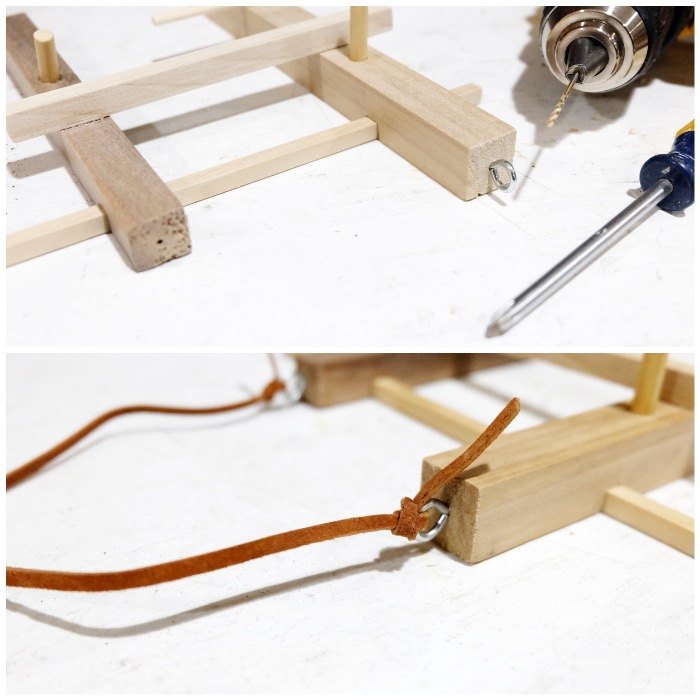
Last part of the assembly, I drilled tiny holes in the tops of the vertical pieces for some eye hooks and twisted them in with a screwdriver then sprayed the whole thing with a clear matte sealer.
Of course it can be painted, stained, finished however you like. To hang it, I used leather cord but string or twine or ribbon or what-have-you works too.
Looking for other great, easy projects to solve dilemmas around your house? No problem, I've got you covered -- drop by Flipping the Flip!
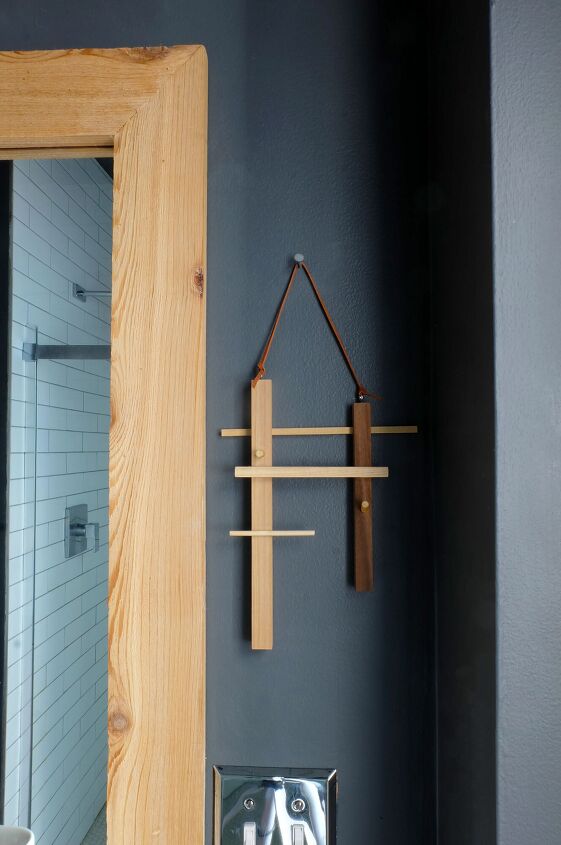
And voila! Here it is in its spot of honor in the bathroom! It is so hard to take pictures in this house....
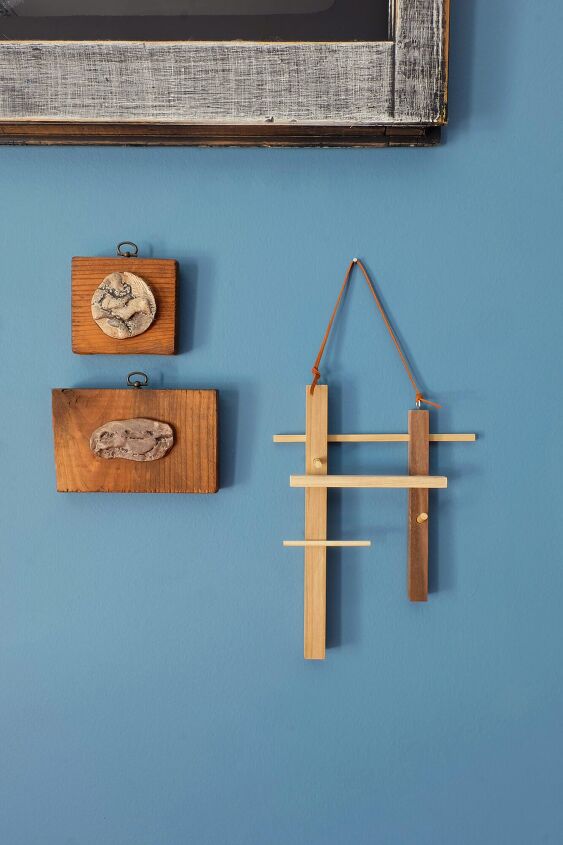
Looks like a sculptural part piece when empty!
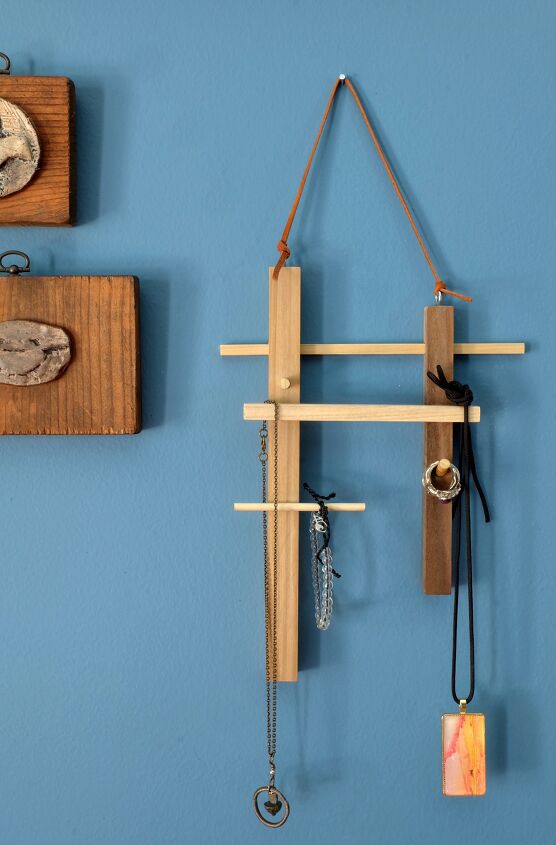
And then with jewelry, it's practical and functional! So easy, right?!
Be sure to click the link below to learn more about this project!
Resources for this project:
See all materials


Comments
Join the conversation
-
CONGRATULATIONS
Very nice & cute project
I love ❤️ it
-
I love it! It’s very elegant and useful. Larry sounds like he’s looking for an argument.


Frequently asked questions
Have a question about this project?
Why is this eclectic?