


DIY Fabric Cornice Box | Add Character to Your Windows for Less
Want to create a designer look for your windows? It will cost you an arm and a leg... or under $45! When I went to a designer window treatment shop to see about custom cornice boxes for my kitchen window and sliding door, they quoted me over $600 for just one! I was not ready to pay that much, so I found a way to DIY my own fabric cornice boxes with that designer touch for so much less… And you can too!
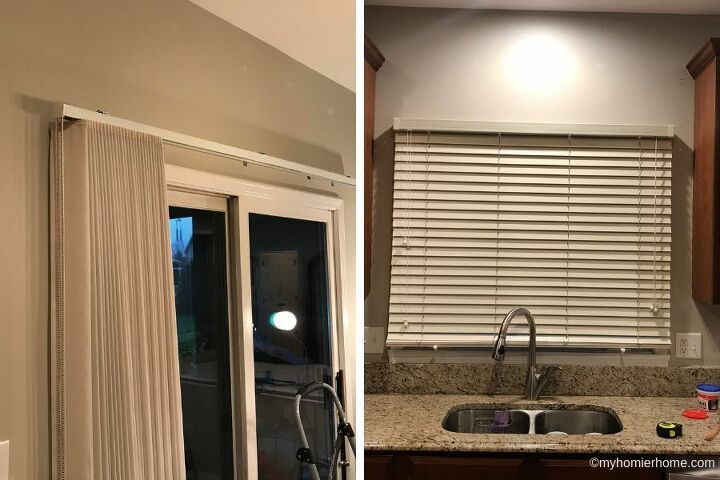
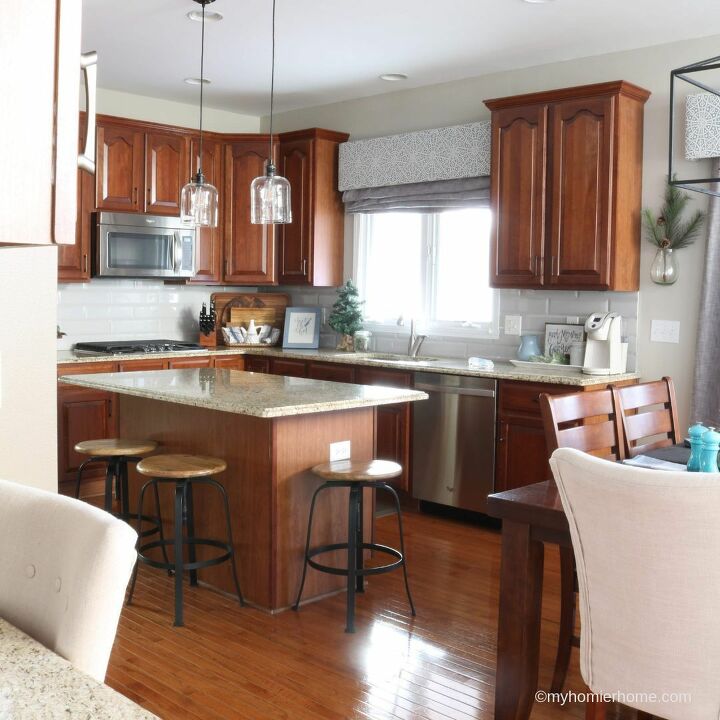
This is what we were working with to start. The bland, plain old blinds. I really wanted to jazz them up and give them so character with a custom, designer-made feel.
Step 1: Measure for your Cornice Box
Before purchasing your materials, you must measure for your cornice box. Always measure at least two to three times before finalizing your numbers. You want to measure the:
- Length (up and down)
- Width (left to right)
- Depth (how far out from the wall)
Step 2: Choose fabric & Purchase it
I ordered my fabric from fabric.com because of there wide selection and ease of ordering, but Joann Fabrics is also a good option if you want to see and feel the fabric in person.
Step 3: Gather and Purchase All Materials
You can get the full list of everything I used at the end of this post along with the full tutorial here, but to start you will need:
- Plywood for:
- 1 Front Piece (fit to your specifications)2 Side Pieces (fit to your specifications)1 Stability Piece (measurement of your front piece minus the width of the side pieces)
- 4 - 2" brackets
- 2 - 2.5" brackets
- Fabric of Choice
- Roll of Batting
- 20 - 1" Screws
- 4 Drywall Screws & Anchors
Step 4: Clear the Area & Spackle/Paint the Holes, if any
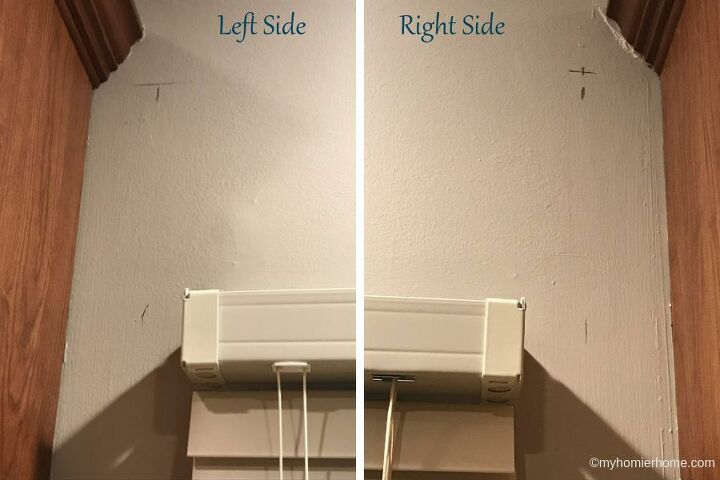
Step 5: Mark your Measurement on the Wall
The goal here is to mark where the side pieces are going to line up both from the ceiling-down and from the center-out to the ends of the box. We measured 13” down from the ceiling and 2” out from the blinds on either side for our boxes.

We started by using a laser level measuring our 13" down from the wall and marked that line on either side with our pencil. To make sure we liked the way the board lined up, my dad held the unfinished front piece of wood up to the wall where it was going to be installed.
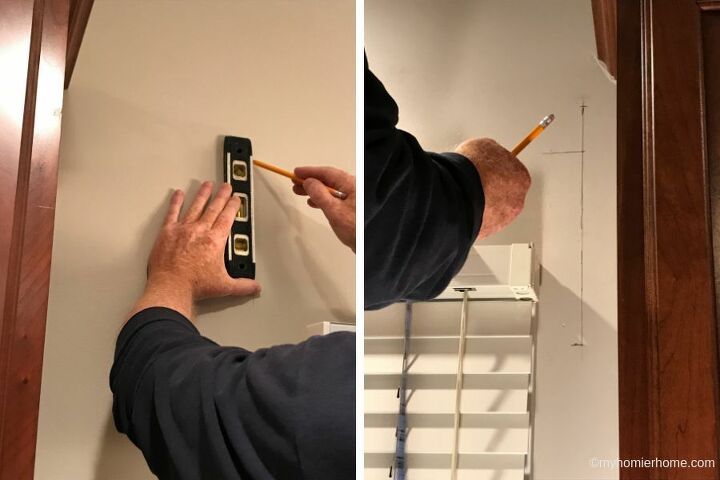
With the laser level still going, we put the front piece down and measured 2” out on either side of the blinds with our handheld level.
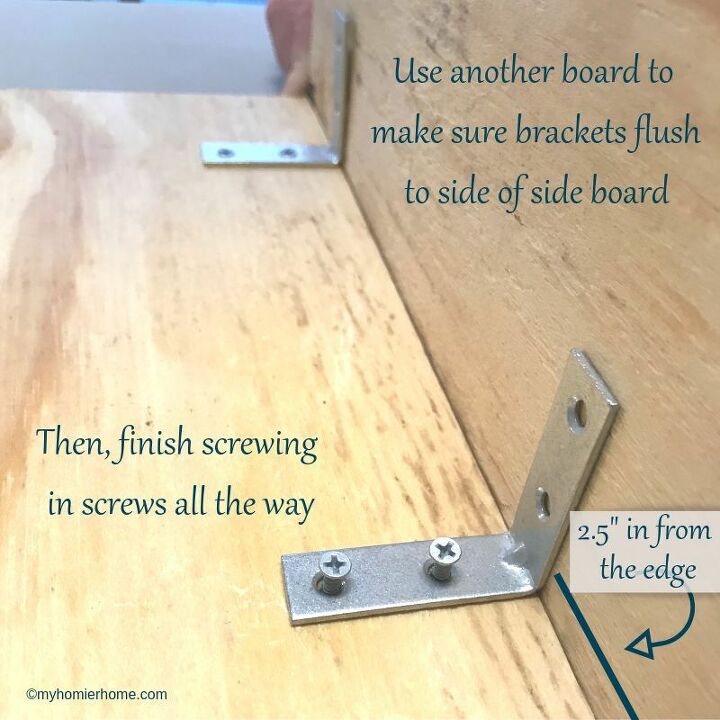
Step 6: Attach Side-to-Front Brackets to the Side Pieces
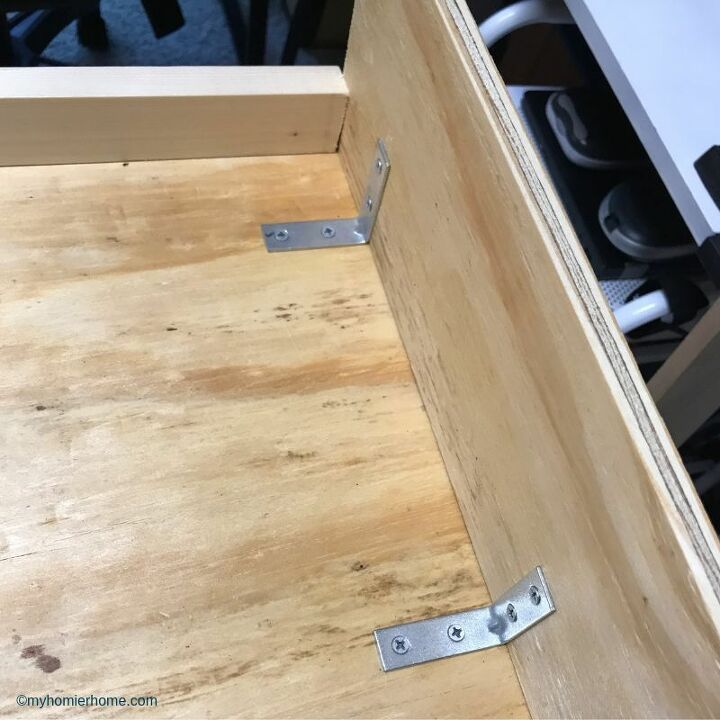
We started by attaching the 2" brackets that are going to connect the side piece to the front piece. Each bracket should go about 2.5” in from each end. Pre-drill holes with a 1/16” bit to make it easier to put the screws in. Repeat this step for the second side piece as well.
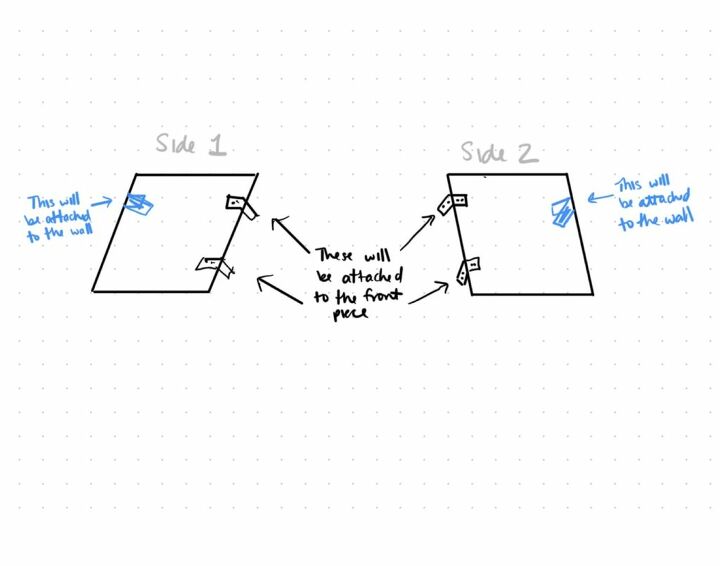
Step 7: Attach Side-to-Wall Brackets to the Side Pieces
Before attaching your side pieces to the front board, you will want to attach your brackets that will mount your cornice box to the wall to the side pieces as well. See diagram above.
Step 8: Attach Side Piece Brackets to Front Piece
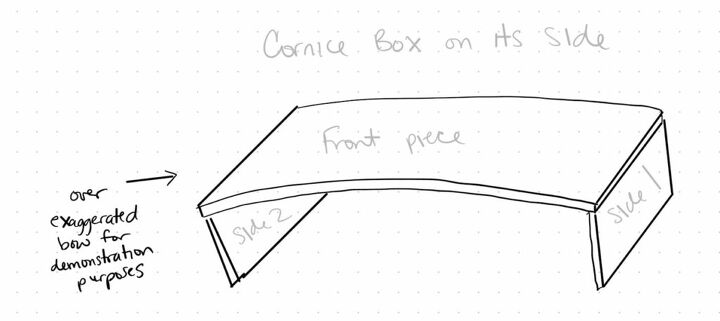
When choosing what side of the front board to make the outward-facing side of the cornice box, you will want to look at the board at eye level. If there is any bow in the wood, make sure the bow is curving in towards the brackets of the side pieces as shown above. This will help the wood to square up when you mount it to the wall.
Once you've determined what side will be the front of the cornice box, attach the two sides by lining them up and pre-drilling the holes with your 1/16" bit. This will be done the same way you attached the brackets to the side pieces.
Step 9: Attach the Stability Piece
The stability piece is going to go at the top of the cornice box (same side where the wall mounting brackets were attached).
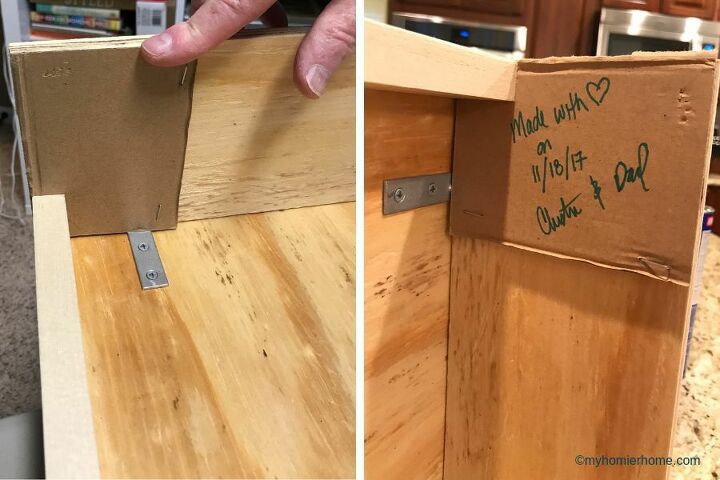
If you had your wood pre-cut at the hardware store, the stability piece should fit pretty snug in between the two side pieces. My measurements were a little bit off, so we did what any DIYer would do and jimmy-rigged-it (see above). It all worked out though because we were able to add my favorite part... the signature!
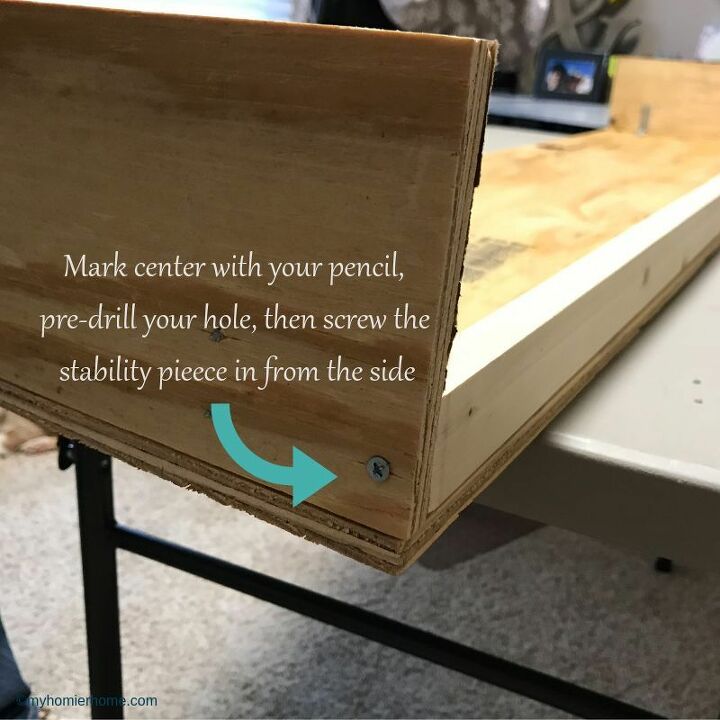
On the outside of the side piece, we measured to mark the center of the stability piece with a pencil. We then predrilled our hole and screwed the ends of the stability piece into the side piece.
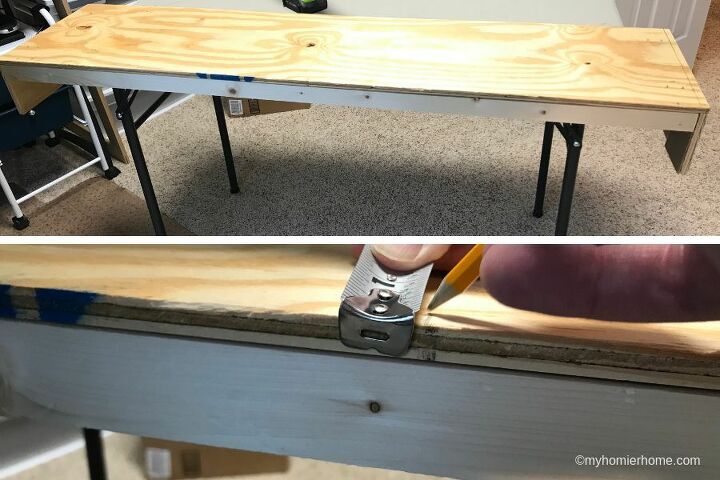
After attaching the ends of the stability piece, we turned the cornice box over and let it lay flat with the sides hanging off. Mark and predrill 3 evenly-spaced holes from the front piece to the stability piece.
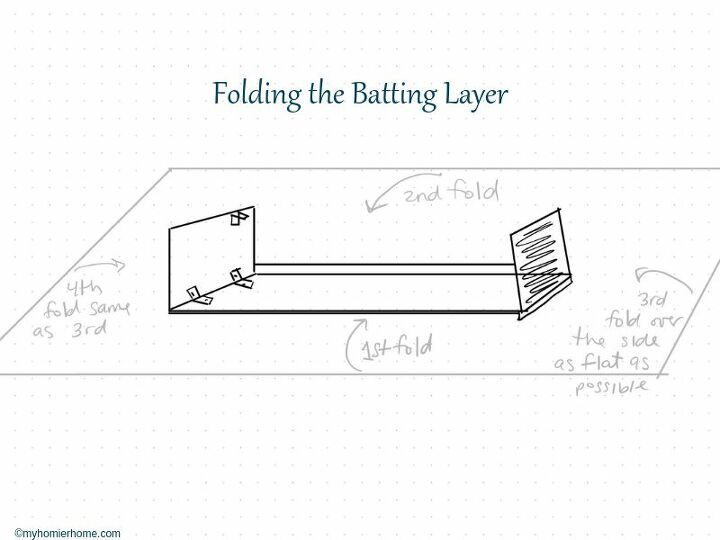
Step 10: Staple the Batting on All Sides
When adding the batting layer, I found it easier to do this on the floor. I laid the batting down first and then put the front face of the cornice box on top of the batting spaced evenly. I folded the batting up like a present (see diagram above) and stapled every 5" keeping the staples on the interior of the cornice box.

Step 11: Iron your Fabric
Step 12: Staple Fabric to Cornice Box
Once the batting is attached and your fabric is ironed, you will follow the same protocol for attaching the fabric as you did for the batting. Make sure the pattern is straight and evenly spaced both vertically and horizontally.
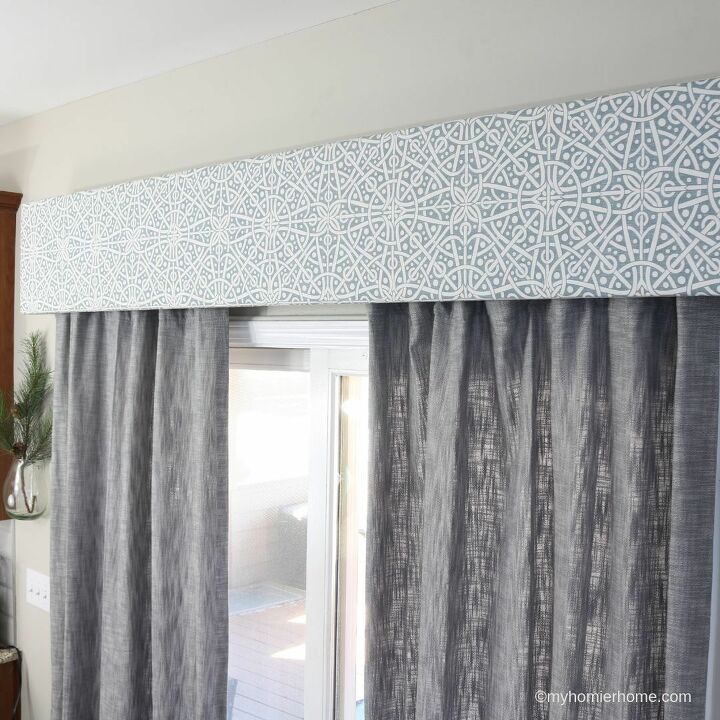
Step 13: Hang Your Cornice Box
Step 14: Revel in the Beauty!
Check out the full tutorial on the blog at https://www.myhomierhome.com/diy-cornice-box/ complete with a printable version of these steps including all my tips for each step.
For less than $90, I completed two fabric cornice boxes with a designer, custom look saving myself over $1300. What do you think?
Resources for this project:
See all materials


Comments
Join the conversation
-
You van do the same thing with foam board
-
I did mine with pink foam insulation sheets. Put them together with adhesive caulk and straight pins. They were very sturdy!!


Frequently asked questions
Have a question about this project?
Did you change the counter tops as well?
did you also change the counter tops?
Did I miss HOW you actually hung the cornice boards?