


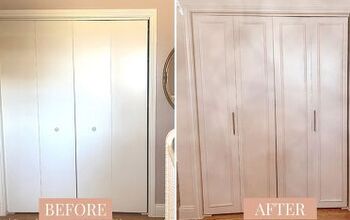
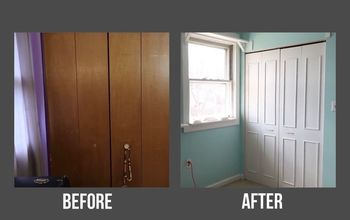
Super Cheap Closet Doors - DIY
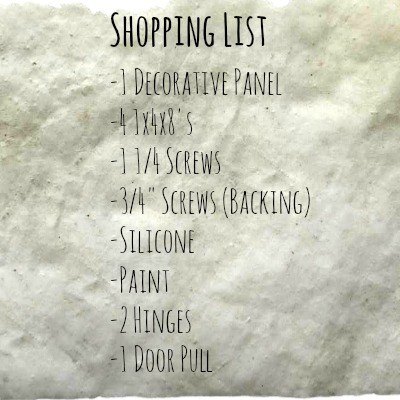
8 Materials
$42
3 Hours
Easy
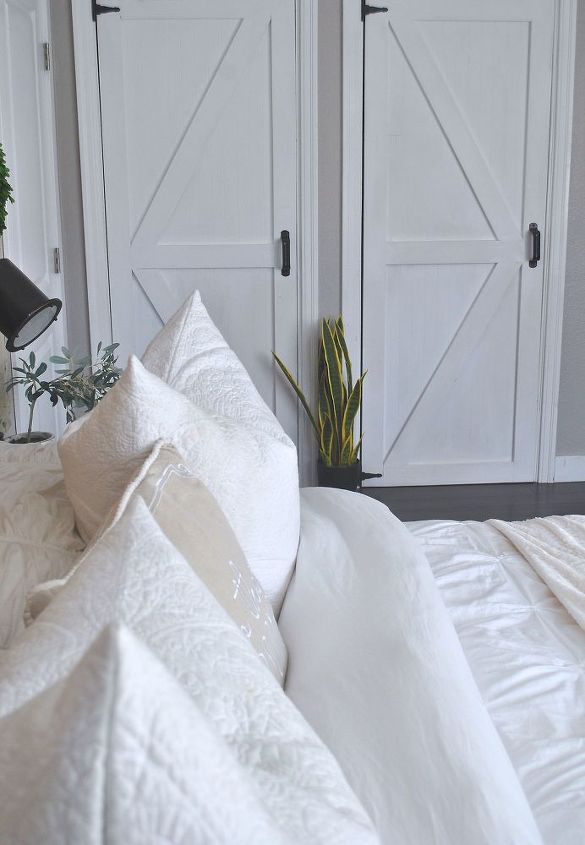
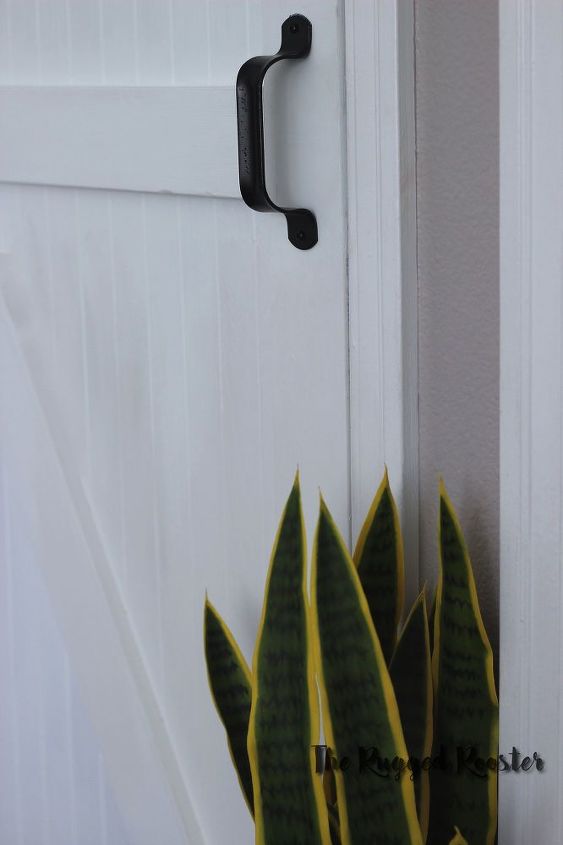
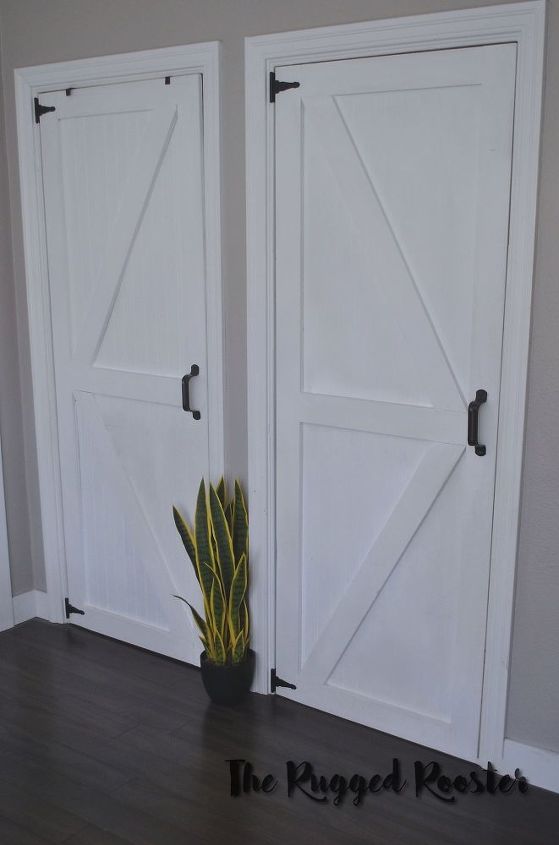
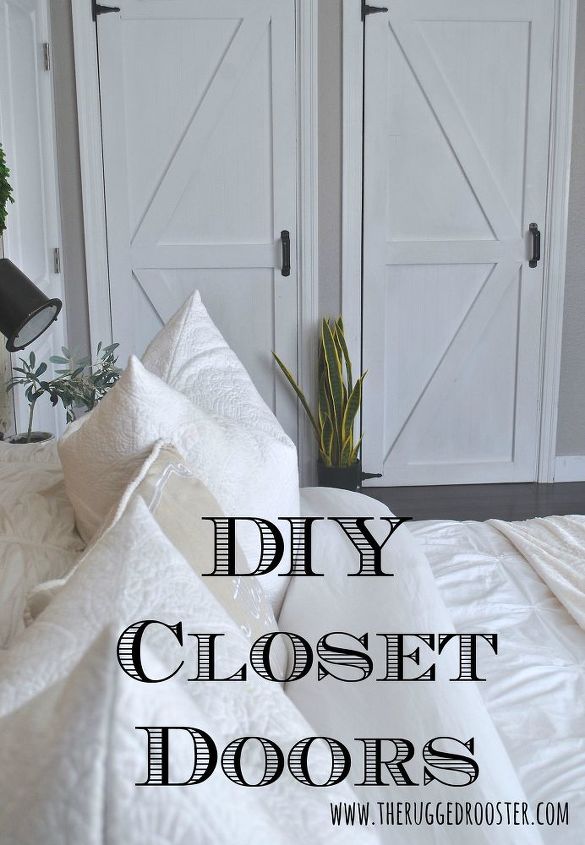
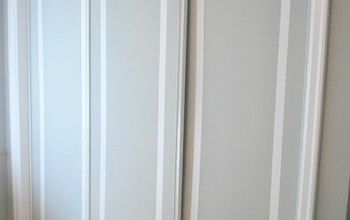
When we first moved into our cute little farmhouse all three rooms had no closet doors. I'm one of those girls that likes to keep my home really really clean. But in the occasion that I need to get some quick cleaning done, I toss my "I-don't-know-what-to-do-with-you-pile" into the closet. We didn't have closet doors, so you can see how this was a NEED TO DO project. I love the look of painted white paneling and I wanted to incorporate something a bit more sleek into our bedrooms. If you don't know what we do for a living, head on over here to have a quick read. Our home is very rustic.
After reading a tutorial on applying painted paneling to your kitchen for backsplash (which we didn't do ). The light bulbs went off in my head. I mean, I got super excited because in my head, it seemed so easy. Let me lay one thing out right now, some of my ideas are great and some, not so much. Glen is my go getter. I can build things on my own.. but down the road he ends up usually fixing my projects or completely re-doing them. So you can see how I try to sweet talk my way into just "letting" him do the project. He's the best husband ever. I just had to point that out really quick.
Are you ready to build the fastest & prettiest closet doors? We took lots of photos for this Easy DIY because we want you all to have the joy of owning your own!
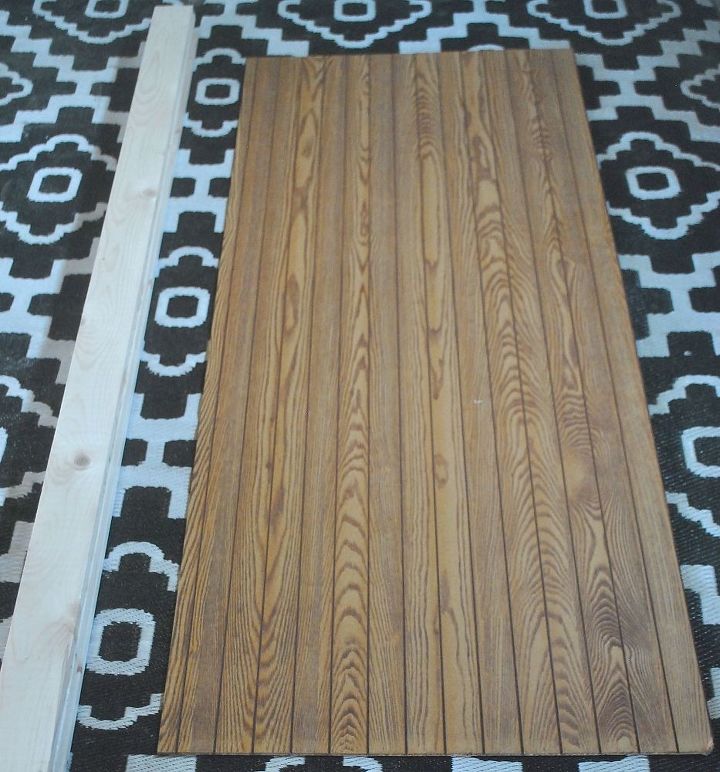
Alright, so you have your laminated decorative panel. I know, it's pretty awesome looking. Don't worry though - paint makes everything beautiful! You also have your four 14's. We cut all of our own wood/pieces as we have the tools. But you can also get the hardware store to do the cuts for you. I can't give you dimensions though as each closet door is different. But here are the dimensions of our doorways: 76 3/4 x 29

So lets head on back down to the shop & start the first step: screwing the frame together.
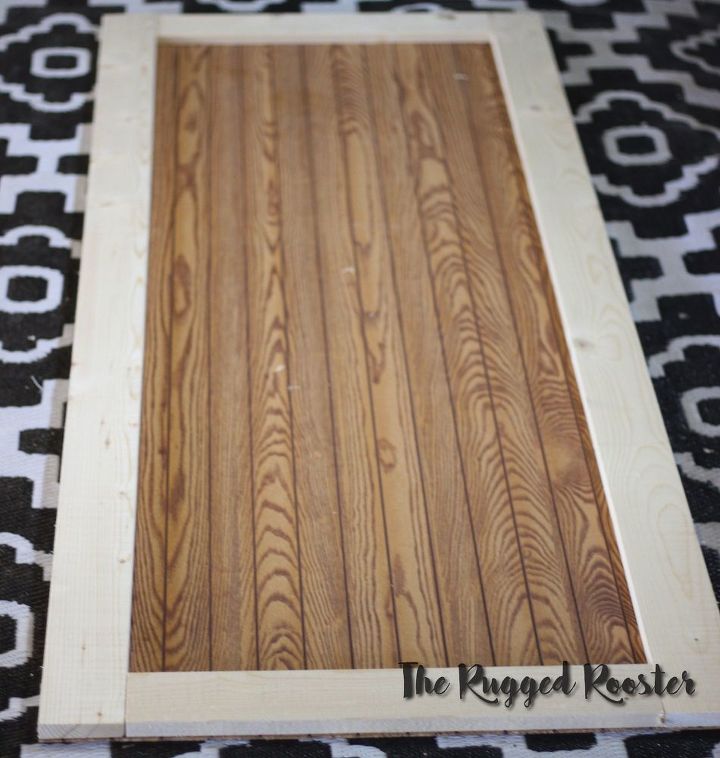
Now that your cuts are made for the frame, go ahead and make your pocket holes & screw together. We put two screws per connection. This is the back side of our frame so once it's completed it will get flipped over on the decorative panel board.
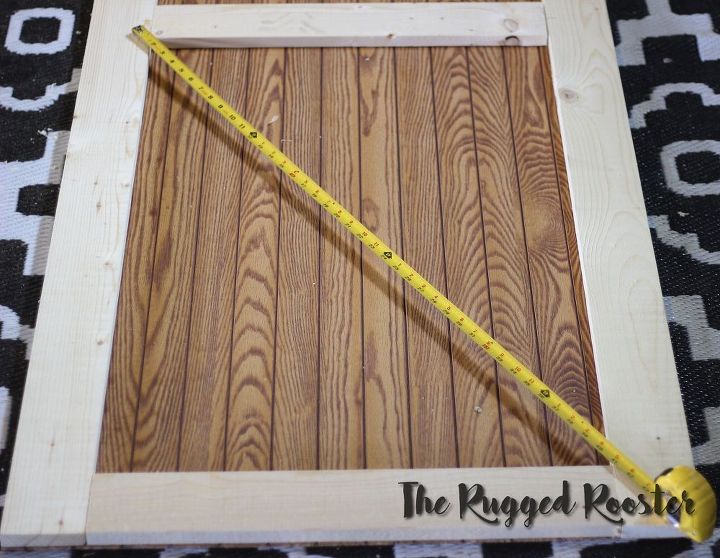
Next step you want to be sure to check that your frame is square. We continually do this throughout all our projects. It's never fun to put time and energy into a piece and have it not square. Remember the cuts you made for the bottom and top? Make one more for the middle. Measure the width from the bottom board to the top and put it right in the middle. Make your pocket holes & screw into place.
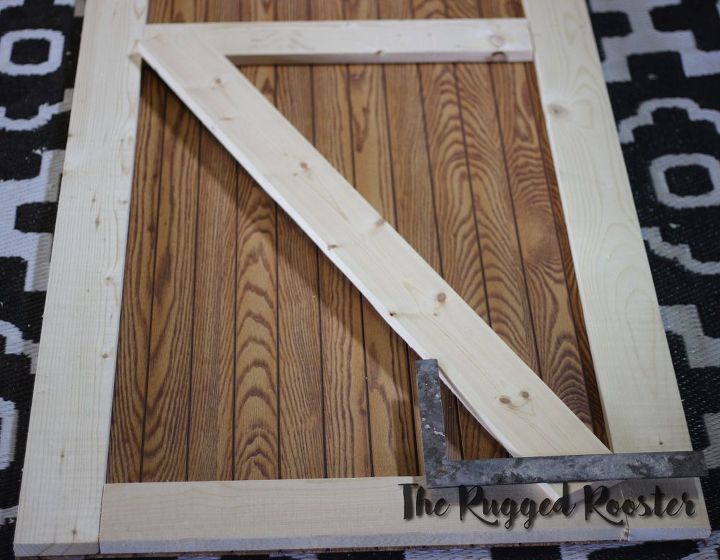
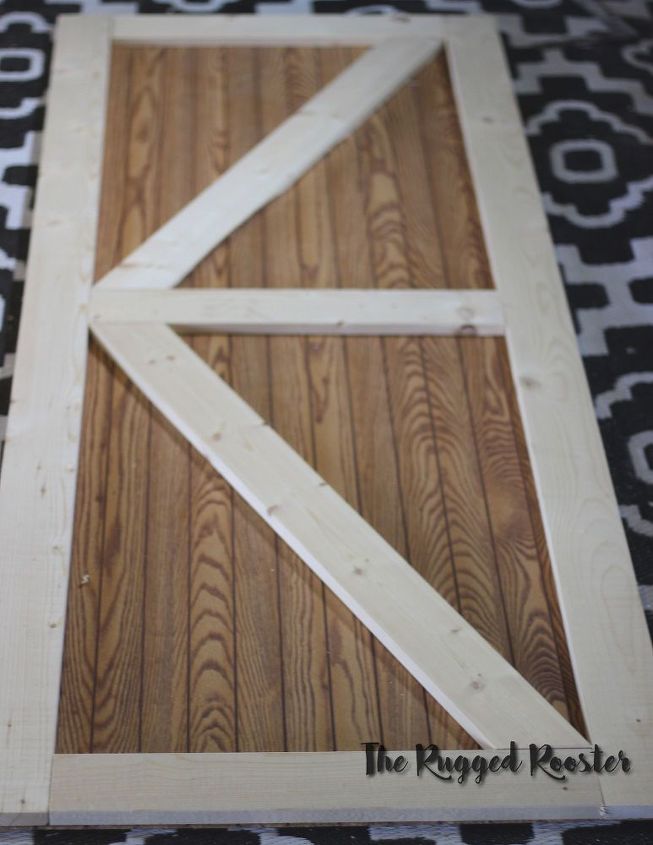
Now we can make our slashes! Measure the distance from point to point. Glen has a little trick he likes to do for angle cuts like this. It makes it super easy
Now make sure you have your frame ( screw holes facing you ) and take your piece of laminate and put it panels facing down on your frame.

Thanks for coming back to our blog to read! I would love to hear your thoughts on this project. Is there anything we can change? Did you love it? Did you hate it?


Any price and availability information displayed on [relevant Amazon Site(s), as applicable] at the time of purchase will apply to the purchase of this product.
Hometalk may collect a small share of sales from the links on this page.More info

Want more details about this and other DIY projects? Check out my blog post!
Comments
Join the conversation
2 of 187 comments
-
Thank you for posting this. I think they look great. Back in the 80s we had an extension and no money left over to rebuild the kitchen. I used old carcasses but made all the cabinet doors myself from tongue and groove wood made into panels then framed with soft wood. 18 of the little beggers. My husband, bless him, moaned about them until in 2003 we bought a new kitchen. They looked very similar to your doors and I was proud of my handywork. Shame he's not around any more so I could show him. Thanks anyway.
-
I’ve never commented before but feel compelled to....what a fabulous and cheap project. I shall definitely do this on my wardrobe doors.
love the cutting top tip btw


Frequently asked questions
Have a question about this project?
I have designed the same doors for my closets but plan to double them (back to back) so they'll be a normal thickness. Are they very heavy?
I’m not clear - did you attach these to the old doors, or just hang the thin door that you made? They do look nice!
Once it’s all put together, what is the thickness of the door? We are thinking of building these as sliding doors for our closet but need to know if they will fit in the tracking as it’s usually 1 inch thick