


DIY Floating Desk With Folding Brackets
Here's how I made an easy DIY floating desk using oak planks, joined with biscuits and wall-mounted in our narrowboat gunnels with folding brackets. I'll also talk about alternative tools you can use.
You can . Then follow my step by step video here on how I made and fitted it.
For months, I've been scouring the internet (and Pinterest) for narrowboat desk ideas. And boat office set-ups to allow us to work from the boat as and when we travel along the canal.
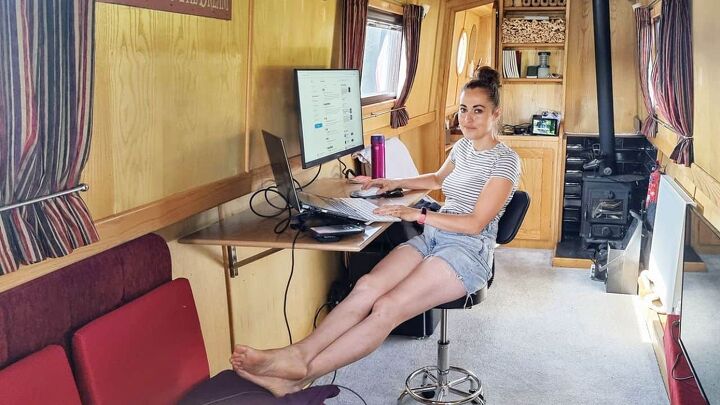
Both my husband and I work from home, so we needed two desk spaces. However, I'm quite happy using the dinette table as I'll often need to do narrowboat DIY projects. Just like this one, funnily enough!
So, I'm going to show you what I came up with. A space-saving desk fitted under the gunnels, that can be used folded away when not in use. And, it can be as easy, or as complicated as you wish!
Note that if you like the idea of a folding desk, yes, you can buy an IKEA Norberg. However at 74 x 60mm, it's way too small for my husband and me, who usually use two monitors.
Also, sourcing solid oak planks at £5 to match with the rest of the boat's carpentry as opposed to particle board or cheaper birch, was a no brainer. And, I put love and soul into something that will last.
Please note, that as an Amazon Associate, I earn from qualifying purchases made through links.
- Folding brackets
- Stud finder (if fitting in a narrowboat or stud wall)
- Biscuit joiner*
- Biscuits (size 20)*
- Wood glue
- Hand saw
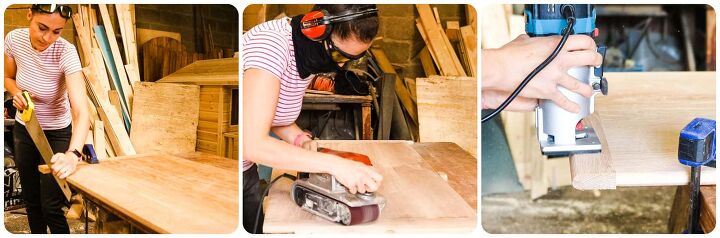
- Palm router
- Router bit
- Clamps
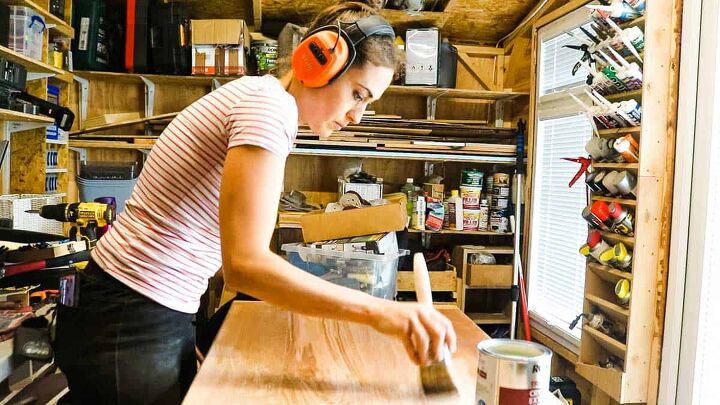
- Bluetooth ear defenders
- Goggles
- Safety boots
- Makita belt sander
- Ronseal exterior wood varnish
- Synthetic paint brush
If you don't have a biscuit joiner, then I recommend looking at dowel jigs for a cheaper option.
Or, an even easier solution, is to look for a sheet of wood that doesn't require joining planks or boards together!
You can for this DIY wall-mounted desk. Please note, these plans should be treated as a guide, with each narrowboat or desk requirement being completely different.
I designed this for a laptop and a spare monitor. But it's also perfect as a pull-down dinette table if needed.
Also, if you made it much shorter in width, you may only need to attach it to a wall with one folding bracket!
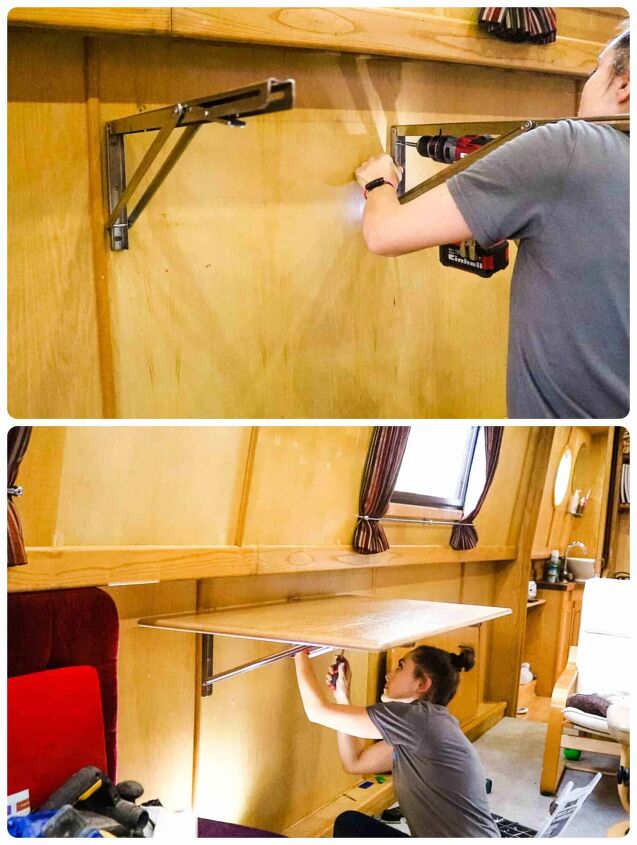
My biggest tip right from the start is to mount your folding brackets to your narrowboat batons first and design your desk top around it. (You can scroll down the page on how I did this).
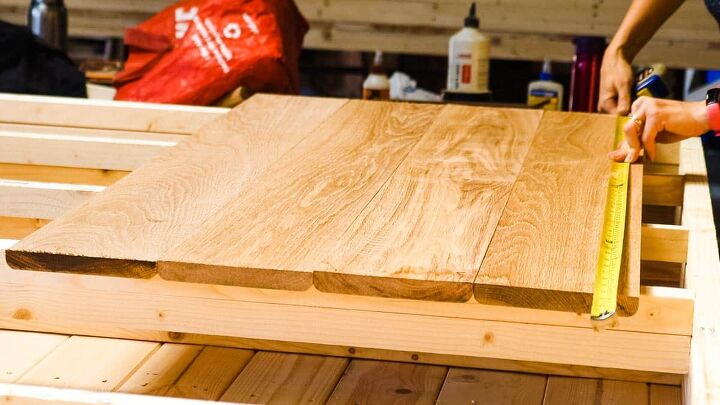
So, after getting an idea of how big I wanted the desk to be, above, I've temporarily placed four planks of oak together to work out my side trim pieces.
*If the planks were long enough, I wouldn't have needed side trims.
For cheaper wooden desk materials, you could:
- Repurpose an old dining table from a charity shop and remove the legs
- Use pallet wood
- Source a large sheet of material and cut down to size to skip the need to biscuit join
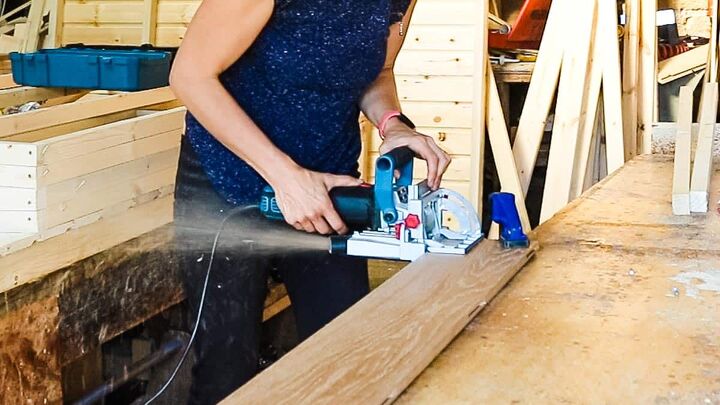
I really love my biscuit joiner. It's the closest I feel to being a proper carpenter, yet a fraction of the cost compared to the Festool Domino. One day, I'll buy one, I'm sure.
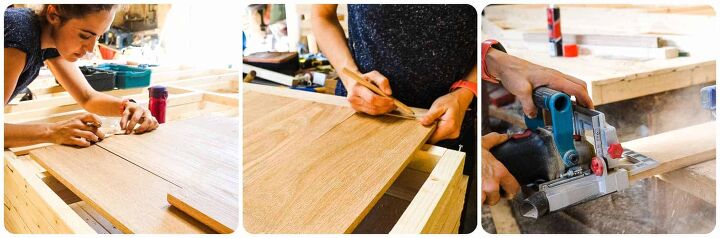
The idea is to line up the wood you want to join and make matching pencil marks. And it's these marks where you need to cut biscuit holes. I recommend reading my DIY radiator cover where I get to know it for the first time.
I then made cuts for size 20 biscuits. The smaller the biscuit number, the smaller the biscuit.
As mentioned earlier, you could use a
- Dowel jig
- Glue and clamp with some batons underneath for support
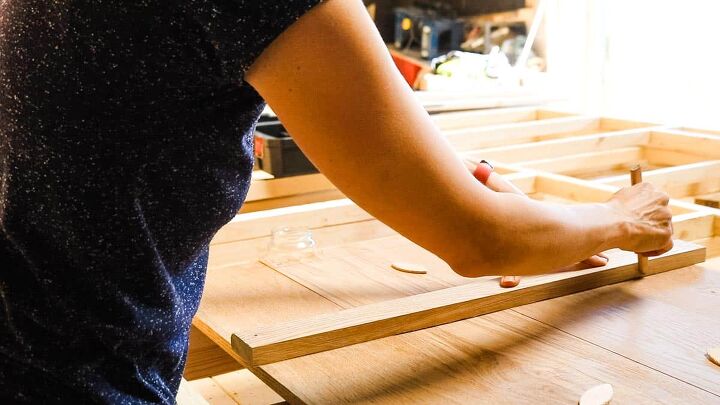
Once I'd cut biscuit holes in the longest edges, I then temporarily pushed them all together to plan where my end ones went.
I spaced out two per end to avoid biscuits clashing and not slotting on properly. Then offered up my two end pieces and transferred my pencil marks to that before my final biscuit cuts.
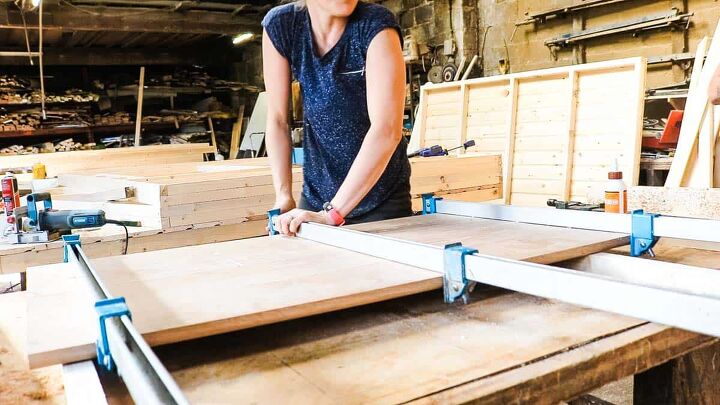
With me needing to glue and clamp my oak desk in different directions, I had to do this in sections.
You'll need to fill each slot with wood glue. Then ensure all sides are covered in glue too. 7 Then add biscuits in the slots and push together before lining up and clamping.
But ensure you do this while it's on a flat surface and that the clamps are all touching the tops to avoid it pushing up and bending. Then leave overnight to full cure. Note, Titebond has a quicker curing time, but it's more expensive.
The next morning, I removed the clamps and belt sanded the sides to smooth out any protrusions.
Then repeated the gluing and biscuiting the side trims. The only down side to this part is that I needed to hunt around for even longer sash clamps!
Alternatively, you could nail locator blocks to your workbench and hammer in wedges to tighten. Again, I left overnight to fully set.
Once all of the clamps were removed, I now needed to work on the finishing detail.
- I hand sawed the excess side trim's length. This was done last to ensure it was cut to the right depth.
- Belt sanded glue off with low grit sandpaper. This is done on an angle to avoid any unwanted dips. Then work your way up to a high grit, such as 240.
- Used a curved router bit to match the rest of the profile. But really, you can use whatever you want, or even sand paper.
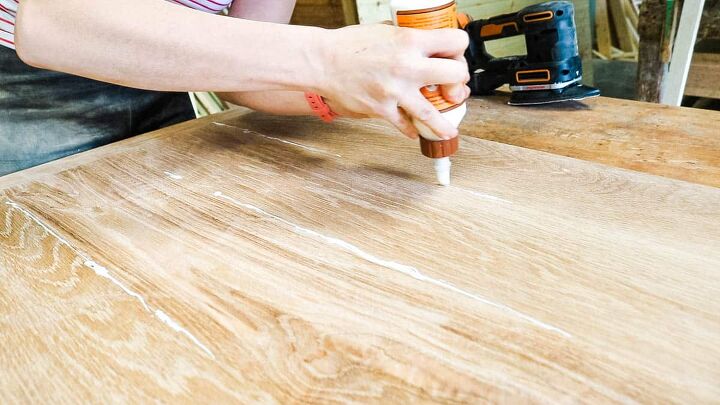
If you're left with any visible joins, then here's a simple trick you can do.
- Run over the joins with wood glue
- Work into them using the flat edge of a chisel
- Go over with a belt while still wet and the sand with blend in
- Leave to dry
Neat, hey?
The trouble is, there are SO many products out there you can use to finish your folding desk. But many recommended a varnish as it's a table, to prevent staining.
Others recommended a wax oil, such as Osmo. Some boaters would recommend Yacht varnish, but I've read about it yellowing.
I decided to go for a Ronseal's Trade Crystal Clear Exterior Satin Varnish, which is water-based. And the main reason is that narrowboats get condensation. And it'll be more likely, in my opinion, as we don't live on it and don't have the heating on constantly in the Winter.
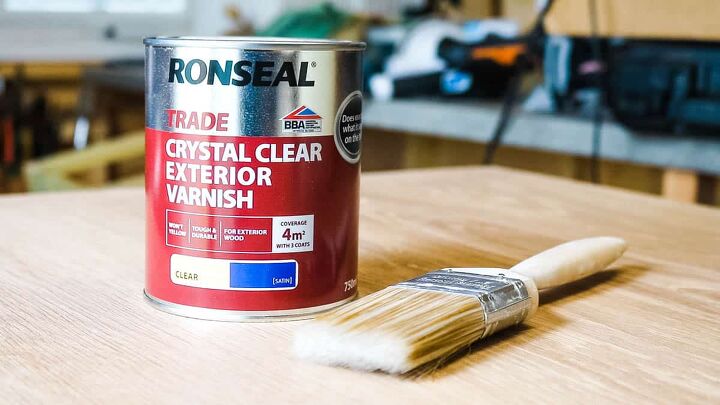
- Give everywhere a final sand with 240 grit
- Hoover or blow off any dust. My shop vac helped
- Apply along the grain with a synthetic brush
- Leave to dry for 6 hours
- Gently sand with 240 grit between coats
- Repeated until it had 4 coats and left overnight to set properly
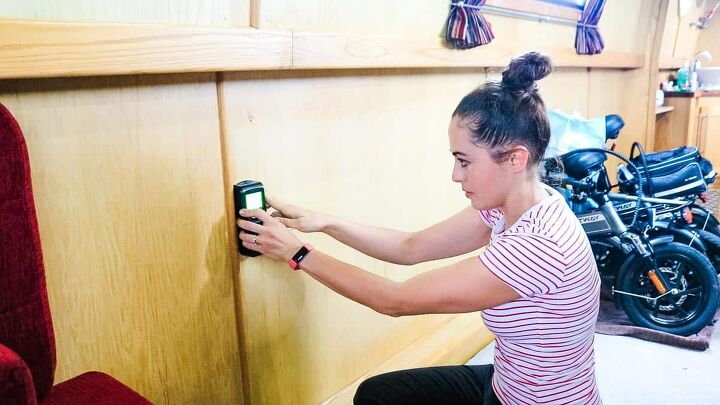
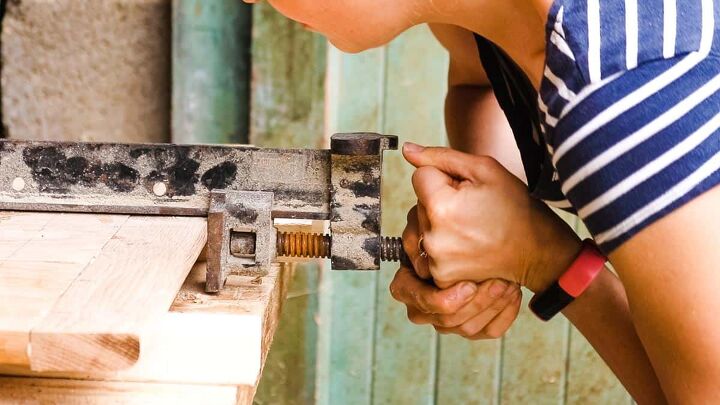
If you're attached your desk brackets to a narrowboat, you'll probably know that spirit levels are useless.
Instead, to set the depth, I used an offcut with a pencil mark of the height I wanted my desk to be and pushed it to the top of the gunnels. Then moved it to where the other stud (baton) was and transferred the same mark.
I offered up my bracket and drew where the screw holes were before pilot holing and screwing on the wall.
I needed to know this very question. A tell tale sign in my boat was where the sink's water waste pipe went out as there's a hole under the kitchen and bathroom wall.
I recommend you poking something through to check the depth. Mine worked out 3 inches. Also, if you hit thick steel with a screw, you'll probably break the screw before you even get through the hull. But don't go mad, obviously.
The ply lining here for mine was only about 6mm, so I opted for around 40-50mm wood screws. Although, in an ideal world, you'd be best using stainless steel.
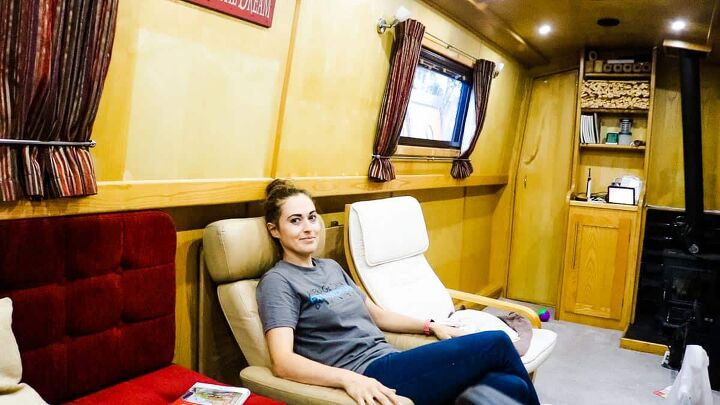
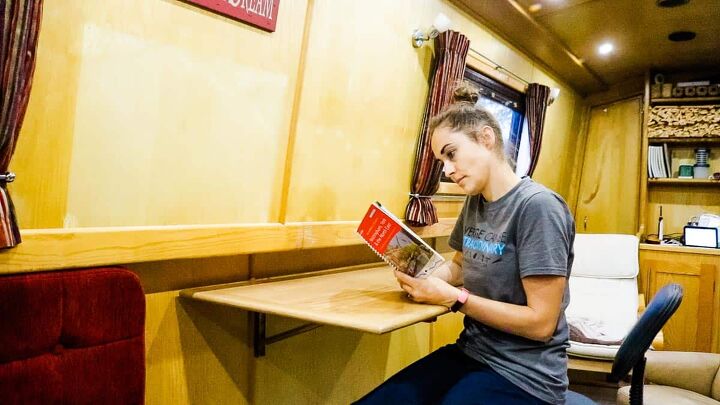
The beauty about where the table is positioned in the boat (in the gunnels), is that doesn't take up any more space when down.
Our two armchairs are still be pushed against the narrowboat wall like before.
The only thing I need now is the perfect office chairs that also have a saloon feel. But, you can't have everything in a day! I've got my eye on the Stressless Ekornes ones, which is the same brand as this camel coloured armchair I'm sitting in.
But I'll keep my eye on eBay as they're an eyewatering £2k each! Very different to the £40 I paid at a charity shop for mine!
In total, I spent around £60 to make this solid oak wall mounted desk, which includes the brackets.
Oak is usually much more expensive. Especially now there's a wood shortage and prices have increased, but these were offcuts.
However, remember, a biscuit joiner can be usual to join many planks of wood. Or try to repurpose an old charity shop table.
-
Folding brackets -
Biscuits (size 20)* -
Wood glue -
Ronseal exterior wood varnish (water based)
-
Stud finder (if fitting in a narrowboat or stud wall) -
Biscuit joiner* -
Hand saw -
Palm router -
Router bit -
Clamps -
Bluetooth ear defenders -
Goggles -
Safety boots -
Makita belt sander -
Synthetic paint brush
- Cut the oak planks as per cutting list or to your desired size.
- Line all of them up and draw lines, approx every 20cm and cross ways for matching biscuit join marks.
- Create size 20 biscuit slots with a biscuit joiner.
- Glue and fill the biscuit slots, again with size 20 biscuits and clamp before leaving overnight.
- Remove clamps and line up a side trim on each side and mark for biscuit joins before cutting, gluing, biscuiting and clamping again and leave overnight.
- Using a belt sander on a low grit, remove all of the wood glue and work your way up to a higher grit. See Note 1.
- Use a router to create your desired profile on the edges.
- Position your folding brackets where your batons/studs are and mark the screw holes before predrilling. See Note 2.
- Place your desk table top on top of the brackets and hand screw from underneath. See Note 3.
When belt sanding, work on an angle while sanding with the grain to avoid unwanted dips.
Note 2Brick walls will require rawl plugs and screws.
Note 3
When fitting a desk top in a narrowboat, the gunnel wall sections are likely to be tapered, which will require packers or shims. I eyeballed what was level and wedged with stacks of washers before screwing. *Spirit levels don't work on a boat!

Comments
Join the conversation
-
I don't have a boat, but I am definitely looking for spaces to put this in my home. Great job!


Frequently asked questions
Have a question about this project?