


DIY Pallet Tiki Bar
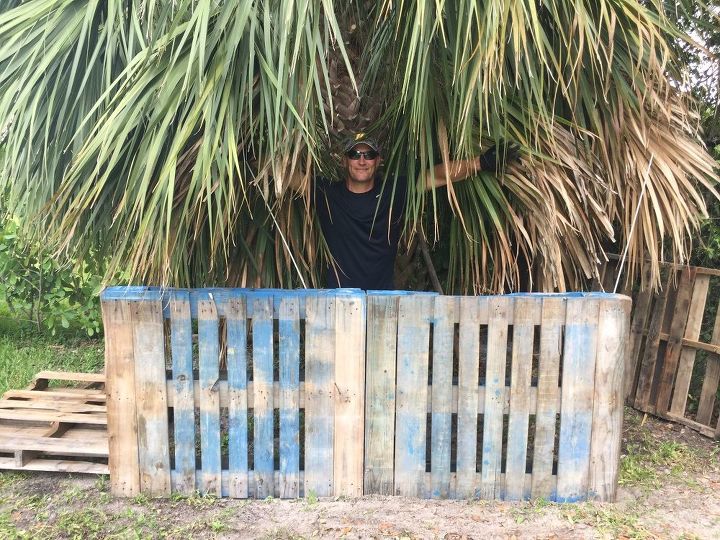
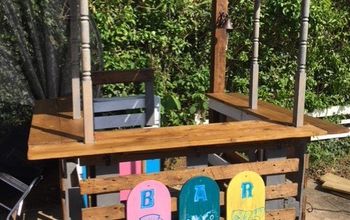
We’ve been talking about building a pallet tiki bar for a LONG time. We had this perfect empty spot in our back yard under a palm tree that was just screaming for a bar! My husband dubbed it the TreeKee bar instead of the Tiki Bar since we planned to use the tree as part of the actual bar. Confused? Don’t be. Keep reading to find out how we did it.
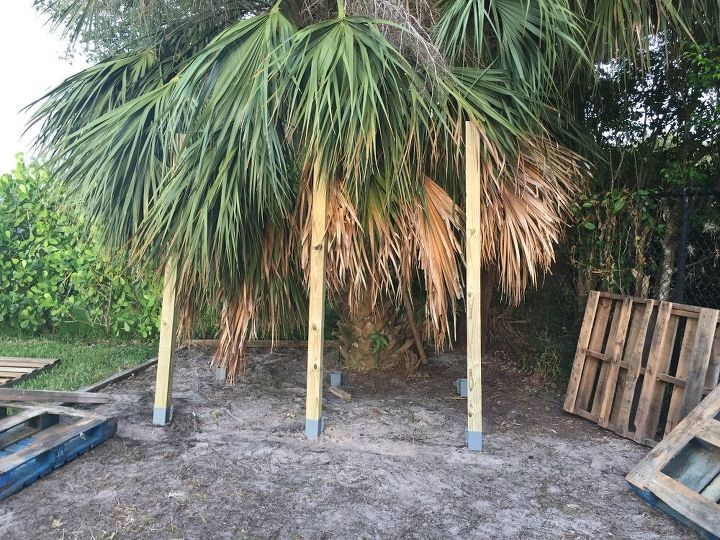
Step 1 – Measure and map out the area…
We played around with a layout and decided we were going to use 2 pallets in the front to make the actual bar area. Each pallet is 4 ft wide which would make it 8 ft across. We felt this would comfortably seat 4 bar stools. We knew we'd need at least 6 posts to hold up the pallets and the roof. As for the roof we planned to put one on, but the tree branches would remain on the roof as part of the ‘tiki look’.
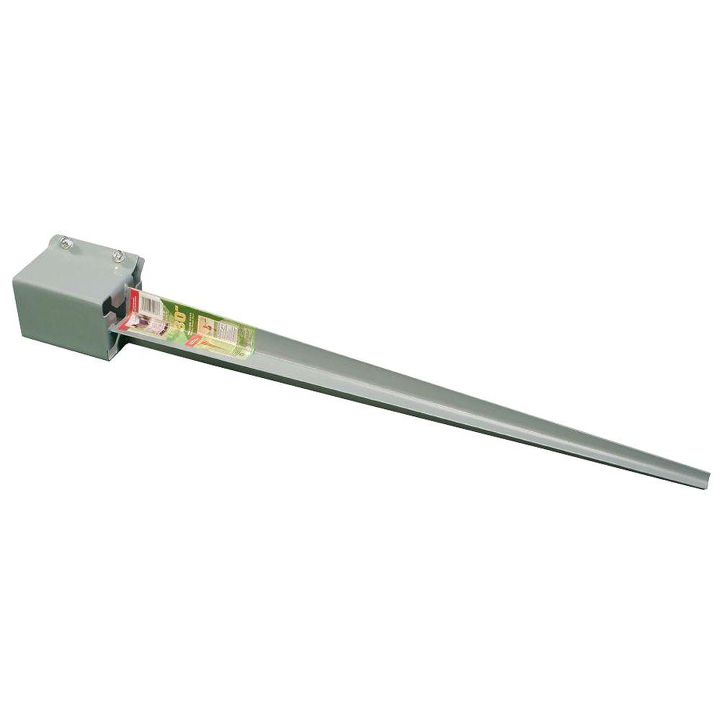
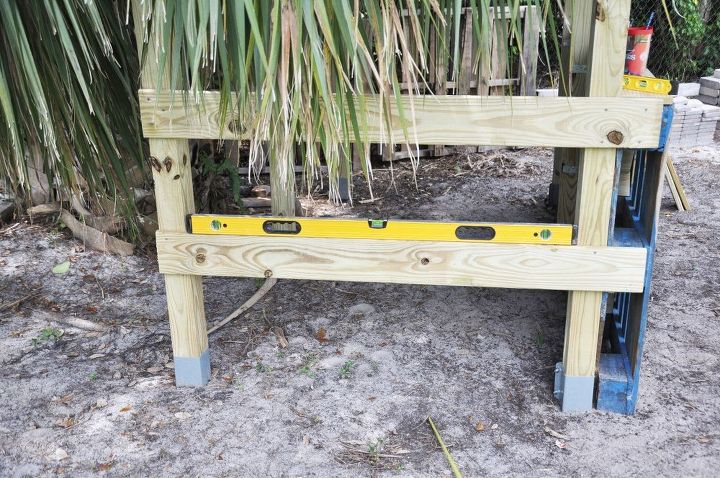
Step 2 – Purchase posts for the base…
We used 6, 4 in. x 8 ft. foot posts and these to hold up the posts. These things are awesome and rather than digging a hole you just stick them in the ground and then put your post into them and tighten up the bolts.
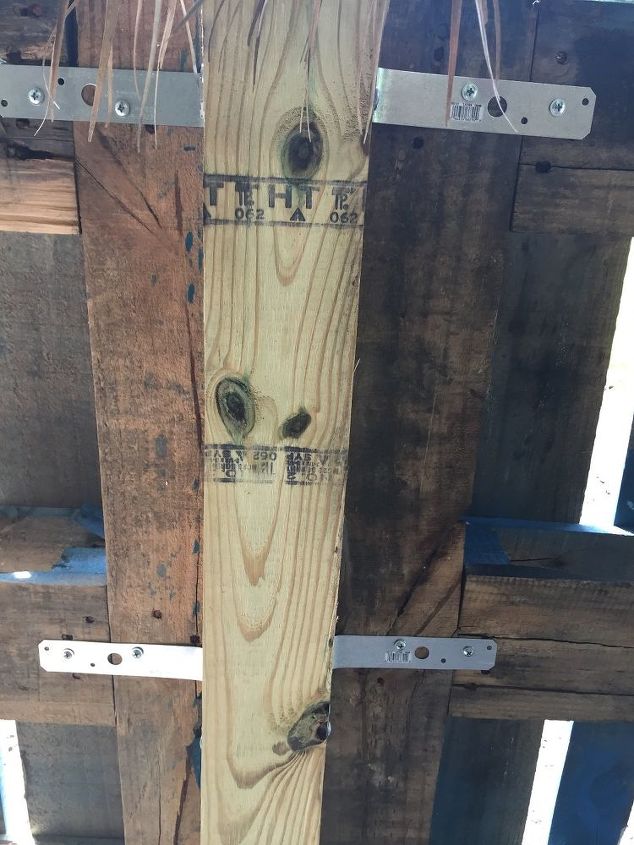
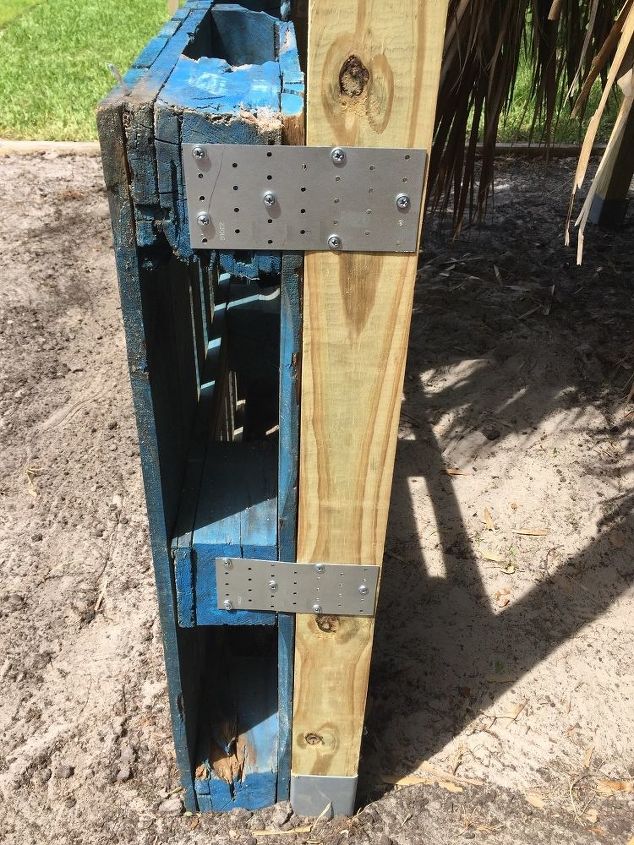
Step 3 – Secure pallets to the beams…
To secure the pallets to the beams we used these corner brackets and .
Step 4 - Sides...
We added a 2 in. x 8 ft. board to the top of the pallets to make it secure and all one level. We added a bar top later (see Step 7). We were going to use the 2 other pallets we had as sides but my husband thought that they'd be good homes for critters and wanted to keep it more open. So we opted to add sides as shown below using 1 in. x 6 in. x 8 ft pressure treated wood that we cut down to 1 x 6 x 4's.
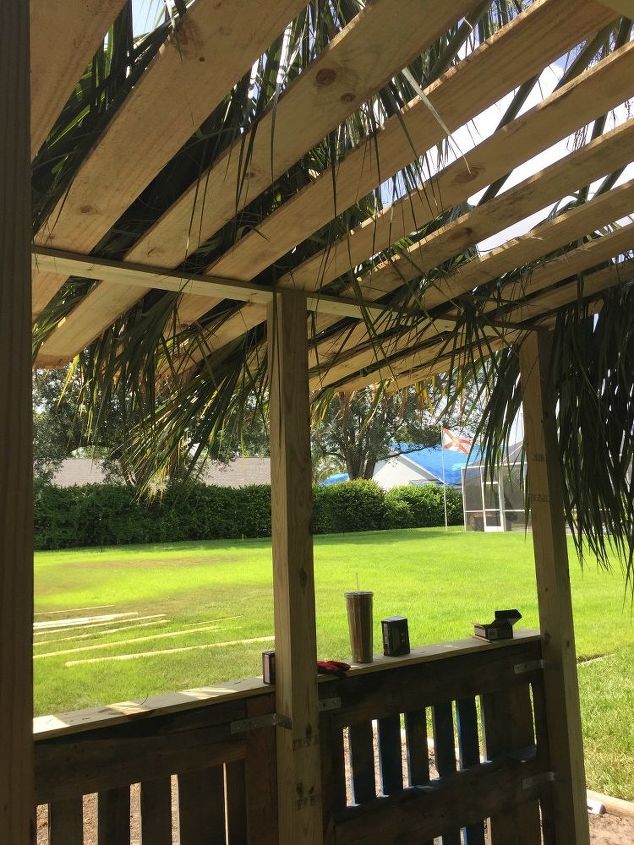
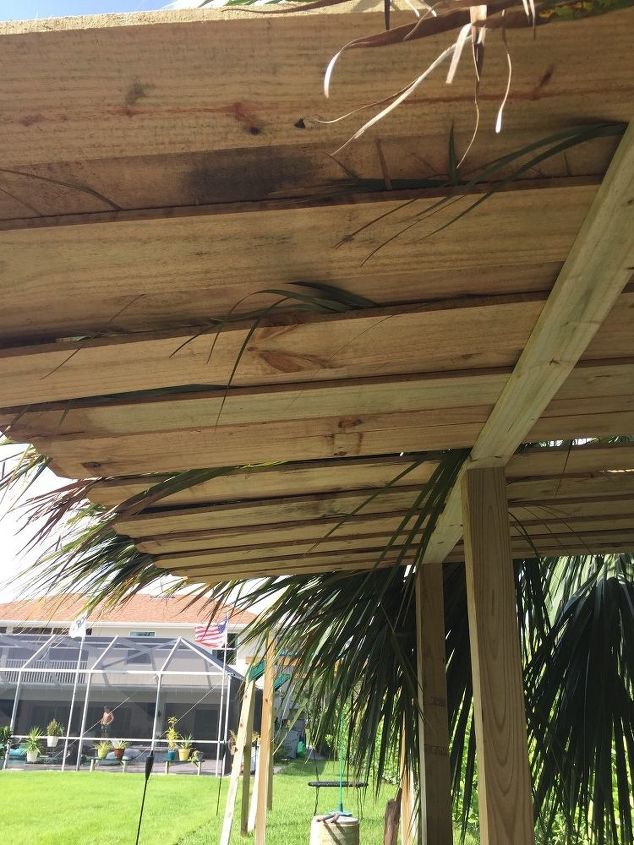
Step 5 – The roof…
For the roof we used 1 in. x 6 in. x 8 ft. Pressure-Treated Pine Dog-Ear Fence Pickets! But first we added a 2 in. x 8 ft. board across the top of the beams so we’d have something to screw the fence pickets into. And don’t worry we made sure to get all the leaves from the tree out of the way, but a majority of the branches remain on the top of the roof. We like it that way. We placed the pickets 4 inches apart and then placed another picket on top of those for a layered look.
Step 6 – Paint…
I contemplated not painting the pallets because I was sort of liking the rustic look, but then changed my mind and went for it and I’m happy I did. We added a shelf to the back part of the bar too, to hold drinks and bottles. I used the color Tropical Lagoon.

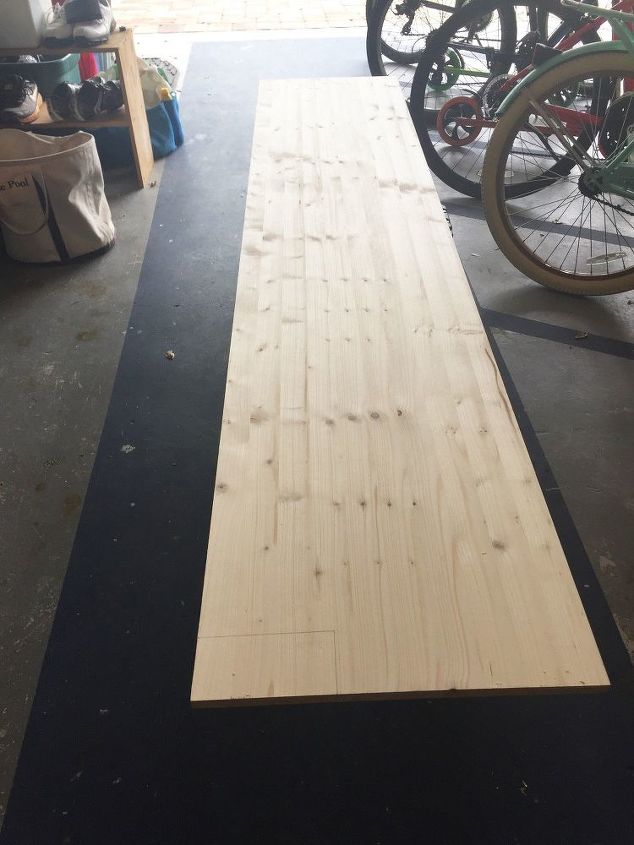
Step 7 – Bar top…
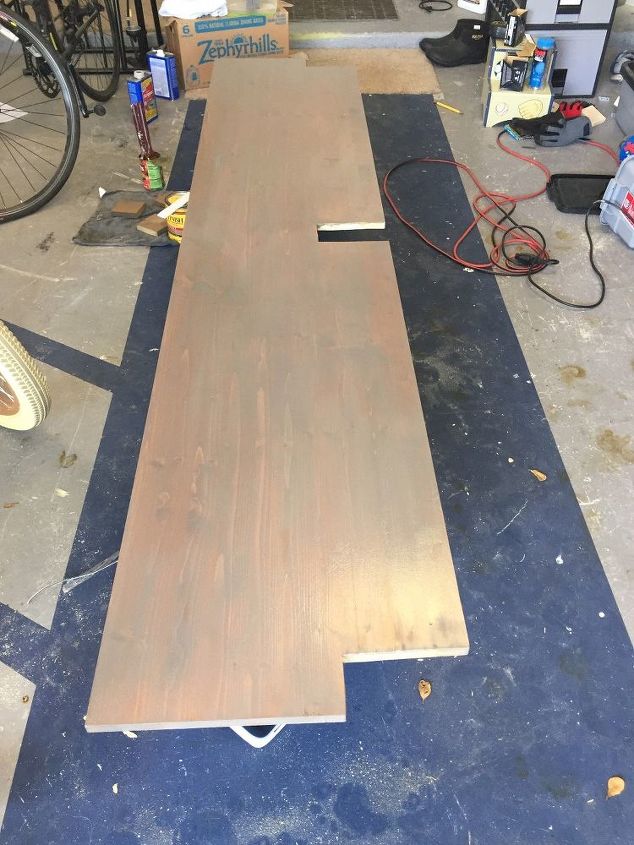
We were searching for a fun looking bar top that wouldn’t be to expensive, like a surfboard or cool looking piece of wood, but we just couldn’t find anything that was cheap. We ended up buying this piece of project board from Home Depot. It is NOT meant for outdoor use but I stained it using outdoor stain, and then used 5 coats of outdoor polyurethane hoping that would be good enough to protect it from the elements. So far, so good, but we’ll see how long this lasts before we’ll need to replace it! Before I began staining we measured and cut out notches where the beams would go.
The stain I used (Weathered Oak) has a touch of blue in it, which is why I choose the blue to paint the pallets on the bar and I was trying to match the barstools that we bought too.
Then we secured the bar top onto the pallets. Using screws and brackets to hold it up.
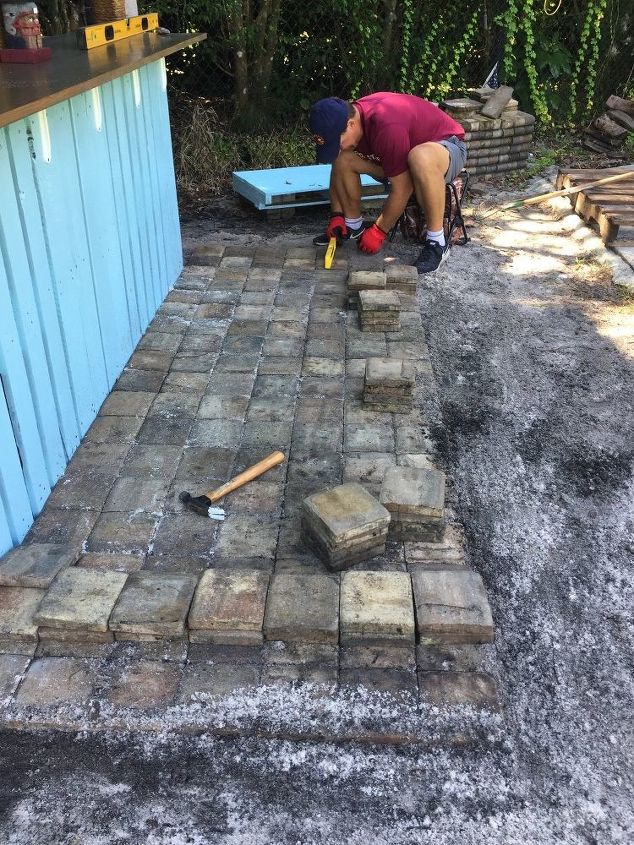
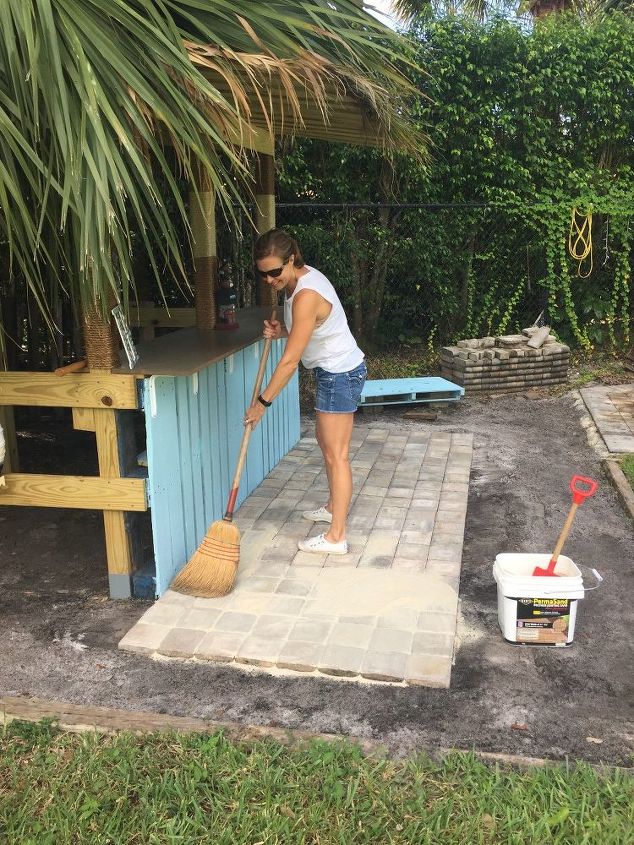
Step 8 – Pavers…
We had a good sized stack of left over pavers from our pool installation, and they turned out to be the perfect amount for a landing for the bar stools. We bought this product called perma sand to put under the pavers. It’s a sand/concrete combo that hardens up when you wet it to make the pavers stay in place. This was a back-breaking work and my husband did a great job making sure they were level and lined up perfect, and then I helped clean up and sweep in the Perma Sand.
Step 9 – Finishing Touches…
Now for the fun stuff. Decorating (which is still a work in progress)! We wrapped rope around the 3 front posts to add a nautical touch and to hide the ugliness of the beams. I made the TreeKee Bar sign from this awesome piece of wood that my mother picked up at a yard sale for $5! I used paint pens that you can get at any craft store for this. The lizard is a gift from some friends and we love it!
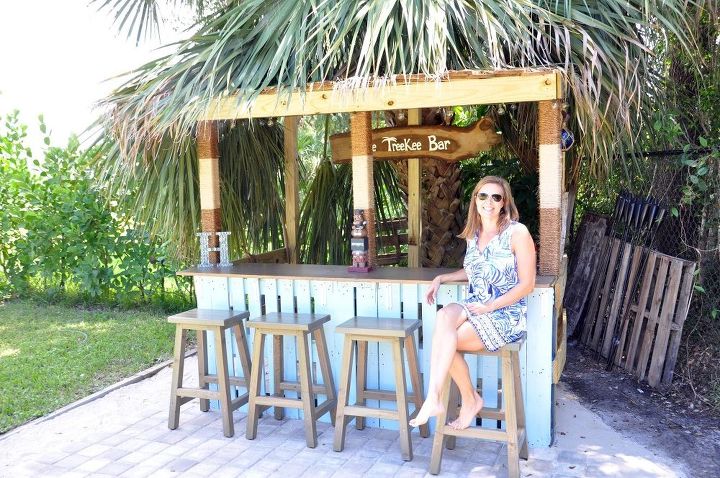
Then we added sand, lights, bar stools, and some other fun decor.
Check out my blog for more details and pictures.

Comments
Join the conversation
-
Looks great!
-
I never knew I needed a Tiki Bar...but I do now :)


Frequently asked questions
Have a question about this project?
Omg I love this. So you just built it under a palm tree? Awesome idea
Do you have an in the ground pool? Wow!! Ideal for the pool. I wish I had a bar outside, but our weather is not for this beauty. Enjoy!!