


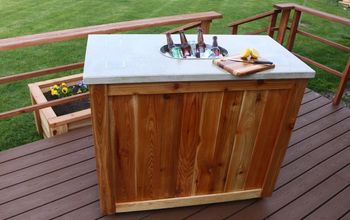
One Shipping Crate Equals Two Home Bars.

About two years ago I purchased a plywood crate from a local on-line auction house. I bought it because it was cheap ($19) and it had a bunch of plywood, that generally proves useful in a variety of projects. I pushed it into a corner of the basement.
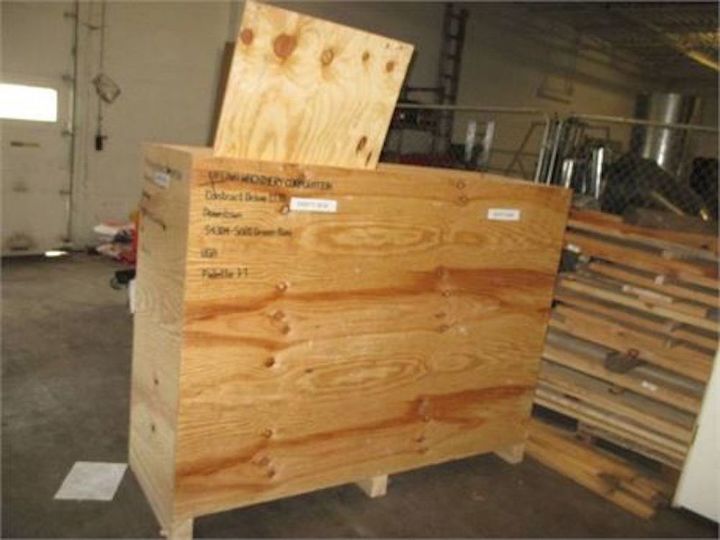
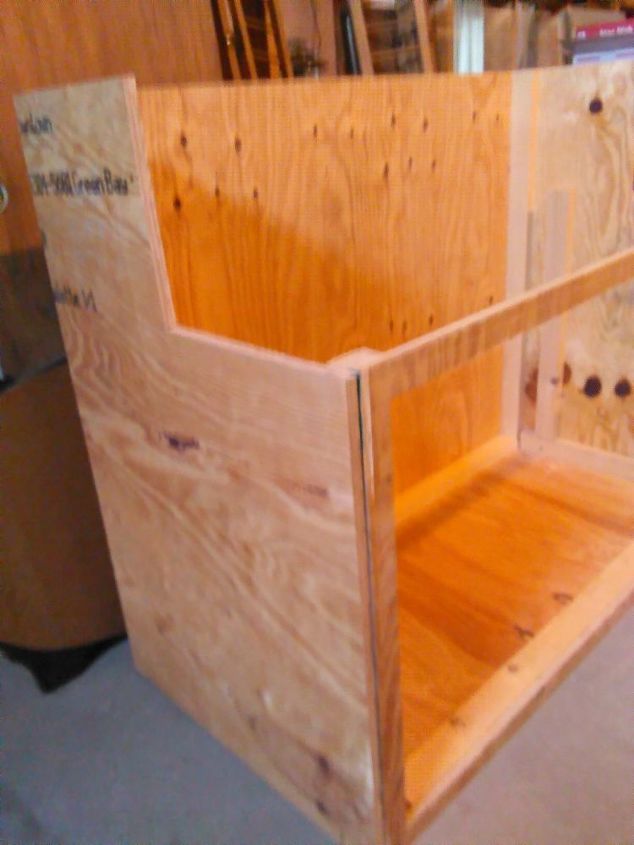
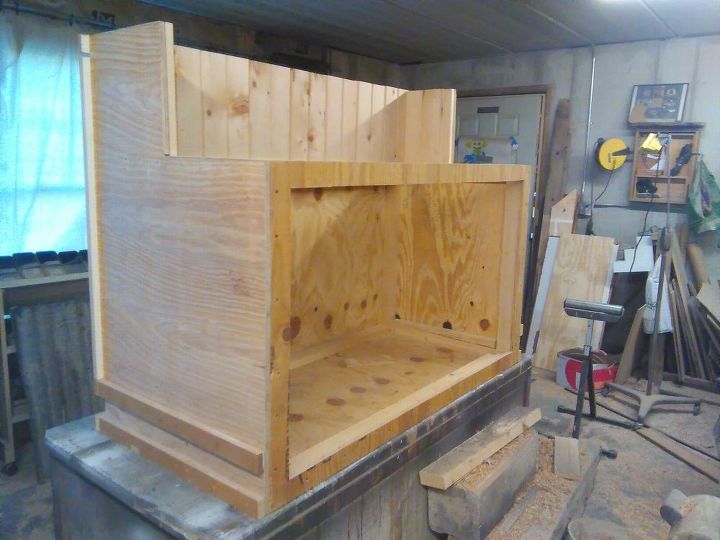
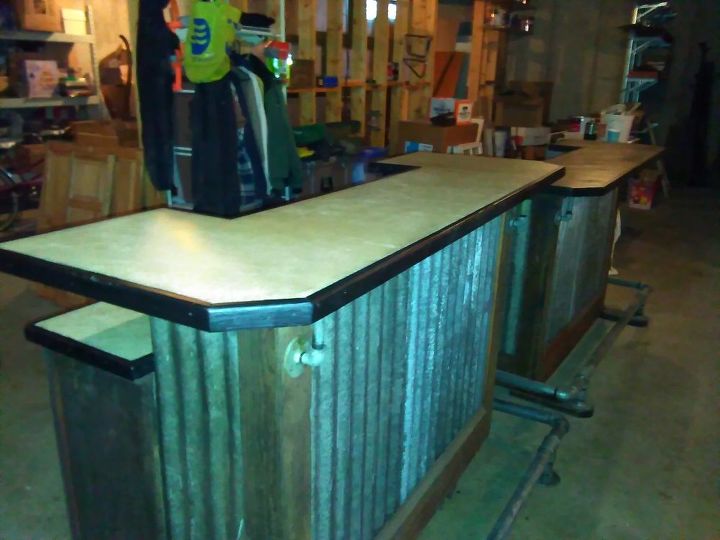
Earlier this year, When I got around to measuring it, it was about 2 ft by 4 ft and 70 inches high. I realized if cut it into two pieces I would have the skeleton of two bars. I cut the two foot side in an L shape so both halves would have a high (39”) side and a low (30”) side. The high side supports the bar top for “the bar patrons” and the low side accommodates the counter for the bartender.
I cut out most of the low side to make the under cabinet space on the bartender's side.
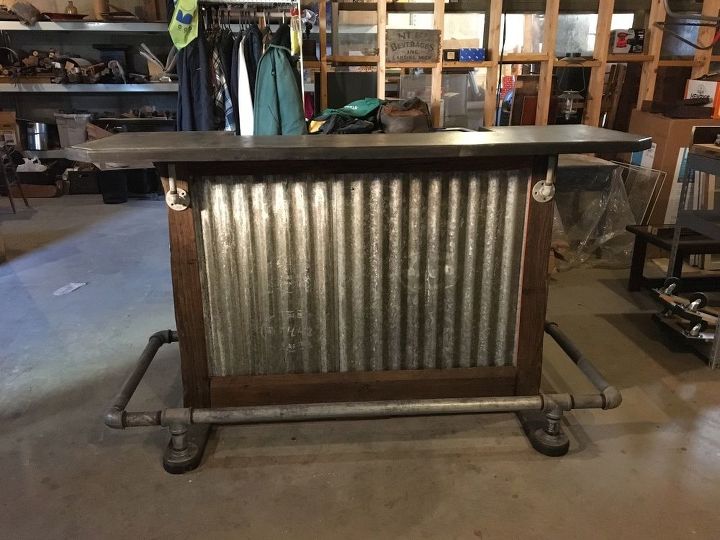
I had three pieces of salvaged corrugated siding that was just enough to wrap the fronts and about half the side of the bar. I cut them into 32 inch lengths with a circular saw equipped with a metal cutting blade. Furring strips created pockets for the galvanized metal, nailing for the barn wood trim, and support for the counter and bar top. Some short lengths of salvaged car siding filled in the space between the bar top and the counter top.
Up to this point I had not purchased much material. I had the galvanized siding and the barnwood.
I did have to purchase three sheets of 1/2 plywood for the bar top, counter top, and cabinet interior which includes the bottom shelf, a partition, and a half shelf. I also purchased four sheets (36” by 60”) of 1/2” cement backer board to use as counter/bar surface. The idea was to give the look and feel of cement counter tops, without the weight and a reduced chance of cracking.
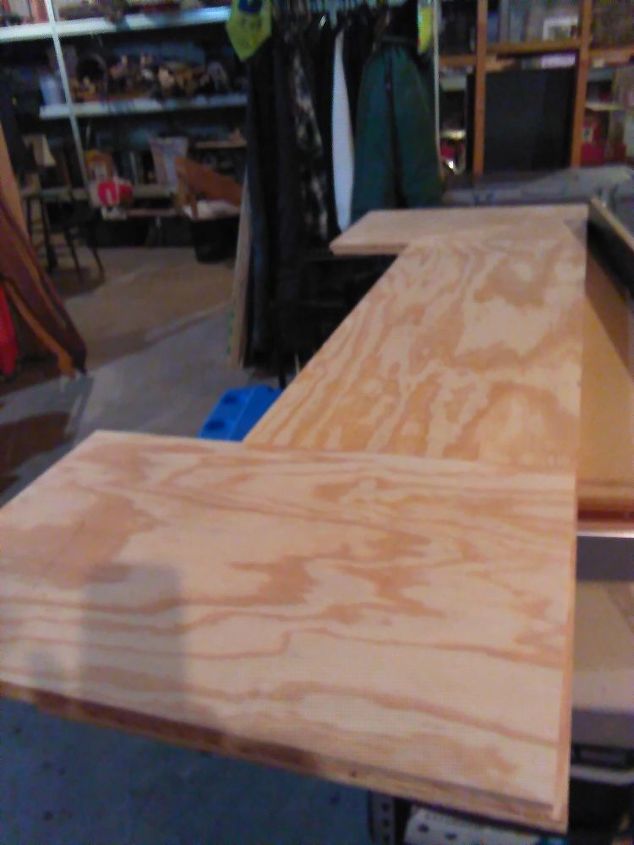
I used construction adhesive to laminate two layers of plywood and a single layer of cement board to form the counter/bar tops. Good news- alternating the joints of the plywood made for a sturdy 1 inch thick substrate and making everything slightly oversized allowed me to cut all three layers to actual size at one time.
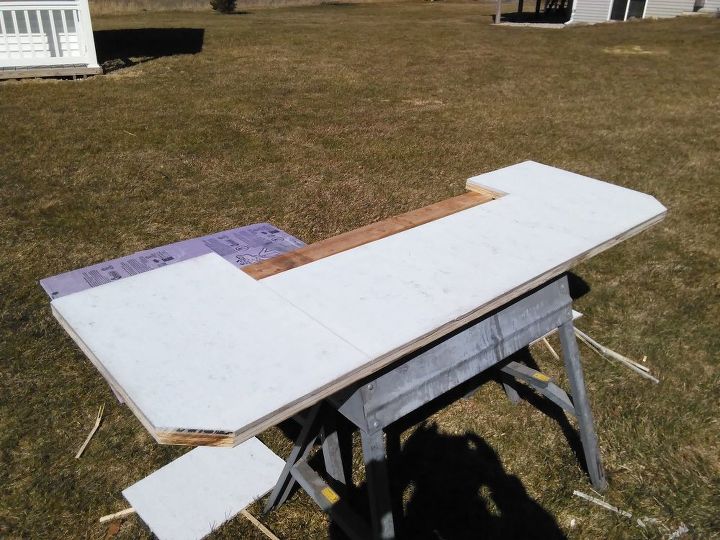
Bad news- cutting two layers of plywood and the cement board was a very dusty job and used up every old carbide blade I had laying around . I used a guide and a circular saw to make the cuts outside on a sunny 40 degree day. The cement board actually wore the teeth right off each blade until they simply wouldn’t cut any more and then I changed blades and continued cutting.
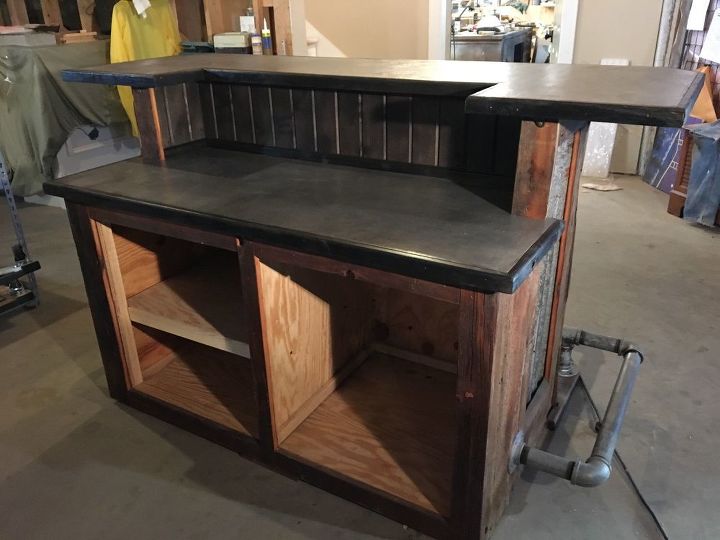
The bar rail is 1 1/2” galvanized plumbing pipe and fittings which were distressed with muriatic acid, some heat, and some darkening agent to blend the rail with the salvaged galvanized siding. The pipe, flanges, and fittings came to almost $300 for both bars.
I wrapped the exposed edges of the counter and bar top with 1 1/2” wide strips of barn wood (cut and surfaced) to hide the cement board/plywood lamination.
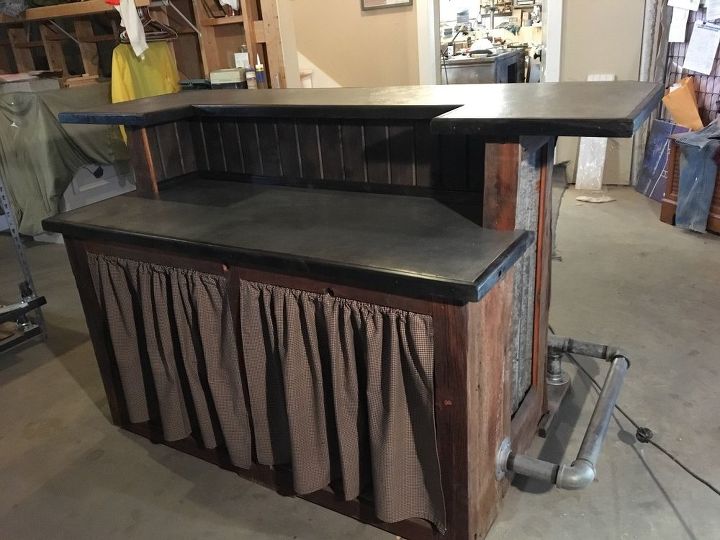
Finishing the various woods and the cement board was trial and error. The barn wood, the interior of the cabinet, galvanized siding, and the galvanized bar rail only required a couple coats of oil based polyurethane. The edge trim and car siding required staining first. I sealed the cement board with acrylic urethane and it looked quite good, except it was a little light. When I tried to darken it with a little ebony stain it became very blotchy. I gave it light over sprays of gray primer and silver and black paint until I got the color and variation that I could live with. Several coats of polyurethane were added to assure durability.

I considered adding some doors to the cabinet, but a friend (and former bartender) felt that they are a nuisance. In addition to offering advice and encouragement, my wife kindly stitched up some fabric curtains and put them on tension rods.
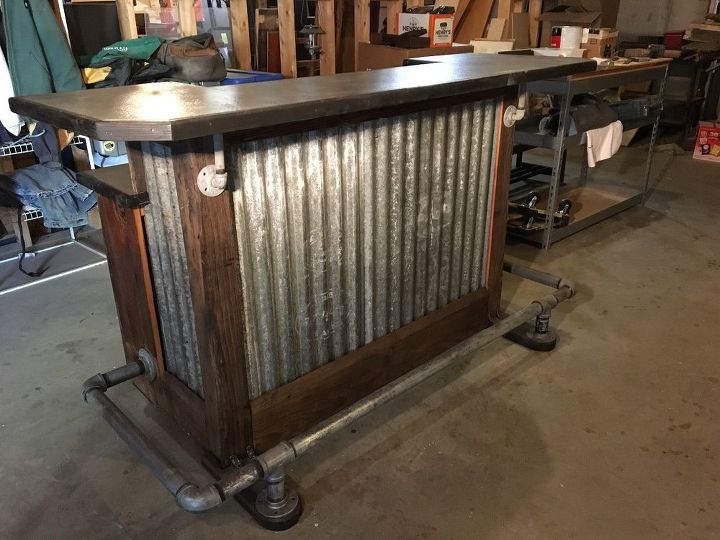
The bar is heavy when assembled, but the bar top, counter top, and bar rail are detachable. Breaking it down into four components made each a manageable weight and a size that will fit through a doorway.
I plan to sell the first one to recover my expense and probably will keep the second for my own use. Starting with a packing crate seemed like a good idea, but it turned out to be a little like the “Stone Soup Fable”. The project turned out well but mainly because of the extras that were added. Prior experience using an old dresser as the base was much easier, and not really that much more expensive.
I still need to finish the second bar and hopefully I will be able to get the look of cement without having to paint the cement board. I plan to seal it with oil based polyurethane, rather than acrylic. I will comment or edit this post to let everyone know how the second one came out.
Hope this all made sense and thanks for viewing.
Edit (May 1, 2018) I have added the photo below that shows bar number two. I came out very similar to the first, except that the cement board was sealed/finished with multiple coats of oil based varnish. It is lighter, yet looks like cement. It look was much more uniform and didn't require the paint overspray that # 1 did.
Update: The bars were put in a consignment shop and didn’t sell. The shop owner politely suggested it was the bar top. I chiseled out the cement board and replaced it with pieces of reclaimed lumber. They were ran lengthwise and then I used 90 degree “herringbone joints” with the shorter pieces on the sides. Coated with polyurethane. Looked much better than the cement board and both bars sold.
Comments
Join the conversation
-
Very Nice!
-
Freakin ingenious! Love them


Frequently asked questions
Have a question about this project?