


How to Build a Chicken Coop From Repurposed Pallets

by
Jenni Ingram
3 Materials
$140
4 Hours
Medium
We got chickens! I needed to build a coop for them, but most of the plans I found online were not free . I'm the type of DIYer who just has to start building and figure it out as I go. So here's what I did to build my own coop:
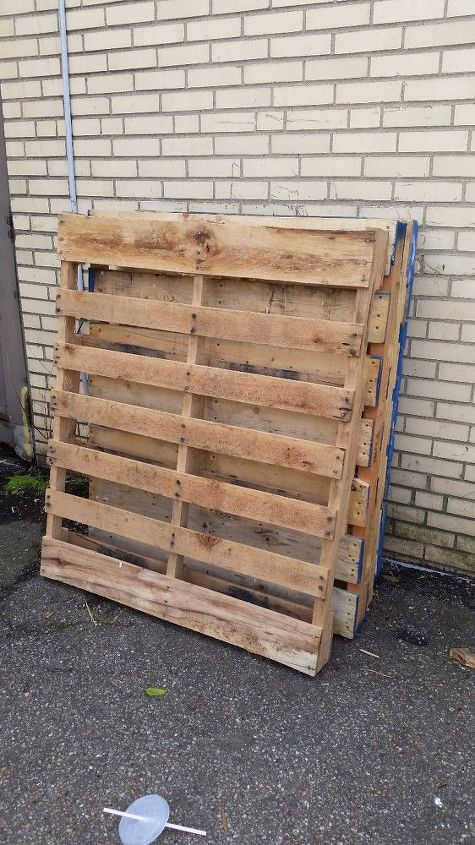
Pallets=free wood! And a great way to repurpose unused pallets.
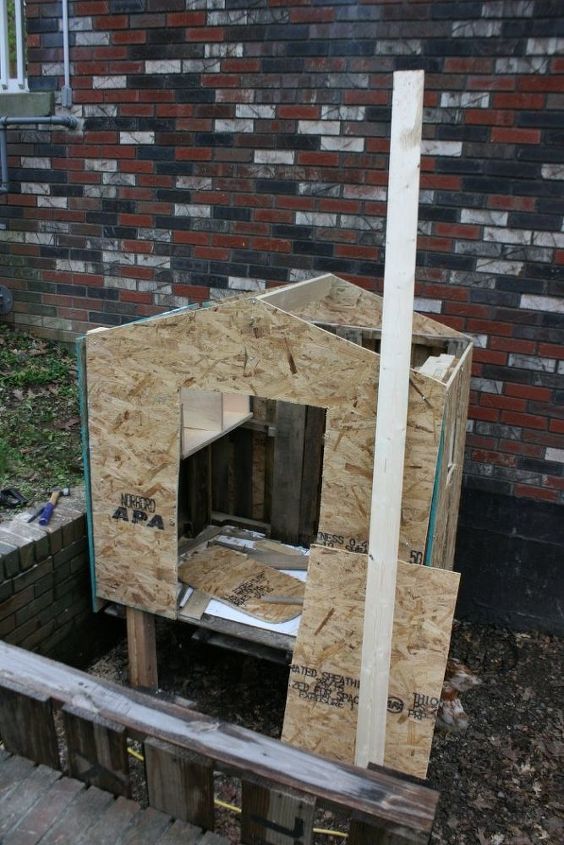
Step 1: Cut 2x4s 18" long, and screw two together to make a square post. Do this 4 times, attach these "legs" to the base of a full pallet. Add another full pallet to the back of the coop, and screw it to the base. I then found a scrap piece of wood and laid it on the floor for a solid bottom for the coop.
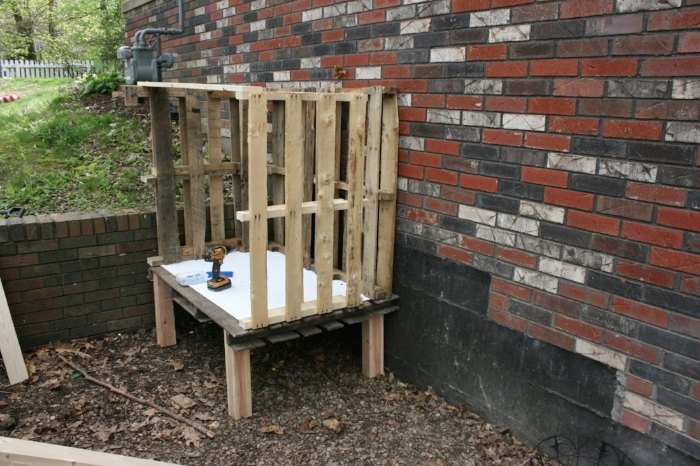
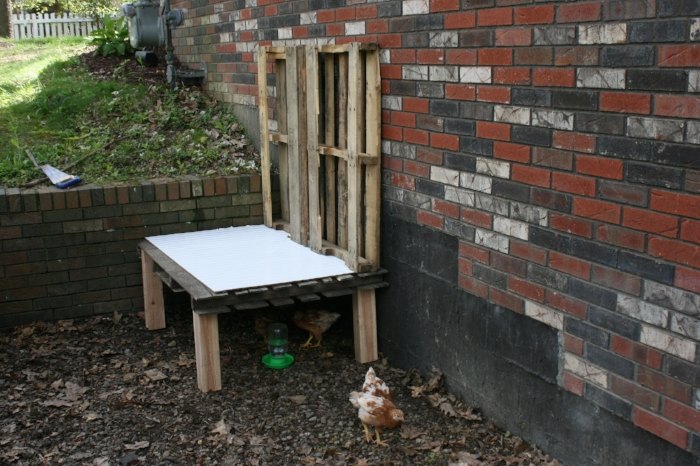
Step 2: Cut a couple of pallets down (these were roughly in half) to make the sides and screw them to the back pallet and the base. Then attach the sides with a 1x4 cut to size across the top.
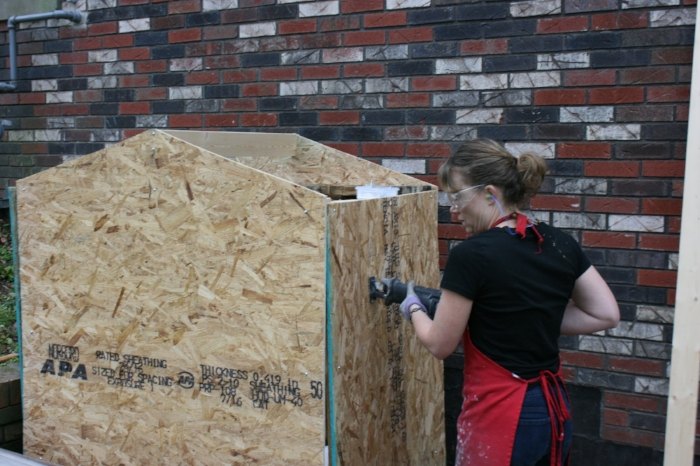
Step 3: Cut plywood to size and attach to all sides. Also, cut the pitch of your roof into your front and back pieces. Screw these to the pallets. This plywood is cheap! Only about $12-13 for a 4x8 sheet! Step 4: Cut your windows and doors through both the plywood and the pallet slats. Get my full list of tools that I used for this DIY project in my complete blog post here.
Step 5: Cut a 1x4 the length of the coop and screw it to the top of the roof. This will give your roofing material something to sit on.
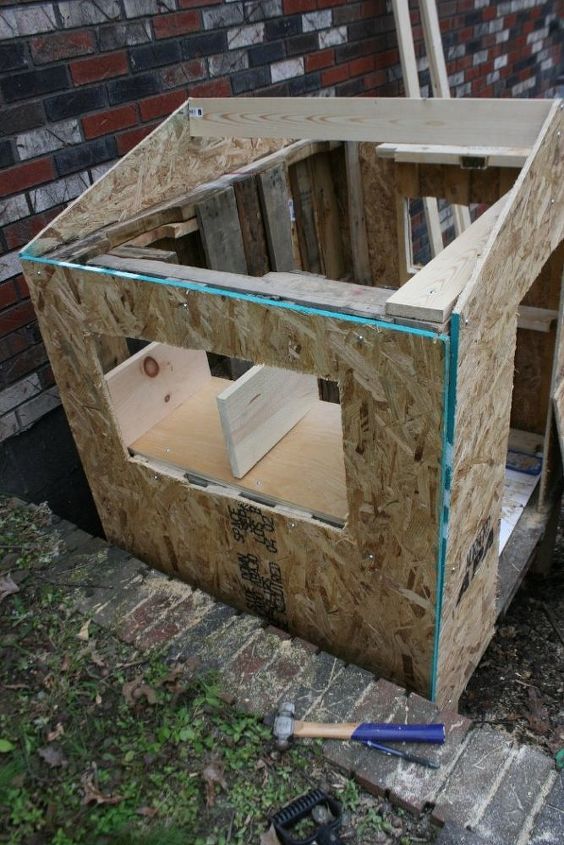
Step 6: Cut some scrap wood for the "nesting boxes" and attach to the pallets where desired. I made a little window cut out there so we can open that window and grab the eggs once they start laying.
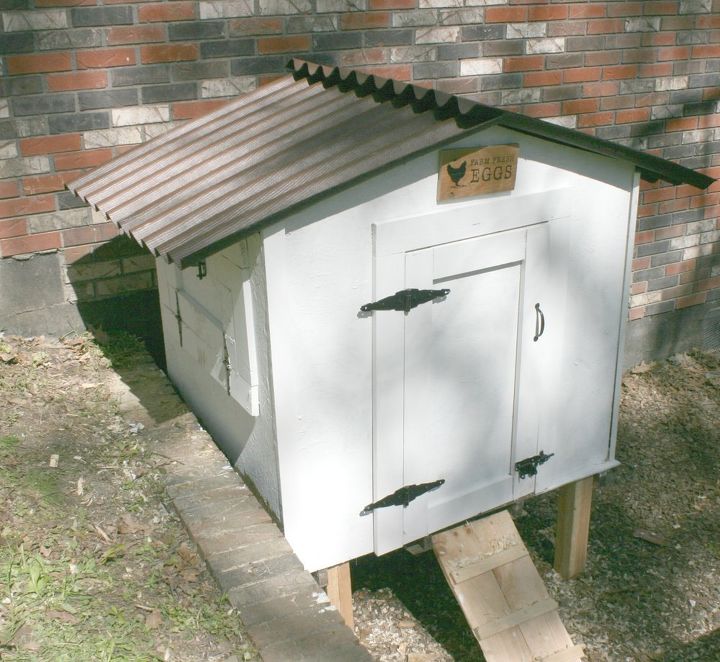
Step 7: Trim and paint! This step takes it from looking like a run down shack to something you are proud to say you built. I just used 1x4's and trimmed out all the windows, doors, and sides. I installed 1/4" hardware cloth on the window so it gives ventilation but still is protected. You can list of the paints I used in my full blog post. Step 8: Attach the hardware. I chose black gate hardware from the hardware store, just for some contrast.
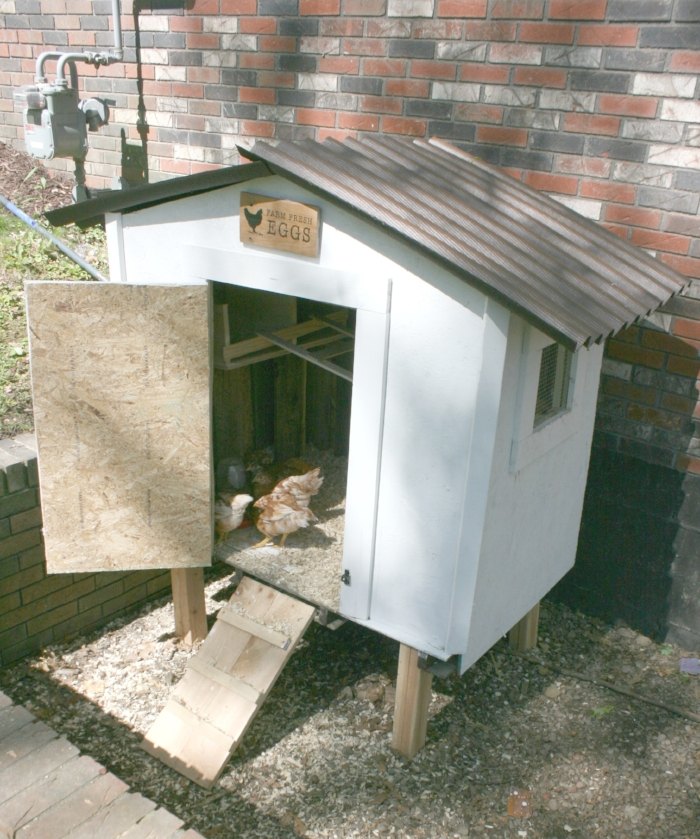
Step 9: Attach the roof. I really wanted a tin roof - for all the obvious reasons; however, I was very unsure I could cut that stuff without also cutting my fingers, so I opted for the plastic version. It was very easy to cut to size and easy to screw right to my wood braces underneath.
If you loved this upcycled project you will love my blog, with more DIY building plans. Just subscribe here!
Thanks for stopping by!
Want more details about this and other DIY projects? Check out my blog post!
Comments
Join the conversation
3 of 25 comments
-
If you put a trap door in the floor, you can scoop the poop right into a wheelbarrow or sturdy box for composting.
-
Well I think it just darling ....I love it and I want to get me some chickens and make them a coop ......you did an awesome job !!!!


Frequently asked questions
Have a question about this project?
Did you make anyplace for them to roost? How will you clean the floor?
You made a cute chicken coop but you forgot to make them a roost. Chickens don't sleep on the ground (or floor) they need something to roost on! Also when you put a roof on you don't overlap your ridge like that because when the wind blows heavy rain it will blow under your ridge and flood into your cute little coop creating not only a mess but the dampness will cause your OSB (oriented strand board) walls to mold and rot and could eventually cause health problems in your chickens. If you plan to keep your chickens thru the winter months your little chickens are going to get mighty cold especially since you live up north. It might have been a good idea to have closed up your walls and added a little insulation inside them and the floor! I will give you credit for thinking outside of the box, building your coop for less by using pallets but you might should have done a little bit of internet time and looked up chicken coop construction just a bit before you started your project to save you time and money later on. I'm sorry I don't mean to be mean just offering a little advice. Your coop is cute but it needs a bit more work to function properly for both you and your chickens!
How many chickens will it hold? Most coops hold up to 10 chickens. Did you forget the roosts?