


Barn Wood Inspired Accent Wall #2020DIYContest

When we first moved into the farmhouse that we slowly flipped over a 4 year period my main goal was to make the house into our home and give it some character. It had a great location, a good amount of land, an unbelievable view of the mountains but the home itself was really bland. The double sided brick fireplace that is in the main living area really spoke to me as the heart of the home. As soon as this was discovered I knew it was my inspiration...so one of the first projects that we did, besides the basic paint and touch up things...was a beautiful barn wood inspired accent wall in the living room.

Our beige bland living room was given a handsome, warm, farmhouse vibe as soon as the wood hit the wall! Follow along and learn how to get the look!!!

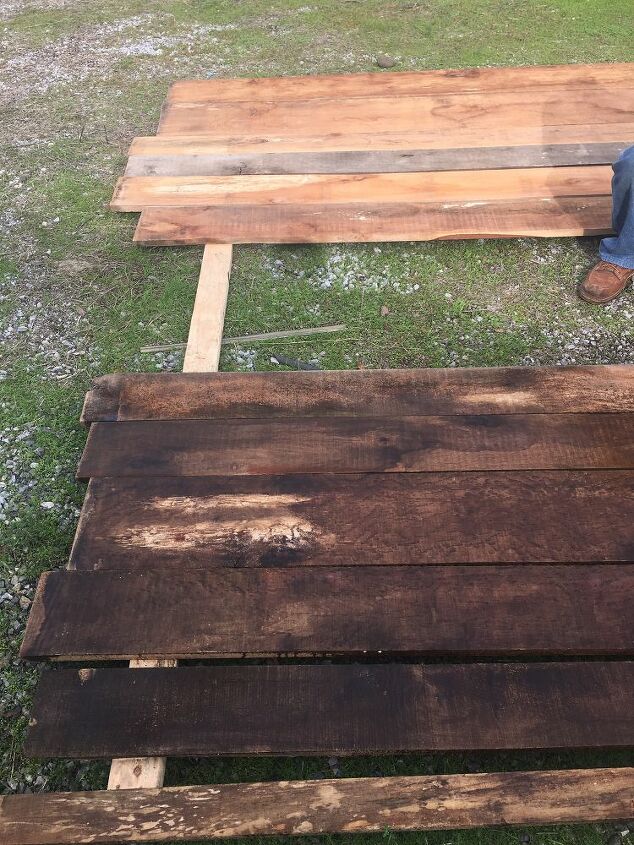
Both my dad and brother are contractors and skilled wood workers and I am lucky enough to not only learn from them but also benefit from them because I get to ask them for help when I have a project brewing up. And that is exactly what happened with this barn wood wall project. I called my dad and told him my vision, which was a barn wood wall and he told me he had some left over red alder wood from another project. Bingo! The only thing that might sound problematic here is the look of the wood....its red alder, which might appear to be an obstacle but honestly turning RED alder into wood that looks aged and rustic is easier than you may think! In the photo above you can see my spraying the wood with a treatment that drastically changed the appearance of the wood, and the best part...NO HARSH CHEMICALS! Before we started spraying the solution we double checked the square footage we needed as well as the lay out I was going for. We decided to frame the doorway in as well as a trim piece at the other end to give a more "finished" feel. Once we knew we had enough we went for it!
The solution we used to penetrate the alder boards with that gave it rustic look we were going for is water, steel wool pads, and vinegar. I did a 2:1 ratio with vinegar to water but depending on the look you're going for you can adjust it accordingly. You do need to let the steel wool pads sit in the vinegar and water solution so it can break down enough to run through the sprayer, I let mine sit overnight in a bucket with a lid on top and it was ready to go the next day!
You can see in this photo how dark and detailed the wood gets, remember to saturate it evenly and don't be shy with the solution, in our case the wood was really dry and soaked up the solution right up!
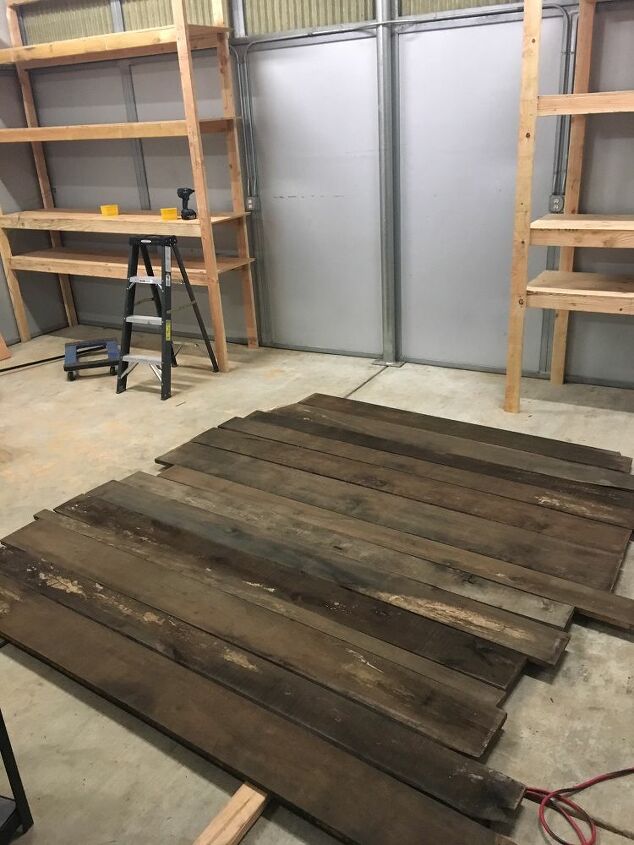
We sprayed the boards outside and once they were dry enough to touch we brought them inside the shop for the night to dry some more...although the treatment wasn't with harsh chemicals the vinegar smell is pretty strong. Even after installing in our house sitting near the wall for the next day or two I could smell it, but I also have a very sensitive nose!
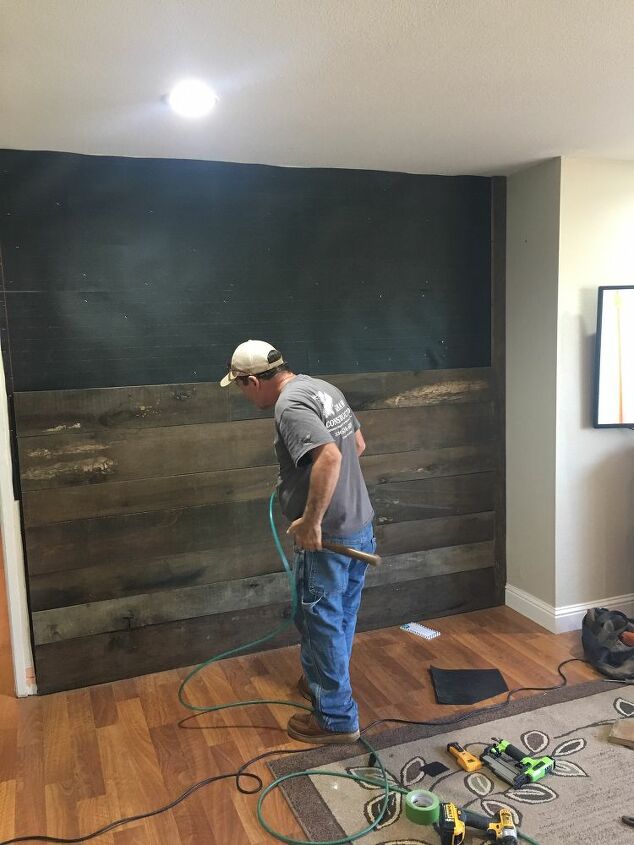
The next morning my dad was over bright and early to tackle the wall! Before we applied any wood we place a black felt backer behind the wood...this step is optional. Because the wood is imperfect I knew there would be spots where the wall behind it would show and I wanted to minimize that contrast as much as possible. I used the black felt because it was cheap, and easy to staple up on the all with a staple gun!
When applying the wood to wall we used a finish nail gun with pin nails small enough that they don't stand out and have provide a seamless finish. Its hard to give direction when applying the wood pieces because every wall is different and every piece of wood is different. We started with installing the trim piece on the right side to work up to and then installed the door frame trim pieces last. But like I said every project is different and believe me, we had to make some changes along the way.
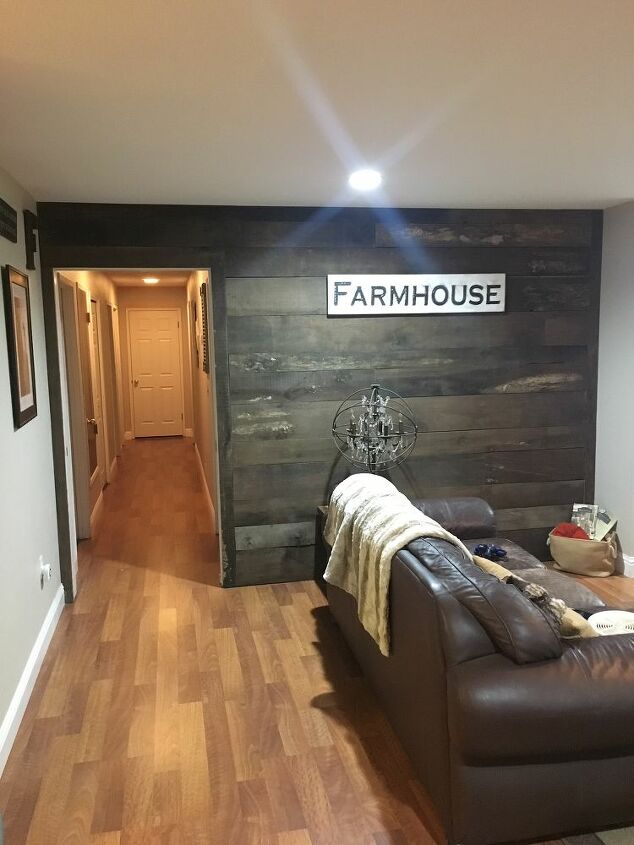
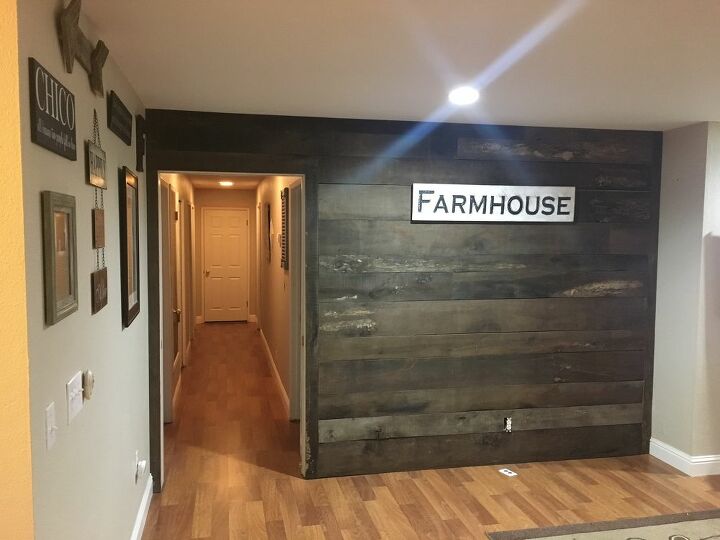
I couldn't wait to hang my farmhouse sign and get my living room situated again! I just love this look and I think it made such a big impact while kind of looking like its been there all along. If you catch my drift? : )
Thanks for following along friends!!!!
Resources for this project:
See all materials


Comments
Join the conversation
-
Love it, it's gorgeous. I did a headboard.
-
I love that look except I think it looks to dark for that space, unless of course you room is a lot bigger.


Frequently asked questions
Have a question about this project?
Great project. One question I have- Did you use felt cloth? Or builders felt (tarpaper) behind the boards?
How thick are your boards?
How thick are the boards?