


DIY Custom Closet Built-Ins | Turning A Thrifted Dresser Into A Closet

In this post I’ll show you exactly how I took a thrifted dresser and turned it into a beautiful custom closet built-ins for my daughters room. I’ll go over each step in as much detail as possible!
Let me start by saying that this was a first for me! I’ve never built a cabinet or drawer of any kind so it was definitely a learning experience.
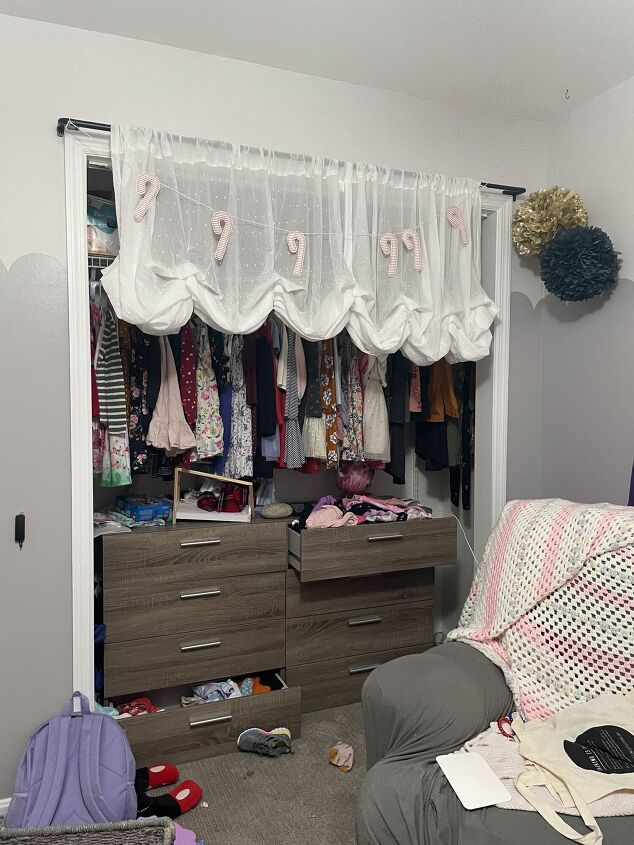
This project began because my daughters dresser (which was only a year old) was completely falling apart and in need of an update.
This was a dresser that was made cheaply out of particle board (although, the price I paid for the dresser was not cheap) and the drawers were completely falling apart.
The drawer bottoms were so flimsy, toddler clothes would cause them to collapse. I had attempted to fix it in the past but I was done. It was time to find a better solution because this set up was not working for us anymore.
I did a complete walkthrough of this situation (and the entire closet build) on my instagram account and saved everything to the highlights “closet {kids} ” and “closet 2”
Here’s what this situation looked like to begin with:
The first step was to come up with a plan. Almost immediately, I had a vision for this space.
My daughter (4yo) nicknamed it a princess closet so that’s what we’re going with!
The closet plans for DIY custom closet built-ins
After stopping by my local Habitat ReStore and picking out the CUTEST dresser, I came up with some rough plans.
At the time of this build we’re dealing with some pretty significant lumber cost issues. I figured if I could get a thrifted dresser, that would save on a lot of the cost and I would have some drawers already done for me.
I considered doing a dresser + IKEA pax system and “hacking” it to make it look built-in. Unfortunately, the cost to ship the IKEA pax was more than the IKEA pax system itself (hah!!) so that was out.
I landed on the idea to do the dresser + built-from-scratch cabinets created from MDF boards.
I do really like MDF and it’s commonly used for cabinets. It’s much stronger than particle board but cheaper than lumber.
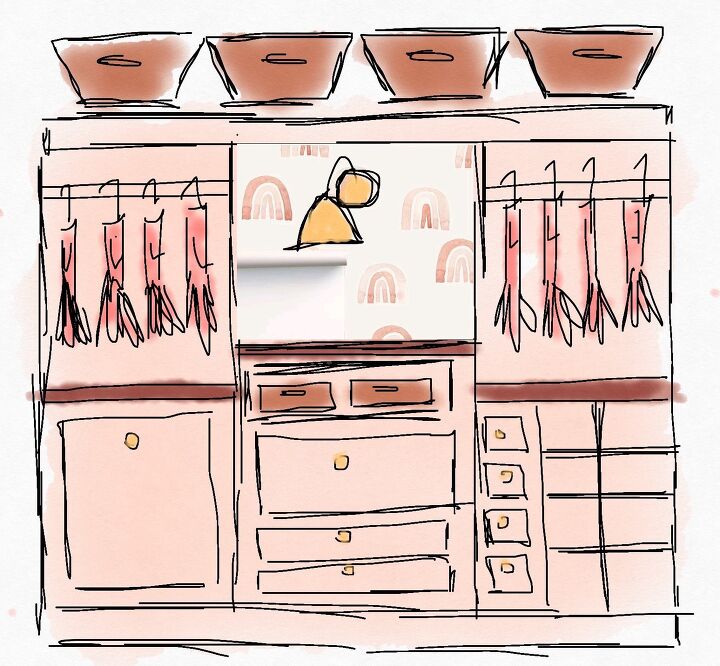
Here are the plans that I drew up:
I also created a mood board for the finishes:
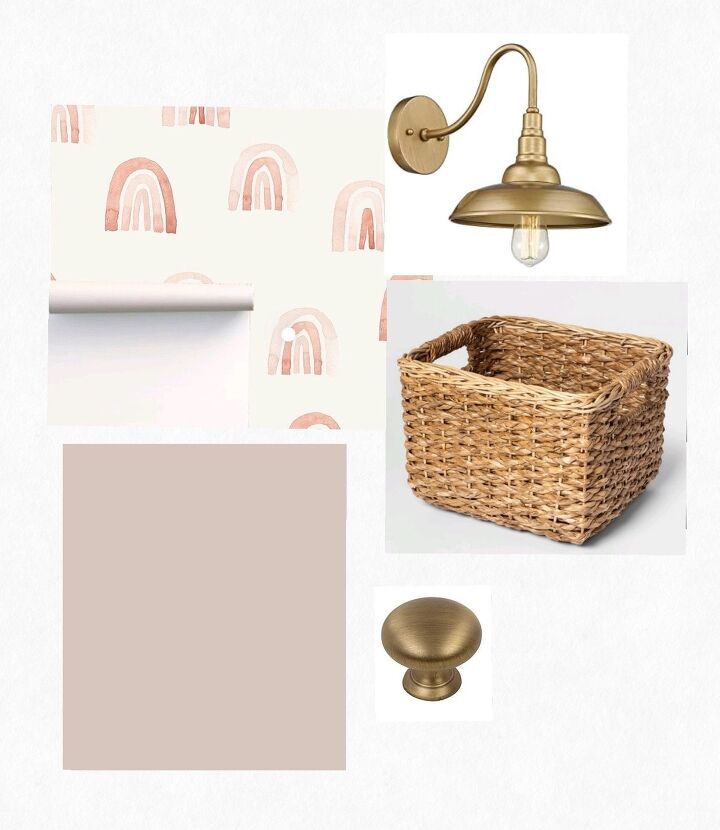
My daughter chose the color and I chose the wallpaper from Interior Blossoms. I was really excited to work with them as an affiliate because they were so awesome to offer my audience a special coupon code for 15% off! You can use code: DIYOURHOME to save on your order!
I went with an antique brass for the sconce and hardware knobs. I will link all of the sources to everything I used at the end of this post!
Starting the build
I started with the dresser. I was not in love with the top drawer, it had different detailing than the rest of the drawer so I decided to remove it altogether.
Next, I took apart the drawers. These drawers were on wooden under-mounted sliders and in addition to not being very easy to open, the drawers also came completely out and I decided that this was not going to be the most functional set-up for a four year old.
I decided to put the drawers on sliders but to do that, I needed to re-build the drawer to allow for space on the sides for the sliders.
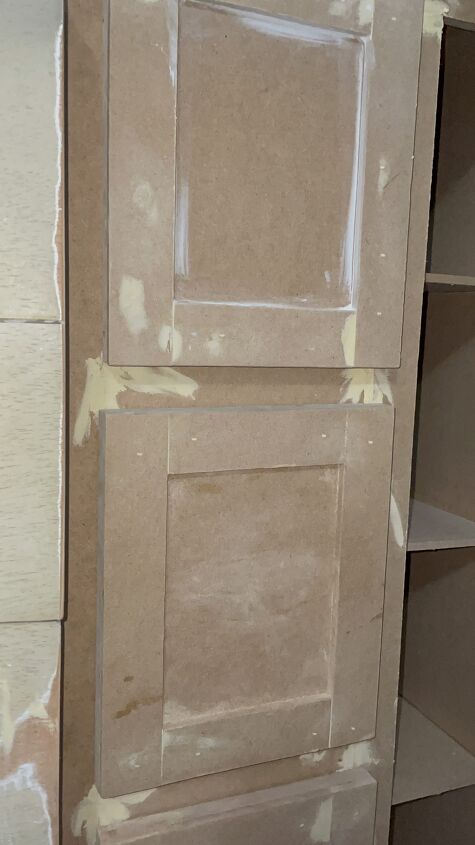
I took the drawers apart, saving the front and the bottoms of them. I used three pieces of MDF boards and connected them together with pocket holes using the Kreg Pocket Hole Jig and attached them to the drawer front.
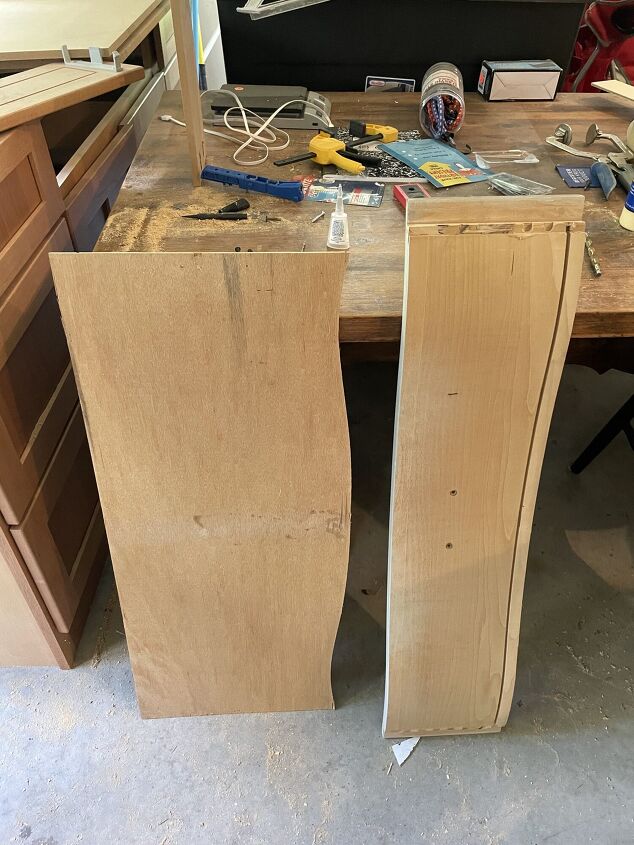
This photo shows the drawer front and the drawer bottom. You can see that by saving these, I saved myself a lot of time and effort! The drawer front already had a groove in it that the bottom could slide right into.
The bottom was already cut to the curve of the drawer front. However, I did have to trim the sides a bit to fit the new, slightly smaller size drawer. I cut them down with my table saw.
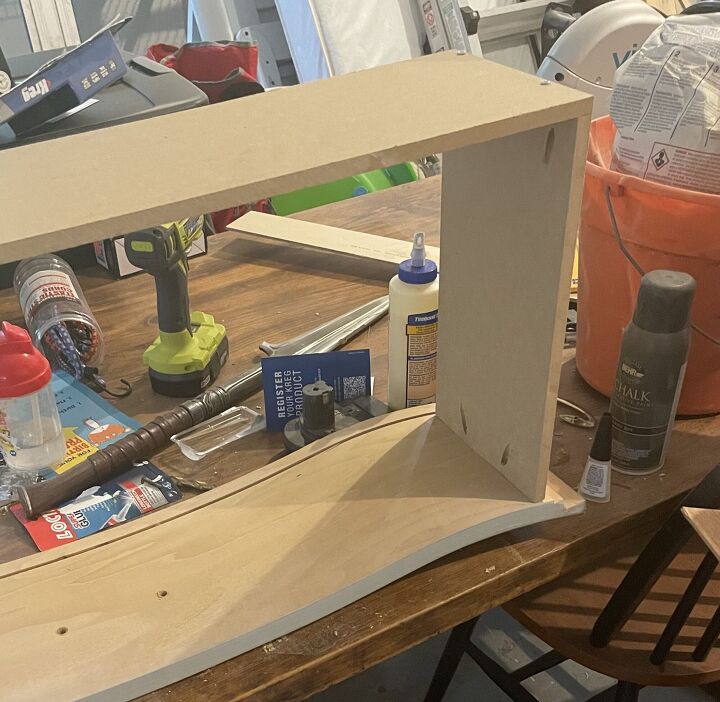
Here’s a look at how the pocket holes connected the drawers. I also added wood glue to every joint and secured the back with screws for extra strength.
I did NOT want this drawers to fall apart a year later and you don’t see the screws at all once the drawer is in the dresser.
Important: always remember to pre-drill holes for these screws (these are called “pilot holes”) to prevent the wood or MDF material from splitting.
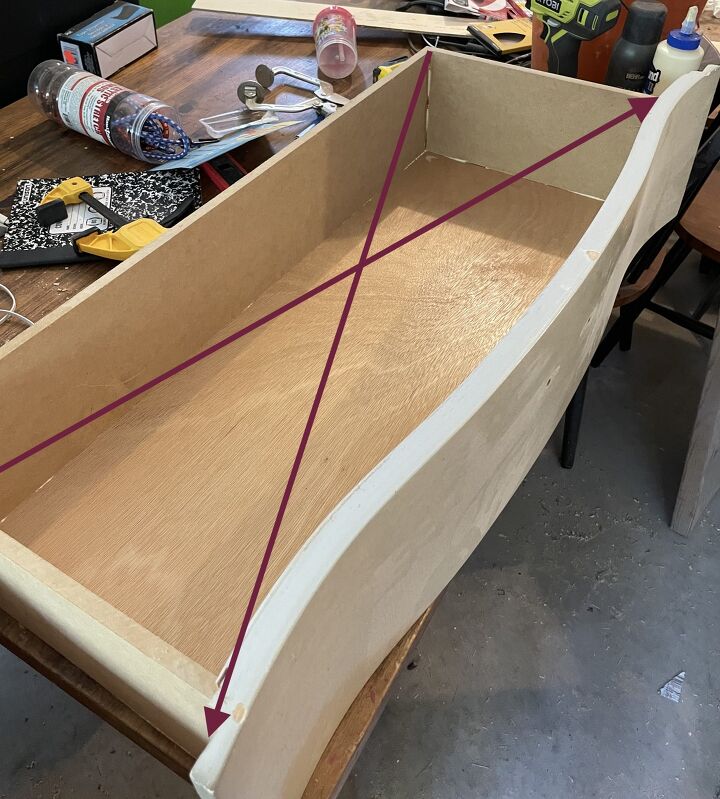
The most important lesson I learned about building drawers is to make sure they are perfectly squared off! Meaning, the measurement from bottom left corner to top right corner and bottom right corner to top left corner match up perfectly or you will have a LOT of trouble when it’s time to put them on sliders in your cabinet or dresser.
After the drawer was built, I installed the slides on the drawer and in the dresser.
Another issue I ran into with this particular dresser is that the top two drawers were actually one very deep drawer. I hate deep drawers! They are a nightmare. Things get buried and they are always messy because of trying to find things.
After researching some solutions, I decided I was going to build a two-tier drawer system by essentially creating a drawer within a drawer. Essentially, I was creating my own version of this Rev-A-Shelf (insanely expensive) system:
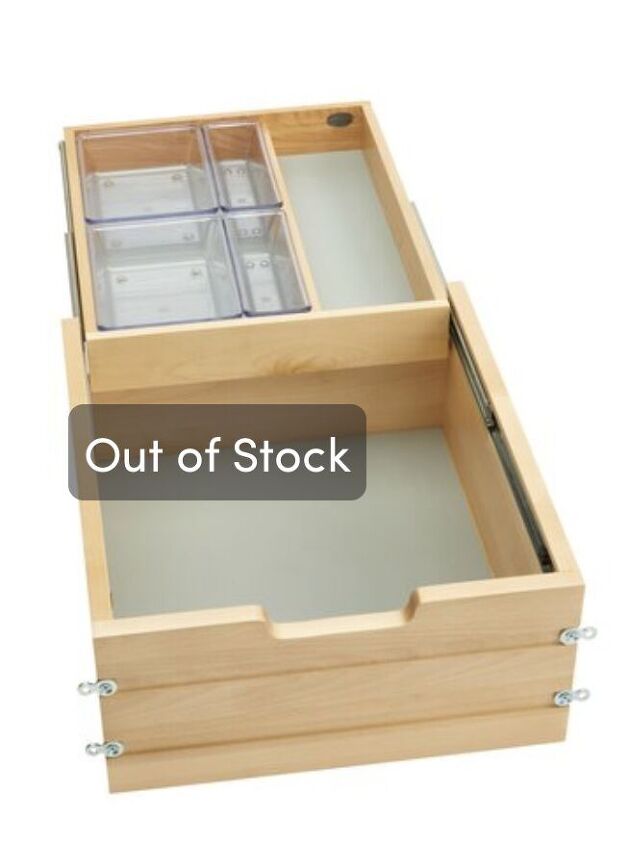
When I re-built the very deep drawer, I built the back approximately half the height of the sides to allow space for the second drawer to slide backwards.
I measured the space from inside the left side to the inside of the right side and subtracted 1 inch (which was how much space would be taken up by the drawer slides).
Then, I constructed a second drawer at that width to be the top tray. I made sure it was shallow enough to only take up approximately half the space so that each tier was about the same amount of storage.
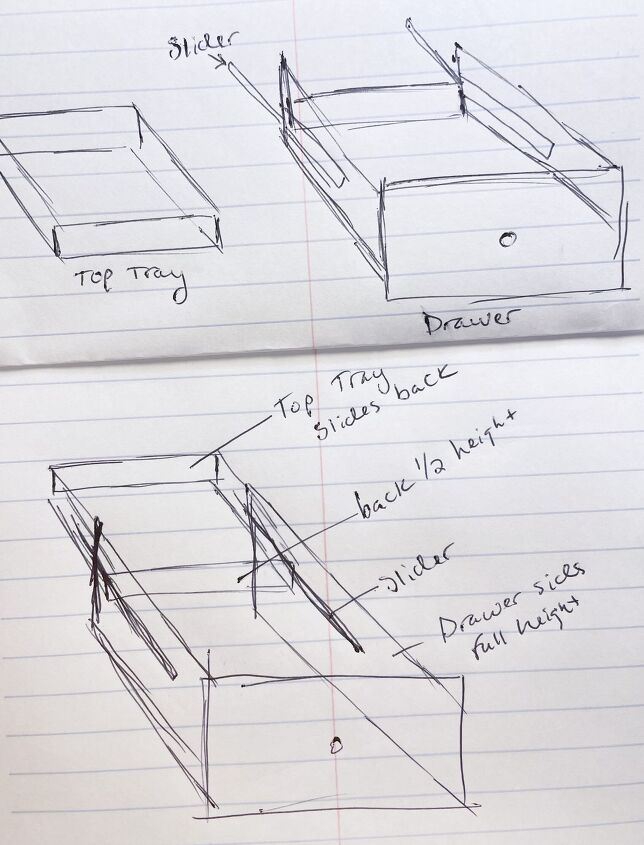
I added sliders that would allow the drawer to slide backwards. That way, when the main drawer was pulled out of the dresser, the top tier would slide back into the space of the dresser.
I was so happy that this actually worked out!
On a side note, there’s a video that shows how this came out in the full post which you can find here: https://projectdiyourhome.com/diy-custom-closet-built-ins-turning-a-thrifted-dresser-into-a-closet-system/

Building the lower section sides
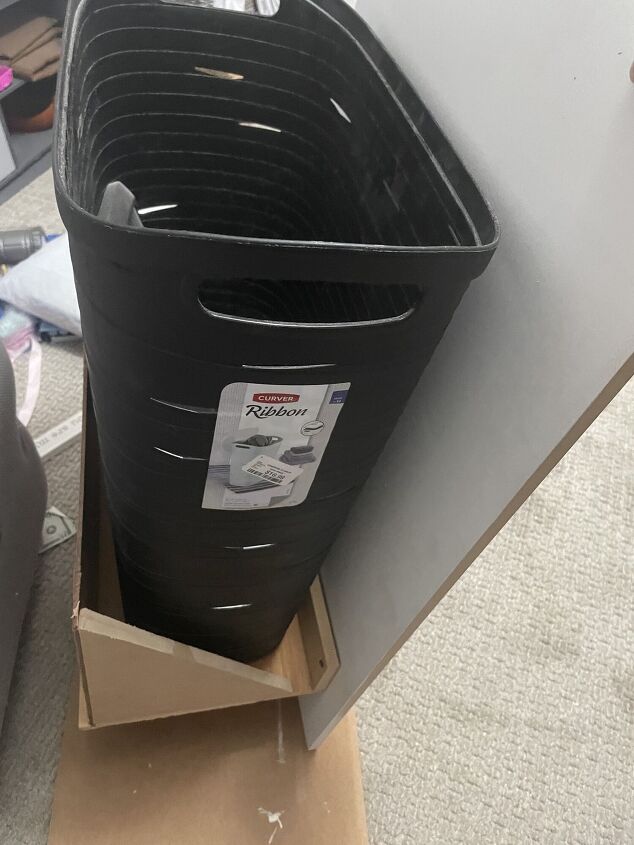
In my plans, the section on the left was going to be a pull-down, concealed hamper. The left side would feature 3-4 smaller drawers (for things that don’t need a full drawer like bathing suits, dance class outfits, etc) and shoe cubbies.
Side note: I made sure to ensure that full-size adult shoes would fit the shoe cubbies as well for when she gets older!
I constructed the “kick plate” out of scrap stud wood and covered the front with scrap plywood.
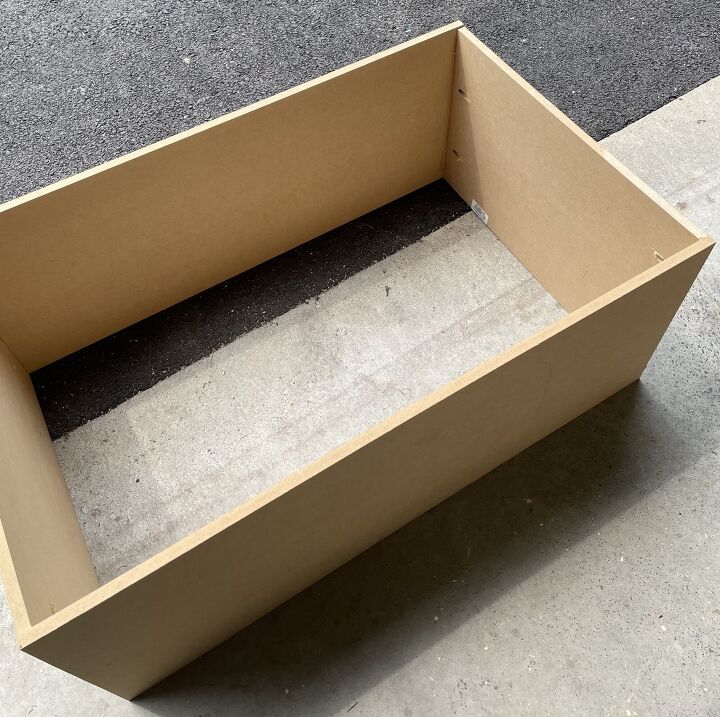
I made the actual cabinet out of 1/2 inch MDF board and used scrap flexboard for the backing. I wasn’t super concerned with the backing since it was all going to be painted out and you wouldn’t see it, especially where the hamper and drawers would be.
Again, I used pocket holes to essentially build a box and I secured the backing with wood glue and nails. This is the nail gun that I use and LOVE!
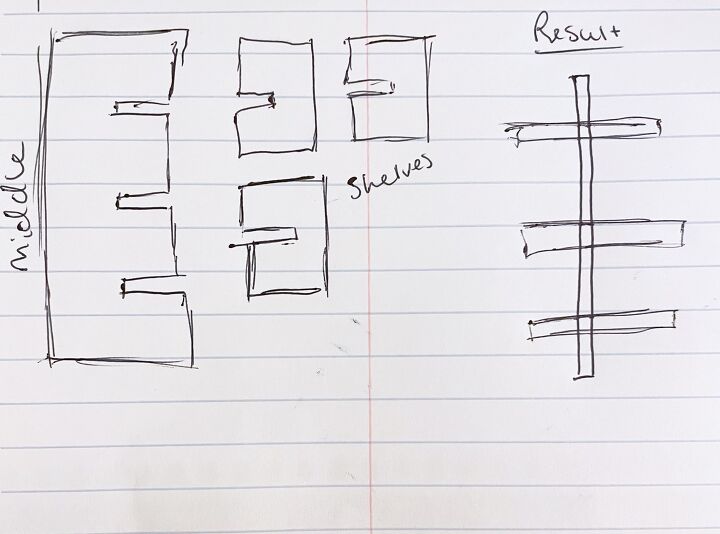
I constructed the shoe cubbies out of 1/4 inch MDF boards. I first cut the middle dividing piece. Then, I measured the height of the space and subtracted 3/4 inch (to account for the MDF boards) and divided by 4 spaces which gave me the height of each section.
I measured and made a mark where each horizontal piece would go and used my table saw to make a slit about halfway through the piece.
I cut each horizontal piece and again, used my table saw to make a slit that went about half way through each piece. I slid them all together to create the shoe cubbie grid.
Here’s what it looked like:
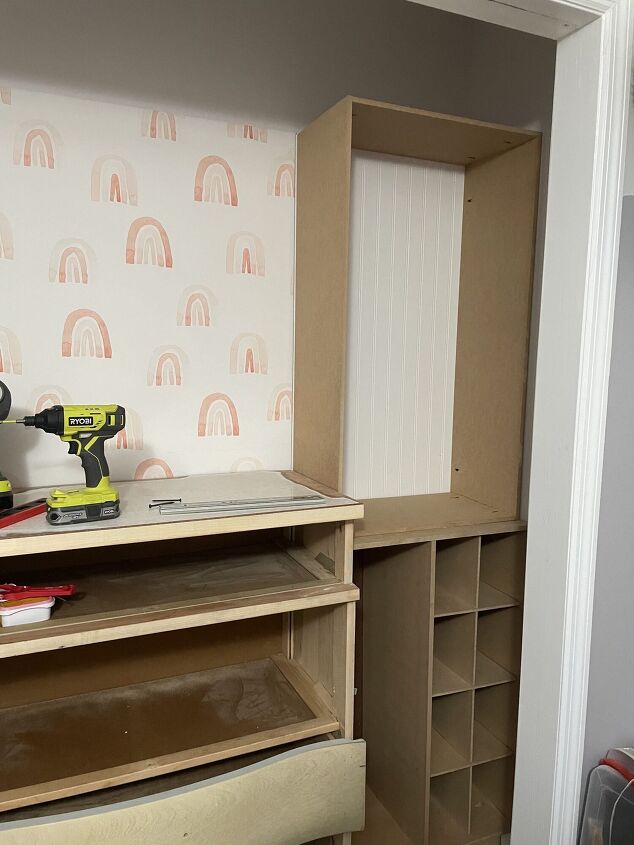
Then, I added small pieces of wood to the inside of the cabinets on each side to essentially work as “brackets” to support the cubbies.
Once everything was in place, I secured the cubbie grid to the brackets using wood glue and nails.
At this point, I’ve installed both of the bottom sections of cabinets but I chose to NOT create the face frames until after the cabinets were built. Again, I’ve never built anything like this so I was literally building “as I go” for each step of the way.
As a reminder, this is all visually stepped out in the closet highlights on my instagram account.
Building the top section cabinets
The top section cabinets are where I will hang my daughters dresses. When she gets older and requires bigger hangers, we will switch to a pull-out slider with hooks and hang items forward-facing but for now, the kid-size hangers fit perfectly!
I opted to use beadboard as the backing on these cabinets which I installed on the wall first so that I could use pocket holes to attach the cabinets to the wall (that way, there would be no visible screws in the backing of the cabinet). It was secured to the wall using construction adhesive and nails.
Important: Always attach cabinets to the wall by locating your studs and drilling directly into them. This is my absolute FAVORITE stud finder — it’s NEVER WRONG! Don’t worry, the top cabinets hit the studs in the corners of the closet space.
At this point, once all of the main cabinet bodies were built, I added the face frames using 1/2 inch MDF boards. I cut the tops and bottoms 2.5 inches wide and the sides 2 inches wide. I secured with wood glue and nails.
Constructing the pull-down, concealed hamper
I had to get a bit creative with this step!
First, I constructed the main “cabinet door” by using 1/2 inch MDF and 1/4 inch MDF for the shaker style border.
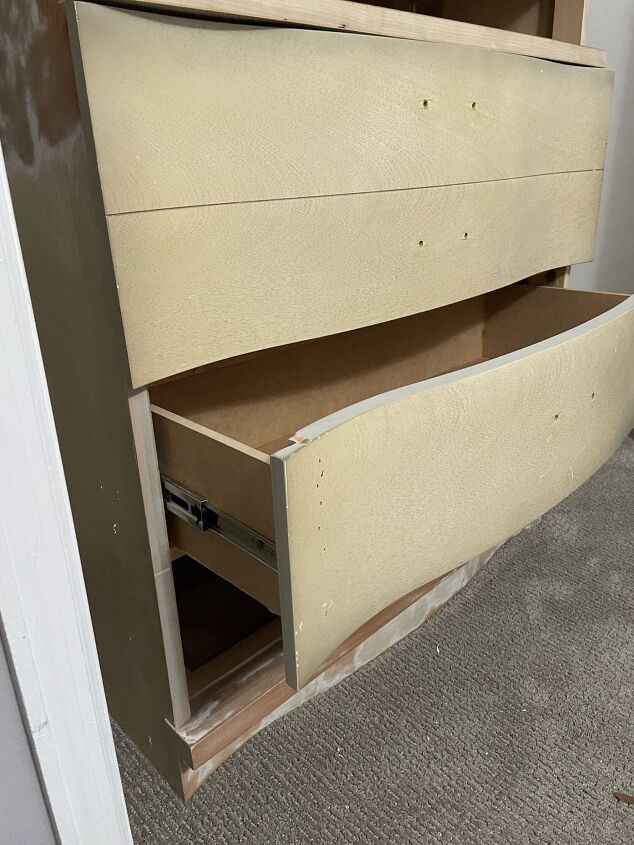
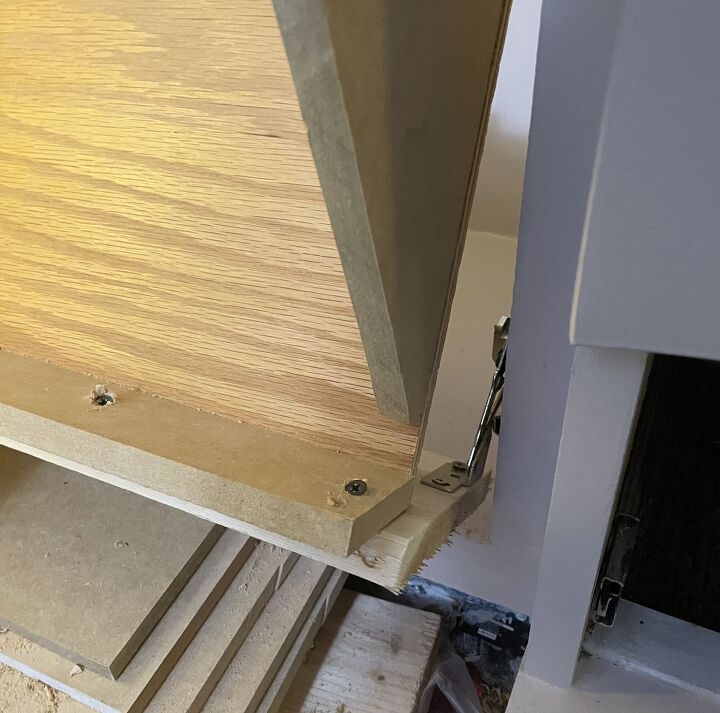
I set it aside and decided to build out the part that the hamper would sit on. I used ALL scraps from my garage so it’s not the prettiest situation but I wanted it to hold the hamper in place but still be able to remove the hamper if needed.
I made the mistake of securing it to the cabinet door first as shown in the image above. When I went to install it in the closet, I knew it wasn’t going to fit because of the bump out of the closet. The space was way too tight.
I moved my attention to the hinge that I ordered. I was able to get the rev-a-shelf tilt out tray hinge from amazon and installed it into the cabinet. I needed to then install another board to the hinge. This board would secure the hamper shelf behind it and the cabinet door in front of it.
Trust me, this was the ONLY way to get it in my specific space. If I was dealing with an open space instead of a closet corner, it would look very different!
Priming and Painting
I started by priming everything using Kilz All Purpose Primer.
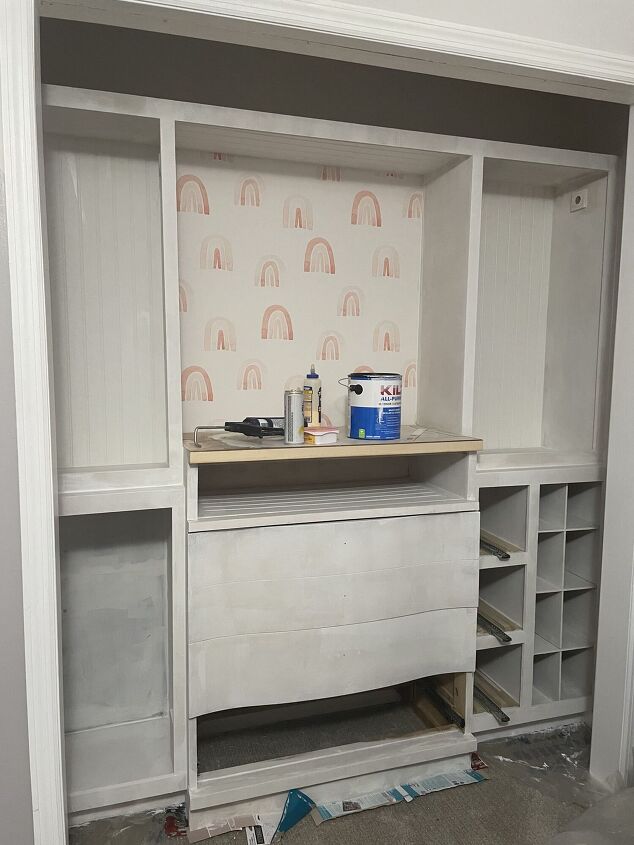
Once everything was primed, I painted using Valspar Signature paint in the color White Truffle (Sherwin Williams) which I purchased from Lowes.
Finishing Touches
The sconce I ordered from Amazon was a little orangey for the look I was going for, which was more of an aged antique brass look.
To solve this, and to get the sconce to match the knobs a little better, I used Rustoleum Satin Bronze spray paint (after Rub and Buff failed adhere to the surface of the sconce smoothly).
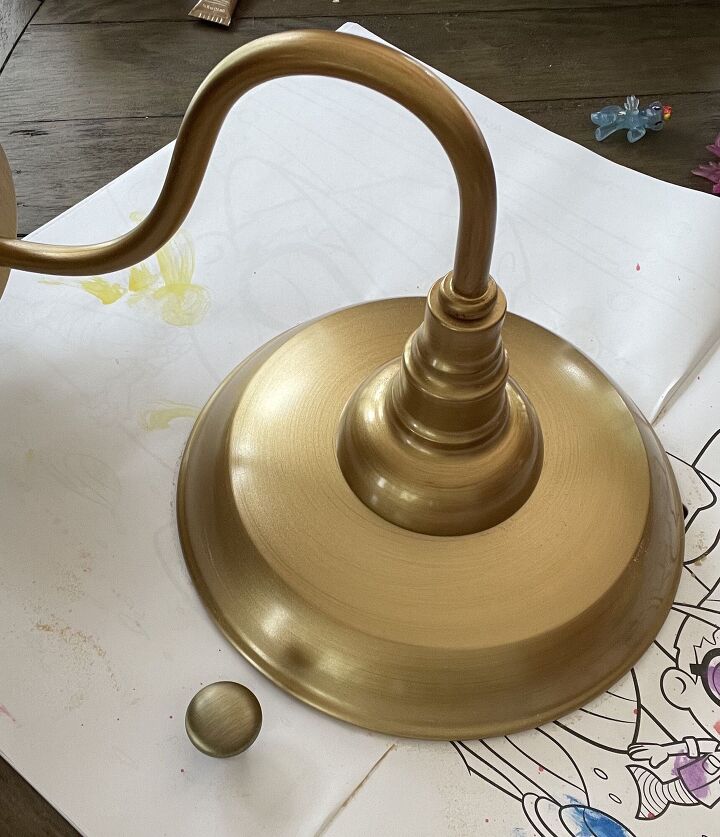
These are the knobs I found on Amazon, and I absolutely loved them!! I purchased these cut-to-size screws since I needed every size except what came with the knobs.
I used thread lock as well to prevent the knobs from loosening over time! Just a drop of thread lock in the knob hole (not the drawer) before you screw them in and you’re all set!
I used rope lights to line the inside of the closet around the trim to give a glowing affect. Personally, I didn’t feel it showed up well in pictures because of the warmth of the light, but it does look pretty cool in person!
The sconce was not hard-wired. I attached it to the wall and used the “magic light” trick (not invented by me) which involves attaching a remote controlled puck light like this into the sconce. I used super glue to do this because it holds well and I can still change the batteries when needed.
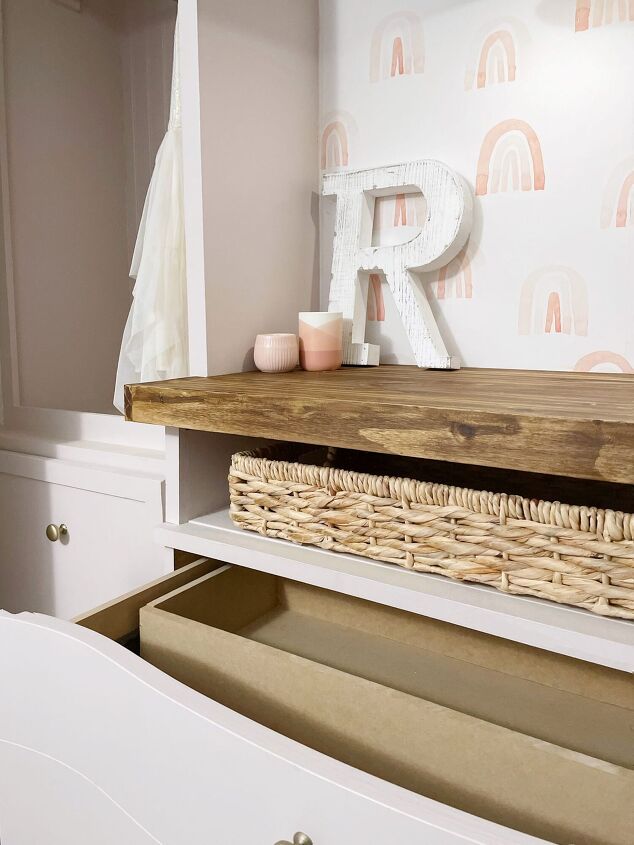
I also purchased a sheet of wood from Home Depot to add to the top of the dresser (to give a “countertop” look to it). I cut it to size and then ripped down pieces to add to the front and sides. I stained it the color Mission Oak.
Visit the full post for complete material list and links: https://projectdiyourhome.com/diy-custom-closet-built-ins-turning-a-thrifted-dresser-into-a-closet-system/
Check out the “After”

Comments
Join the conversation
-
Amazing!!
-
Ha-friggen-za!! Fabulous!!!!!


Frequently asked questions
Have a question about this project?