


IKEA Billy Bookcase Hack Tutorial
Today is all about our IKEA Billy Bookcase Hack. How we turned IKEA’s Billy Bookcases into a wall of built-ins!
After moving in to our home, we wanted a wall of built-ins installed in our den. I got a bid from the cabinet shop that did our cabinets, and it was way out of our budget. So, I started googling DIY options. I came across a few IKEA hack wall of built-ins and decided that may be the perfect solution.
After researching and reading tutorials, we came up with a plan.
Executing Our IKEA Hack Plan
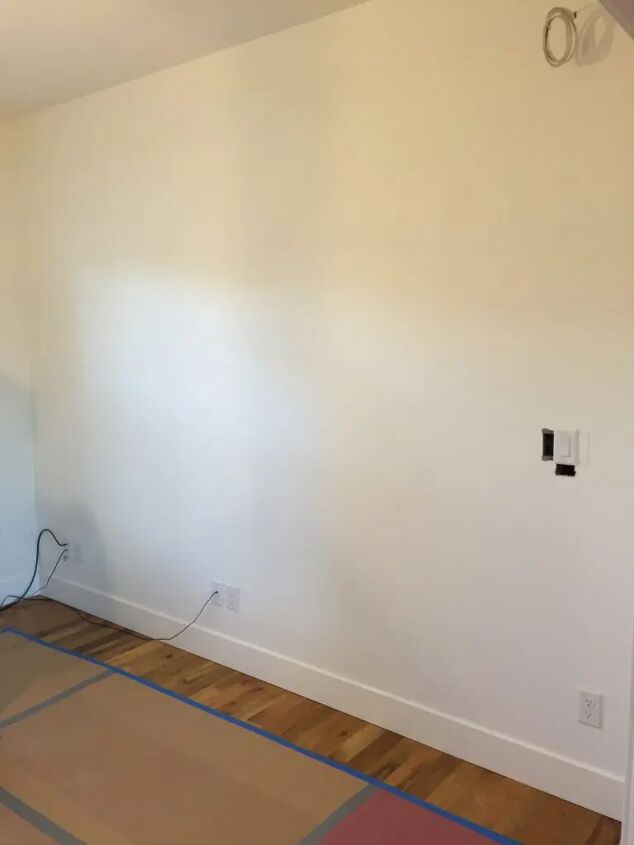
We started with a blank wall measuring 141″ wide with 9′ ceilings. We removed the baseboards along this wall and saved them to re-attach later. My husband is an electrician, so at this point he did all the necessary wiring to be able to install the lighting after the built-in is complete. If you are wanting to have hard-wired lighting, this is where you want to call in an electrician.
Materials Used For IKEA Hack
We purchased and put together the following IKEA Billy Bookcase items: (4) Billy Bookcases 31.5″x79″x11″ (4) Billy Bookcase Height Extension 32″x14″x11″ (8) Oxberg Doors.
The height extension simply adds height to your bookcase. We have 9′ ceilings, so we wanted a tall bookcase. This may or may not be the case for you!
Other items we used: 1×10 MDF trim for top; 1×6 MDF trim for sides; 1×4 MDF trim for between each shelf; 2x4s & OSB crown molding for top; Benjamin Moore Simply White paint for all of the trim pieces.
Tools used: compound miter saw; table saw; drill; nail gun & compressor.
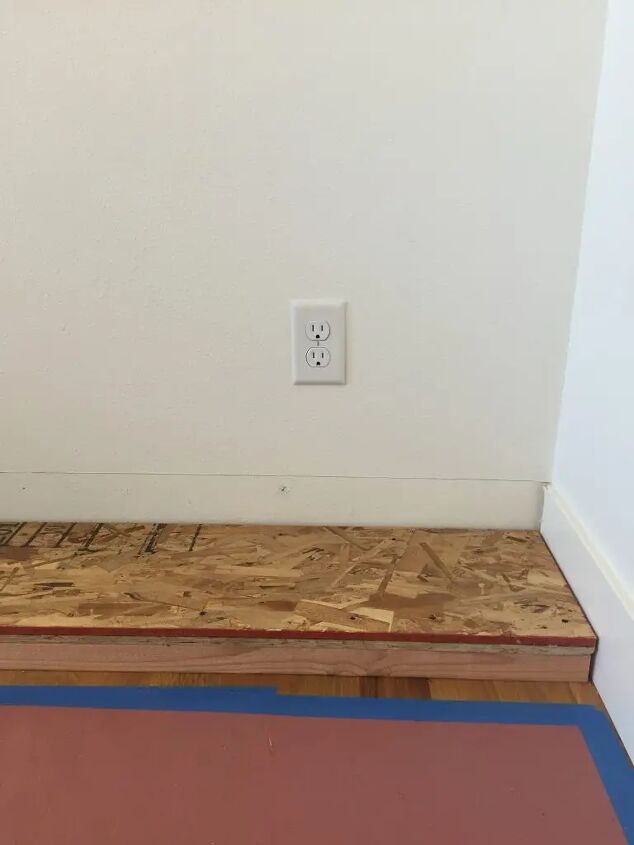
We then built a platform for the bookshelves to sit on to make the 1st shelf even with the 6″ base molding we removed and will put back on later.
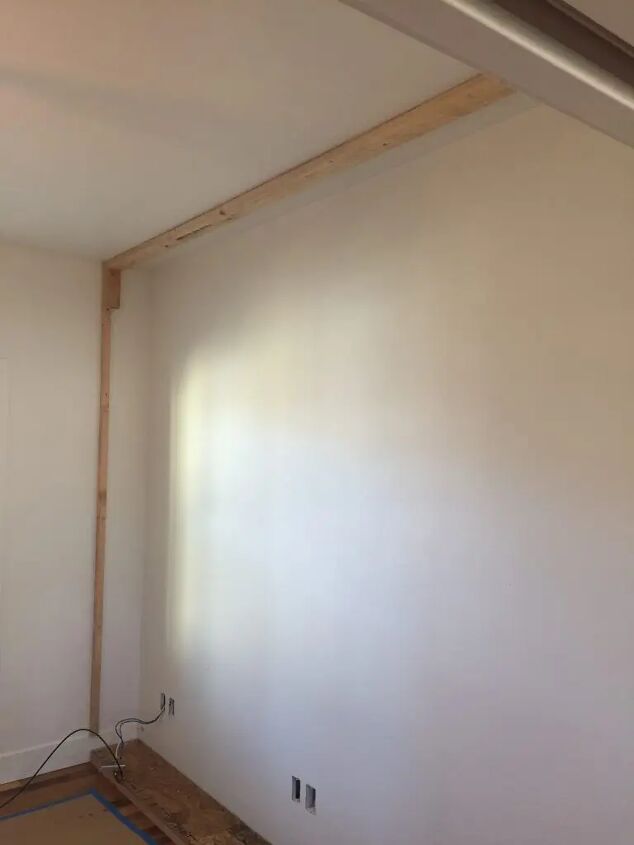
Next, pieces of wood trim were attached to both walls and the ceiling. We used screws where we could hit wood, and sheetrock anchors where we couldn’t. This wood trim will be used later to attach the finish trim to.
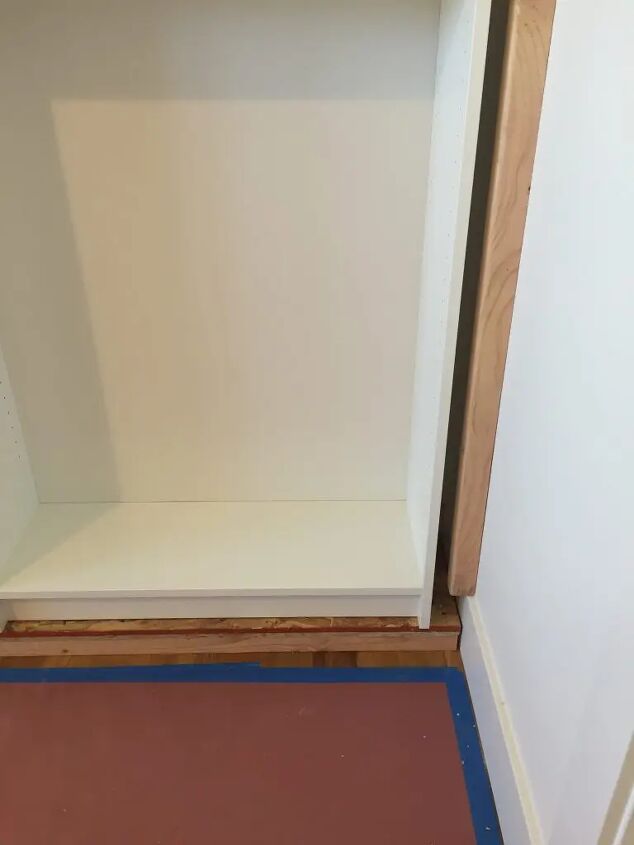
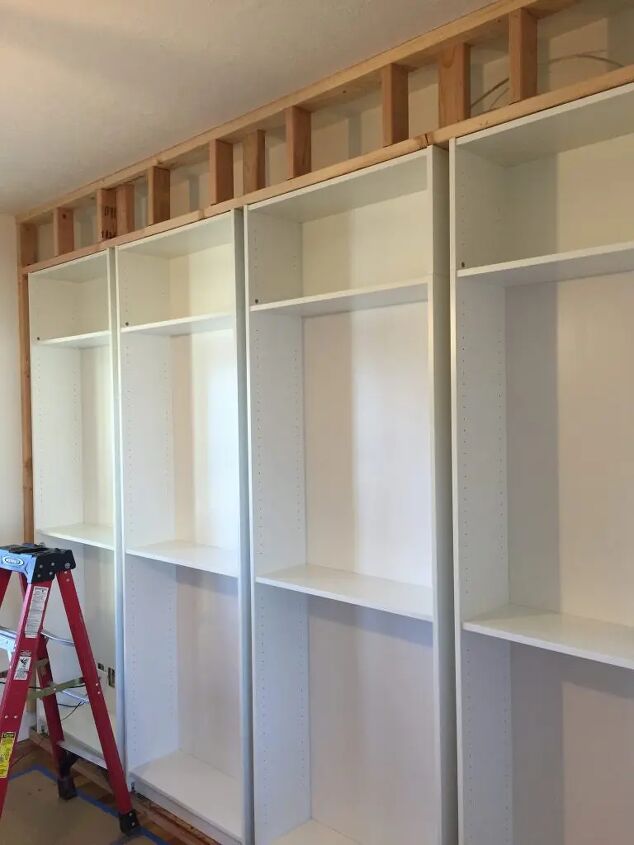
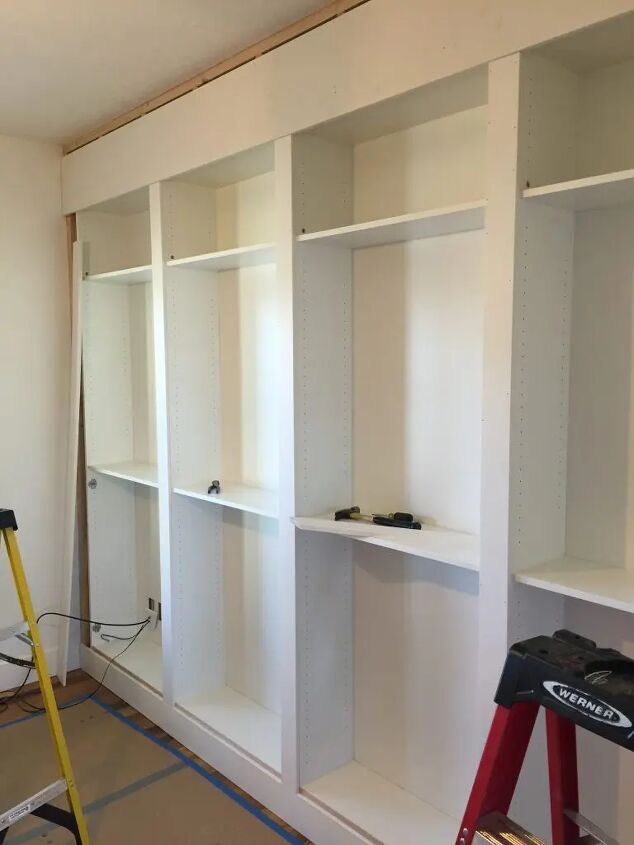
The bookcases are then installed on top of the platform. (You can see the wood piece mentioned in previous step above.) We evenly spaced the bookshelves so the trim pieces would be equal between each shelf as well as against the wall.
The spacing between the wall and bookcases is bigger than the spacing between each shelf (and obviously will be different for everyone depending on wall size,) but what is consistent is the measurement between the left bookcase and the wall and the right bookcase and the wall, as well as the distance between each shelf.

Here you can see all 4 of the bookcases evenly spaced along the wall.
Next, we installed more trim pieces to the top of the newly installed bookcases. This is so we can attach 10″ finished trim to it later. Same idea as the pieces of trim shown earlier.
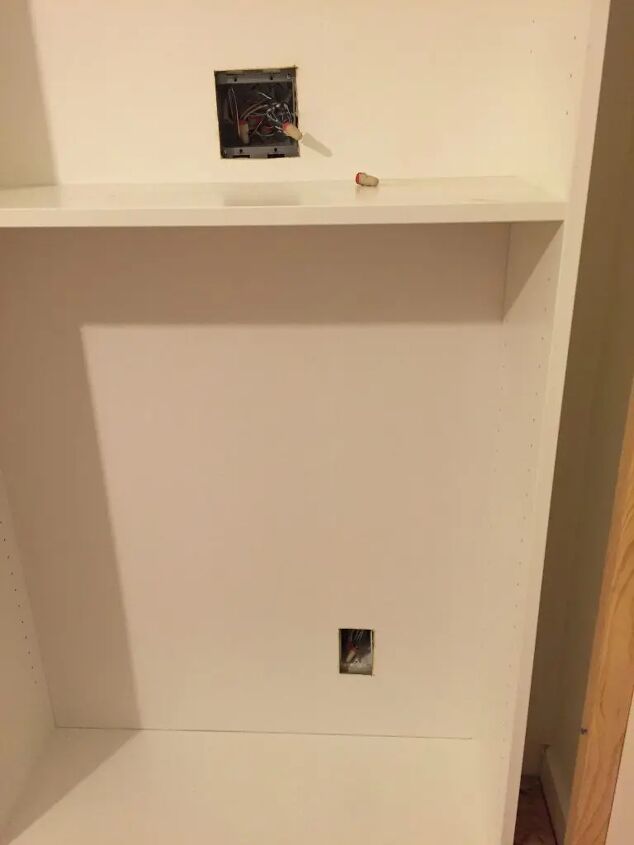
At this point you will want to cut out any light switches and plugs you may have covered with the bookcases.

Here you will see where all of the wood trim pieces we secured to the wall, top of shelves and ceiling are coming in to play. The 10″ finish trim piece is installed on top. The piece still showing above the 10″ molding will be covered by crown molding later.
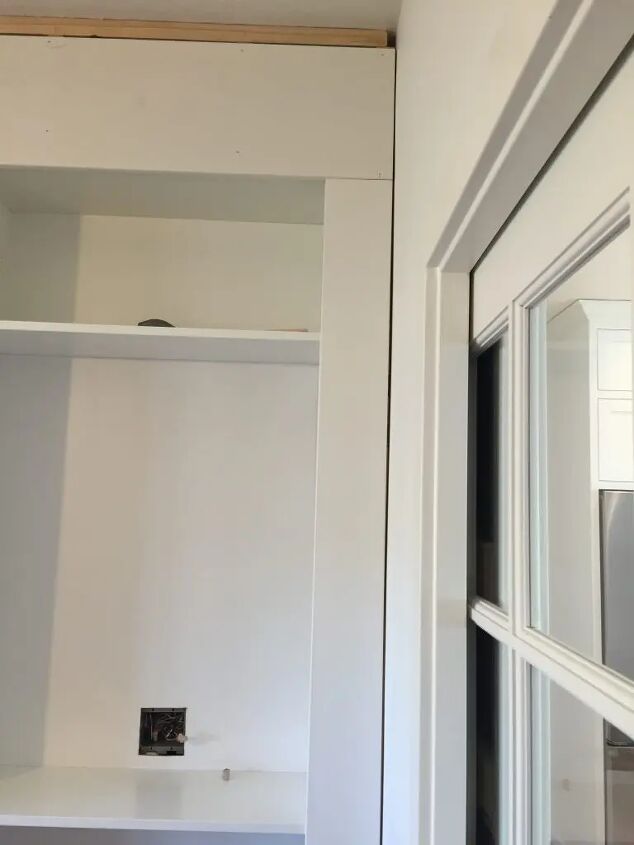
Another view of the finish trim on the top and sides. The gap between the wall and the 6″ trim piece shown here will be caulked.

Shown above is the 4″ trim piece that will be installed between these two shelves.
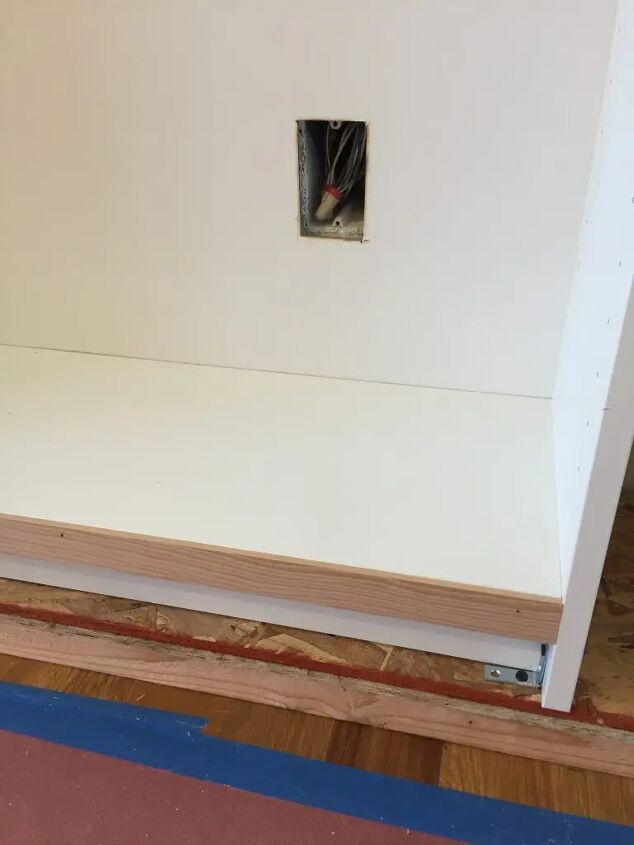
The unfinished wood trim piece shown above is installed so the doors will sit flush. (You can also see in this photo how the bookshelves are attached to the platform.)
You can now see what the built-ins looked like before any caulking, wood filler, crown molding or doors. I do want to mention a trim piece that I do not have a photo of. The front of each shelf pictured above got a trim piece as well. This is so the top of the doors wouldn’t have a gap. We used wood filler and sanded quite a bit so it appears to be all one piece.
I do have a video of this saved to my IKEA Hack highlight on my Instagram page if you have questions about this portion.
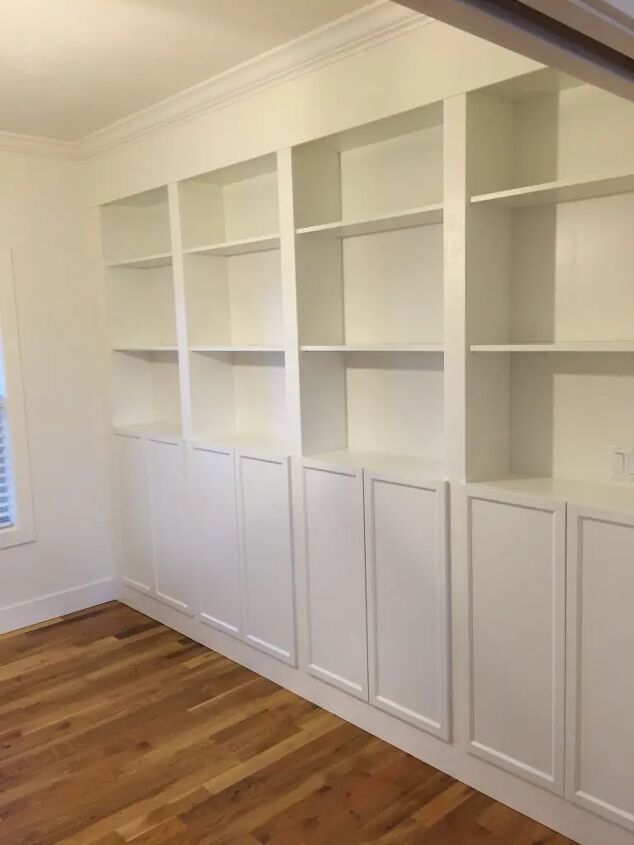
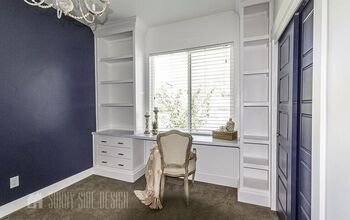
And here is the almost finished built-in. We filled all of the holes that come pre-drilled from IKEA to make it look more custom. This obviously means we will not be adjusting the shelves. You can do this part or not.
We caulked everything and painted everything except the doors, back of the bookshelves and the actual shelves. We painted it with Benjamin Moore Simply White. I cannot tell the difference between what we painted and didn’t. (We used a Zinsser primer before painting.)
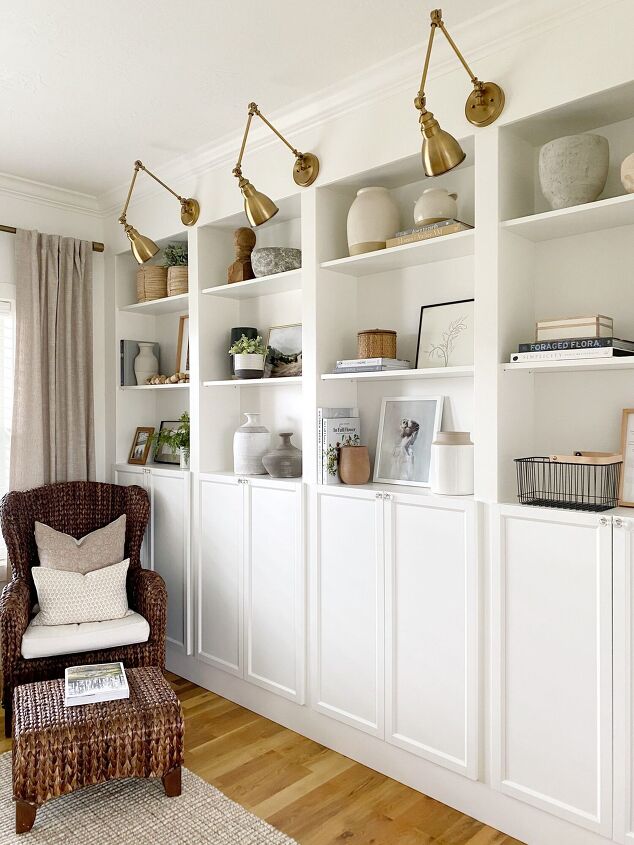
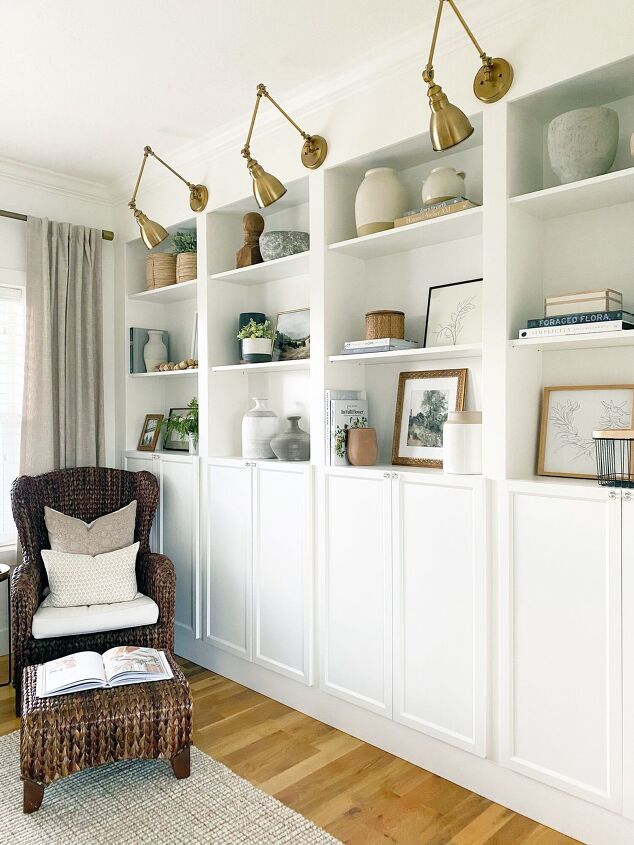
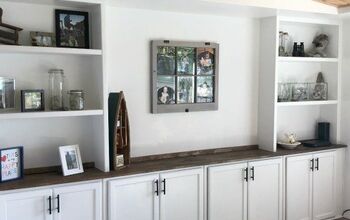
The after of our IKEA Billy Bookcase Hack ! The last thing was to install these Brass Swing Light Sconces and style the shelves! Like I mentioned above, there is a highlight saved on my Instagram page that may also be helpful if you are doing something similar. And as always, feel free to reach out with any questions you may have!
*One question I have received a lot of is regarding the doors and hanging them. We did have to drill new holes, because of the added thickness of the trim we added. We adjusted for the extra depth, and used the screws they gave us to drill into the cabinet in a different spot. However thick the wood is on the front, you will move the new drill hole that amount.
Update- I have written a FAQ IKEA hack blog post. You can find it here: IKEA Billy Bookcase Hack: The Most Frequently Asked Questions
Resources for this project:
See all materials


Comments
Join the conversation
-
Well, this does look built-in and it's absolutely beautiful!! I would do this! Great job!
-
We had planned to do this in our living room--we wanted bookcases to wrap around the room. Sadly--at the time we were ready to put this plan in motion--the Billy bookcases were not to be found at an IKEA near us and shipping wasn't on option, either. We found a local store that sold upper kitchen cabinets for a pretty good price--we assembled them and stacked them on top of each other. I like having the doors--with glass inserts you get to see the books and my assorted doo-dads--plus--it keeps the dust to a minimum. IKEA bookcases would have been easier but we got essentially the same look without having to wait forever. A recent search shows Billy is still in short supply--ugh!


Frequently asked questions
Have a question about this project?
Did you add a shelf? Before has a bigger space between them after they are even.
How did you get the colors to match? Did you paint the IKEA shelves?
Why didn’t you add all the materials to the list of resources?