


Wire Shelving Makeover

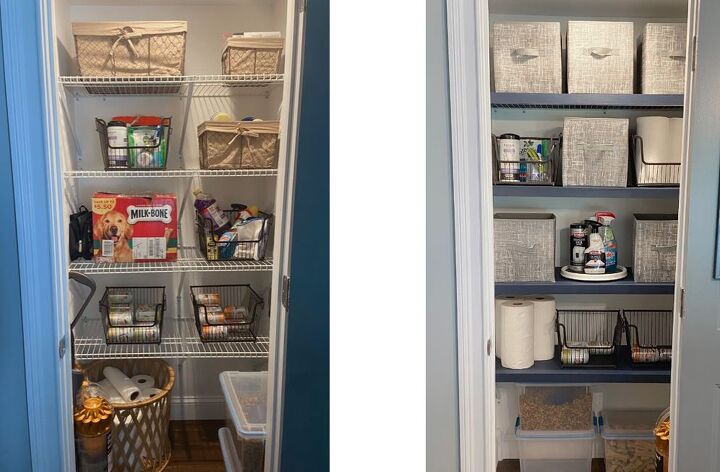
Moving into a builder grade home, we had these ugly wire shelves in every closet. After a year of living with them, I decided it was time for a little face lift. I didn't want to spend very much money on this so I had to get creative.
I've seen this done a few different ways. I saw a few examples using foam board and contact paper but I wanted something more sturdy. A few others I've seen used wood and a wood router, but we don't have one of those. That lead me to this method! I wound up going with underlayment because it was sturdy, lightweight, and cheap. It also can be easily painted or stained. If I were to do the project again, I would make a few small changes which I've outlined below, but overall it was definitely a success.
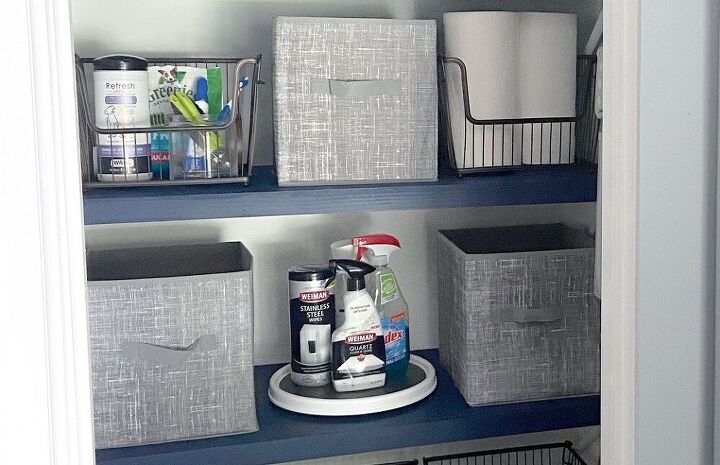
The whole makeover only cost $40. I also "shopped my home" for some organizational items to make the space a little better to look at (i.e. baskets, turntables, etc.).
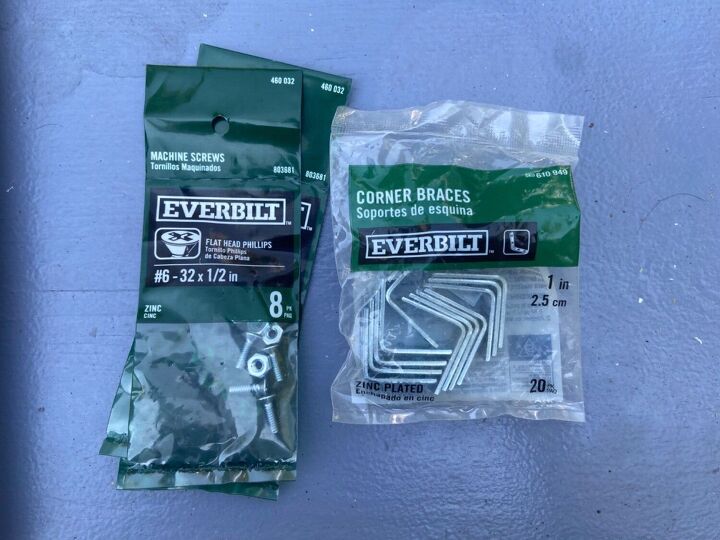
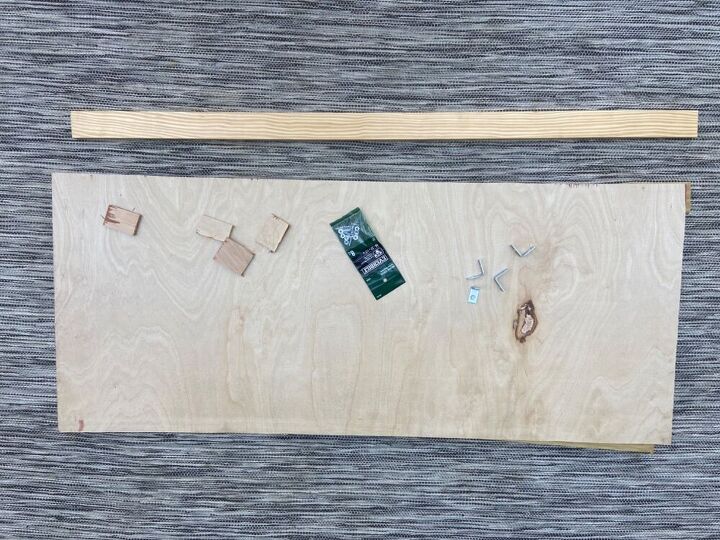
What you'll need:
1/4 in. underlayment (I would use 1/2 in. if I were to do this again)
1/2 in. x 2 in pine moulding (1x2s would be a cheaper option)
1 inch corner brackets
1/2 in. screws
Paint (optional)
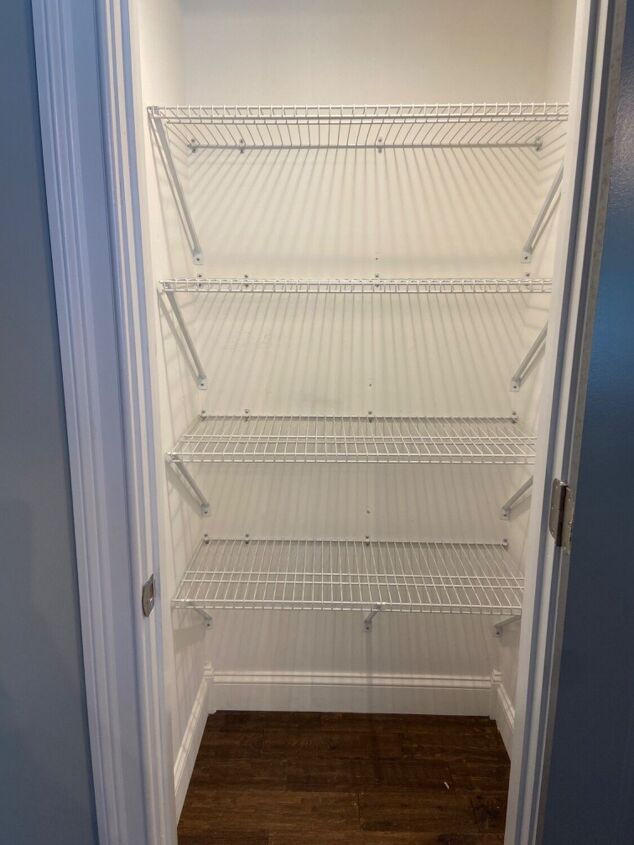
Step 1: Measure and plan
First I cleared out my pantry closet and measured my shelves. I had four shelves- each one was 16 in. x 38 in. and I decided I wanted my overhang in the front to be 2 in.
Unfortunately, I couldn't completely do away with the wire supports but I did remove the middle bracket for a cleaner look. If you do this, make sure that your shelves are sturdy enough with just the two supports.
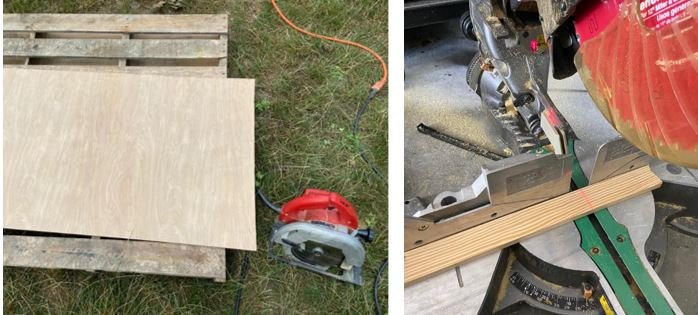
Step 2: Cut materials to size
I used a circular saw to cut the underlayment for the shelf base (four pieces, each 16 in. x 38 in.) and I used a miter saw to cut the moulding for the overhang (four pieces, each 2 in. x 38 in.).
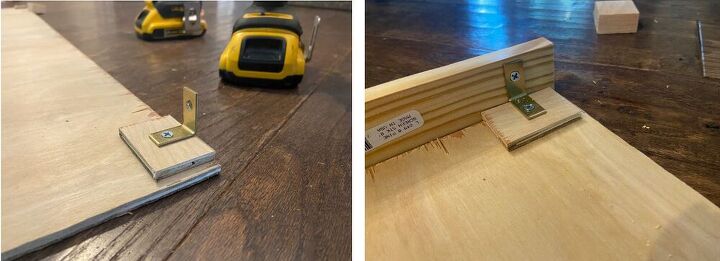
Step 3: Connect shelves
I used the corner brackets to connect the moulding to the underlayment and I pre-drilled all of the holes so I didn't split my wood.
I also had to use scrap pieces and double up the underlayment so that my screws didn’t go all the way through (remember, 1/4 in underlayment and 1/2 in screws). If I were to redo this project I would have gone with 1/2 in underlayment so I could skip this step.
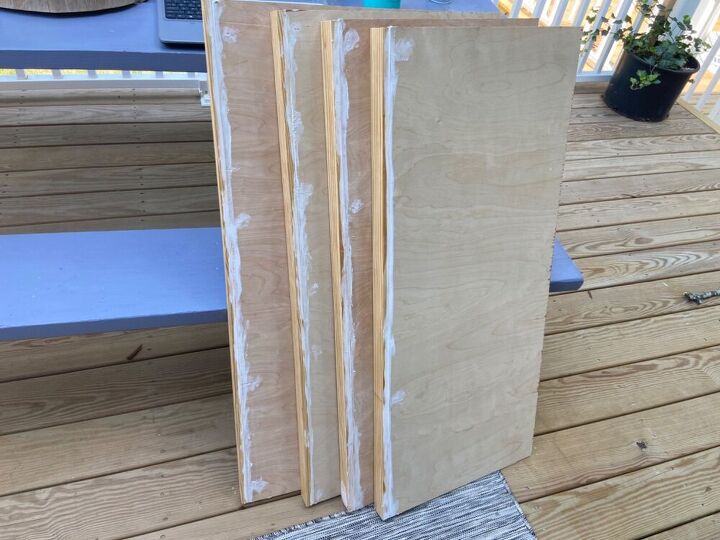
Step 4: Sand and caulk
Because I pre-drilled, I went fully through the underlayment in some places, so I lightly sanded the holes down and filled them in. I also caulked the gap between the underlayment and moulding to create a seamless look.
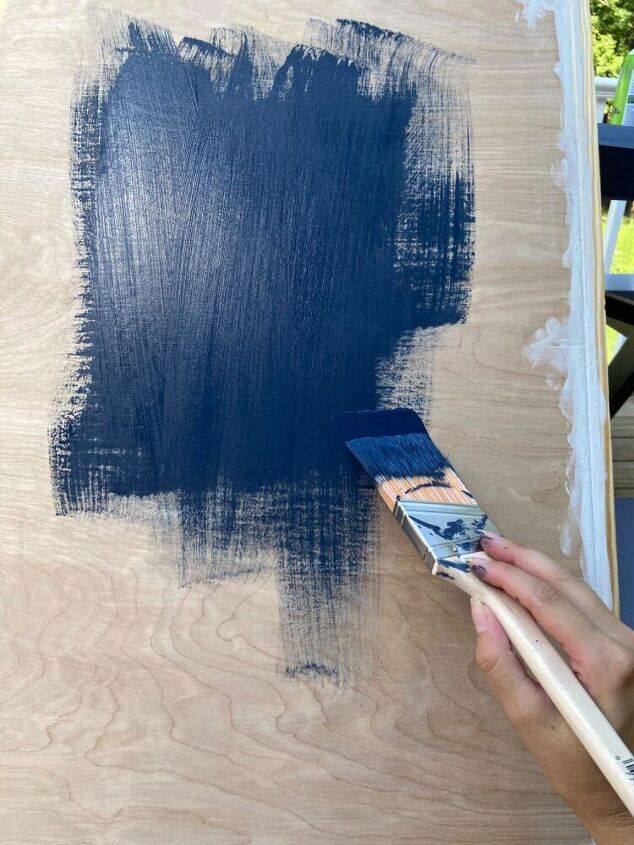
Step 5: Paint
Once the caulk dried, I painted the shelves
Step 6: Assemble
Next, I just slid the shelves over the wire shelving and restyled/organized!
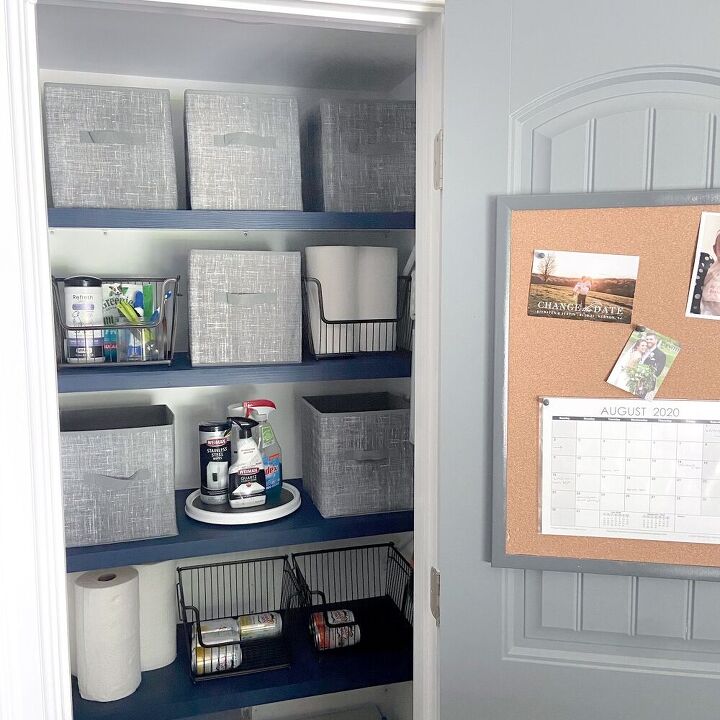
For only $40 I couldn't be happier with this project. It was an easy, cheap fix for the ugly wire shelving we had before. I liked it so much that I may be doing it again for our linen closet upstairs!


Comments
Join the conversation
-
I did this project, but used old faux wood blind slats to hide the wire shelving. Cost me nothing! And I'm pretty happy with it.
-
Great job! I too hate those wire shelves.


Frequently asked questions
Have a question about this project?
Where did you purchase the bins for the shelves?
Didn't using scape wood to attach molding impact the level of the shelf?
Did you have to put some scrap pieces on the back of the shelves too ?
Seems like it wouldn't be level if you didn't