How to Transform Your Bathroom Window With a Pretty Privacy Screen

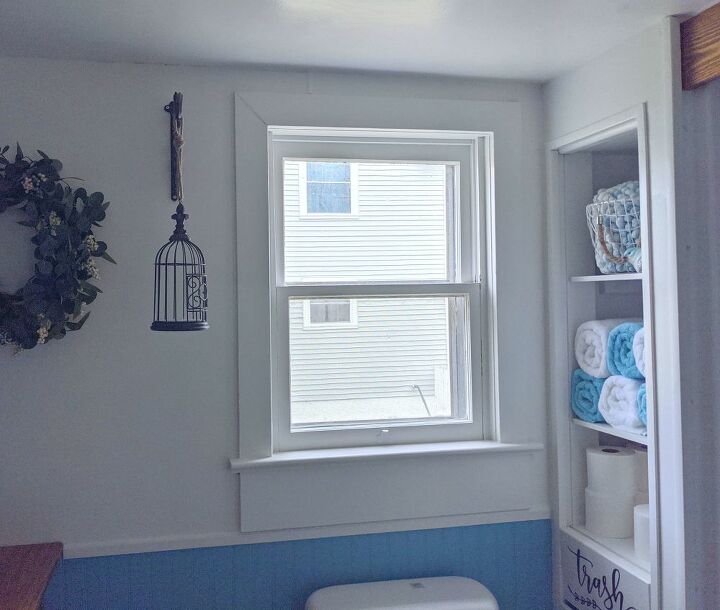
When we did our bathroom makeover, I wanted to transform the bathroom window. It needed to give some privacy but also let air in during the summer. So, we came up with a pretty dove design and made a DIY privacy screen for the bathroom window.
This shows that there was a real need for privacy in this bathroom.
1. Find a screen panel
This is an amazing product sold as an outdoor decorative screen panel but sometimes used by others (like me!) in other ways. The panel measures 32" wide by 4' high and obviously doesn't fit my window as is so will need to be cut down.
2. Make a frame
Cut 4 pieces of pine wood to fit the inside dimensions of the window minus 1/8" so the frame can open and shut.
Run the wood through the router to create the same depth groove on all 4 pieces.
We wanted a rounded edge, so he routed the edge, but this is optional.
3. Verify the groove fits
As you can see, the screen panel is a nice thickness of about 0.25".
It's waterproof, can be painted, and resists warping too. I really love this product!
4. Make pocket holes for screws
Create pocket holes with a Kreg jig then screw the frame together
5. Lay your frame onto the screen
Align it to your liking. I wanted to avoid cutting the birds off so choose where to place the frame accordingly.
6. Mark the first line
Pencil a line all the way around your frame's inner edge.
7. Mark the second line
Because the frame has an inner groove mark a second line, which will be your cut line. Your measurement will be the depth of the groove in your frame.
Now you have two lines. The outer line is your cut line.
8. Cut to size
Using a fine-tooth blade on the jigsaw and set at a slower speed, carefully cut around the outer line you drew. Go slow, take your time.
9. Verify the fit
Take one end of the frame apart to verify the fit by sliding the panel into place.
10. Paint the frame
Remove the inner panel and paint the frame.
11. Assemble and apply optional putty
Once the paint is dry slide the inner panel into the frame. You can glue it if you want to then screw the pieces together. If you want to you can also putty the corner pieces and then touch them up with paint.
12. Attach hinges
Attach your hinges to the frame and window.
DIY bathroom window privacy screen
Here you can see we can open the privacy panel to open the window. The panel can then be shut and the breeze flows in. So nice!
The panel comes in white or black (or can be painted) and there are a variety of designs. You can find these panels on Amazon and also at Home Depot for about $35. The design is Ginger Dove by Acurio Latticeworks.
I'm loving the look and the birds are so cute in my bathroom, which has other bird features. Let me know what you think of this bathroom window transformation in the comments below.
Has this project inspired you to transform your home with a designer touch?
Enjoyed the project?
Resources for this project:
See all materialsComments
Join the conversation
-
 Cha101791165
on Mar 31, 2024
I think that is a brilliant idea, though I don't need privacy as I look out on sheep and horses. However I will bear it in mind for the future and spread the word. Thank you so much for sharing.
-
-








Frequently asked questions
Have a question about this project?
It is beautiful and I like it, but is it right above your commode? If so, does it really give you privacy? Not meant in a negative way, I have a window similarly placed and neighbors that are often outside. 😊
The privacy issue can be cured with vinyl stick on frosted glass paper. It’s available at home improvement stores in rolls. Place it right on the glass & have forever privacy and still have the light shining in the bathroom. I love the screen. Good job! I will be coping your idea in my master bath for sure!
Love this