


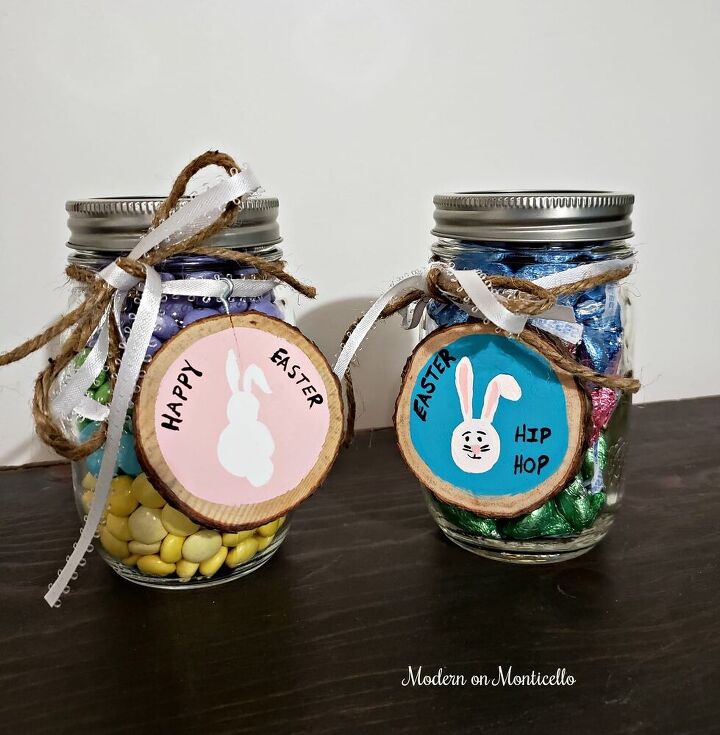
Easter Candy Jars

Easter is just a few weeks away and candy is always a big part of the holiday. Grab a few mason jars and wood slices to create an adorable Easter candy jar.
Since I had the mason jars and the wood slices already on hand in my craft room, I didn’t need to spend any money on this project except for the candy.
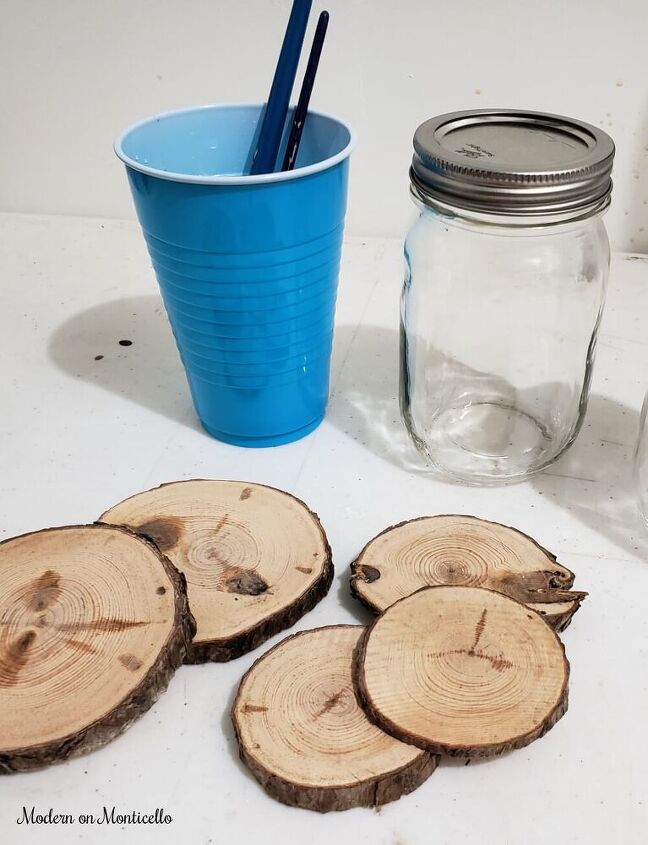
For this project you will need:
- Mason jars with lids
- Wood slices
- Small Eye Hook Screws
- Decorate Ribbon
- Jute Twine
- Acrylic Craft Paints
- Craft paint brushes
- Candy of your choice
I use wood slices from my own yard. Just one of the perks of living on such a wooded lot.
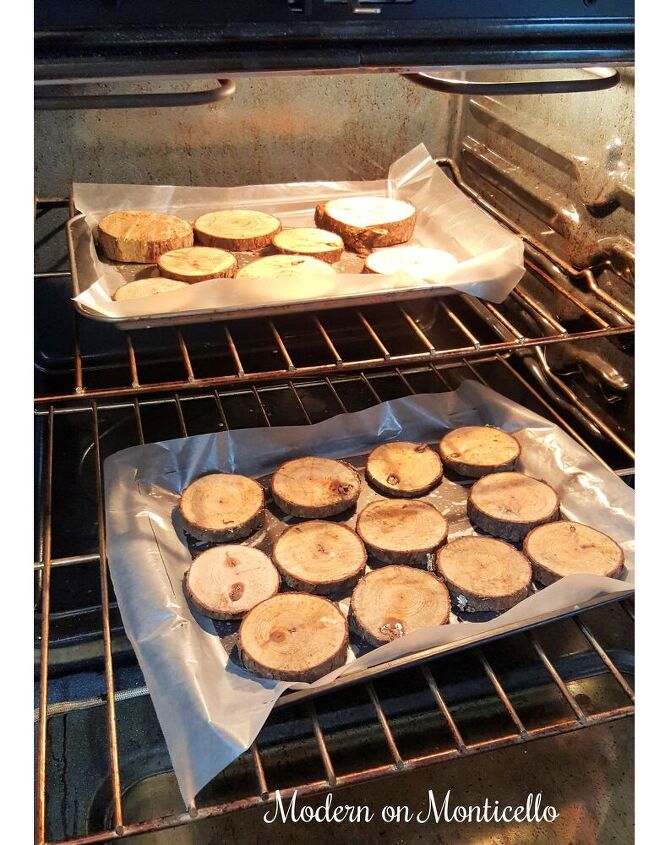
Since I use wood slices cut from my own yard, I have to bake them in the oven to dry them out before I can use them.
To do this, I bake the wood slices at 200 degrees Fahrenheit in the oven for 30 minutes, turn them over, and bake for another 30 minutes.
This not only dries up the sap and water in the wood, but also kills off any bugs and bug eggs that may be hiding in the bark.
This is not a step you will need to do if you purchase pretreated wood slices from Amazon or a craft store.
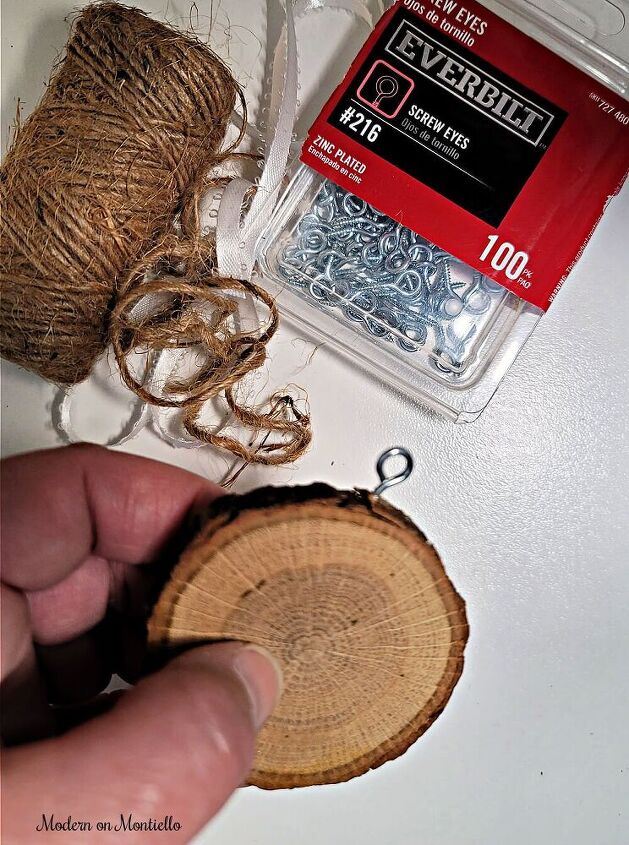
For my version of this project I used pine wood slices which are softer, even after baking them in the oven, and the small hook eye screws could easily be turned and screwed in on the bark edge of the wood slice.
This is not the case when I have tried to use wood slices from my yard that are from hickory or ash trees. The slices are just too hard after baking to get the hook eye screw to even make a dent in the wood. If you don’t know if these hooks will work on your wood slices, it is probably best to make a small hole in the wood slice with a drill instead.
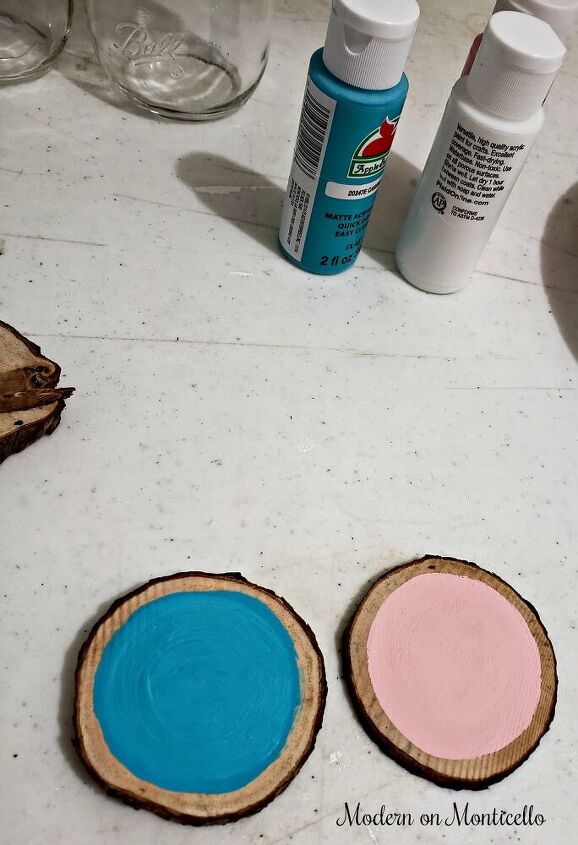
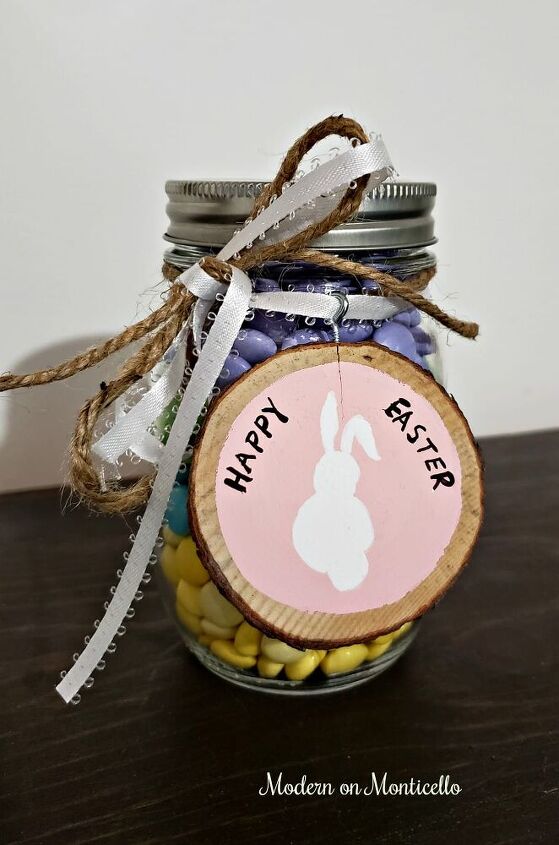
I painted cute bunnies on my wood slices since these were for kids, but you could also paint on a cross or other symbols of Easter.
To start the cute Easter bunny design on the wood slices, I painted the inner circles in light blue and pink.
After applying a few layers of the pink and blue paint on one side of the wood slices, I then painted a cute design of a bunny tail and bunny face for the Easter holiday.
I painted these free hand because the design was so simple. If you have a Cricut machine, use that instead. Or whatever is easier for you.
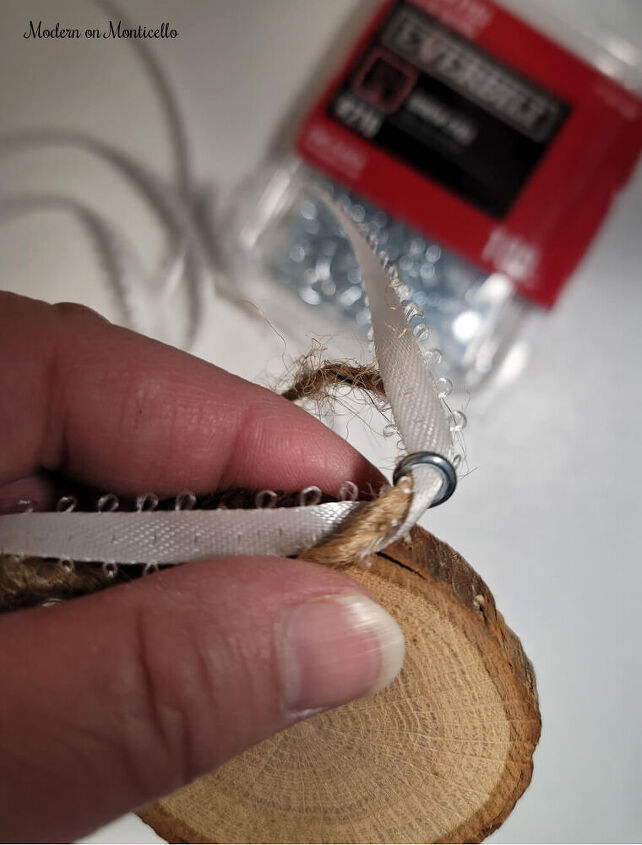
To attach the wood slices to the jar, I inserted an eye hook screw in the bark edge of the wood slice and threaded the jute twine and ribbon through it.
For a very quick project and very little money, these make for an adorable one of a kind Easter candy jar.
I even sorted the candy before putting it in the jar to create a colorful layered look.
Hope you enjoy the holiday this year! Happy Easter.
Resources for this project:
See all materials


Comments
Join the conversation
-
Such a cute idea! Thanks for sharing.
-
Super cute Easter Idea. I just followed your account.


Frequently asked questions
Have a question about this project?