


Turn an Old Cabinet Door Into the Perfect Spring Chalkboard
Grab an old cabinet door around and some paper clay to make this gorgeous vintage inspired chalkboard complete with timeless faded flowers. It will add the perfect pop of Spring to your decor while getting your creative juices flowing.
Have you been cooped up at home while social distancing and feel a little out of sorts? If you missed my post about why being creative helps so much during stressful times, you can find it here...
Today's project today will not only keep you busy but will get your creative juices flowing as well so it's a win win.
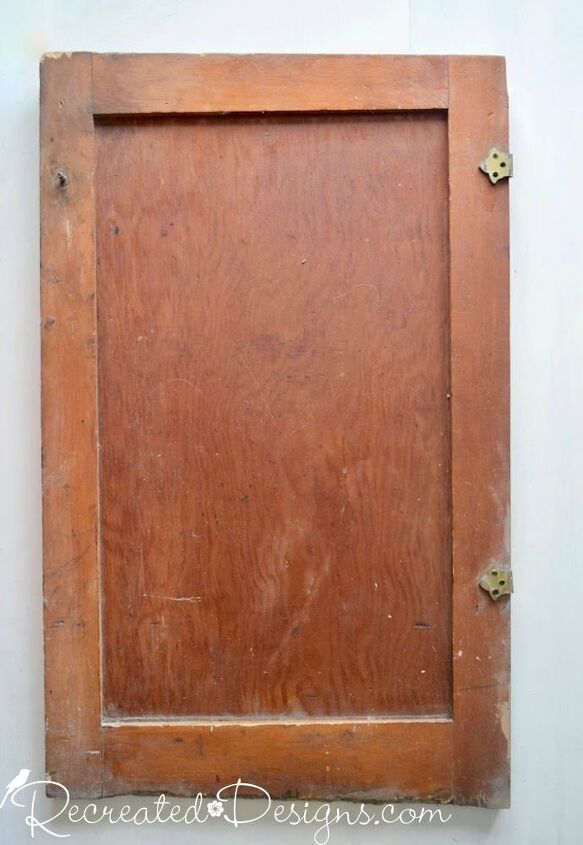
A few years ago I had purchased two of these really old doors (for $2 each) and even though they were both chewed up, crooked and holey, I instantly loved them. The wide thick moldings and wear at the bottom was simply charming.
I didn't need to do much to get the door I used ready for the project except remove the hardware and give it a good cleaning with soap and water.
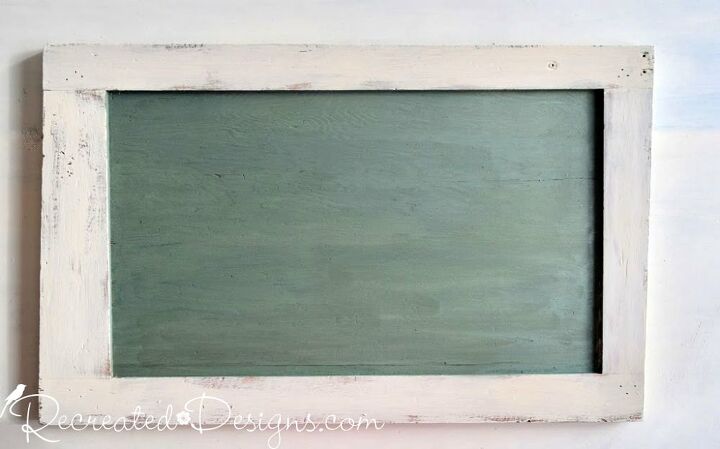
Once it was ready, the frame got a very light coat of Annie Sloan Chalk paint in Old Ochre with a loose, natural bristle chip brush. I wanted the paint to look old and worn so didn't worry too much about getting it even or perfect.
To create the chalkboard centre, I used two parts Miss Mustard Seed's Milk paint in Boxwood with one part Artissimo and it was the perfect old school chalkboard green colour. I also added just a little bit of Miss Mustard Seed's Bonding Agent to the mix for added stick.
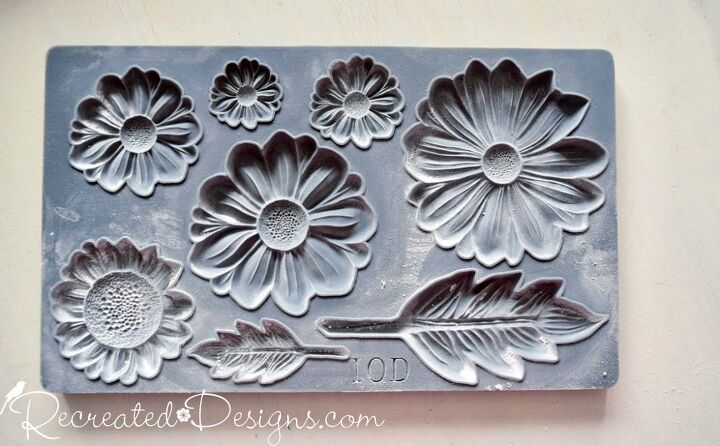
With the chalkboard ready, it was time for the Springy part of the project. Using the He Loves Me mold from Iron Orchid Designs and some paper clay I made a whole bunch of flowers and leaves.
I should note here that I always dust my molds with corn starch before each making each flower/leaf. The corn starch helps the paper clay pop out easily from the mold.
Once I had enough flowers and leaves, I laid them out on a piece of wax paper.
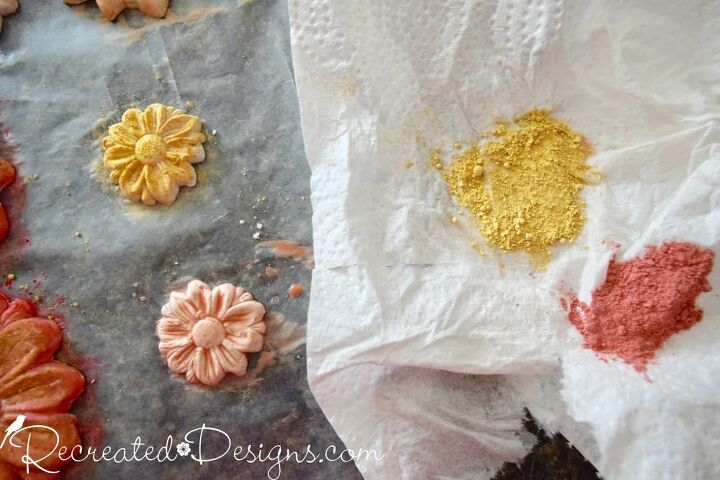
Wanting my Spring board to have a very vintagey feel, the flowers needed to have muted and worn colours. I mixed up some Miss Mustard Seed's Milk paint in Mustard Seed Yellow, Apron Strings, Tricycle and Outback Petticoat for the flowers and Lucketts Green and some of the vintage chalkboard colour I had left for the leaves. At a ratio of 4 parts water to one part mix, there was just a hint of colour in the water and it made the paint almost translucent when brushed on.
To add some colour dimension to the flowers, I also brushed on some dry paint mix. While the molds were still wet from the watery paint mixture, I dipped a small paint brush into dry paint mix and brushed in over parts of each flower. The chalky mix stuck to the wet surface and added some great texture and colour variation.
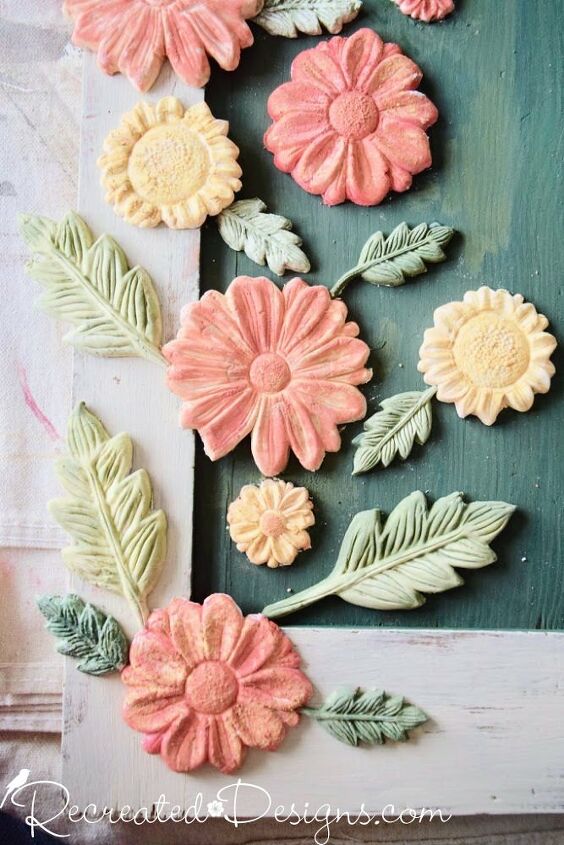
After letting the flowers mostly dry overnight, I laid them out on the chalkboard. It took a few minutes to arrange them in a way I liked and then it was time to adhere them to the board. I brushed some wood glue onto the back of each one, stuck it in place and then left them to dry again.

I really needed this little bit of Springy cheer in my house and absolutely love the vintage feel the board has. From the distressed paint to the chintzy looking flowers it all makes my heart happy.
To read the original post with additional tips and pictures, pop over to the Recreated Designs blog...
Resources for this project:
See all materials


Frequently asked questions
Have a question about this project?