


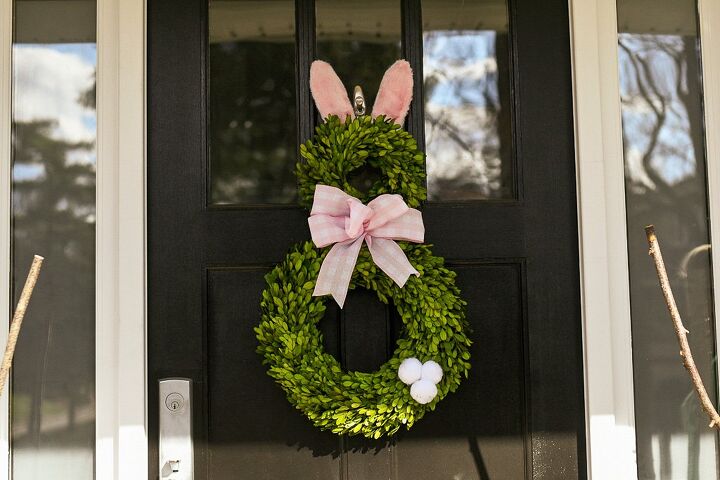
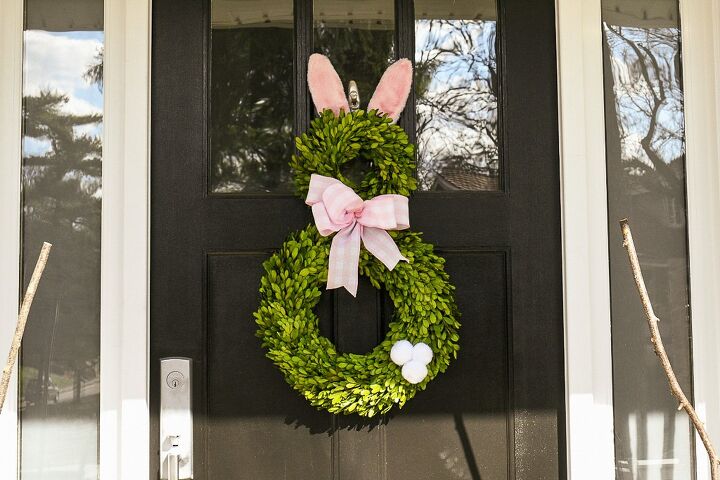
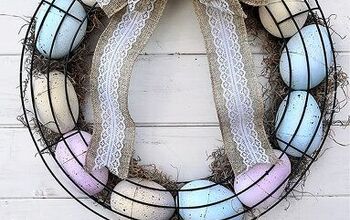
THIS EASY DIY EASTER WREATH IDEA WILL LOOK ADORABLE ON YOUR FRONT DOOR
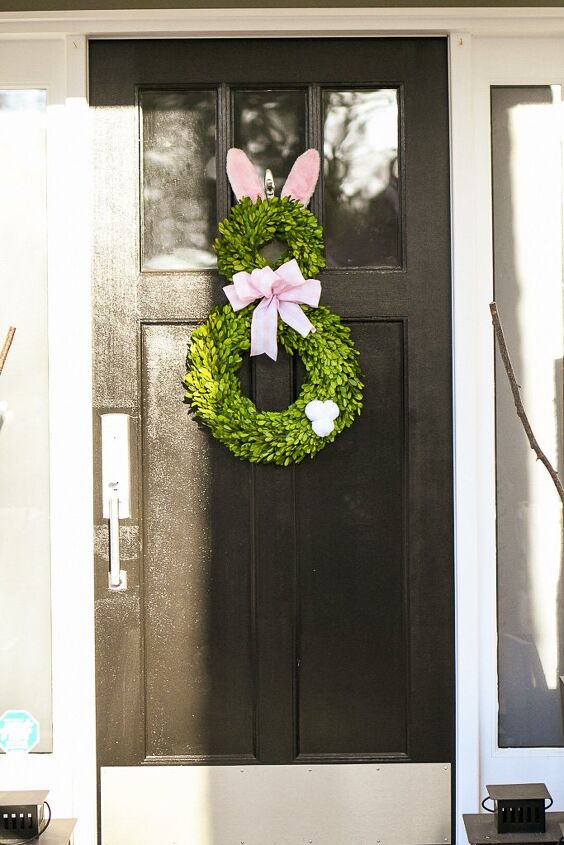
This easy DIY Easter wreath idea is simple to make and will be an adorable addition to your front porch. It’s the perfect accent for Easter!
Today’s celebration: a darling Easter wreath that is as cute as it is easy to make.
I just love this Easter wreath!
And truth be told, I copied it.
Yup. I saw a wreath very similar to this one for sale in a charming boutique not far from my house.
As soon as it was featured on their Instagram, I thought to myself, “I have to have that!”
So I hopped (see what I did there? LOL) into the car and off I went.
The Easter bunny wreath was just as cute as I thought it would be in person.
And then I looked at the price tag.
Gulp.
It was close to $150. Yikes. That’s a lot of “green” for a wreath!
So the wheels in my head began to turn.
Could I craft a knock-off version that was equally as adorable for less?
I experimented a bit. Then I pondered. Finally I got out the trusty glue gun.
And guess what? I did it!
Now I’m sharing how you can do it too!
Because hippity … hoppity … Easter is on it’s way!
And so are step-by-step directions for this charming, DIY Easter wreath idea.
You’re going to love it! It’s sooo cute!

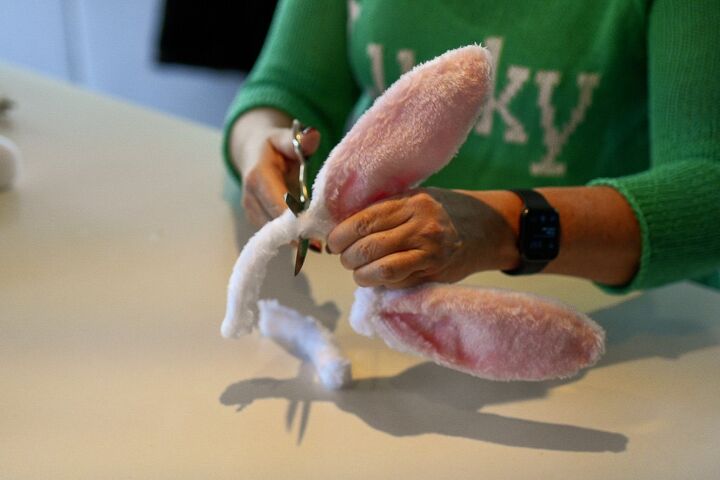
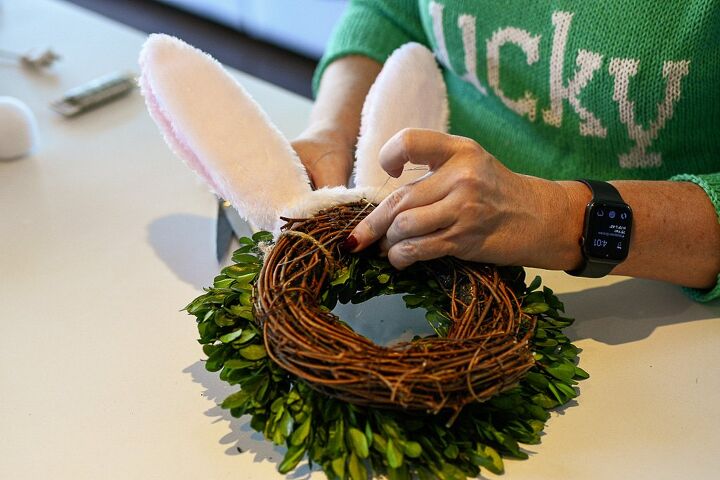
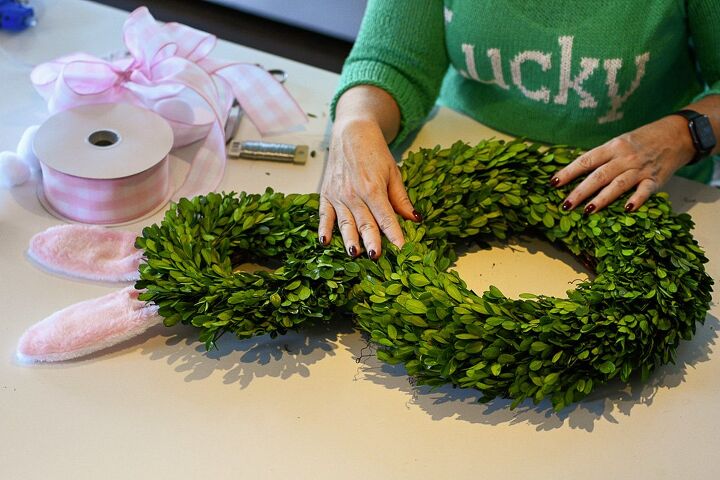
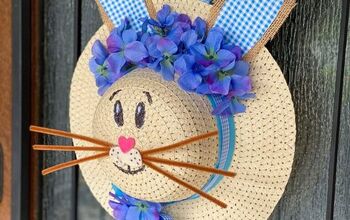
STEP ONE: ATTACH THE EARS TO THE SMALLEST WREATH
Since the ears are part of a headband, you need to cut off the bottom portions of the headband. You only need the ears for this project. And the arc of the headband almost perfectly matches the circular curve of the wreath!
You’ll want to grab a sharp pair of scissors to cut through the plush fabric, as well as the plastic band. You may need to bend the plastic back and forth to make it break.
After the ears are cut to size, take a piece of floral wire (about 12 inches of floral wire is ideal) and begin to attach the ears to the smaller wreath.
You can do this by threading the wire through the individual grapevines on the back of the wreath.
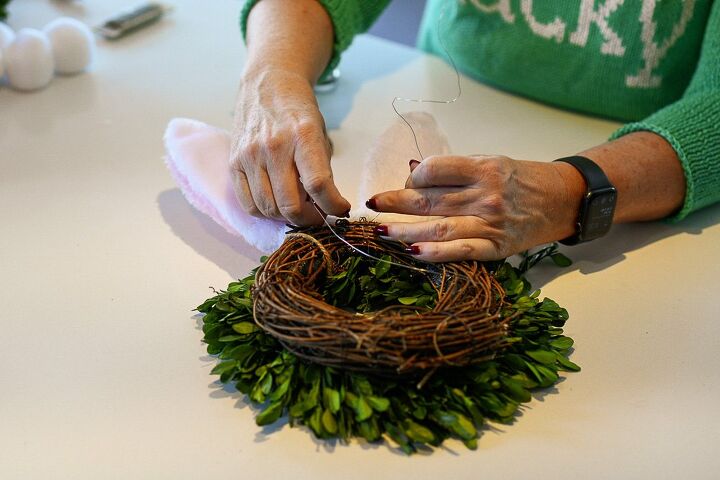
You’ll want to thread it through several times to make certain the ears are securely attached to the wreath.
When the ears are firmly in place, pull the wire taut and double or triple knot the floral wire. Trim off any excess wire with a sharp pair of scissors.
You’re almost halfway there! And honestly, if you have a smaller door or window, hanging just the top half of this DIY Easter wreath idea could be a cute, simple touch! You could even create multiples!
STEP TWO: ATTACH THE SMALLER WREATH TO THE LARGER WREATH
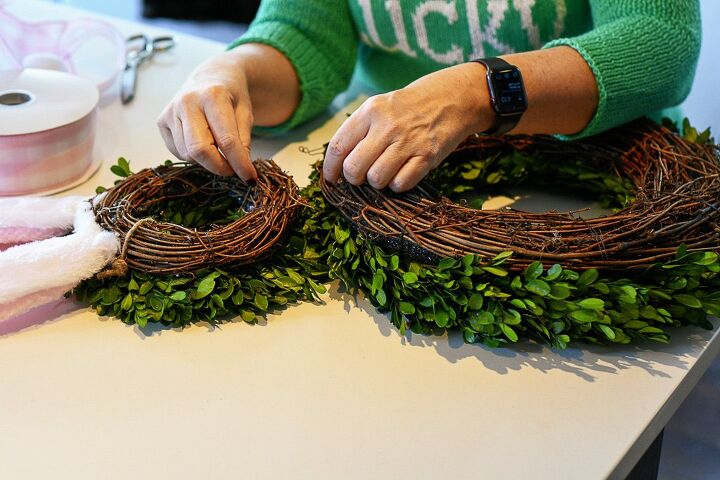
Cut a second piece of floral wire about 12 inches in length.
Utilizing the same technique you just used to attach the bunny ears, thread the floral wire through the individual grapevines between the small and large wreaths.
You’ll want to pass the wire through each wreath at least five or six times.
When you feel the two wreaths are securely attached together, pull the wire taut and double or triple knot the floral wire. Trim off any excess wire.
Carefully flip the wreaths over and get ready to finish the project!
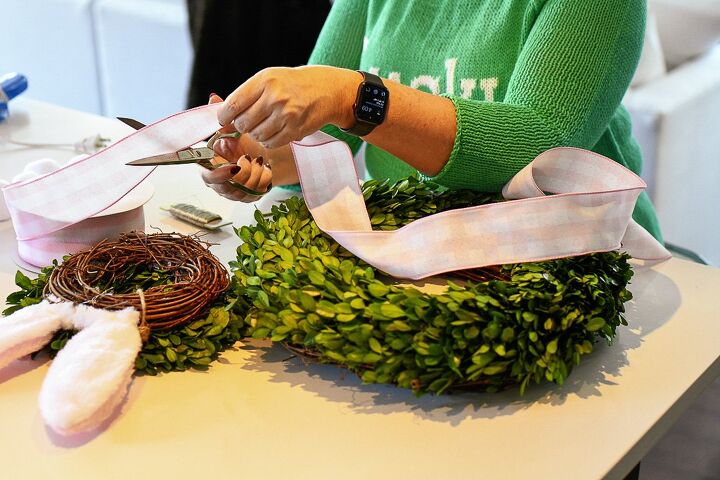
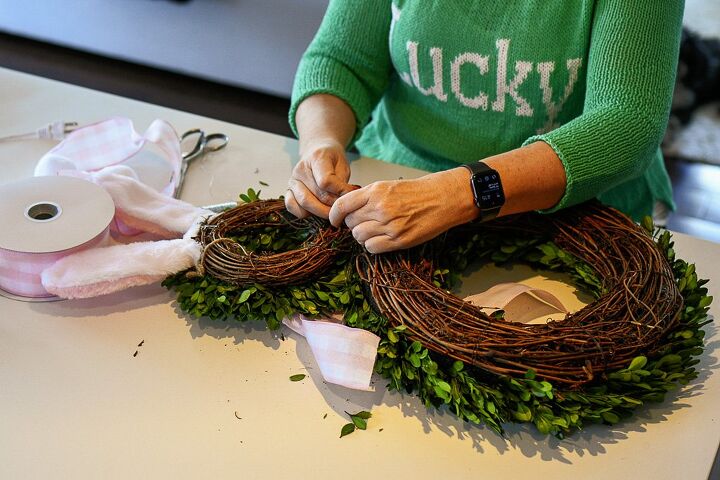
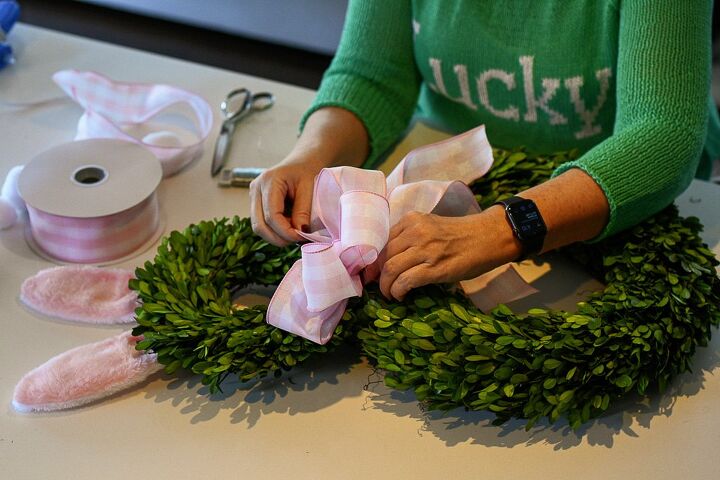
Cut about one yard of ribbon to make the bow.
For my bunny wreath, I chose a pink and white gingham ribbon that was 2.5 inches wide. I think it’s the perfect width to complement the size of theses wreaths.
Plus, you don’t want your bunny to have a paltry bow!
Before you start to make the bow, cut a third piece of floral wire to about six inches in length.
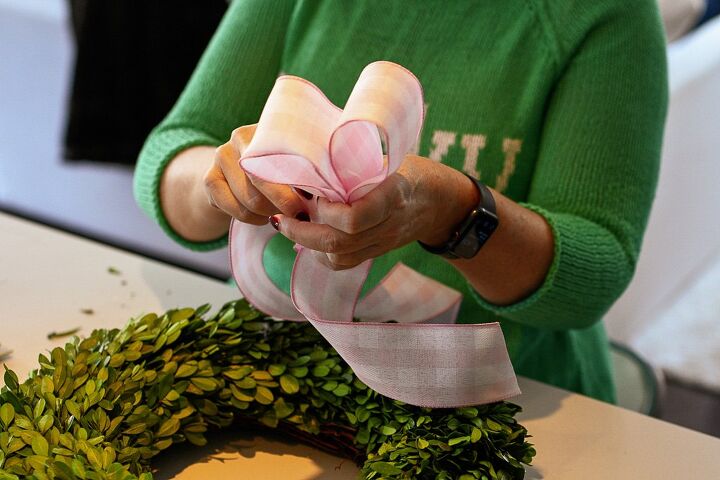
Next, create about five loops with the ribbon, each eight inches long.
Take the floral wire and place it in the center of the loops.
Twist the floral wire until the bow begins to form.
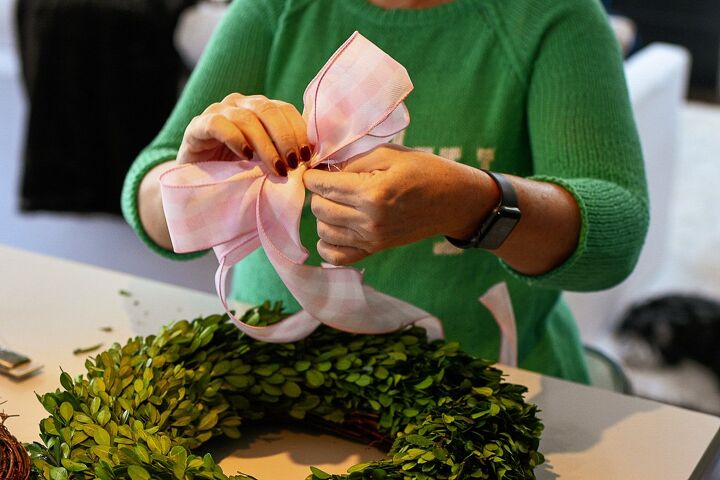
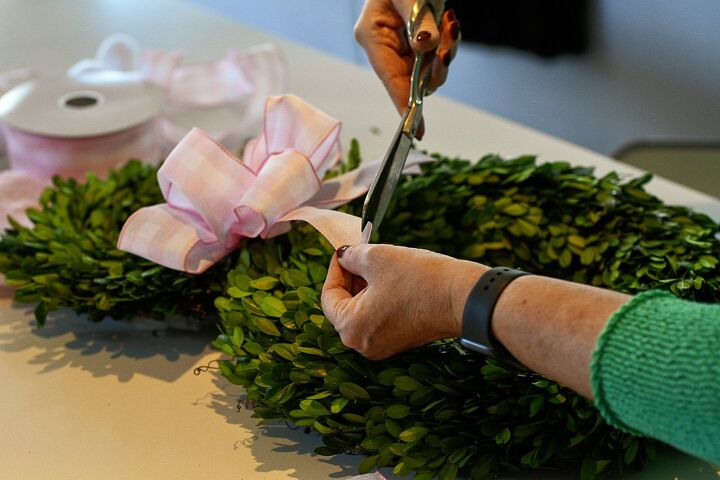
After the bow has taken shape, attach it in between the two wreaths. You want to make sure it is secure, since this will be outside, so making sure it is securely tied to one of the grapevines is essential.
After the bow is in place, simply play with the loops a bit to make it look dapper and festive.
Finally trim the excess ribbon. To create a cute detail at the end of the bow, I folded the ribbon in half and cut it on an angle. My bunny’s bow now has these cute, triangular points at the ends!
STEP FOUR: IT’S TIME TO CREATE THE COTTON TAIL!
Since the pom poms are two inches, you’ll want to group about three of them together to ensure your bunny’s cotton tail is as adorable and fluffy as it should be!
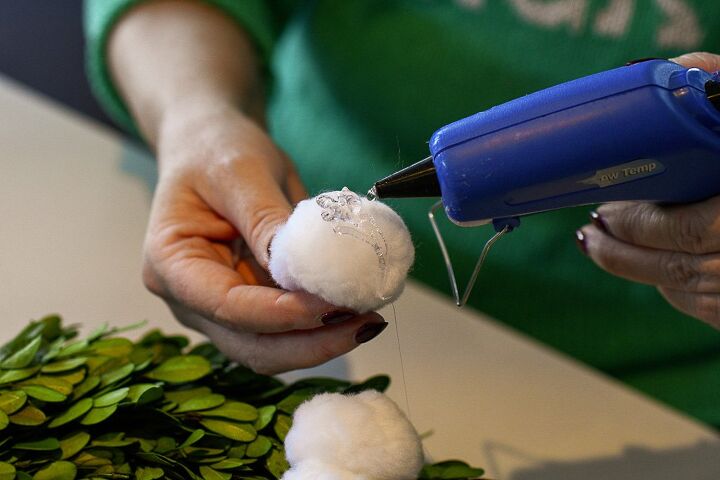
Simply place hot glue on the back of each pom pom and attach it to the wreath. As you group them together, you’ll also want to give the pom poms a bit of a fluff.
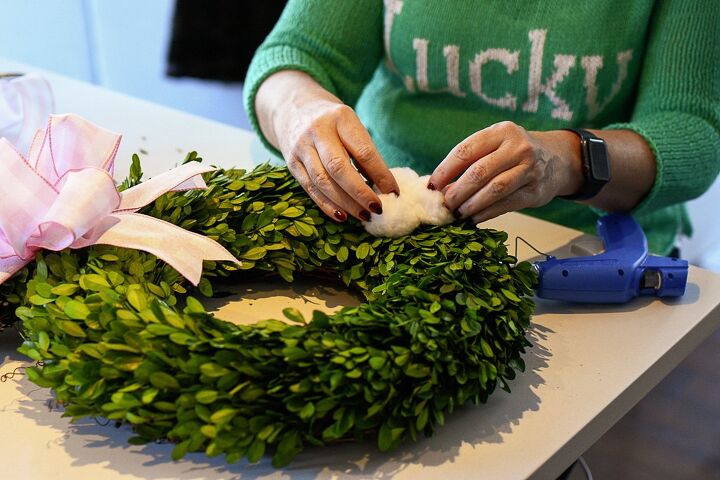
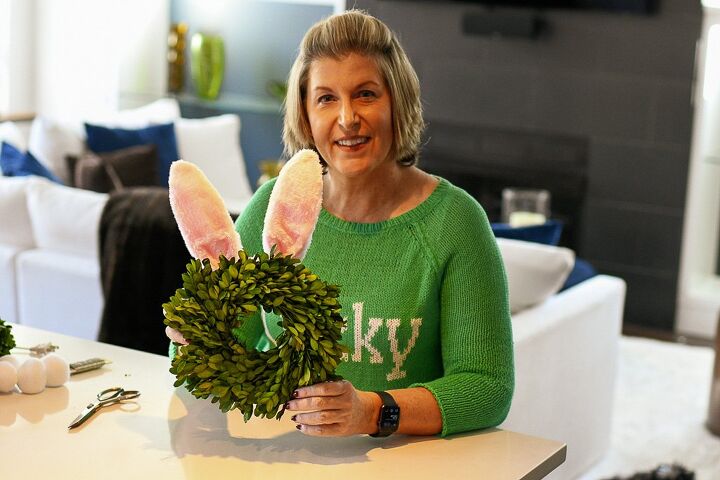
That’s it! You’re ready to hang your adorable and easy bunny wreath!
How cute is this DIY Easter wreath idea?
In just a few simple steps, my front door went from wintery drab to springy fab!!! I love it!
Share photos of your Easter decor on Instagram with the hashtag and tag @makeeverydayanevent.
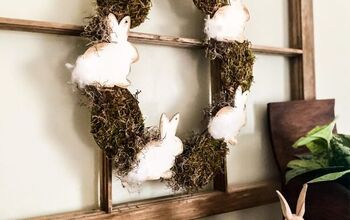
Did you enjoy this DIY Easter wreath idea? Looking for more great spring ideas? Check out these blogs:
Five Simple Easter Tabletop Decor Trends
How to Transform a Home Office into a Workspace You’ll Love
If you have any questions or suggestions, contact us or leave a comment!
Follow us on social media! You can find us on Instagram, Pinterest, and Facebook.


Frequently asked questions
Have a question about this project?