


How to Turn Plastic Cups Into Giant Festive Sparkle Balls

If you're looking for a really big-impact Christmas decoration, this is the project for you. Using just Christmas lights and some household materials, you can make giant sparkle balls for your home. Let's get started!
1. Gather your materials
We want to help you DIY, so some of the materials in this post are linked to sellers. Just so you know, Hometalk may collect a small share of sales from the links on this page.
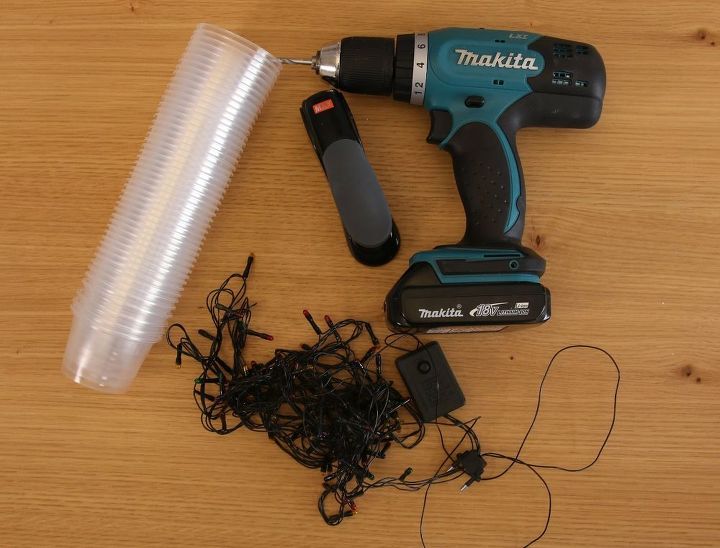
I used about 100 mini plastic cups, fairy lights, a stapler, and a drill (Optional) to make holes in the cups. If you don’t have or don’t want to use a drill, then you can punch holes with an X-ACTO knife or even a screwdriver.
If you’re using something else to make holes, check to make sure the holes are correctly sized for your fairy lights. It would be a real shame to build your whole sparkle ball only to discover the lights don’t fit.
2. Put holes in your cups
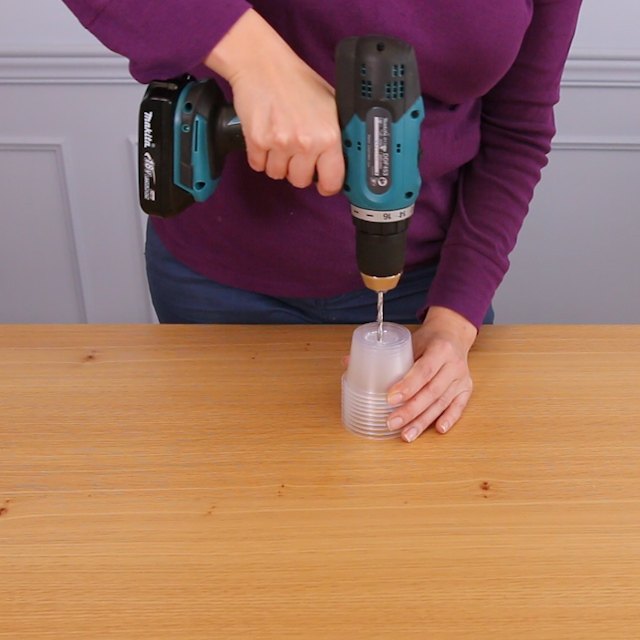
I used an 11/64 sized drill bit to make holes in my cups. By drilling through them, I was able to do 100 cups (in 2 groups) in under two minutes. Like I mentioned before if you aren’t using a drill, then just make your holes with whatever you're using.
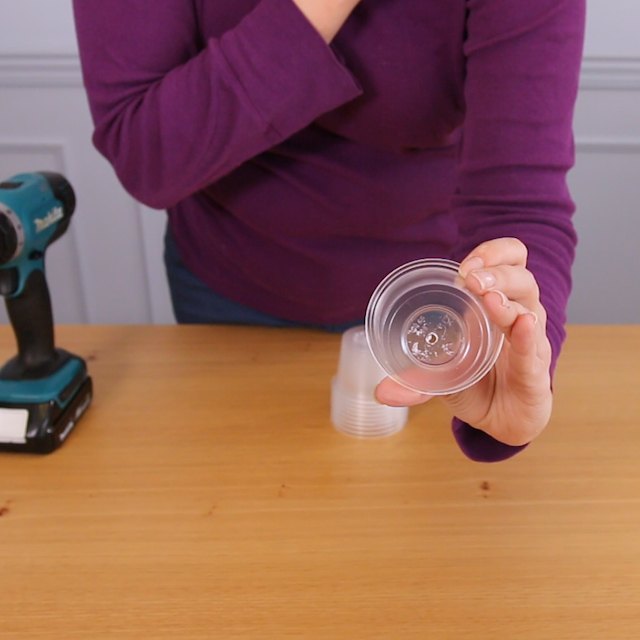
Here's what each cup should look like after you've added your holes.
3. Staple them together
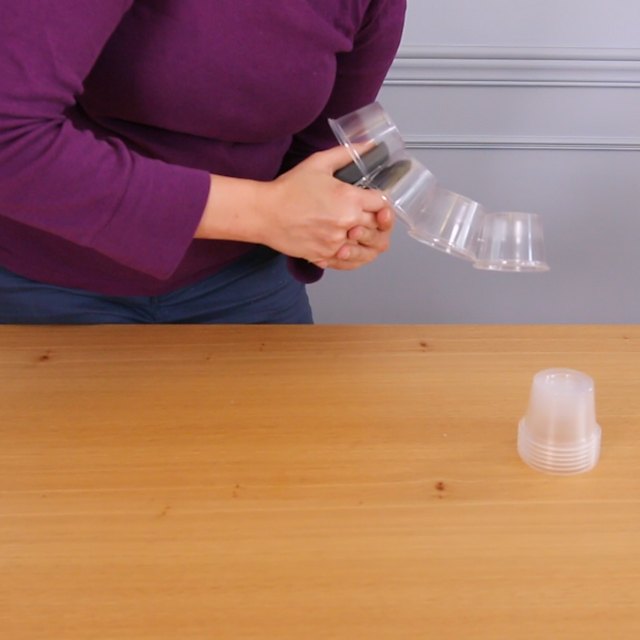
Using a stapler from our office, I started building the ball. Make sure to squeeze all the way down when stapling, so that the cups really stick together. I found it easier to staple as far down away from the lip of the cup as possible.
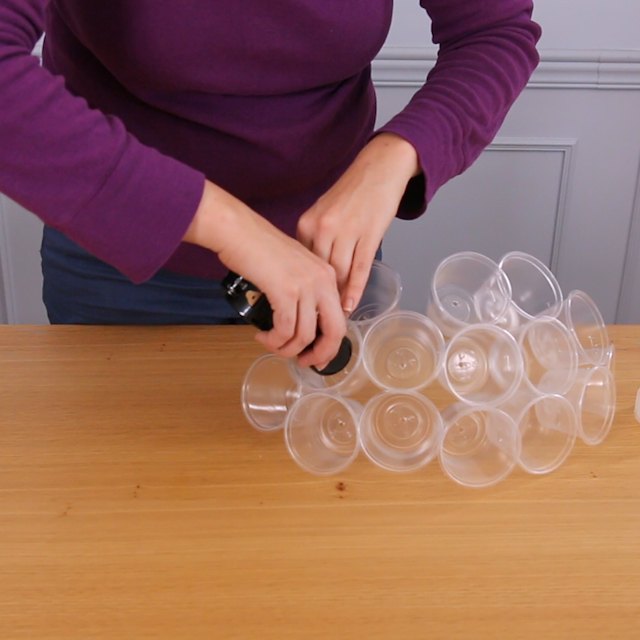
In order to make a ball, I simply put the second row (and third and fourth row...) of cups around the first row. That, combined with the gentle slope shape of the cup, made it easy to make a ball.
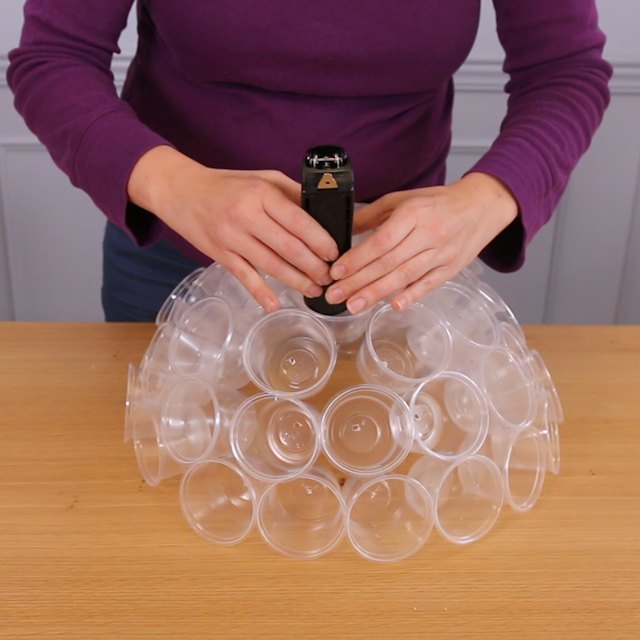
Here's a picture of half a ball. You need to make two halves and attach them after you have added the lights.
4. Add the lights
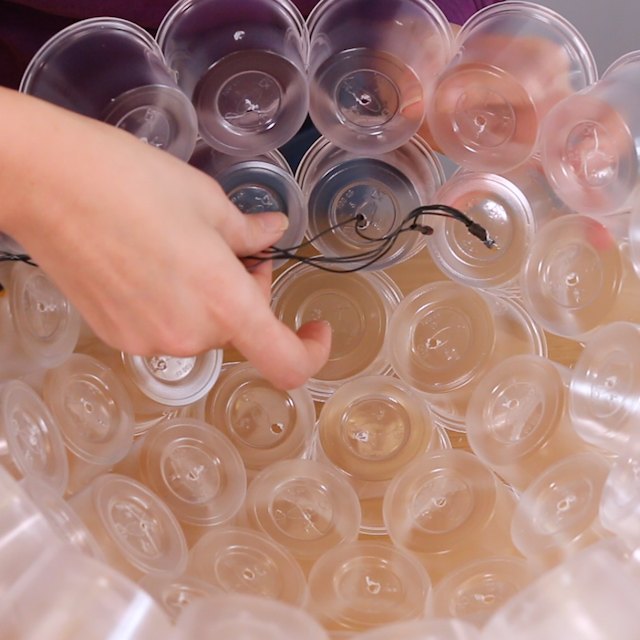
Because my holes were exactly the same size as the fairy light bulbs, I was able to pop them in and they all stayed in place. If you find that your holes are too large, a small drop of hot glue will hold them in place.
If you find that the hole is a little too small, force the light in -- then they won’t fall out. If it's really small you might have to make it bigger.
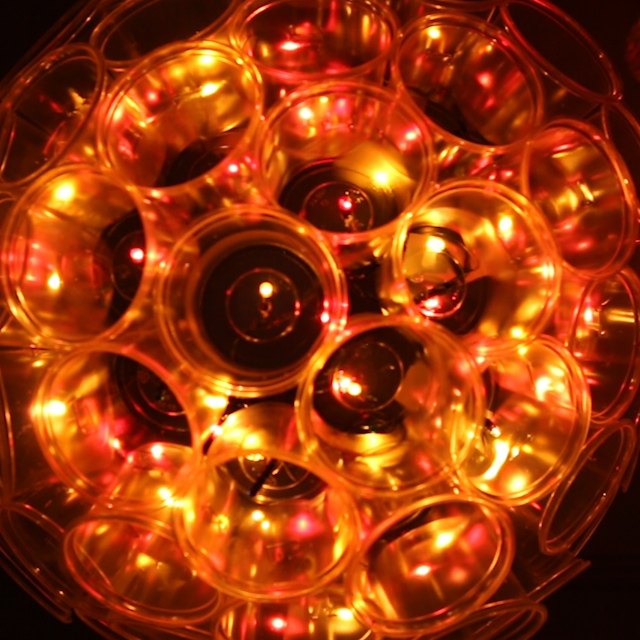
DIY sparkle balls
Voila! These are safe to hang outside.
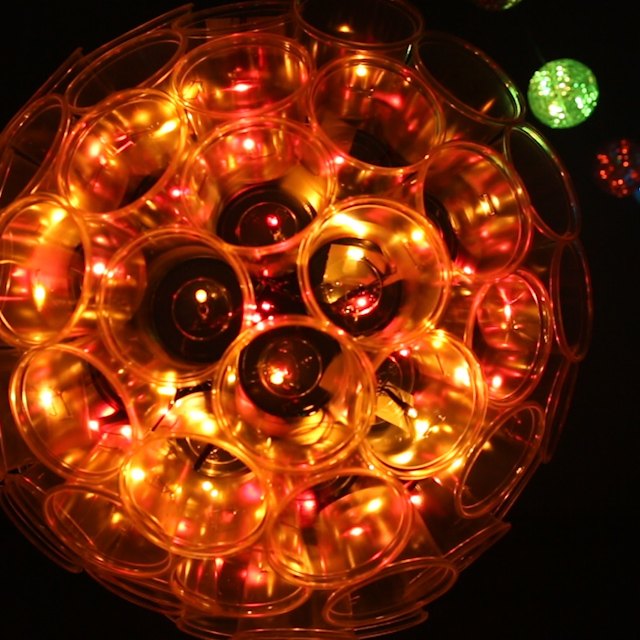
We string them all along our porch for a really WOW effect you can see from the street. I actually hang them using a small piece of string I tie in between two of the cups. You can easily save these from year to year!
Comments
Join the conversation
-
My compliments, Shawna Bailey! My granddaughters and I made a bunch of these and I'm pretty sure it took us longer than 10 minutes for each one! Must have been my clumsiness that slowed the girls down. The first ones we did, using off brand cups, didn't turn out round or neatly fitted; we had to use Solo brand. Obviously, I should have followed your tutorial and saved some time and money. Live and learn. I will be following you now. Thanks!

-
Have to try this. I recently saw a snowman built from white cups at my library which I’m planning for next Christmas. Supposedly the instructions are on YouTube.


Frequently asked questions
Have a question about this project?
can you send me link for printed directions
I’m confused, if you used 100 cups for your ball, how does that work ? Wouldn’t you need more in row one than the -12-9- then 4 ?
is like to make a bigger one . Any suggestions . Thanks 😉
Can one use the laundry or fabric softener cups for this project?