


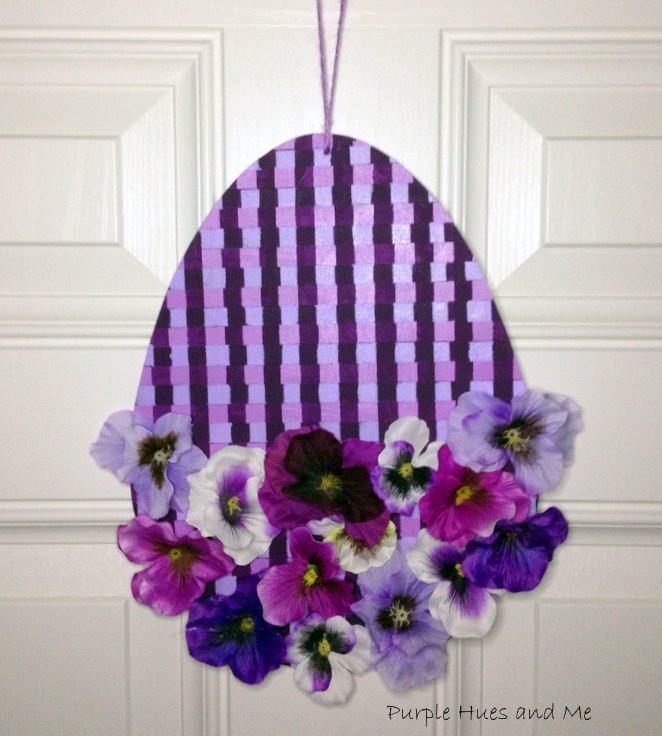
DIY Checkered Plaid Egg With Flowers
Checks and plaids continue to be quite popular these days in home decor. What a great way to celebrate Spring by painting and creating a checkered plaid egg adorned with delicate pansy flowers! How cute and trendy is this!
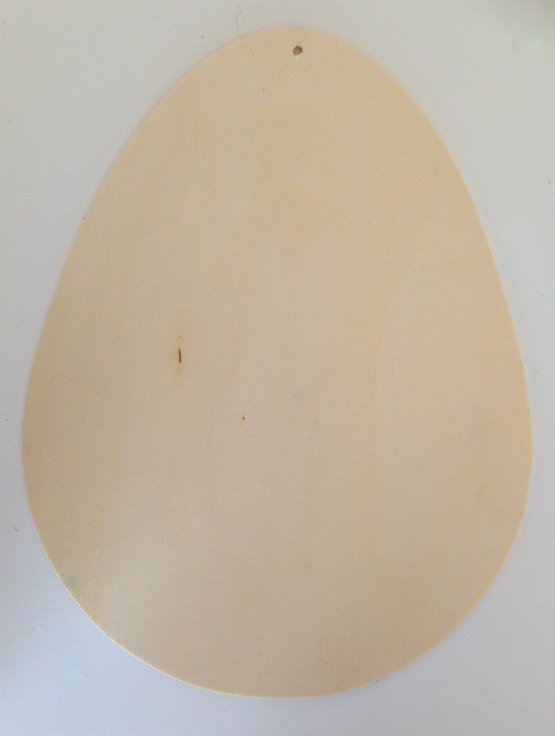
Let's get started with a plain wooden cut-out egg.
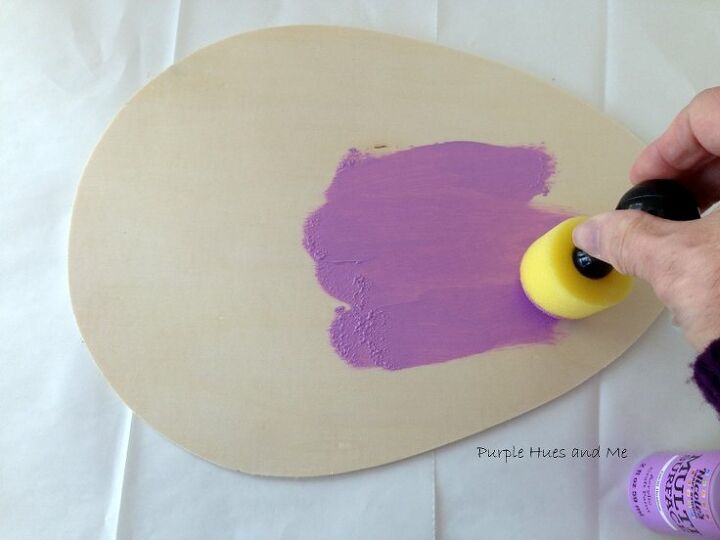
Paint on a base color of a multi-surface acrylic craft paint like this pretty color!
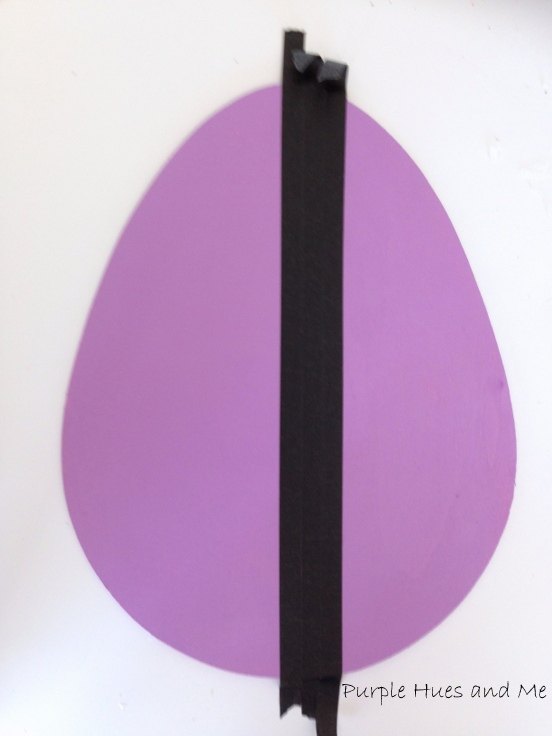
Next, find the center or middle of the egg and place the first strip of 1/2" painter's tape down on the egg. Smooth out the tape so no paint will seep under. Then place another piece of tape right next to it. This is called a spacer tape. You can place it down on either the right or left side. The spacer tape provides a guide for making sure the next painter's tape lines are straight and evenly spaced.
Put down a third piece of tape next to the spacer piece. Then remove the spacer tape.
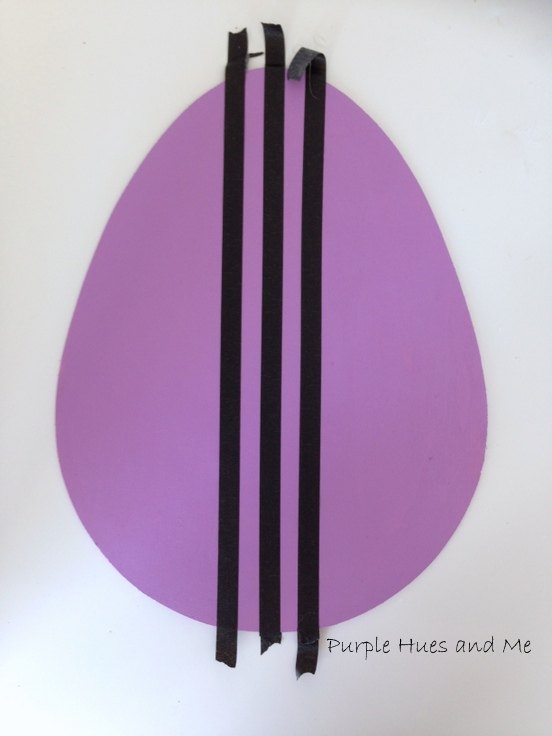
Continue placing a spacer tape down and placing a new tape next to it, removing the spacer tape, etc. until the egg area is completely covered with painter's tapes. Be sure to smooth out the edges of all the painter's tapes.
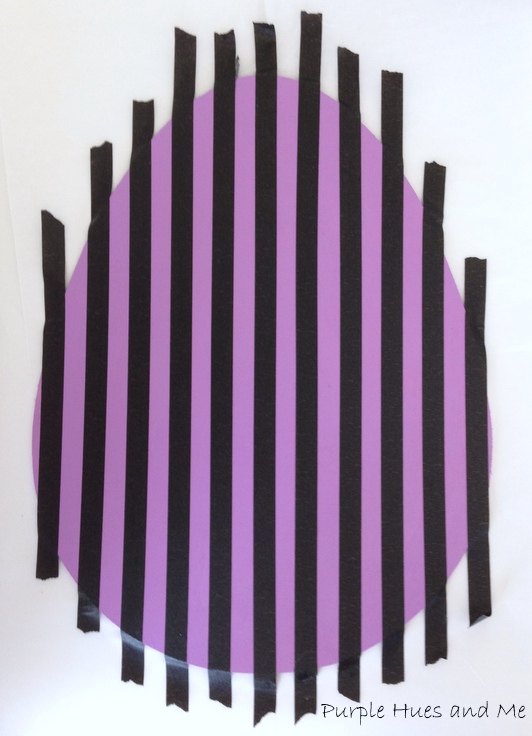
Once all the tapes are in place, begin painting the area not covered by the tape. Lightly use a sponge dabber to cover this area.
Once the area is painted, remove the painter's tape and let dry.
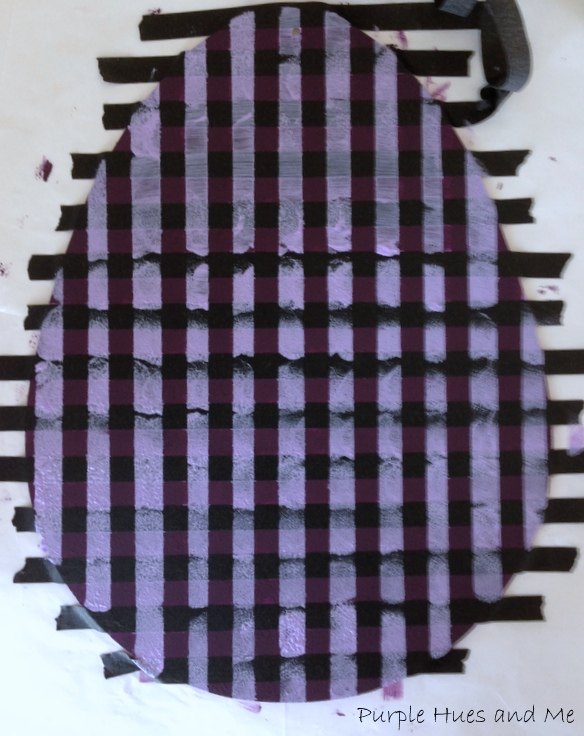
For the horizontal stripes, find the center of the egg and begin laying down the first strip of painter's tape, as before. Use the spacer tape next for tape placement and then a strip of painter's tape, etc.
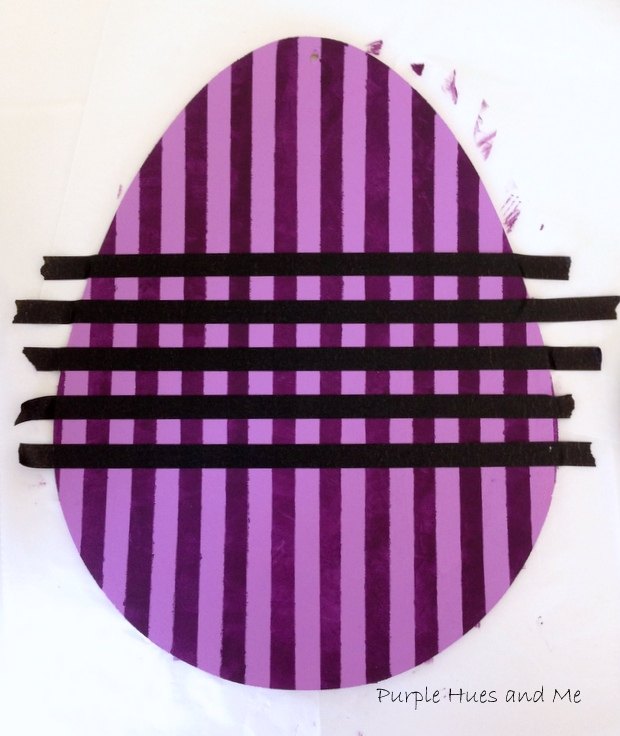
Continue adding painter's tape with a spacer next, then another painter's tape, etc. until the egg is covered again with painter's tapes. Be sure to smooth down all the edges of the tapes, as before.
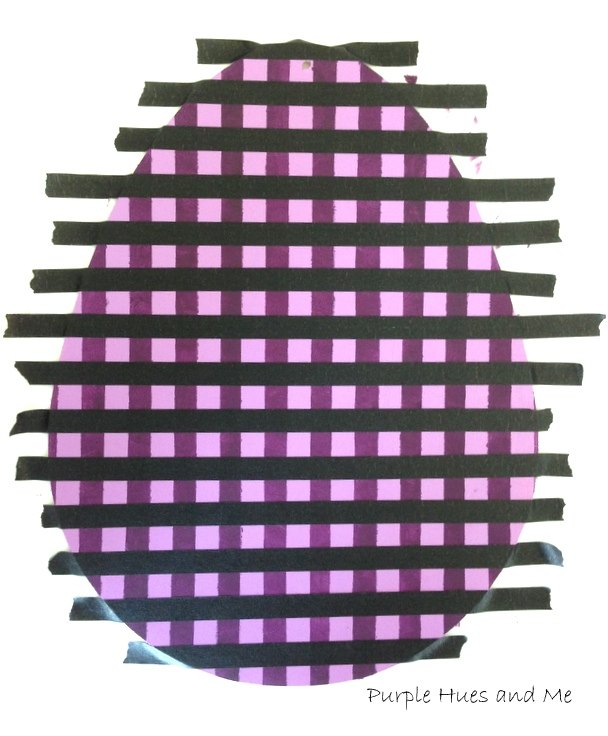
Once all the tapes are down and smoothed out, dab paint on the open areas for a checkered look.
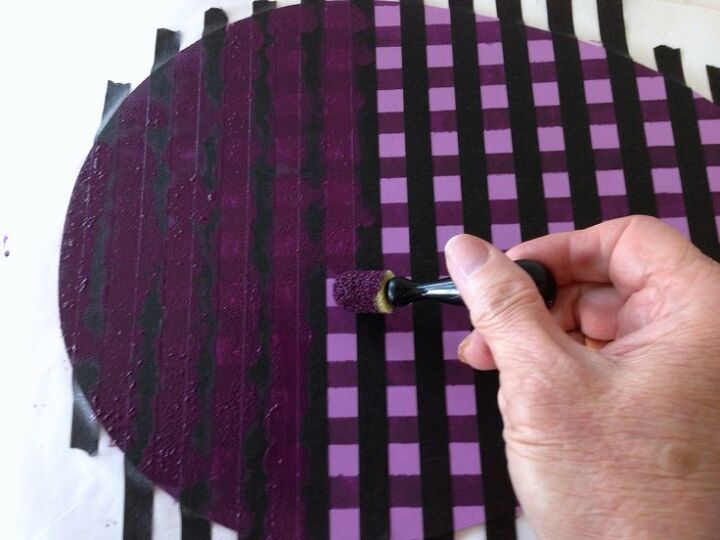
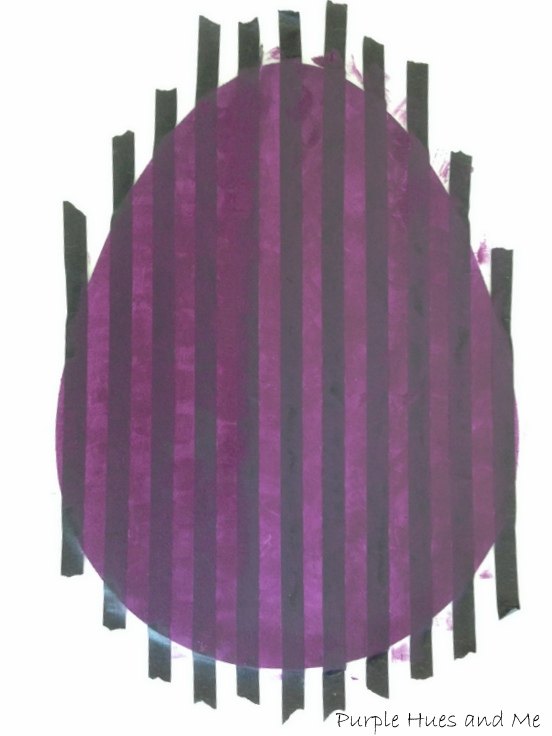
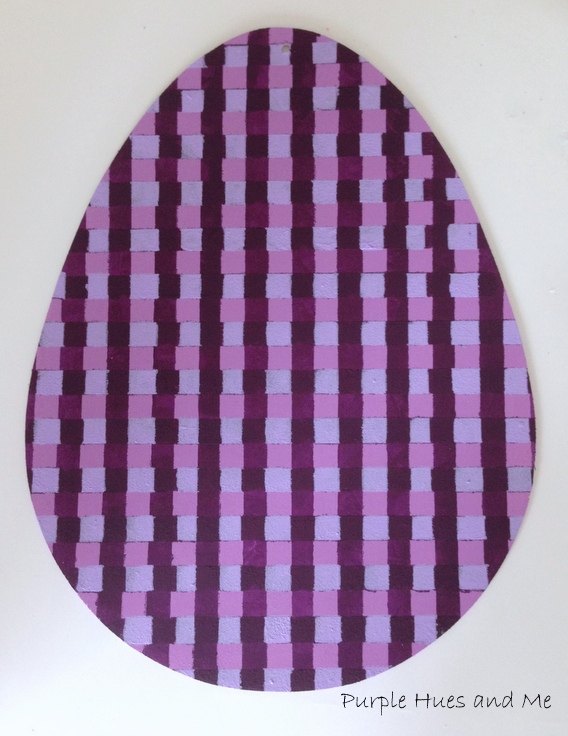
Next, after removing all of the painter's tapes, I thought the colors were too dark (sorry I don't have a picture of this) so I tried putting tape back on following the previous painted stripes.
And then painted the open areas using a lighter color. I needed two coats to cover the darker color.
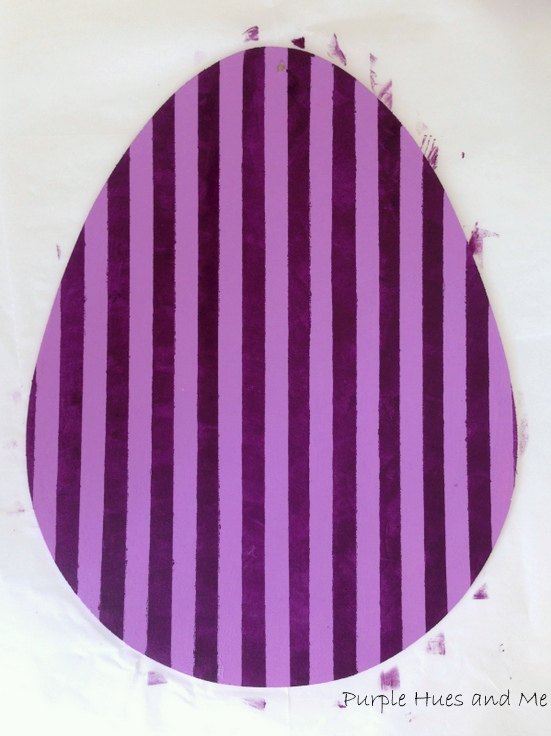
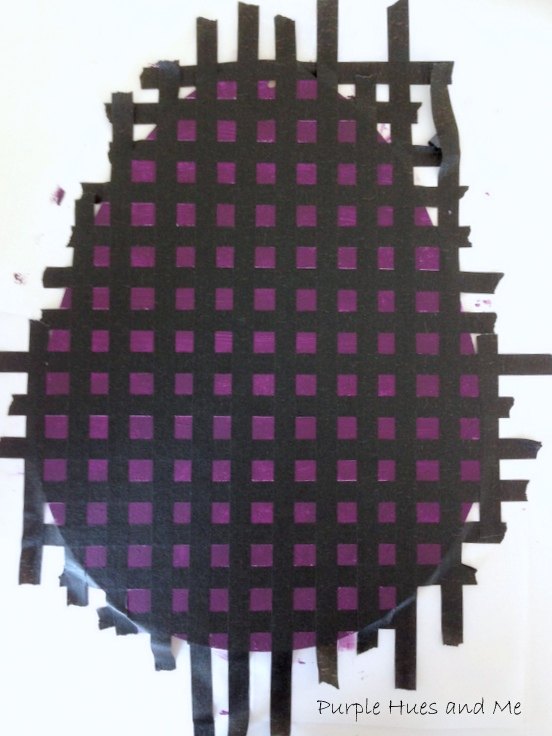
The colors looks so much better after removing all the tapes. But obviously, I didn't quite lay the tape exactly over some of the lines. There are variations in the lines - a mishap I'm really loving! Sort of like a houndstooth design!
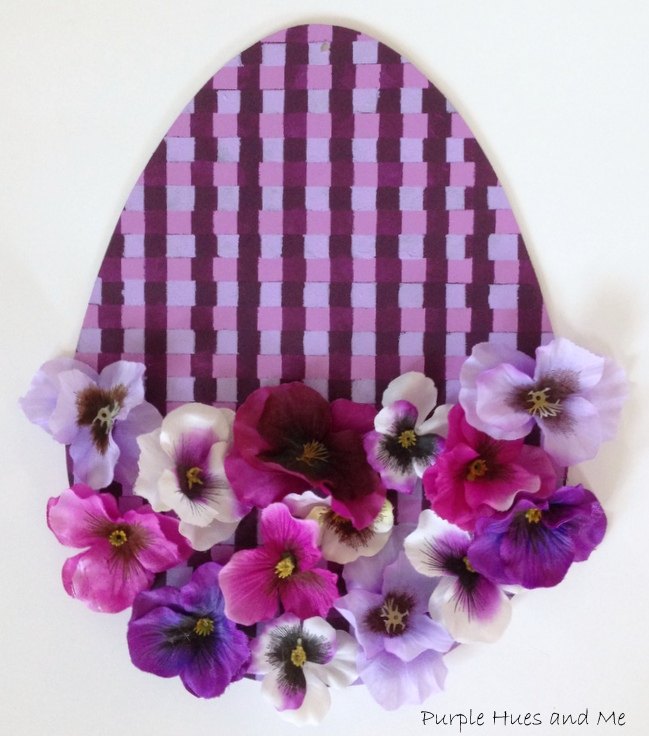
And finally, to enhance the look of the egg and to make it look extra pretty, remove the stems from faux pansies leaving the petals intact and glue them on.
Resources for this project:
See all materials


Comments
Join the conversation
-
Great project! Loving the purple!
-
Cute, cute, cute.


Frequently asked questions
Have a question about this project?