


A DIY Cement Vase With A Cat Design
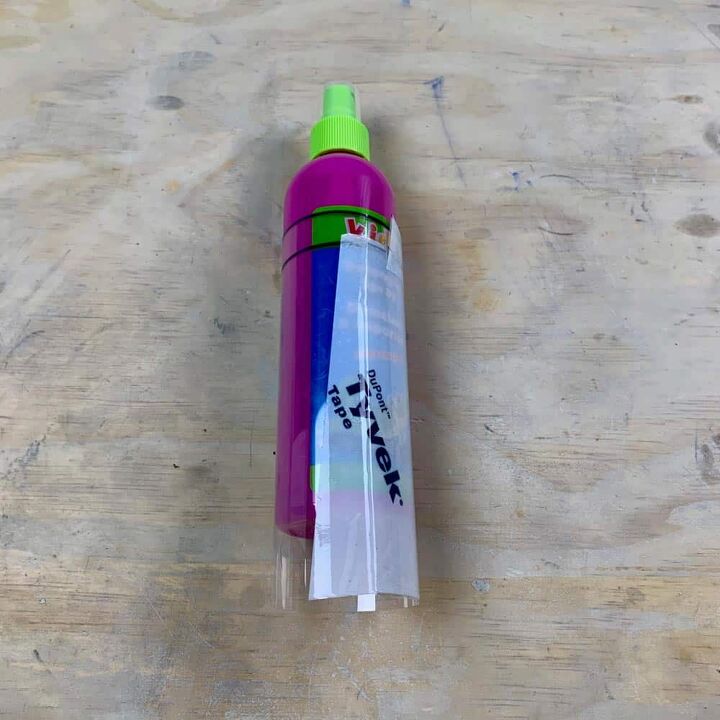
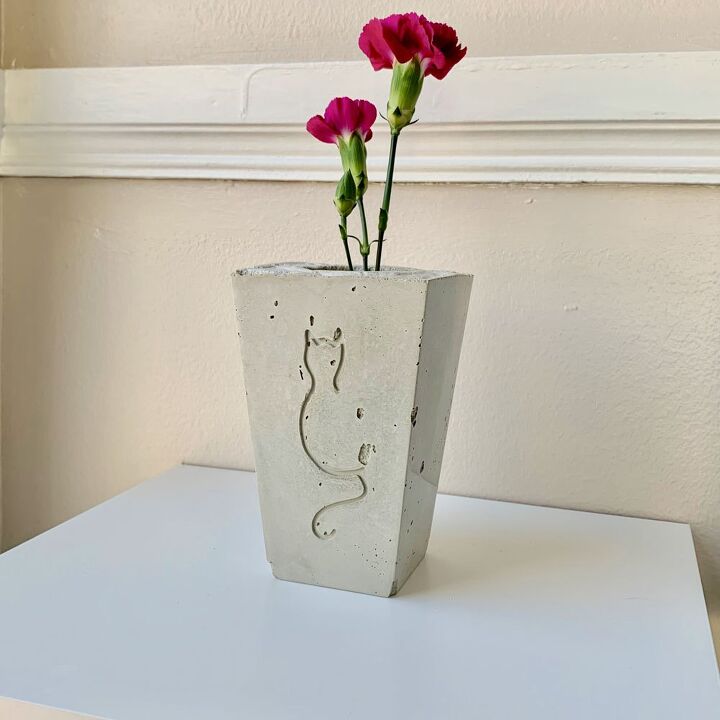
Hail all cat people! This DIY cement vase has been on my list since I spotted the plastic popcorn container at the Dollar Tree store.
With its funky shape, I just had to use it for something and its longer height, a vase seemed like the right fit.
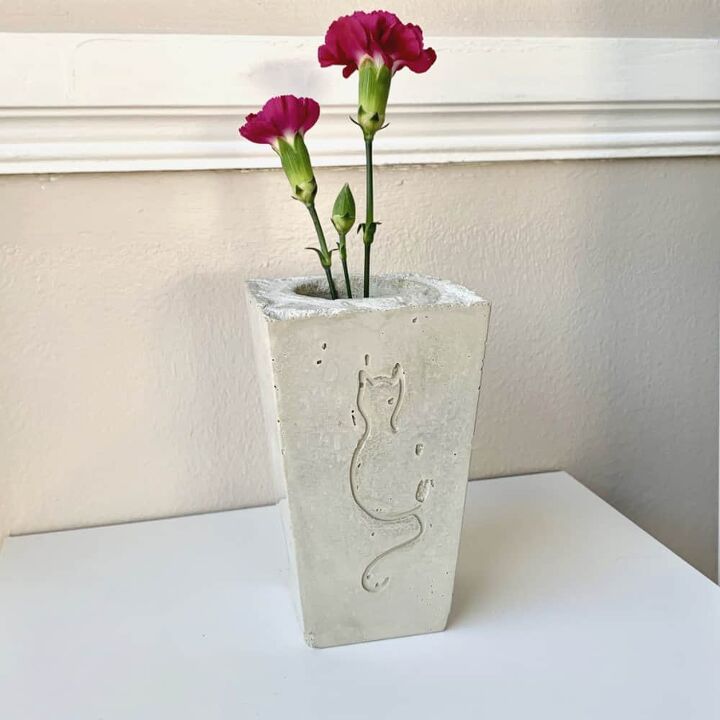
The next thing to decide was what kind of design to put on it. The container kind of has an Egyptian feel to it because of its shape.
So that might be where the cat idea came into my head.
I saw a tattoo like this before and since I love graphics that are streamlined a cat in this style seemed like it would work with a minimal Egyptian-like aesthetic.
I kind of love the cat design so much, I’m considering getting a tattoo of it. I would be my first tattoo, and at 40-something, kind of a big step.
We’ll see, my husband thinks I’m all talk. :))
If you don’t have a Cricut machine, you can test your X-acto skills and cut this by hand. Just download the design and use it as a template.
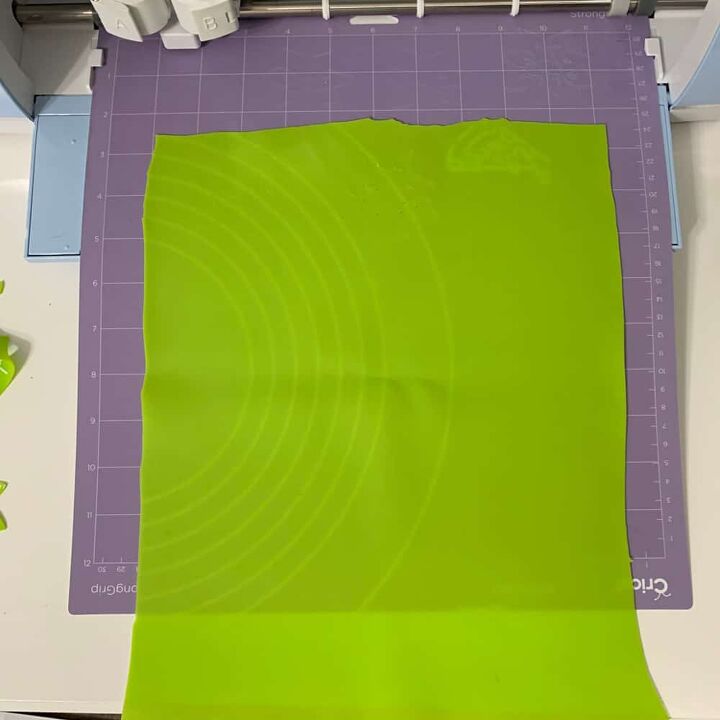
Step 1 | Trim The Silicone Mat To Fit The Cricut
The mat is too thick for the Cricut’s wheels and it will lift up, so trim the mat to fit inside the wheels. To be safe, cut that to 10 ½” wide.
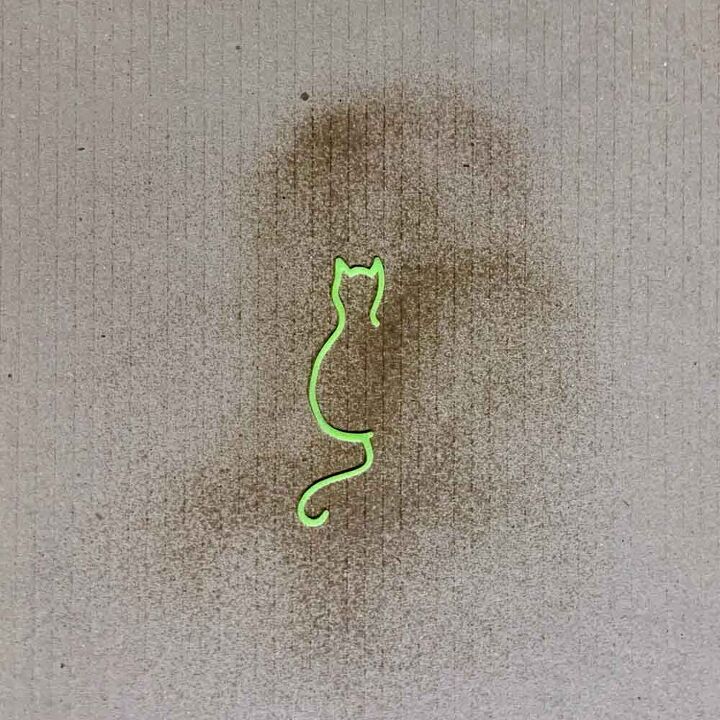
Step 2 | Cut Out Cricut Cat Design
Download the Cricut design from here. Upload it to the Cricut Design Space program and proceed to the cutting settings.
Set the material to the Leather Shimmer 1mm and the pressure to default, and then set the Cricut dial to custom.
Go ahead and load the silicone mat onto the Strong Cricut mat and load it into the machine. Follow the Cricut’s directions and cut.
Please read this guide on how to clean a Cricut mat for some useful tips on keeping your mat in tip-top shape.
Step 3 | Adhere The Cat Silicone CutOut To Cement Mold
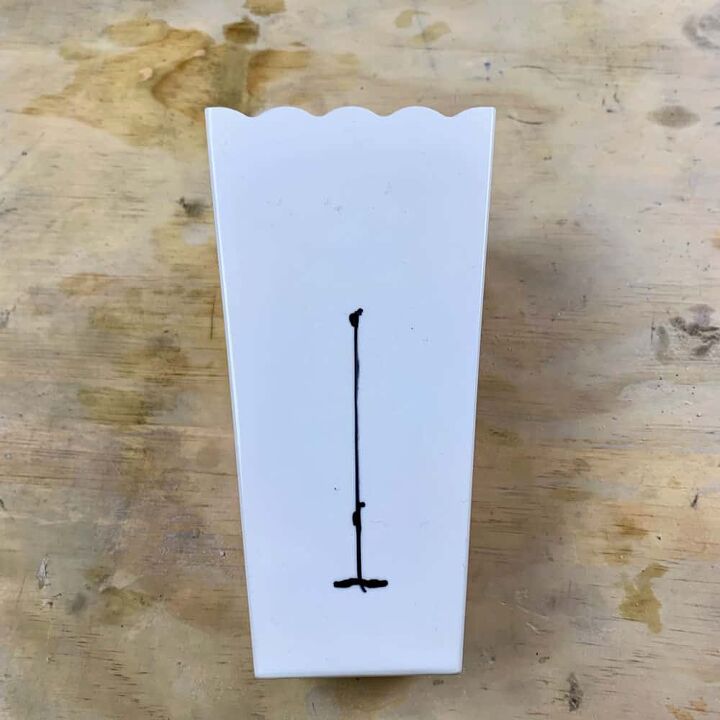
First, decide where on your cat vase you want the design.
Please note, the direction it faces the side of the container will be the same after the vase is cast- in other words, it’s not a mirror image.
Now mark the bottom of where the cat will sit, as well as the and centerline for the placement of the cat design.
I made mine ¾” from the bottom and centered.
Place the cat design silicone cutout onto a piece of cardboard or newspaper. Shake the spray adhesive can for about 30 seconds, then lightly spray the silicone cat piece.
Wait 5-10 seconds, then apply it to the inside of the outer mold. Apply firm pressure for a few seconds.
Be sure to get it placed correctly, if you reposition it, you risk losing some adhesion.
Step 4 | Make Your Own Inner DIY Cement Vase Mold

I made the vase 5” tall, so I needed an inner mold that was 4 ½”, which would leave ½” for the bottom thickness.
You will want to leave a little extra at the top to give you a little bit of material to grab onto when you demold the vase.
So take the acetate sheet and mark 2 lines on it. One will be at 4 ½” and one at 5”. Trim it at that 5” mark and 7” long.
This is easier if you have something about 2” in diameter to wrap the acetate around to stand in temporarily as your mold.
Look through your hair supplies for bottles of this size (sprays, detanglers, etc.)
Now wrap the acetate around the bottle and take a piece of packing tape and run it along the seam. Leave the bottle inside for now.
Step 5 | Create The Bottom And Top Of The Inner Mold

The reason you are making the inner mold is because when casting cement that is tall, having anything inserted inside will be difficult to remove.
Basically, the more cement that is covering an inner mold, the more difficult its removal. Making your own will make it much easier and take less time.
First, heat up the glue gun. While that’s heating, take the acetate wrapped bottle and put it on top of one of the plastic container lids.
Now trace around them. Cut out this circle- this piece, this will be your bottom.
Next, trace that circle you just cut on a second plastic lid and trim that, only this time, you want it just slightly smaller, so trim more on the inside of the line you traced instead of on it
Step 6 | Glue The Cylinder Cement Mold And Fill It
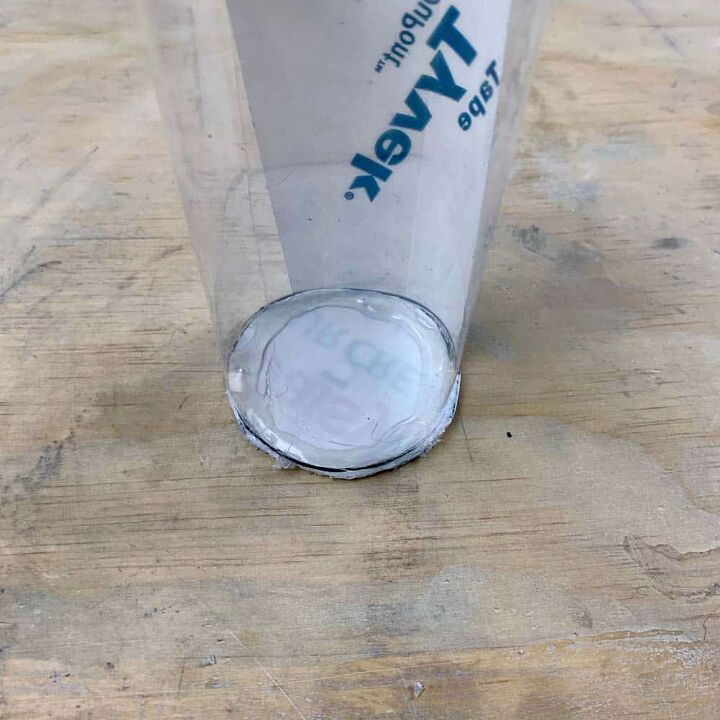
Now glue the larger circle to the bottom of the acetate cylinder mold. Try to keep as much glue within the cylinder as possible.
When you go to demold this inner piece, it would be nice if the bottom comes out with it.
If you have glue on the outside, then it will probably stay stuck on the bottom- which isn’t ideal, but it won’t affect your flowers.
Once the bottom is glued, take about 1 ½ cups of sand and pour it into the cylinder until it meets the 4 ½” mark.
Next, slowly add water to it, to help weigh it down. The sand will drop down, so you’ll need to add a little more.
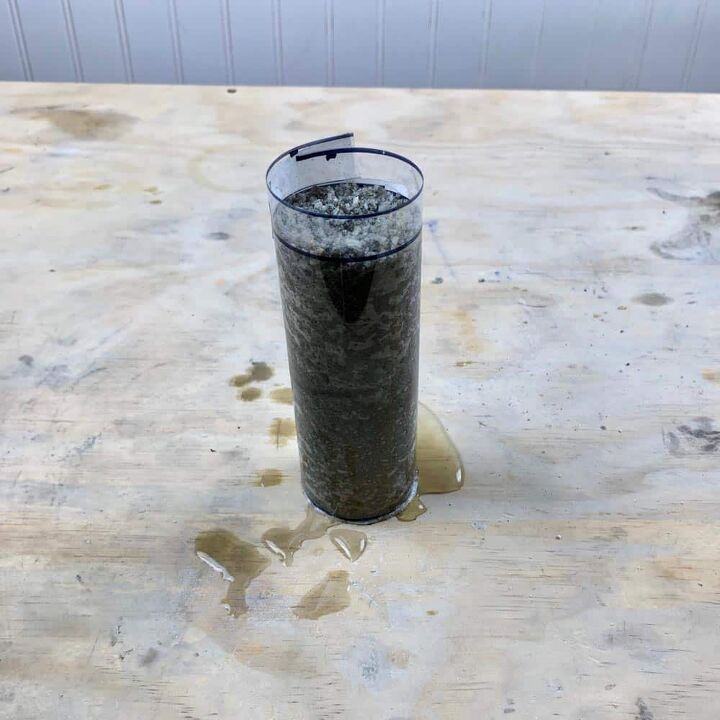
Now, you’ll probably notice water leaking out the bottom. If you have water leaking, then wait about 5 or 10 minutes until most of it has come out. Then reseal the bottom where you have holes.
Remember, the more glue there is on the outside, the more likely the bottom will be cemented to the vase- but again, it won’t affect anything.
Just take care not to get glue on the sides of the cylinder insert, or it will be a little trying to demold.
Finally, take the 2nd lid circle and put it in the top of the cylinder mold. This is just to help keep sand from flying up when you are tapping the mold to release air.
You may be able to see hot glue on the top at the edges, you can ignore that, it wasn’t necessary.
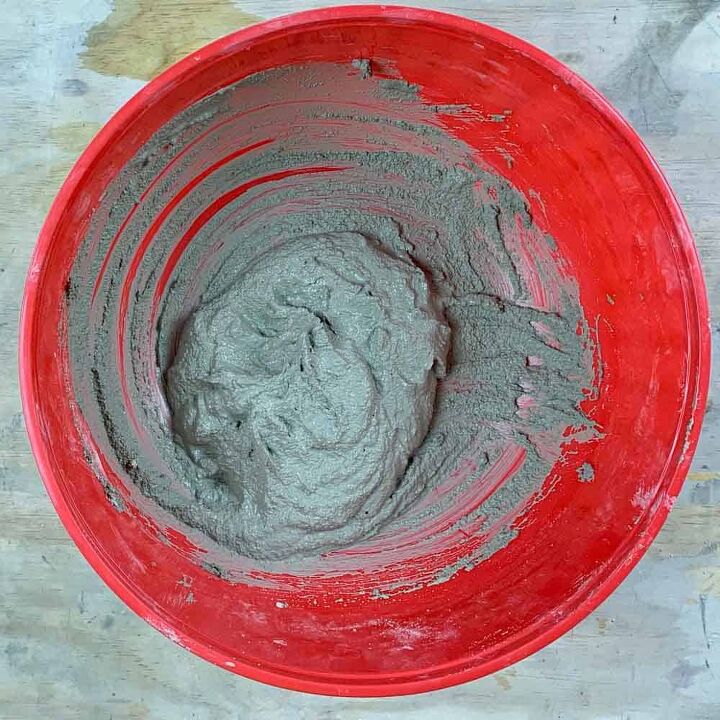
Step 7 | Mix And Cast The Cement
**If you love making concrete projects, then check out my Pocket Guide to Concrete Mixes! I tested 6 mixes and made a handy reference chart. It's a FREE download. 😉
Put on your safety glasses. Add about 2 ¼ cups of Cement All to the disposable bowl. Mix it so there aren’t any lumps.
I like to smush and push it to ensure I am lump-free. The consistency you want is like a thick shake but it should also have some form so that is a little gloppy when it goes in.
Pour in the cement and then shake and tap it on the work surface to release air bubbles.
Now place the acetate cylinder mold over the center of the vase and insert it to the stopping point you marked.
Shake and tap again with the inner mold inserted, but also don’t overdo this. You don’t want the cement to get pushed between the silicone cutout and the container.
Try to get some air to rise and get the top level. Getting the top level is tough, so go ahead and cheat a little and use something like a craft stick, or even a small paintbrush to smooth out the top.
Let the cement cat vase cure. The longer you let it cure the better the chance it will be shiny.
If you want it shiny, wait about 4 hours before demolding. Otherwise, you can demold at around 2 hours. Just be sure the vase is not still warm when you demold.
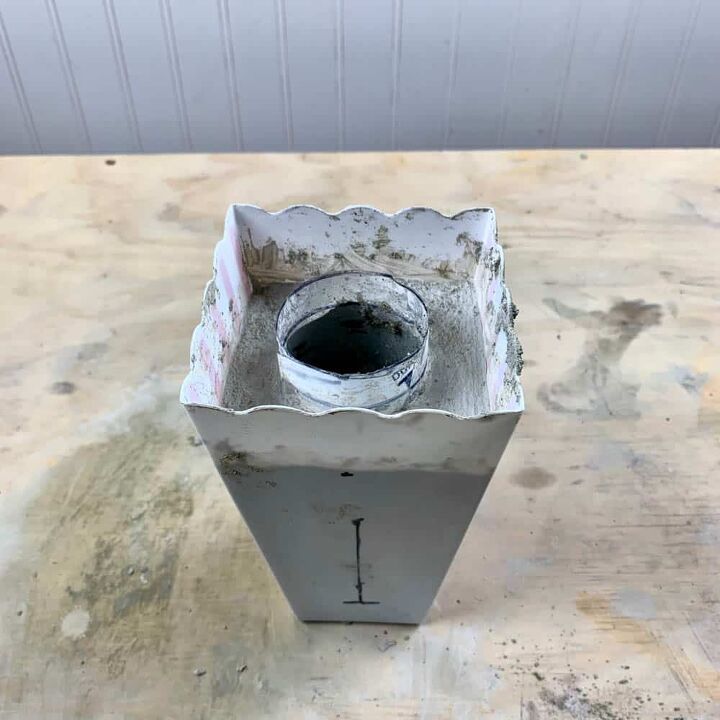
Step 8 | DeMold The DIY Cement Vase
Put the safety glasses back on for this. Start demolding by removing the inner mold first. It will probably be easiest to remove the top lid and shake the sand out.
Now grab the acetate and pull. If it doesn’t come right out, then grab some pliers and pull and twist if necessary.
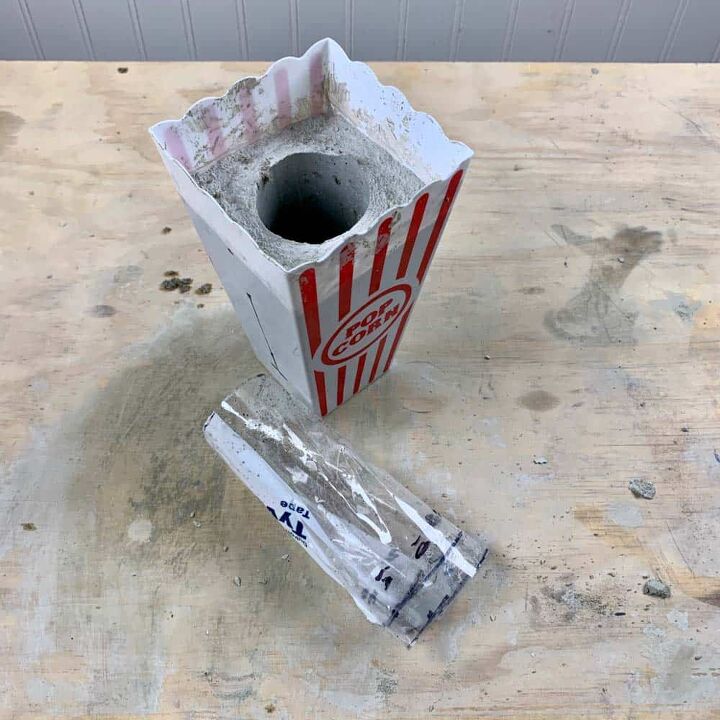
Next, remove the popcorn container mold. Here I needed the heat gun and X-acto knife. Use the heat gun to help release the sides and bottom.
This will also soften the plastic. If the cement cat vase doesn’t pop out, then use the X-acto to carefully create a slit at the top. Once the slit is started you will be able to peel it apart.
Note: Make sure you are careful when touching the plastic because it can get very hot from the heat gun. I used a rag to pull the sides apart at the seam.
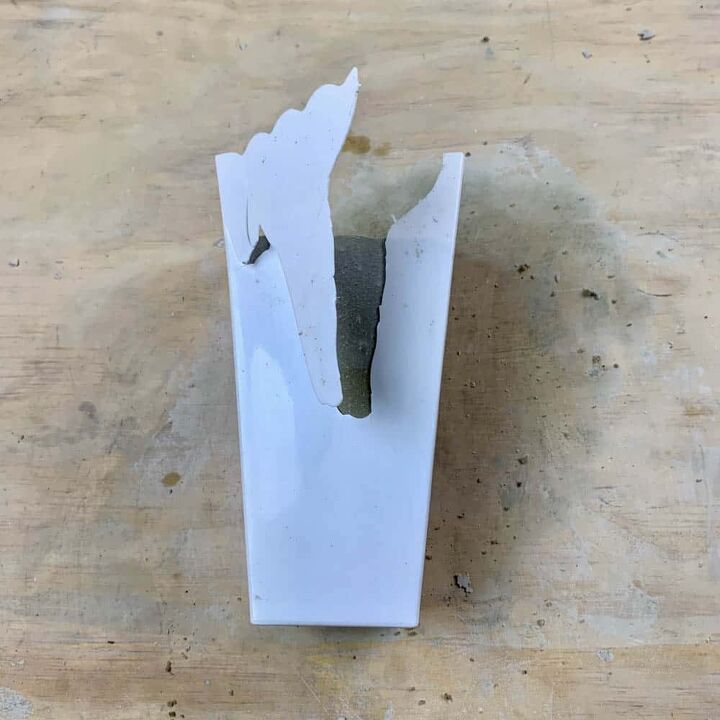
Final Step | Remove The Cat Relief Design
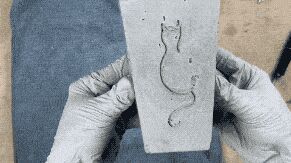
Now for the most fun part! You will likely have a bit of cement obscuring part of the silicone cutout.
Using the backside of the X-acto knife, gently push away the cement that is obscuring the design and then gently lift away a piece of it.
From there, you can pull it out with your fingers.
I have another tutorial with a recessed Cricut design, if you haven’t seen it, it’s A Cement Planter With A Succulent Design. 😀
Resources for this project:
See all materials


Comments
Join the conversation
-
I am a cat lover and I love it !!!
-
I love ♥️ the cement vase with the cat design (big cat fan), but know absolutely nothing about Cricut and such. Seemed like a LOT of work, but since you know what you are doing it was probably easy for you.
TFS 🐱


Frequently asked questions
Have a question about this project?