


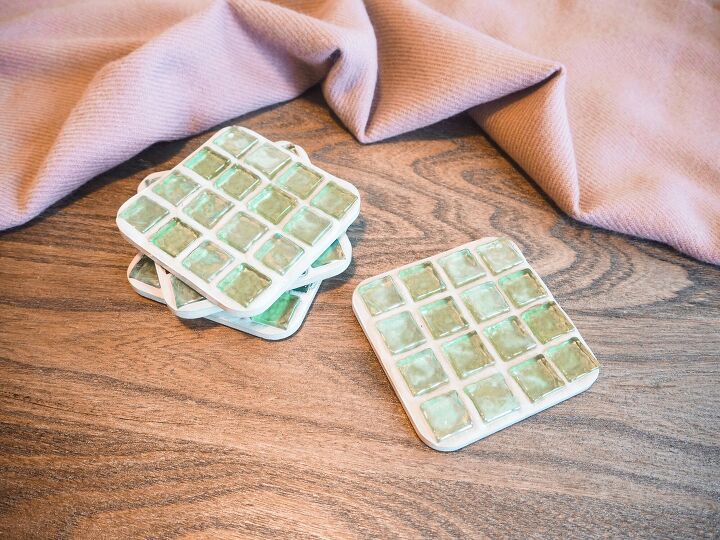
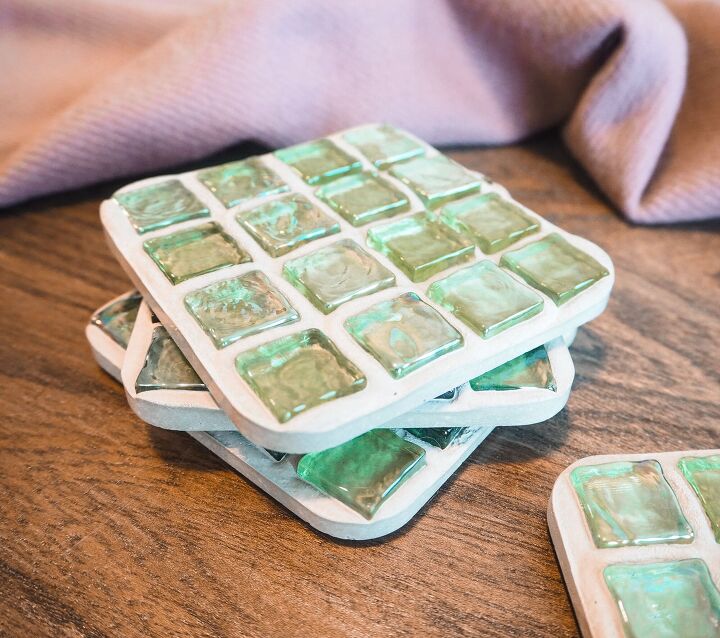
Cement & Mosaic Tile Coasters

Hello all, thanks for checking out my post today.
Today's project is once again super easy to do and extremely quick if you're looking for something to pass the time but also isn't too labor intensive.
As usual, I have a full YouTube tutorial on this project up on my YouTube Channel. I've also included a direct link to the video below.
WHAT YOU'LL NEED
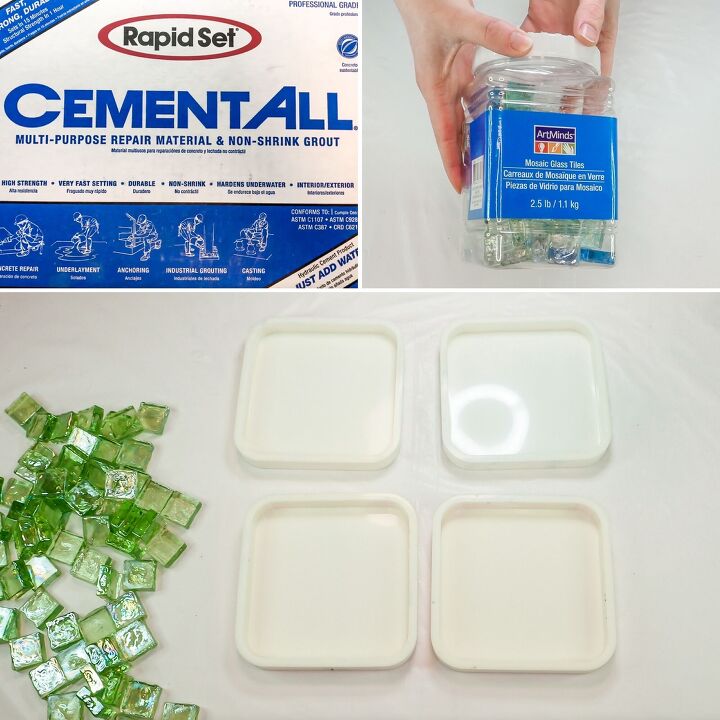
- Cement - I recommend Cementall Rapid Set
- Glass tiles
- Coaster molds
- Mixing container and mixing tools
- Sand paper
- Felt feet
STEP ONE - WATCH MY YOUTUBE VIDEO
As mentioned above, I have a YouTube video of this exact project so go ahead and check that out by clicking the video link above.
Please consider subscribing whilst you are there. I post weekly and include a wide variety of crafts for all skill levels 👍🏻
STEP TWO - POURING THE CEMENT
I recommend using Cementall Rapid Set for small projects like this one as the cement sets rock hard and is so easy to use.
First, lay out your coaster molds and get the right number of tiles out ready. You don't want to waste time doing this after mixing the cement....it's called Rapid Set for a reason!
I worked out that 16 tiles per coaster would be perfect for me.
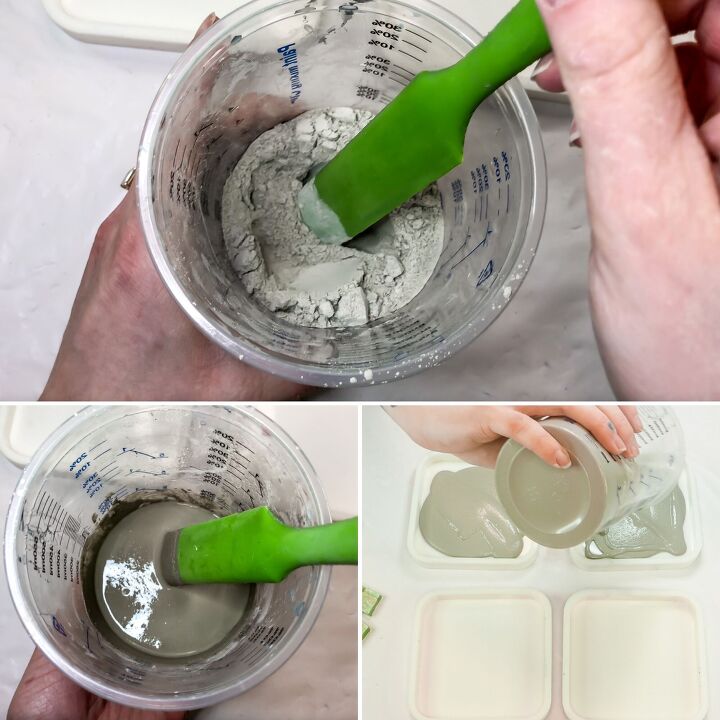
Mix up some cement at a rough 4:1 ratio of cement to water.
Mix enough to fill 2 coaster molds about a 3rd of the way (adding the glass pieces will make the cement level rise so you don't want to pour too much in at the start).
Do 2 coaster molds at a time so that you have enough time to lay all the glass pieces without the cement starting to set.
Once you have poured the cement into the molds, tap the molds to help level the mixture and to bring any little bubbles to the surface.

STEP THREE - ADDING THE TILES
Once the cement has been added, start placing the tiles into the cement starting with the corners. This should help place the tiles more evenly.
Press the tiles into the cement so that they are about 2 thirds submerged. You want them to be securely embedded but you also want to keep a thin layer of cement on the bottom of the mold so don't push down too far.
Place all your tiles swiftly as you'll notice the cement starts to stiffen.
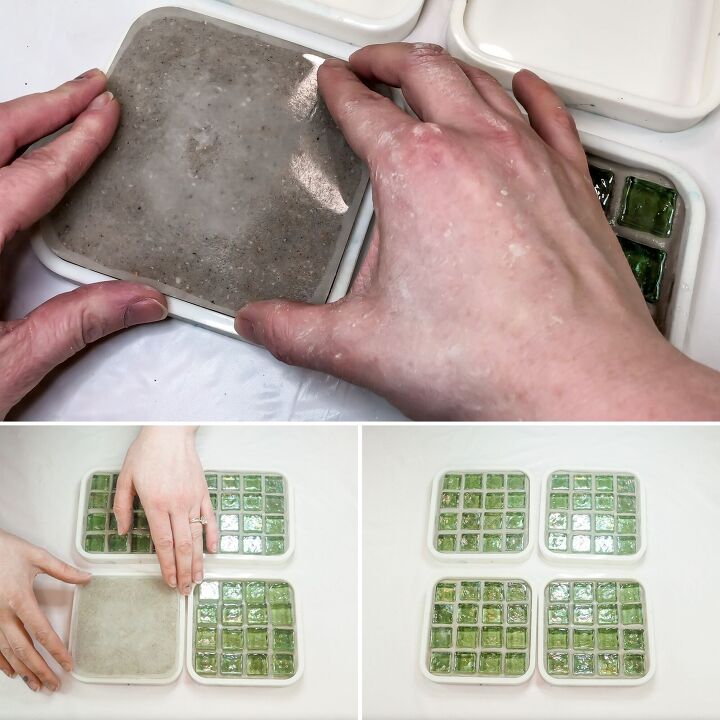
Whilst the cement is still workable, take something flat that will also fit inside the mold and press firmly on all the tiles to create an even surface, not to push them down further.
I used a coaster I had actually made with these molds so this was of course a great fit.
Leave this pair to set and repeat the entire process so that you have 4 coasters at the end.
This cement fully sets in about 3 hours.
STEP FOUR - FINISHING TOUCHES
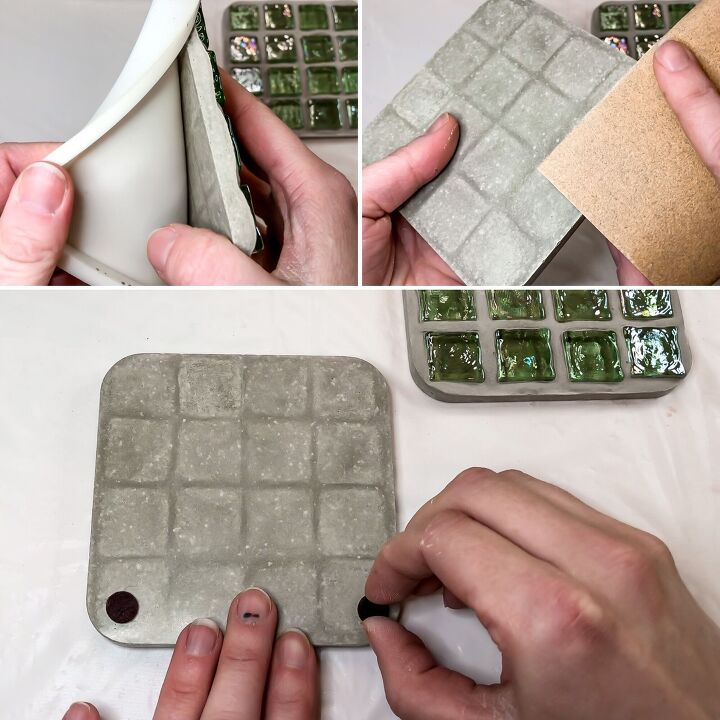
Once the cement has set, demold all 4 coasters and sand away any sharp edges.
Add felt feel to the bottom to protect your surfaces and that's it! You're done!
I told you it was quick and easy!
Thanks for taking the time to view my post today and please remember to check out my YouTube channel.
I also have an Etsy store where I sell lost of bits and pieces so feel free to check that out too.
Thanks again and happy crafting! x


Frequently asked questions
Have a question about this project?
Great job! Do you seal the cement at all? If not, does moisture affect the cement? Thank you!
I really like this idea. My question is with this cement are you able to colour it ?