


DIY Resin Candle Holder With Dried Flowers
Learn how to make a DIY resin candle holder with dried flowers. This decorative candle holder is made using epoxy resin and dried botanicals for a unique home decor item or homemade gifts.
Candles are becoming increasingly popular as homemade gifts. A wonderful way to enjoy aromatherapy at home, the decorative resin candle holders on these DIY candles are what make them shine.
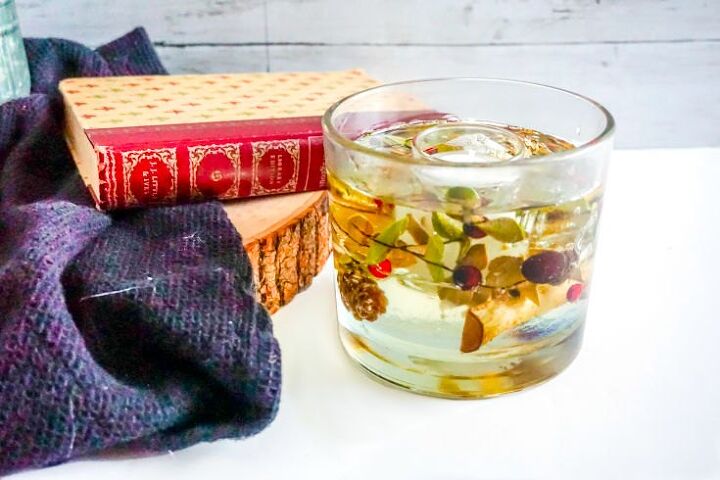
Inspired by the hand poured soy candles sold by TOKYN, these resin candles holders are made using a store bought candle. Once burned, you make a new candle to refill the one you burned. Alternately, you can also make these candle holders using a glass insert and hand pour your own candles from the start.
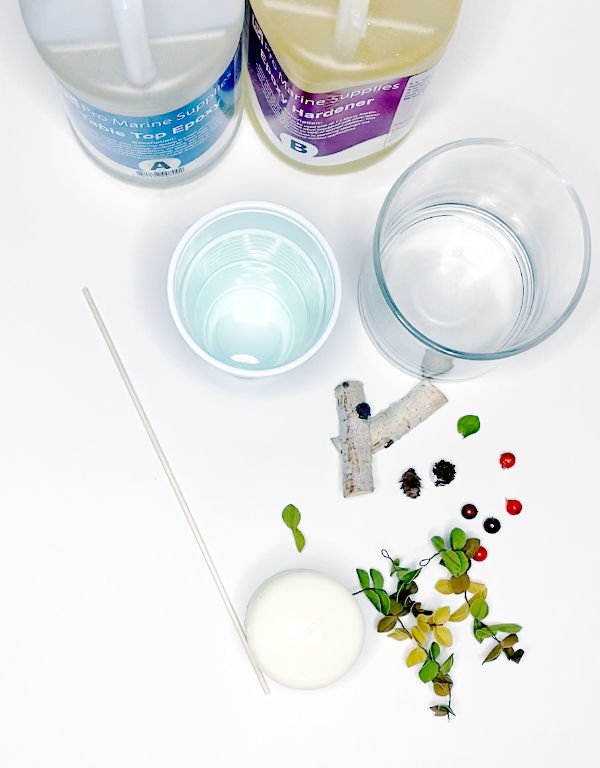
Materials Needed to Make a Candle Holder
- Short Glass Vase
- Dried Flowers and Botanicals
- 2-Part Epoxy Resin
- Candle Filled Glass Votive or Large Candle
Get detailed information on the supplies I used and where they were purchased via my original post on how to make resin candle holders here. (I also include tips on the process.)
Tools Needed
- Disposable Cups
- Dowel or Craft Sticks
How to Make a Resin Candle Holder
The first step to creating a resin candle holder with dried flowers is to plan your design and determine the placement of the dried flowers and botanicals you chose for the project.
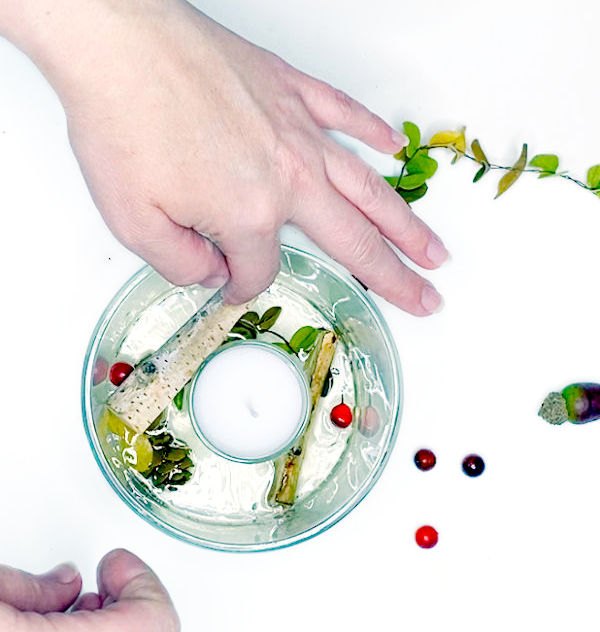
To plan the design, first place the candle in the center of the vase. Then arrange a few pieces of the various flowers and botanicals around the candle. These will serve as the elements embedded in the first layer of the resin in your candle holder.
Once you have a design you like, you can pour the resin into the container to set your design.
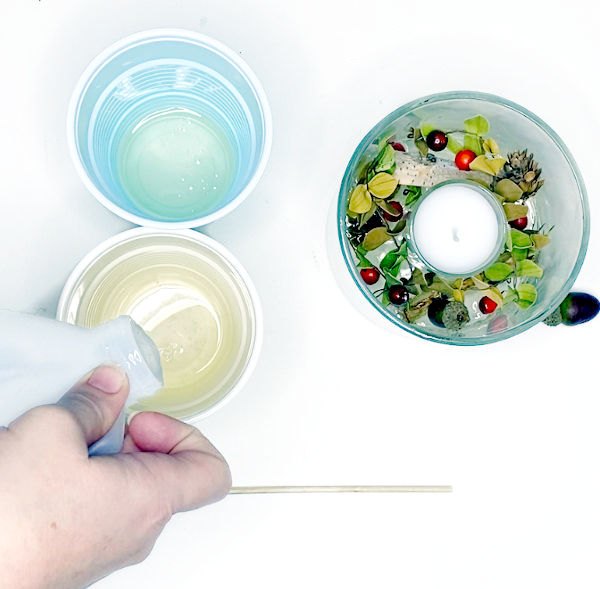
To mix the epoxy resin, pour equal amounts of each part of the two-part resin (about ½ cup each) into individual disposable cups.
Now pour the thinner resin part into the thicker resin part to combine. Stir the resin parts together constantly, using a dowel or craft stick, until the two parts are thoroughly mixed.
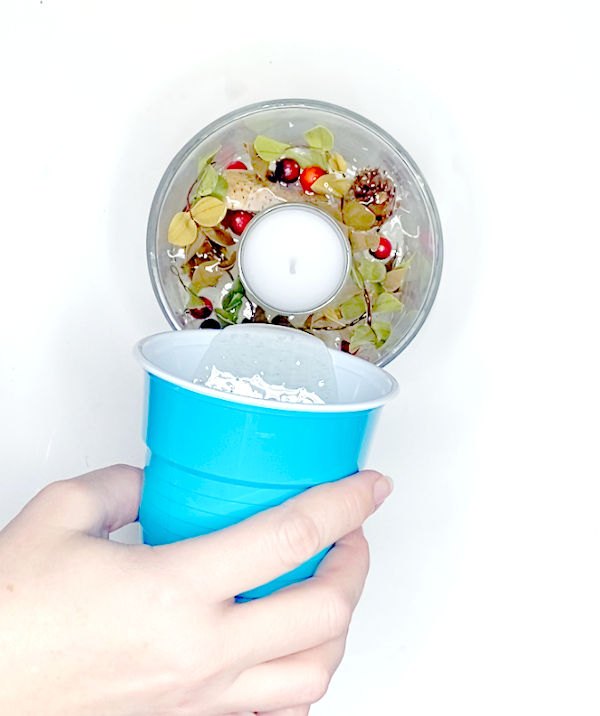
Once the resin is mixed, gently pour the resin over the dried flowers and botanicals to fill the cavity area between the candle and glass vase side.

Now leave the vase to set, untouched and in a room about 75-degrees, for 4 hours. This allows time for the resin to set up before proceeding to the next step.
After the first layer of resin has set, you are ready to proceed to the next step. This step is basically a repeat of the one you just completed.Design and place the additional floral elements over the top of the hardened first layer of resin.
Then repeat mix a fresh batch of the 2-part epoxy resin, the same way you did the first. Pour the second layer of resin into the container around the candle to cover the dried botanicals. Allow the new layer of resin to cure for 4 hours.

If necessary, you can repeat this process as needed until the vase is filled to your preferred height.
Allow 72 hours for the resin to fully cure. Your DIY resin candle holder is then ready to gift or use.
Resources for this project:
See all materials


Frequently asked questions
Have a question about this project?
Where you let the first layer dry before pouring the second layer, will it show a ring where the two meet. Or will it disappear after it all hardens.
In your photos, the first pour had the votive in the larger candle along with the botanicals. Then in the next photo for the second pour, it was gone. I would assume you leave the votive in for the subsequent pours (at whatever level you put the votive in) and not remove it. Correct? If you remove it while the resin is soft, the votive "hole" will fill in, but if you leave it in, the resin will harden around the votive and you will not be able to remove it. Or am I missing something?