


Hide a Wi-fi Router Without Creating a Fire-hazard

Every house has some ugly plastic piece of technology that gets hot and bothered if it is hidden too far away. Deal with it by sticking it behind a ventilated screen.
Hometalk Recommends!
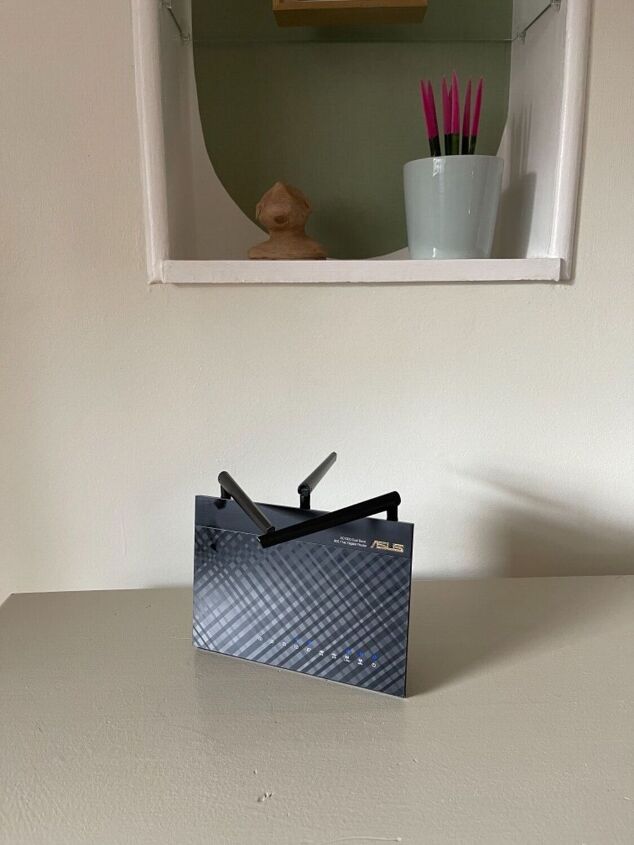
Just look at this bug-like thing standing in a girly pink and green bedroom. But boy, did I get backlash for even suggesting that we hide it in some way. Because everybody knows - you never, ever mess with the wi-fi!
My initial plan was to cover the thing with a plastic basket but having experimented a bit, I found that it got even hotter, particularly when the top was covered. So, please be cautious, even with my suggested solution, there is a good reason why these boxes have ventilation slits. And watch that you don't use anything metallic or suchlike which might affect the device’s performance.
The solution
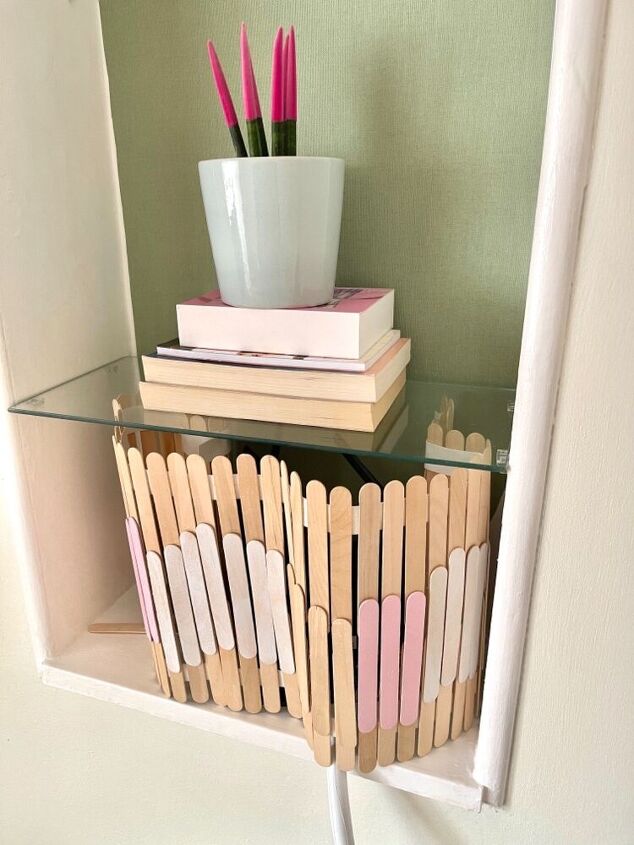
In the end I decided to make an wavy screen. Why, you may wonder, if there are plenty of easier ways to create a screen? I thought I would try a trendy fluted, undulating design that matches the wallpaper arches I made for my last project and appeals to the teenage occupant. Besides, all the arches you see these days remind me of ice-cream sticks anyway.
Measure and plan
To make my ice-cream stick screen, I measured the circumference and height of the router to get an rough idea of how big my screen should be. This design will only work for something that isn’t too tall such as a router. If you need to hide something bigger you would have to go the conventional route and build a frame or use a lampshade frame as a base.
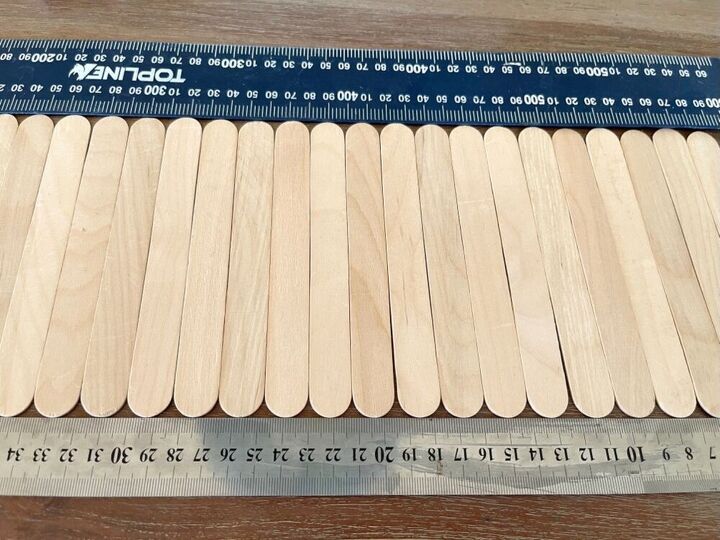
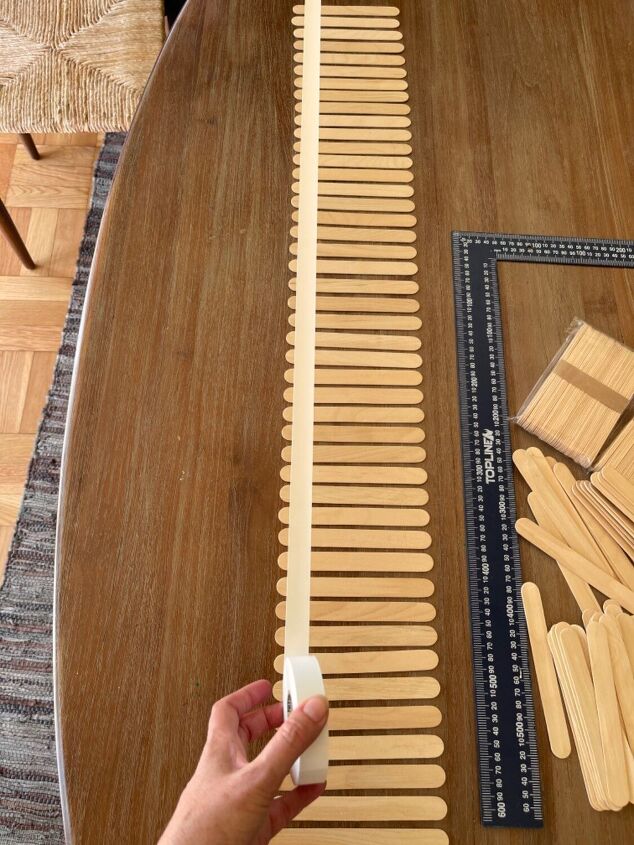
Gather popsicle sticks
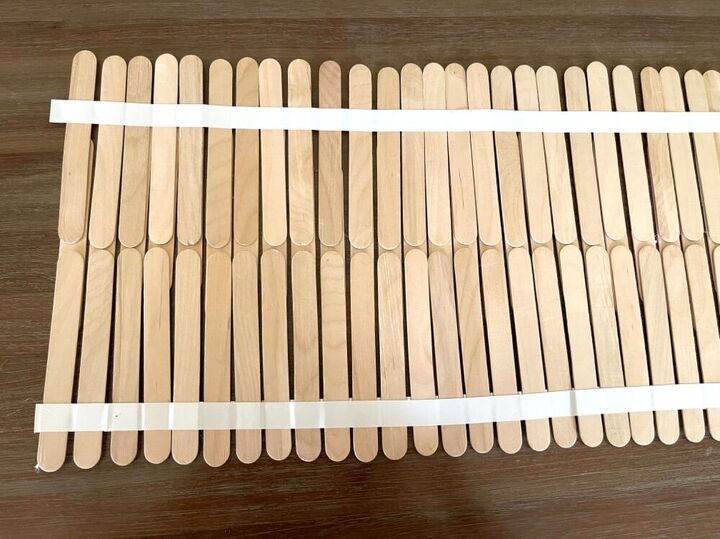
To make my bendy one, I laid out a row of popsicle sticks much wider than the circumference between two long rulers. This makes it easier to align them. You will have to slide the rulers along the row because the row will probably be much wider than even the longest steel ruler.
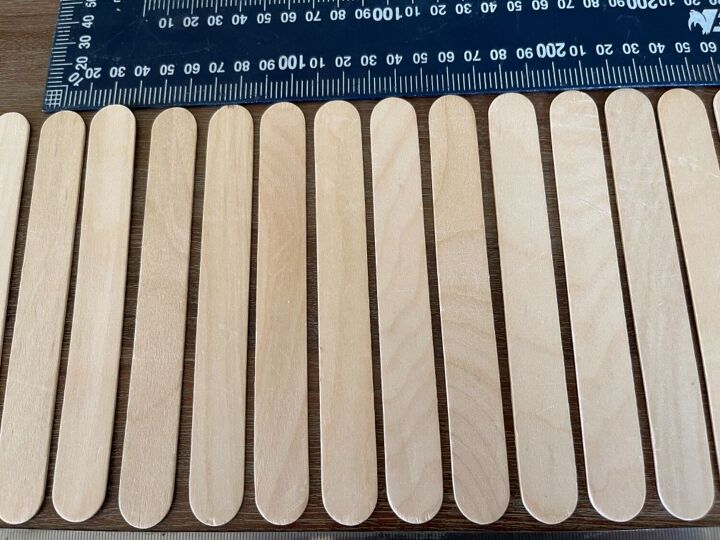
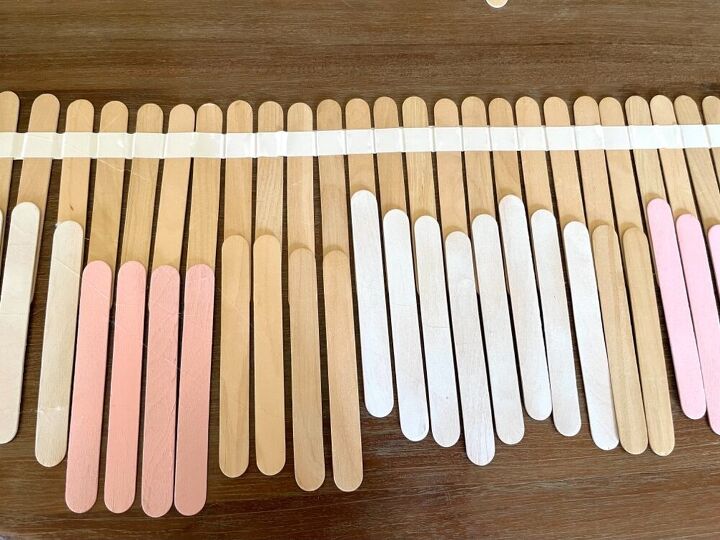
Space them
I then moved the sticks so that there were even spaces between them. This would hopefully allow some airflow.
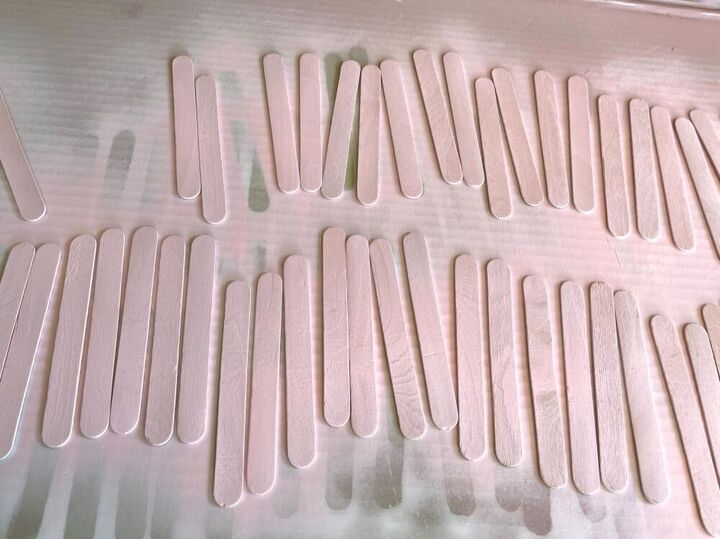
I also spray painted some pink and white and kept them aside.
Stick them together
With the help of somebody else, I carefully stuck a strip of electrical tape to the base of the sticks. Having an extra pair of hands definitely helps to ensure that the tape is lowered evenly and that nothing moves. I stuck a strip both on the front and back, effectively on top of each other. Once again, it helps to have someone to assist when you flip the set over.
What type of tape? Long answer.
The electrical tape has both pro's and con's:
- This particular tape didn't stick very well so the sticks came loose once I lifted the set. But this also meant that I could reposition the odd ones that did move. Using ‘removable’ tape meant that I could build my screen and then take off the strips that didn’t fit in with my design.
- My tape also stretched, which once again can be both an advantage and an irritation. At a later stage I got so frustrated that I actually removed the tape entirely and used leather strips and contact adhesive.
- Washi-tape would create the same not-sticky enough problem.
- Duct tape might work, except that you can't remove it. For sanity's sake definitely use tape so that the whole row can be stuck down instantly. I wouldn't have the patience to individually glue hundreds of popsicle sticks to a leather or plastic strip with contact adhesive.
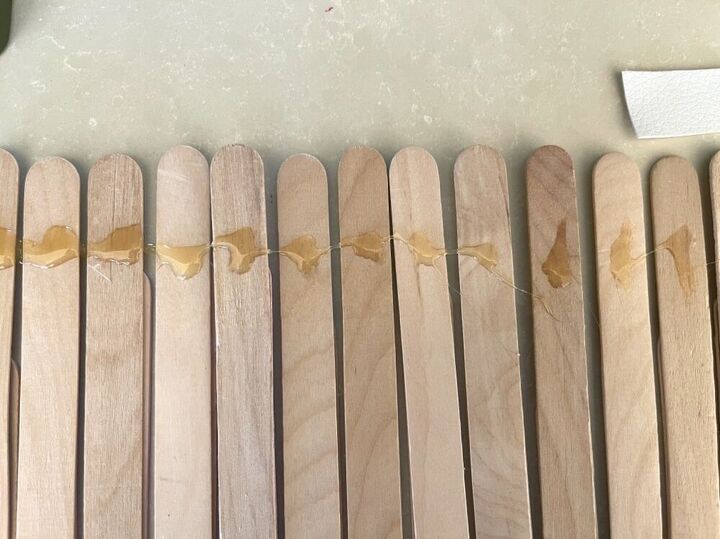
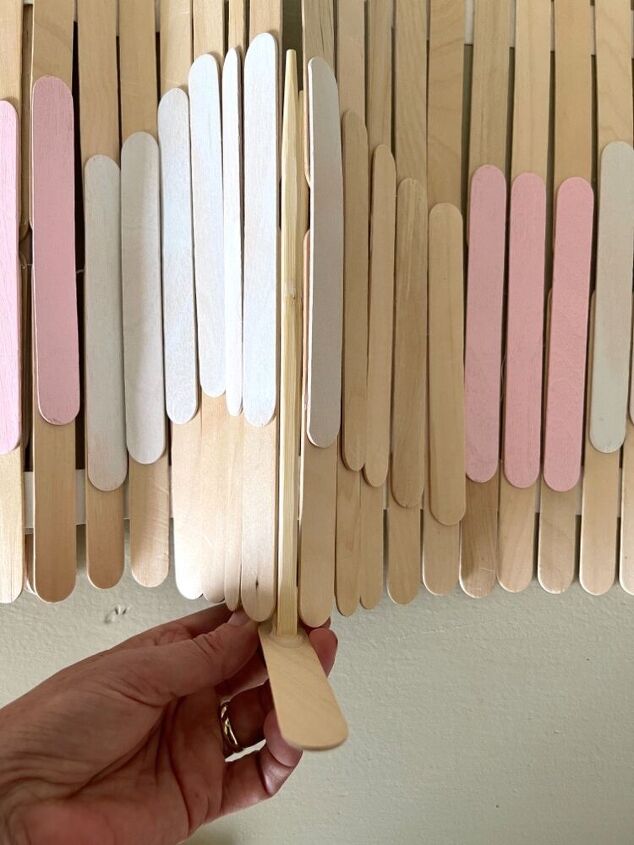
Plan the design
With the first row done, I started a design with the coloured sticks by placing as second row that overlaps each of the first row at varying heights.
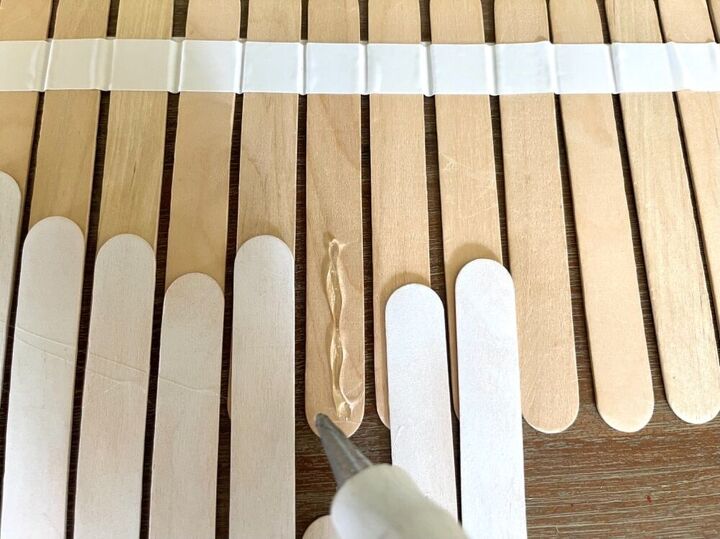
Stick them down
I stuck them down individually with a glue gun. Every stick in the first row must have a corresponding second one and you need to keep them straight.
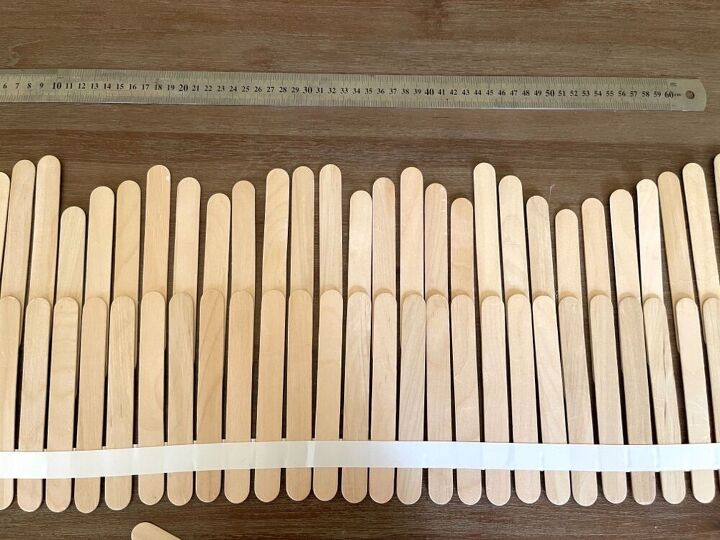
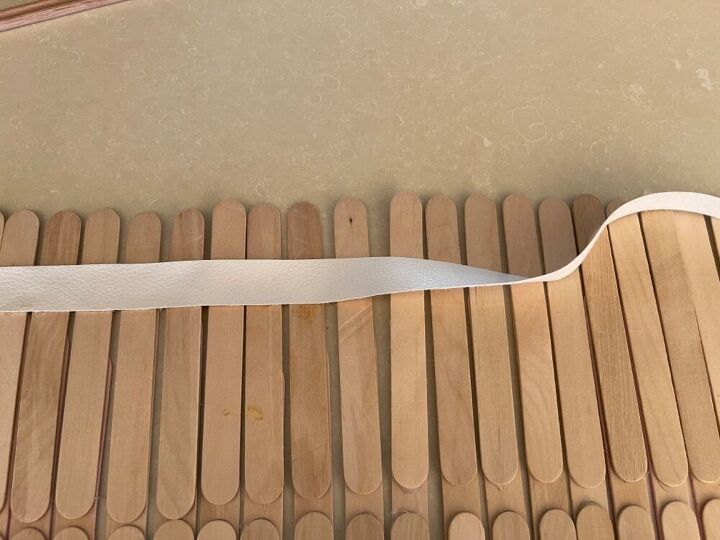
Plan the final row
Once done, I flipped the set over. Its important to take the maximum height of your little fence into consideration should there be one. My router has to stand on a bookshelf, so I had a specific height limit. I measured the required height from the base of the sticks and placed a ruler at the top to act as a guide (see above).
The third row was stuck to the back of the second with hot glue. It so happened that the height I required meant that the third row touched the first one. This may not apply to you.
Stick another strip
A second strip of tape was placed over the top part of the set. You may need to add a third strip because the whole construction becomes less stable the higher you build. But don't build too high because there will be a point where this whole design might not work for you.
Optional step for those of us who didn't quite get it right first time
Even with my best efforts the dastardly sticks still came loose. So, I carefully took off one strip of tape at a time (taking care not to get the whole lot in disarray as I pulled the tape off) and replaced it with a leather strip stuck down with contact adhesive. If you don't know contact adhesive, it is messy and it goes yellow. Don't smudge or drip and work section by section.
I also removed the front outward facing tape strip completely. This meant that I was only left with two strips on the back of the screen.

Hide the cables with trunking
I couldn't find any suitable trunking to hide the three cables so made my own. I cut a piece of soft plastic piping thick enough to hold the cables and long enough to cover the visible section of cables.
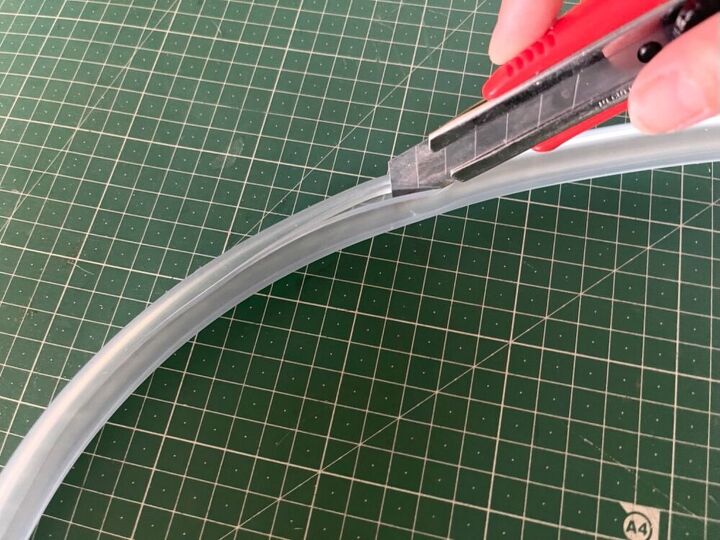
And cut a slit lengthwise.
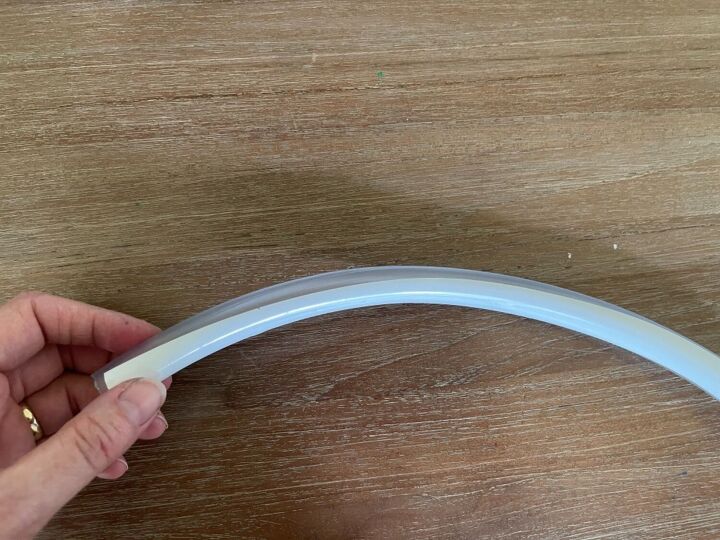
Cover the entire pipe with tape, slit and all
I then covered the pipe with tape lengthwise, working section by section. It helps having someone to hold the pipe down and straight whilst another person does the sticking. My tape was quite narrow so I used about 3 overlapping sections to cover the entire pipe, slit and all. You could just use a wider tape. I suggest you use a solid colour or you may end up with a mismatched pattern. Or you could ad some decorations.
Cut a slit in the tape
Finally, run the boxcutter along the pipe's slit again so that the tape is cut in exactly the same place as the pipe.
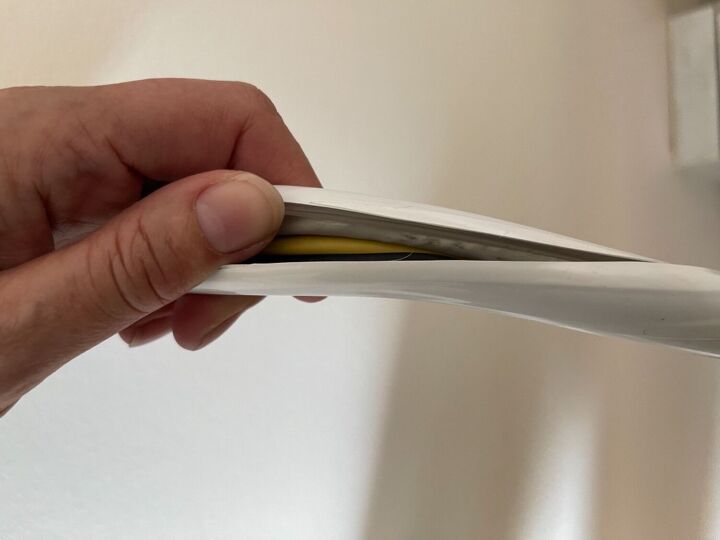
Place the cables inside
After that it was pretty easy to stuff the cables inside the trunking.
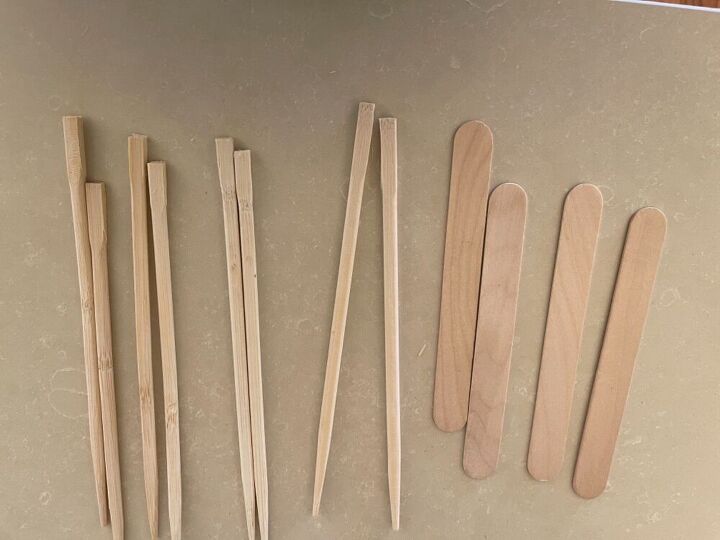
Make some stands
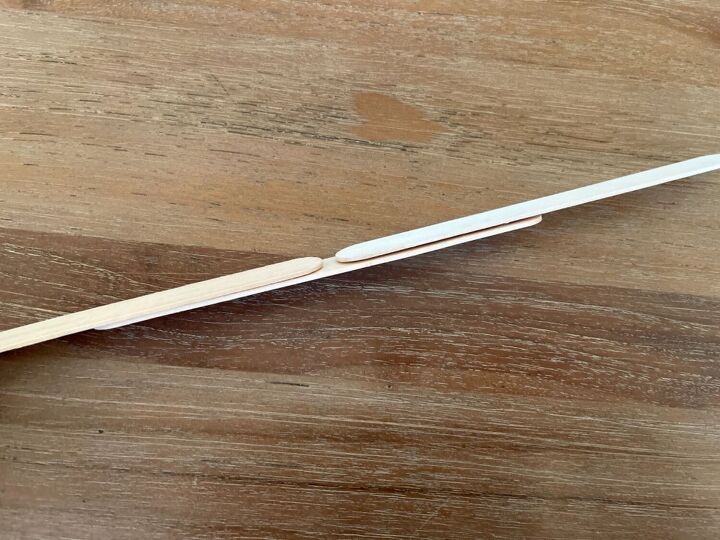
This is all good and well but effectively I had constructed a long, floppy popsicle table runner. It needs to stand up. I took 4 sets of disposable chopsticks and split them.
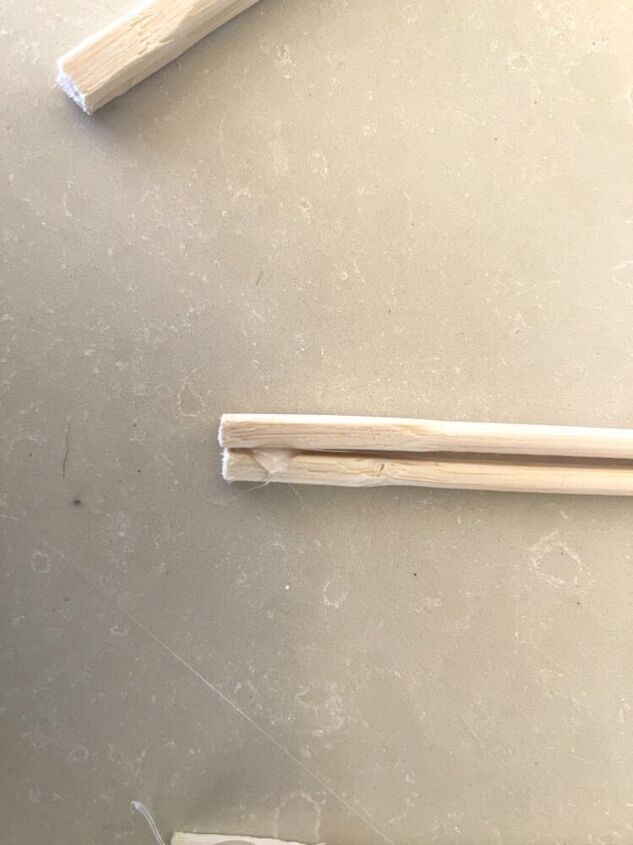
Then I stuck them back together again but lower than they were initially before they were split. This is means that the slit between them is longer and runs closer to the base. Sticking the two sections together with hot glue also makes them stronger.
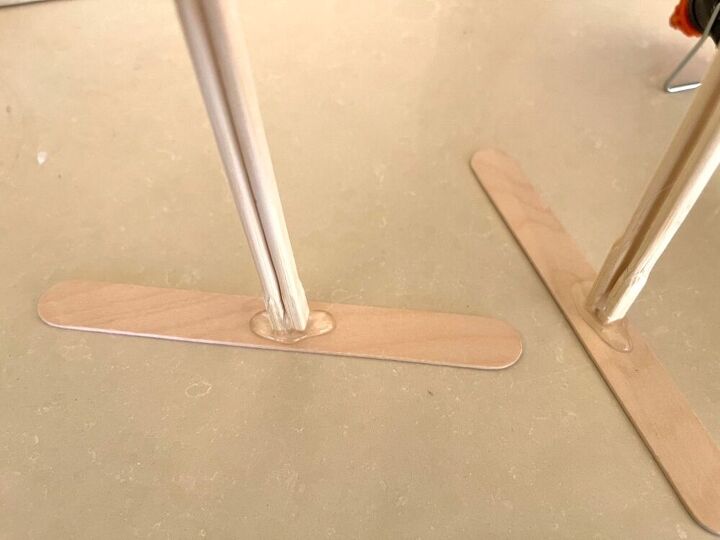
I then placed a sizeable blob of hot glue in the centre of 4 popsicle sticks and stuck the chopsticks onto each. Note the direction of the chopsticks and that the chopstick slit runs at a right angle to the direction of the popsicle sticks.
Put the screen up
Once I was ready to put the screen up I slid the 4 stands into position. I could then arrange it around the router in a wavy shape, hiding all the black bits.
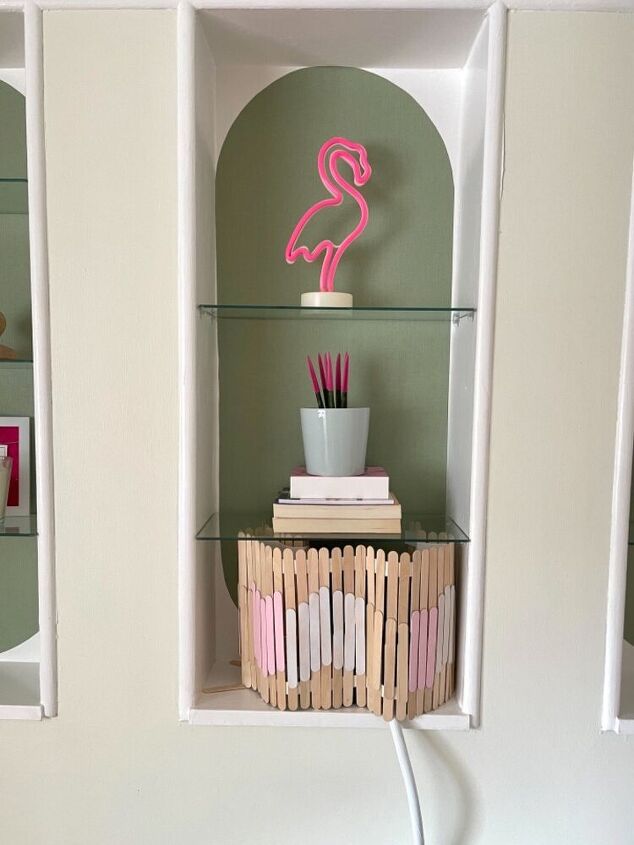
It goes very well with the rest of the decor in the teenager's room where it stands and no one's internet speed was reduced in any way.
Resources for this project:
See all materials


Comments
Join the conversation
-
I like it. Try to get a patten so no one takes your idea. Spruce it up mass produce and make some money. Its a really cute picket fence. It actually reminds me of the fencing used to keep sand from moving during daily winds and waves tidal rise and fall, and storms. Cute adorable. You should be proud and very practicle.
-
IT is simply amazing.
LOOKS great.
LIKE the colors.
A nice addition .
PIECE of artwork is what it is.
OF all the good ideas this is the best.
GARBAGE cans outside can be hidden the same way using pocket fence slats.


Frequently asked questions
Have a question about this project?
I like the look of the router better.
Love your picket fence! The router is not easily compatible with any decor one may choose. I do think your idea is a good one! Now that I'm thinking would pipe cleaners help to steady as well as easily be bent or manipulated?? Just a thought.. I think I am going to try this. I really like the colors you used for yours and it matches just right.