


How to Upcycle a Vase Into Aged Pottery
Post contains affiliate links
Have you seen these beautiful, aged pottery pieces that are sold at Pottery Barn and Ballard Designs for around $80 or more?
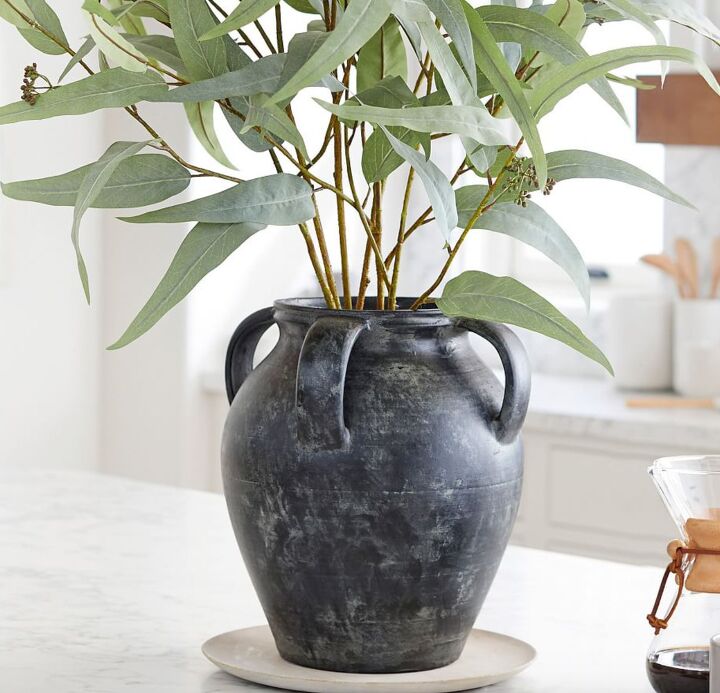
I absolutely love the character of them, but I was not about to pay $80 or more for a piece of pottery. So, I was determined to find a way to make my own pottery for much less, and I can’t wait to show you how I did it!
One weekend, while out hitting garage sales, I came across this vase and fell in love with its unique curves.
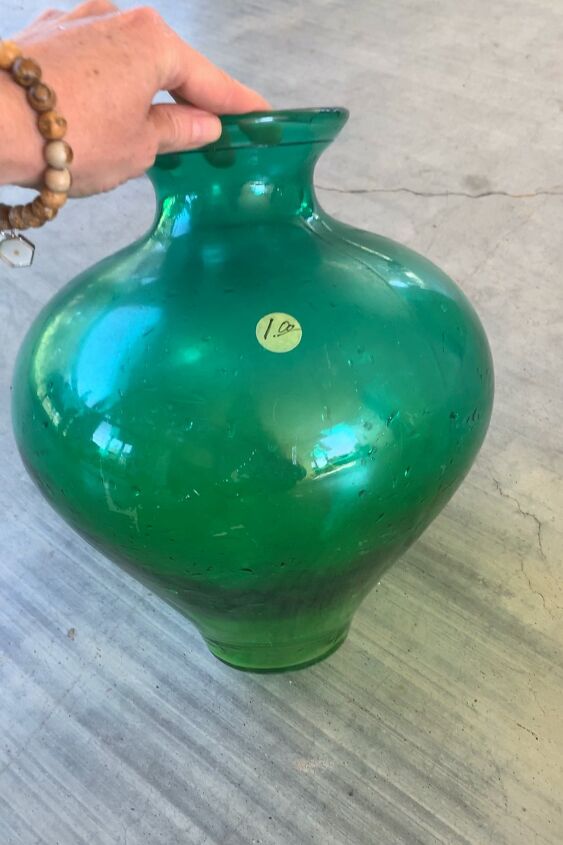
At only $1, I had to take it home with me!
Now, let me show you how I upcycled this glass vase into a piece of aged pottery!
How to upcycle a vase into aged pottery
The first thing I did was wash and dry the vase off real well.
Then, I grabbed some DAP DryDex Spackling. This stuff is typically used to fill in holes in your wall. You can find it at most hardware stores.

I scooped up the spackle mixture with my hands and applied it to the vase.
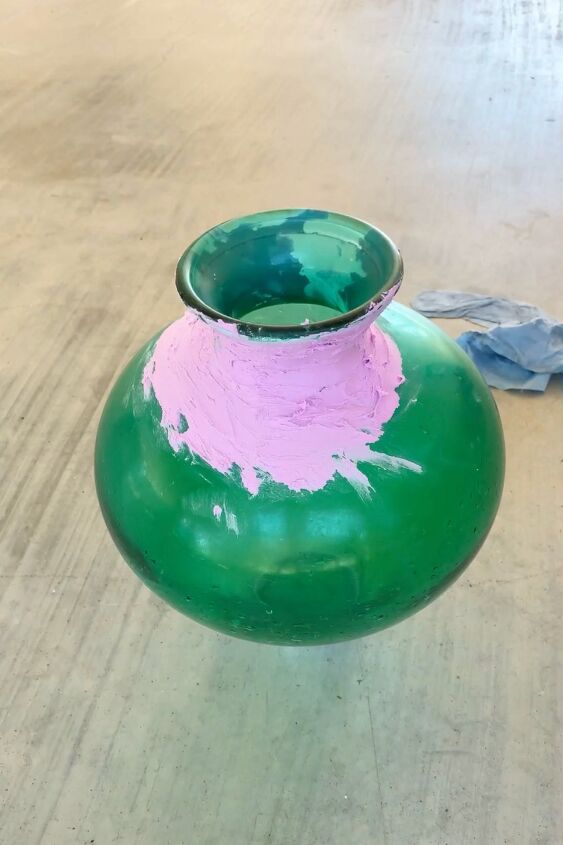
I started at the top of the vase and worked my way down, making sure to smooth it out horizontally.
This part was fun!
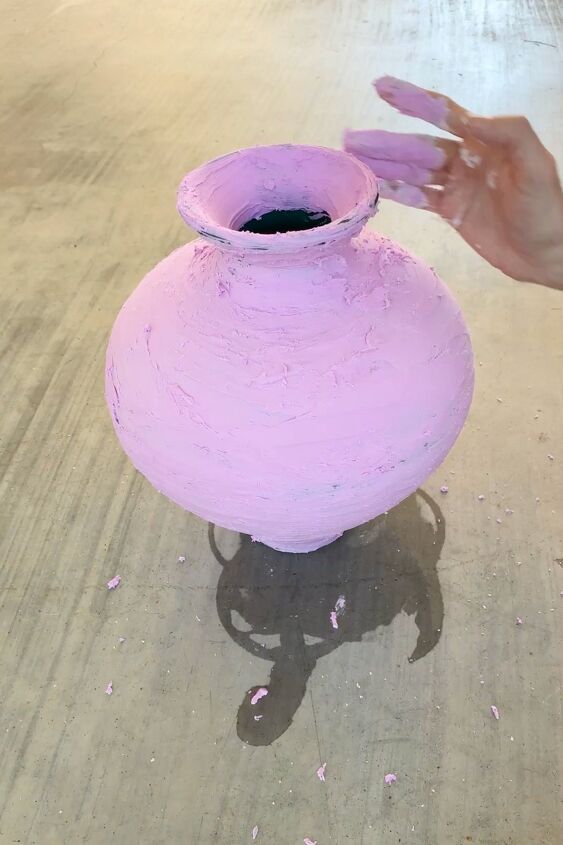
The spackle goes on pink and will turn white when it’s dry.
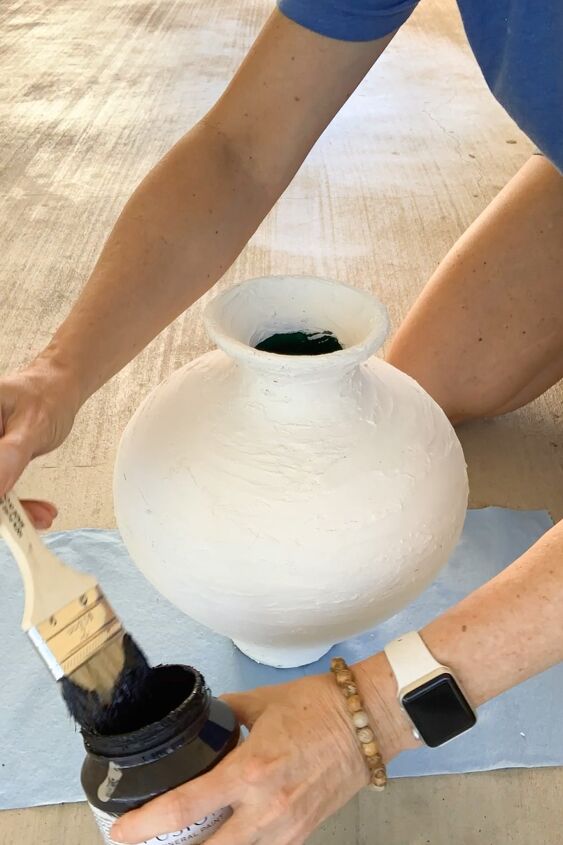
Once it’s dry and completely white, I grabbed some black paint. I used Coal Black by Fusion Mineral Paint, but any paint will work. (If you want your vase to have a white. pottery look, then skip this part.)

Using a cheap brush, I began painting the vase using horizontal strokes.
Don’t worry about getting every nook and cranny covered with paint. The next step will cover up any areas you didn’t paint.
Now, while it’s drying, scoop up some dirt from your yard and put it into a bowl. Add a little bit of water to it until you get mud. You want to be able to pick up the mud and smear it onto your vase, so make sure your mixture isn’t too runny.
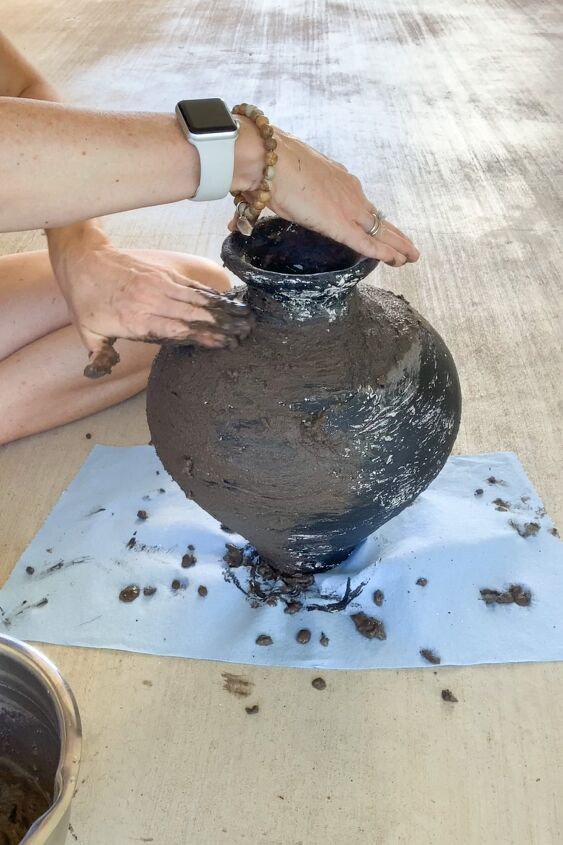
Once you have your mud, scoop it up and wipe it all over your vase.
I’m not going to lie… this part may have made me gag a little.
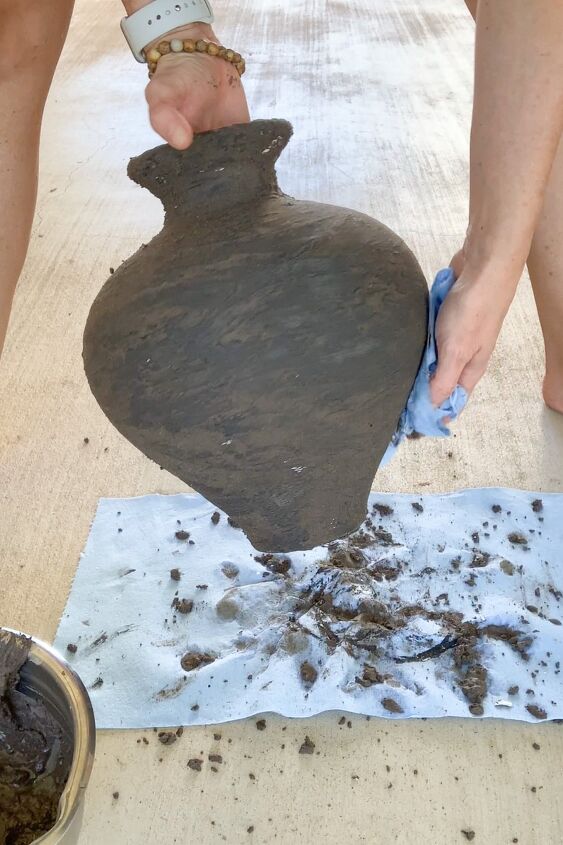
After you have smeared the mud all over your vase, go back over it with a rag to remove any excess.
Then, let it dry completely.
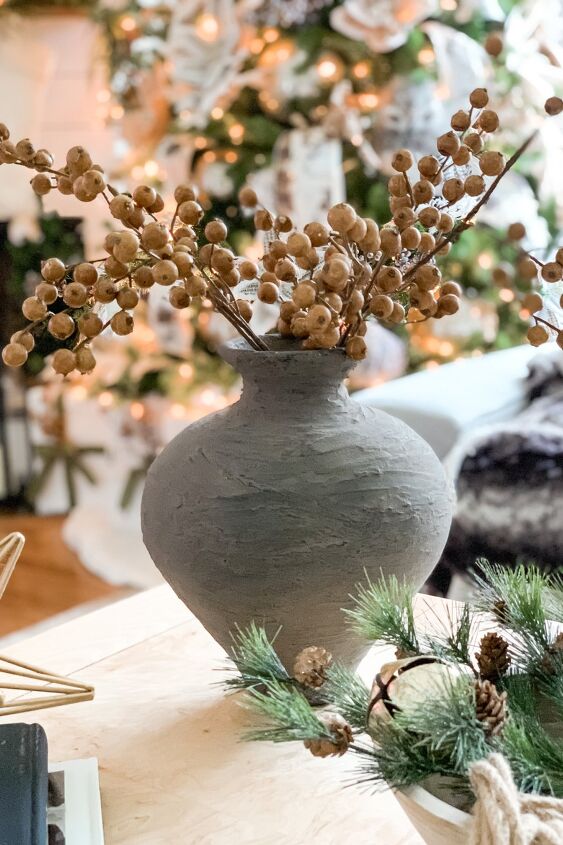
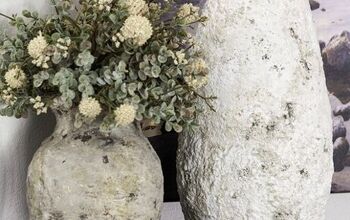
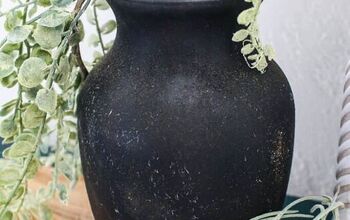
Here it is! What do you think of my new piece of pottery?
Can you even believe it’s the same vase?
Since I already had everything I needed to do this project, this entire project only cost me $1… the cost of the vase. If I had to buy the supplies, it would have cost me around $28. STILL cheaper than buying one of those pieces of pottery from a store.
I’ve also done this technique without the spackle… you can see that here. I like the texture the spackle creates, so I definitely think I’ll be making more of these soon!
Do you think you’ll try this out? Let me know in the comments below.
Related posts: Super Easy and Inexpensive DIY Fall WreathA Branch Tale: Easy DIY Wall Art DecorMud Painting.. It's a Thing!


Comments
Join the conversation
-
I like the finish on pottery in the first picture of a black handled vase (Pottery Barn, photo credit). I’d like to try replicate that vase. I’m thinking black chalk paint and waxed finished. How would you get it to stick to a glass surface is my question. Thanks for the inspiration!!
-
Don’t use mud. It’s unsanitary and unnecessary. Get some stucco patch from a home improvement store and do the same thing.


Frequently asked questions
Have a question about this project?
What happens when it starts to dry out and crack? More Spackle/Mud??
Won't the mud eventually crumble off the vase?