


Sand and Resin Ocean Coasters

Hello everyone and thanks so much for checking out this post!
Today’s project is of course nice and easy, but so effective and a great way to create pieces to remember places that you’ve visited.
In this project I use real sand that I collected on a trip to Miami so I love knowing that I’ve basically created my very own souvenirs.
I make lots of coasters, clocks and many more items like this to sell in my Etsy store so if you’re interested in taking a look I’ll drop a link down at the end of this post!
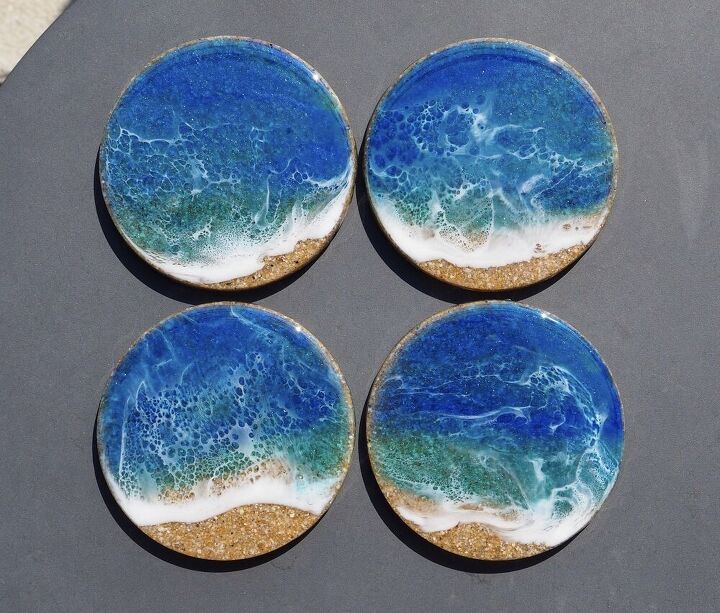
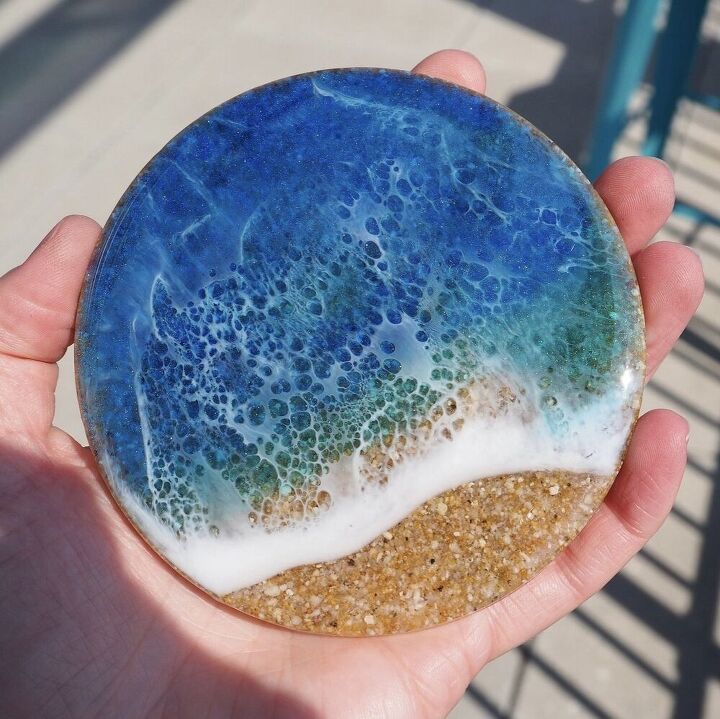
This resin waves technique is one of my favourites - no, no it’s not, it IS my favourite technique in resin and I hope you can see why.
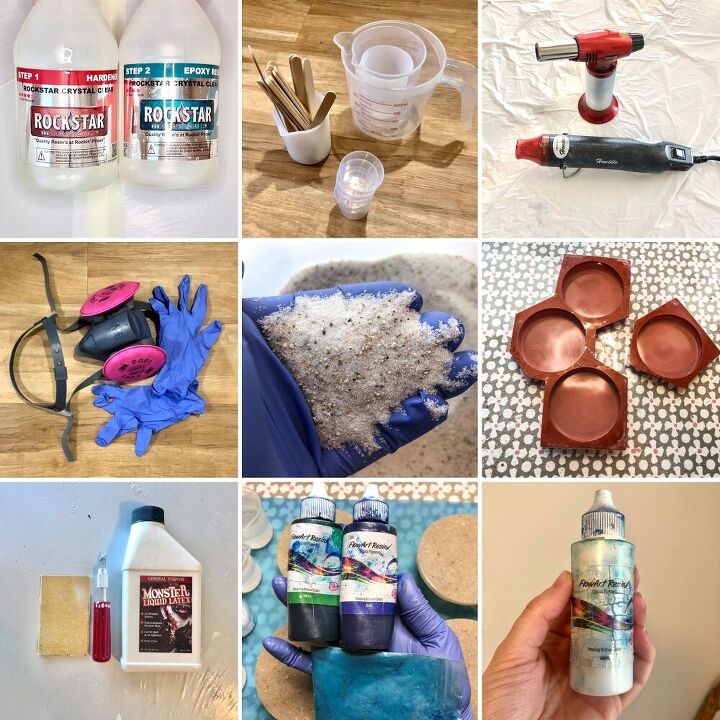
WHAT YOU’LL NEED
- Resin - Click this link and use my code HANNAH for 10% off along with free shipping. I’ve used their 4 Star 1:1 Thin Coat resin
- Sand
- Coaster molds (any shape really)
- Mixing containers and sticks
- Liquid pigments (you can also use food colouring!)
- Liquid latex (or painters tape)
- Heat gun
- Blow torch
*Always use resin safely and wear protective equipment*
YOUTUBE
I also run a YouTube channel that I’m thoroughly enjoying creating content for so it would mean a lot to me if you checked this out and maybe even subscribed!
Above is a link to my video tutorial where I create these resin waves for you to watch.
However, if videos are not for you then below is a full guide on how to not only create these beautiful waves but to make your own sandy based set of coasters.
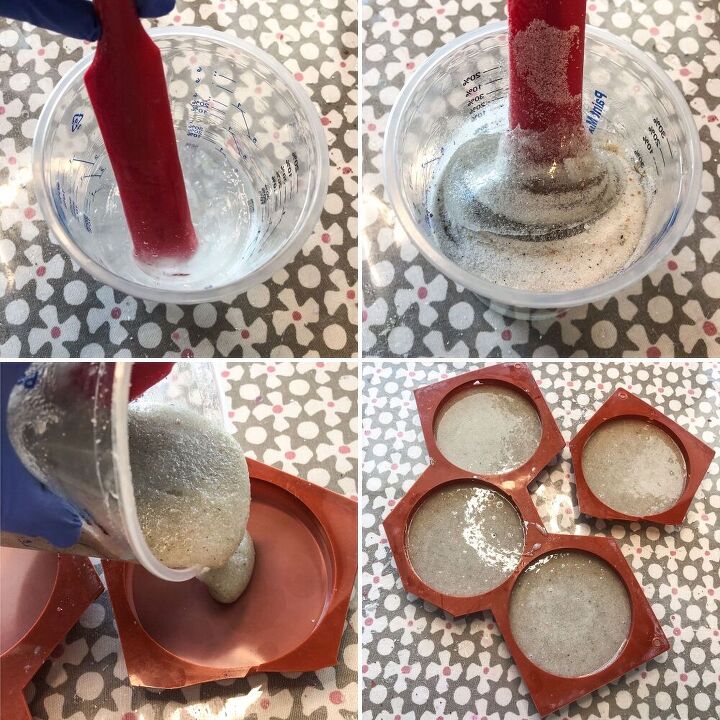
MAKING YOUR SANDY BASES
Mix together 100mls of resin. To do this, add 50mls of resin into 50mls of hardener (whenever you buy ‘resin’ you will receive both parts, the resin and the hardener). Always add your parts this way around too as it makes for an easier combination and a more throrough mix.
Combine the 2, stirring and mixing for at least 5 minutes.
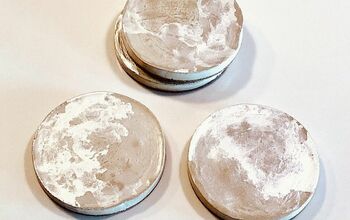
Next add in your sand. I added in enough sand to double my mixture to 200mls. Add the sand in bit by bit, not 100mls all at once, and mix together thoroughly, then divide the mixture equally between your coaster molds.
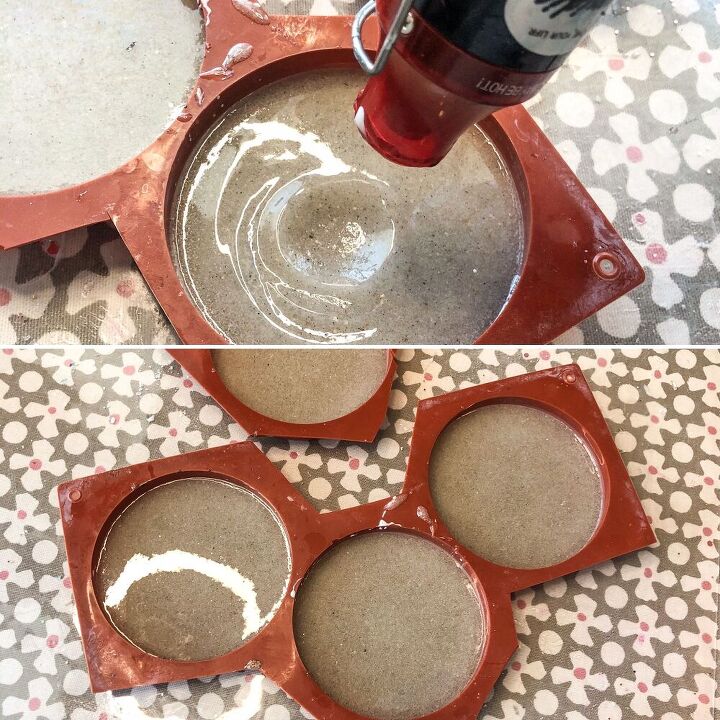
Use your heat gun to pop any air bubbles in the mixture and then use your blow torch to get any last surface bubbles.
Leave your resin to fully cure. The 4 Star 1:1 Thin Coat resin that I’m using takes approx 12 hours to cure.
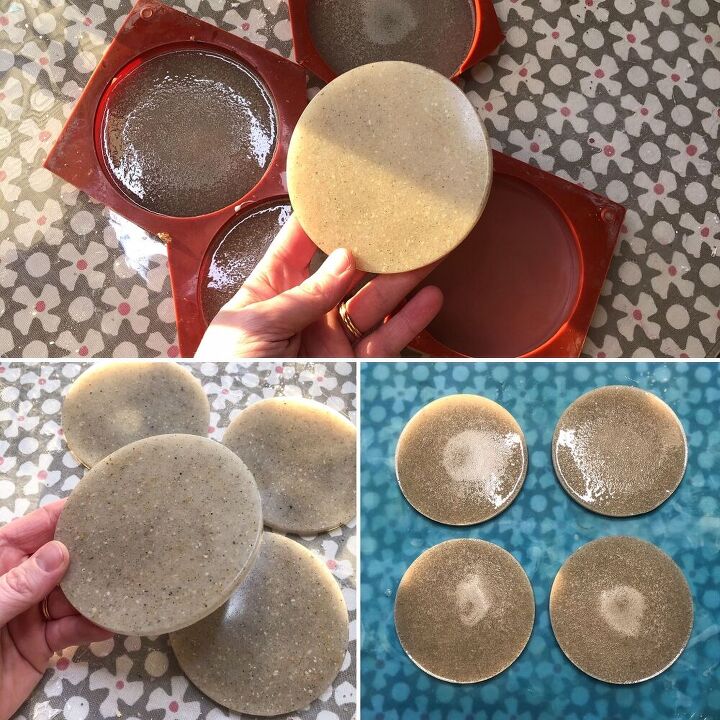
PREPARING YOUR COASTERS
Demold your coaster bases and lay them flat, backside up.
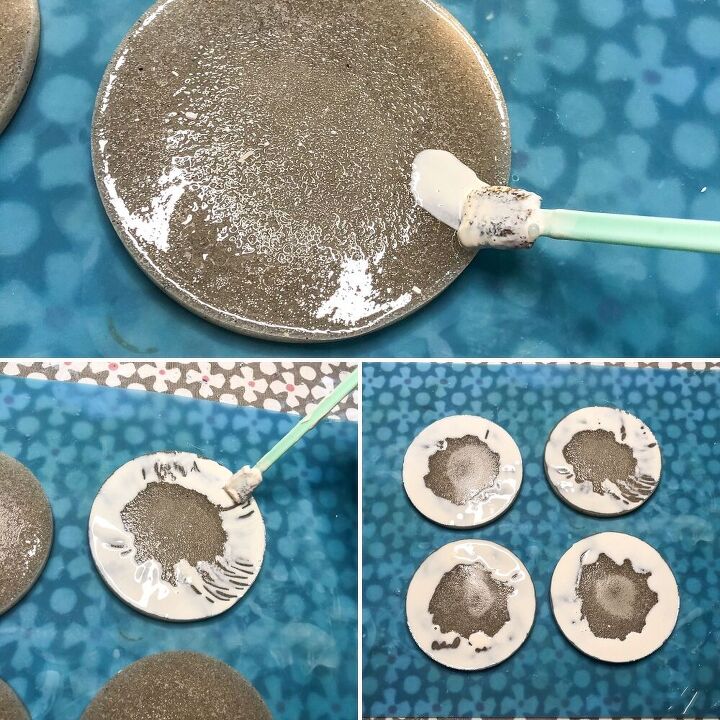
Add a generous layer of liquid latex all around the edges of your coasters or tape off the bottoms using painters tape. I use tape in my YouTube video.
THE CALM BEFORE THE STORM
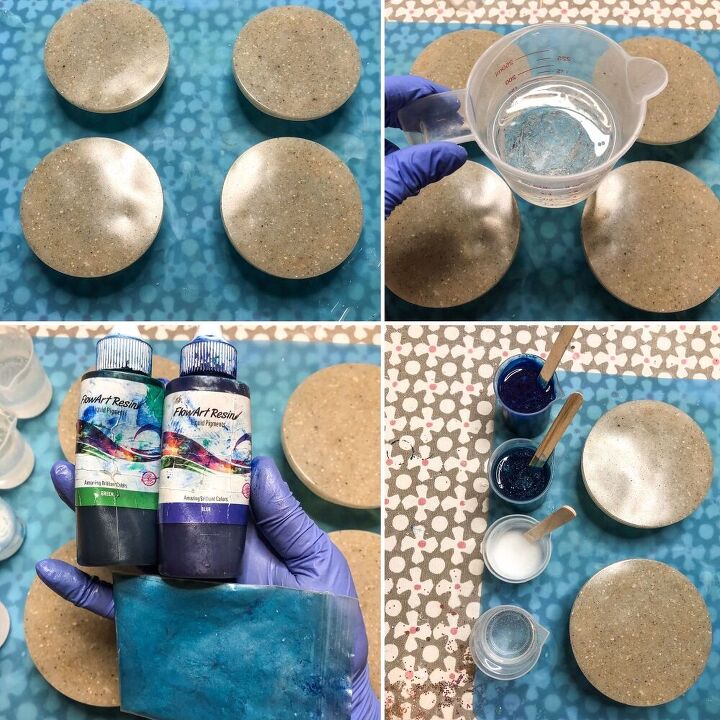
Mix together another batch of resin, approx 150mls.
Split your resin into 4 smaller containers for example:
- Dark blue - 50mls (a few drops of blue and a couple drops of green liquid pigment)
- Teal blue - 50mls (a few drops of green and a couple drops of blue liquid pigment)
- White - 20mls (a few drops of white)
- Clear - 30mls
I also add in a tiny bit of turquoise mica powder to my blues to give them a nice shimmer although this step is optional.
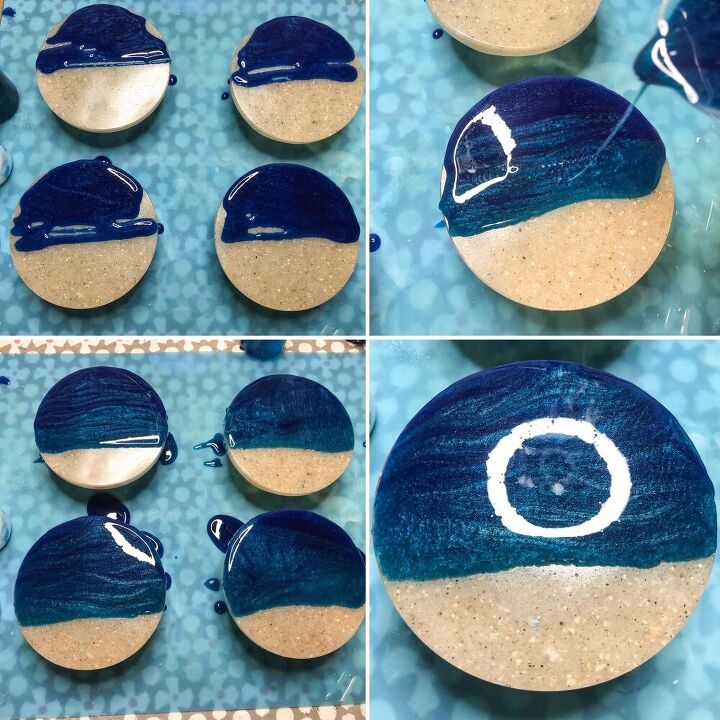
Cover approx 2 thirds of each base with a combination of your 2 blues. I add my darkest blue to the first third and then the lighter blue to the 2nd but I overlap them in the middle for a nice gradual blend.
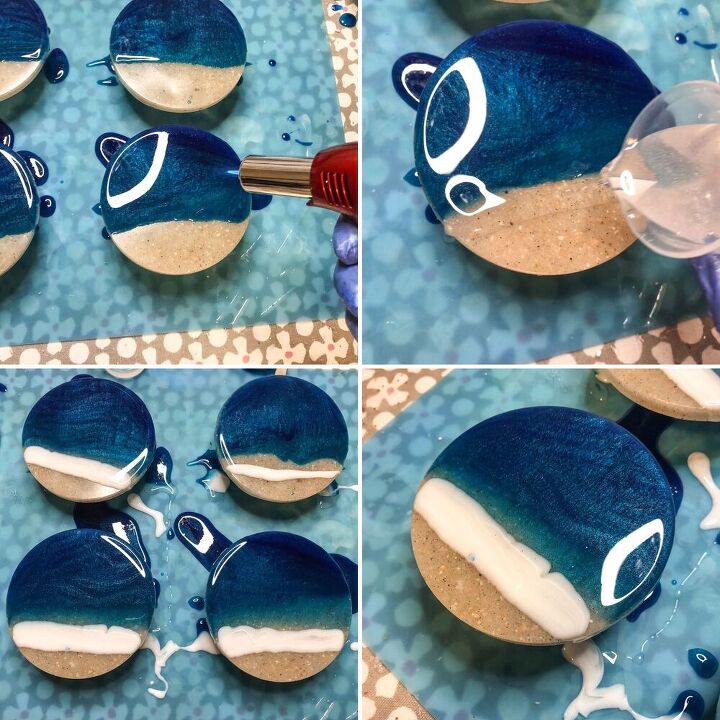
Pop any little bubbles with your blow torch and then it’s time to add the clear resin.
You want to add this in a thin line in front of the lighter blue resin so that it acts as a clear shoreline barrier. You want to leave the front quarter of the sand base totally bare and resin-free.
Now with your white, add a thin line in front of the clear resin so that the white touches both the bare base and the clear resin. Don’t add it directly on top of or into the clear resin. It needs to be the first colour in contact with the bare sand base at the front. Still leave some base clear at the front so that you can see the sandy shore.
MAKING WAVES
Pop any little bubbles with your blow torch and then it’s on to making your waves!
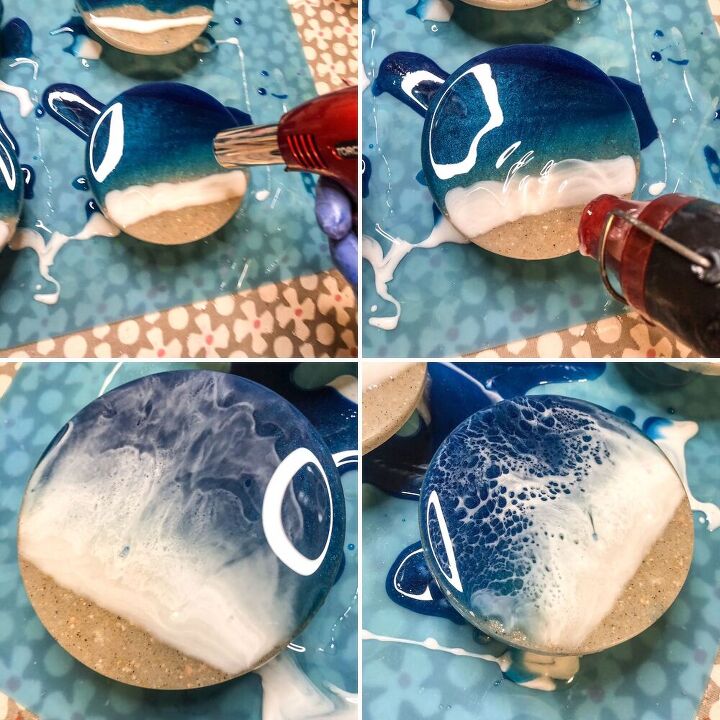
This part is so easy but makes a piece look so good and impressive. All you have to do is use your heat gun to blow the white resin into all the other resin.
It’s slow at first because the resin isn’t very warm but once you start applying heat, it flows easier and you’ll start to see the waves appear. Keep going until your white has drifted across your coaster and stop when you’re happy with how it looks.
Use your blow torch on a low flame and sweep it over your white resin. You’ll see the resin starts to part and turn into foamy cells which is exactly what you want. Try not to hold the heat on your resin for long or it will burn.
Now leave your resin to cure again.
All that’s left to do is remove the latex from the back and pick off the resin drips. If you used painters tape then use your heat gun to apply a bit of heat to the tape so that the resin becomes soft, then carefully pull the tape off.
Add felt feet if you like or leave as is.
Thanks for checking out my post and as I mentioned earlier, I sell pieces like this and many more in my Etsy store so please feel free to click here and take a look.
Until next time x


Comments
Join the conversation
-
HOLY SMOKES....THESE ARE INCREDIBLE!
You're the 'Bob Ross of Resin'!!!
Bravo!
-
Love it...makes me feel so relax. Just beautiful and creative!


Frequently asked questions
Have a question about this project?
These are amazing! My question is, why do you not put any clear resin over the "sandy beach" part, will the top of the coaster not be uneven if some has resin and some does not? Total resin novice here...