


Simple Doll Stands on the Cheap.

4 Materials
$20
2 Hours
Medium
Last August my aunt gave me patterns to make her a bunch of Doctor Who dolls. I wanted to stand them all up and get a finished picture of this huge undertaking. There are 28 dolls in all, but 3 stand on their own so, I needed 25 doll stands and I needed them cheap. I looked on ebay and amazon, they were anywhere from $3 to $8 each. OUCH! not in my price range. Even in bulk on ebay it was just too much. Well I figured I made the dolls so I might as well make the stands right?? I had the necessary tools and the ingenuity... So off to work I went ...
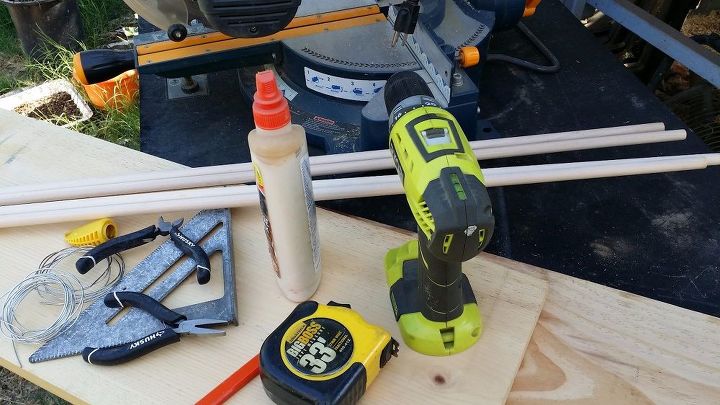
Ok I gathered most of what I needed. A saw, almost any will do I used a miter saw. It was easier to get to than the table saw. All mechanical things that can remove my fingers in a blink terrify me but I am a determined kind of person. I'm not going to let a little fear get in my way. I had a 6 foot long 1 foot wide pine board that I had bought for something else and ended up not needing and I had a left over 3 foot piece of the same. I bought 4, 1/2" diameter dowels and ended up going back to the store for 1 more. That triangle thing is for making straight lines I ended up using it for the first cut then I noticed my saw has inch marks so I put the triangle away. Later you will need the dowel glue, drill, pliers and wire.
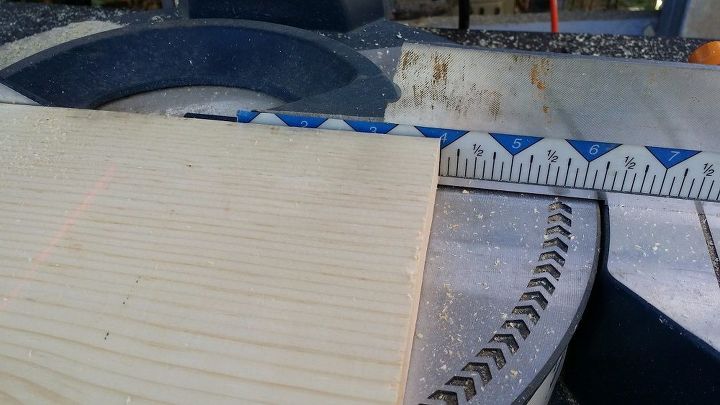
Ok here is where I realized the saw has inch marks. So I lined up the wood to the 4" line I needed 25 4" X 4" pieces. I was doing fine when I had the largest part of the board to my left and the 4" part to my right. There is a clamp on the saw that holds the board so my fear was at a minimum here. It was when I had a 12" X 4" length that I was reducing to 4" that I had anxiety. That meant no clamp to hold the board. It is about 9" away. Not good when you have an 8" board you are cutting in half.
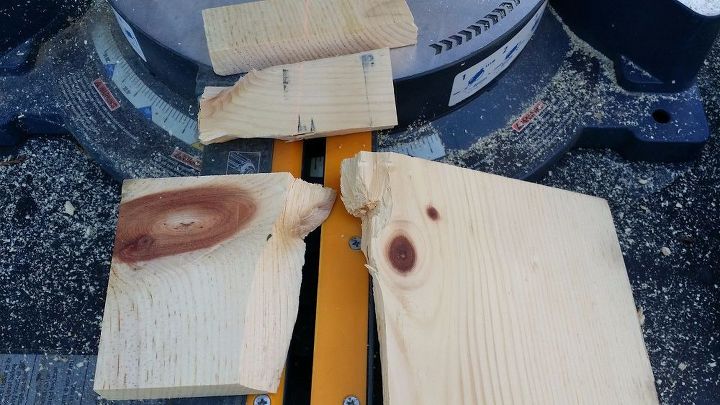
Now this here is what happens when you don't want to hold the piece of wood. I had set it in place and lowered the saw blade to right above the wood and started it up and lowered it to cut the wood. Next thing I know I have wood flying through the air. And a wasted piece, also you don't want to cut through a knot same thing happens even if you are holding it in place.
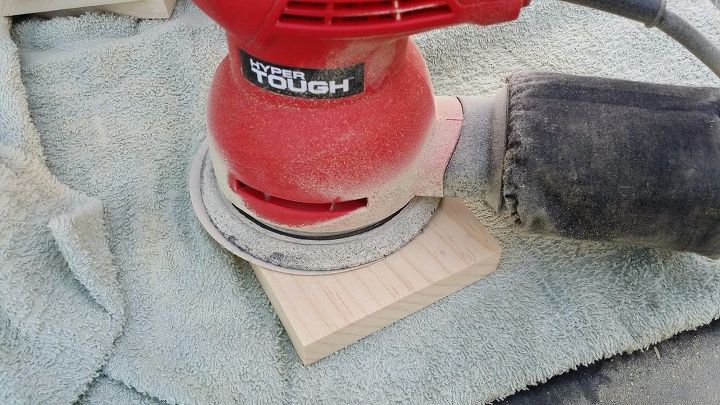
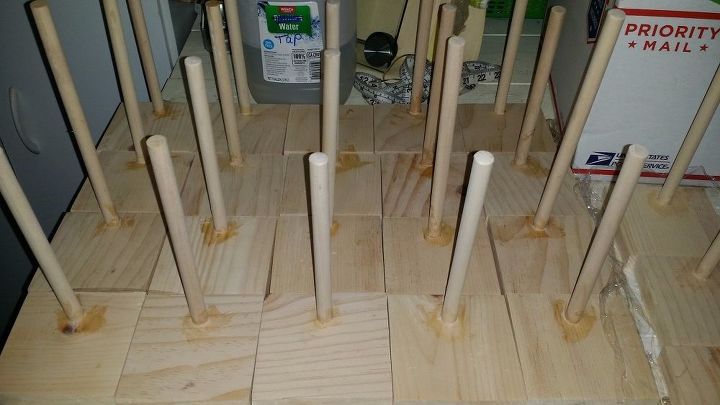
Now that all of your wood is cut, it is time to sand it smooth. I used 80 and 120 grit papers. Here is where I realized I should have sanded smooth the top and bottom of the wood while it was still a big plank. Those little 4" squares were hard to hold on to. The towel slowed down their spinning and stopped them from picking up the black spray paint that was on the table I was working on.
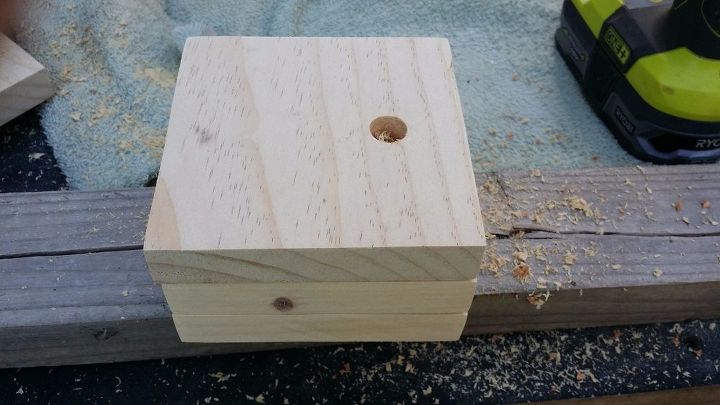
Ok boards are now nice and smooth, Time to drill holes for the dowels. Now you don't have to drill all the way through like I did, but I figured it would be more stable if I went through. I stacked the wood to prevent the bottom side from splintering when the drill went through. Also the drill going through marks the spot on the next piece, if you line them up correctly that is. Make sure your drill is straight up or your holes will will be at an angle and that will make your supports at an angle. Go ahead ask me how I know.  LOL
LOL
LOL Oh I used a half inch spade bit to drill the holes.
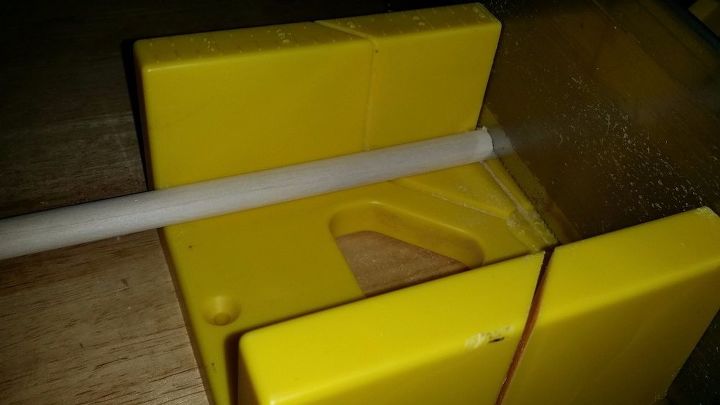
The saw terrified me enough cutting the blocks, and most of the dowels pieces I needed were going to be 8-10" long. There was no way that clamp thing on the saw was going to hold that round dowel so I brought the miter box and hand saw in the house. I set them on a TV tray (Not the sturdiest thing to cut on) and I watched Doctor Who videos while I cut the dowels, it didn't take very long they were thin enough. Probably a dozen passes of the saw and I was through. I sanded the ends before I moved on to gluing them in the holes.
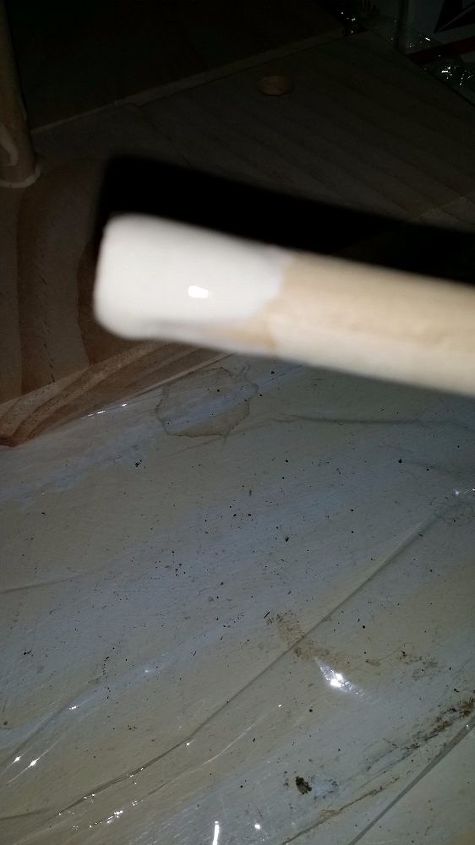
I used Elmer's brand wood glue. I just unscrewed the top and plunked the dowel in the glue then slid it in the hole.
I first laid plastic wrap on my table. Once the dowel and glue was in the hole I set it on the plastic wrap making sure the dowel went all the way through.
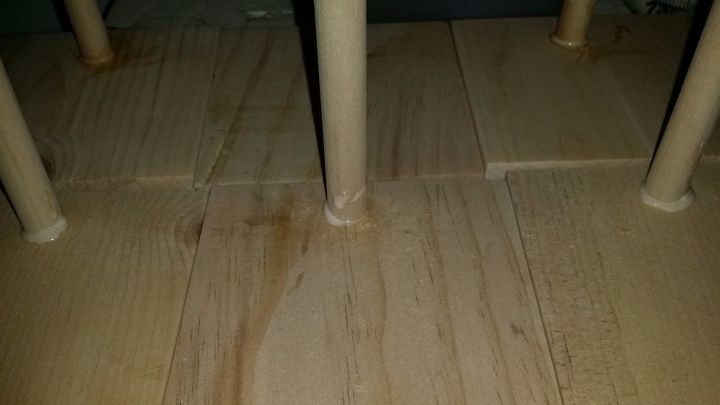
The glue was a little sloppy I wiped up the excess with a craft paint brush. It dried to a yellowish color and I sanded that off, I also needed to sand the bottoms smooth.
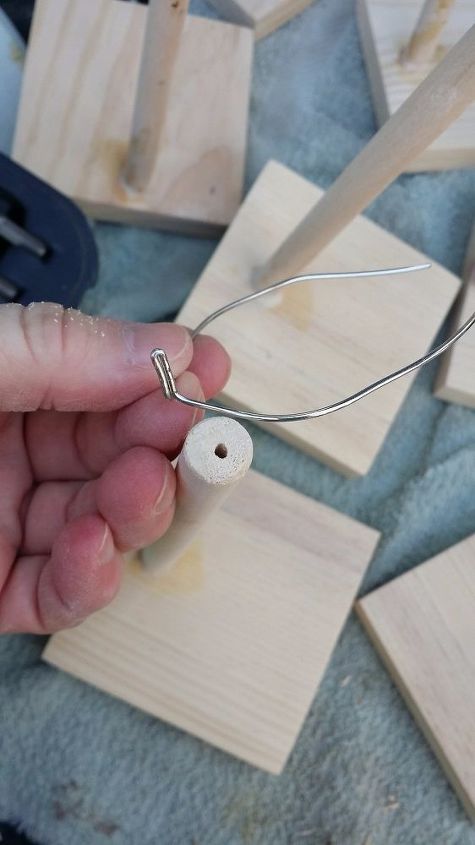
I used the 3/32 drill bit to drill a half inch deep hole in the top end of the dowel. It's not the smallest bit in the box, but the one next to it. I was using 16 gauge wire and here I was test fitting . I ended up not using glue to hold it in. It was a tight enough fit on its own.
Measure how long you will need the wire to be and fold it in half. The fold end will go into the dowel.

For some of the dolls the dowel was the perfect height so I put a little bend in the wire. Pressed the bend into the 3/32 drilled hole.
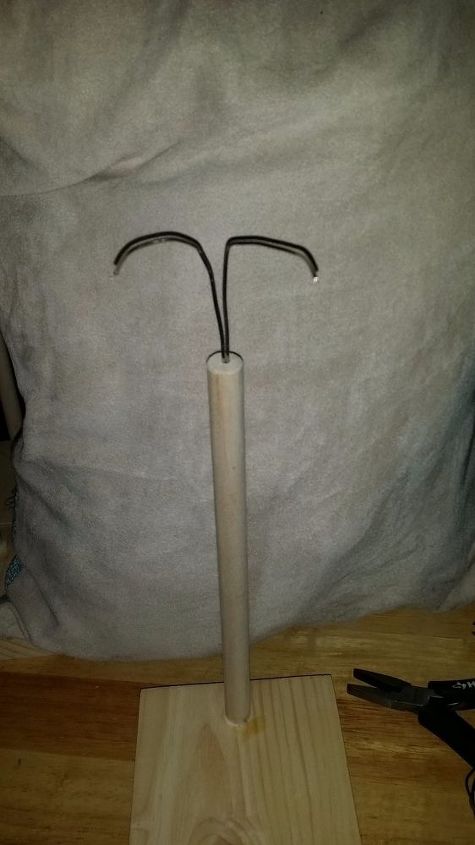
For some the dowel was too short. I thought I had measured them all accurately, I thought wrong. Oh well no harm done I just needed a longer wire. For these I folded the wire in half and poked in the 3/32 hole, and bet the wires higher up.
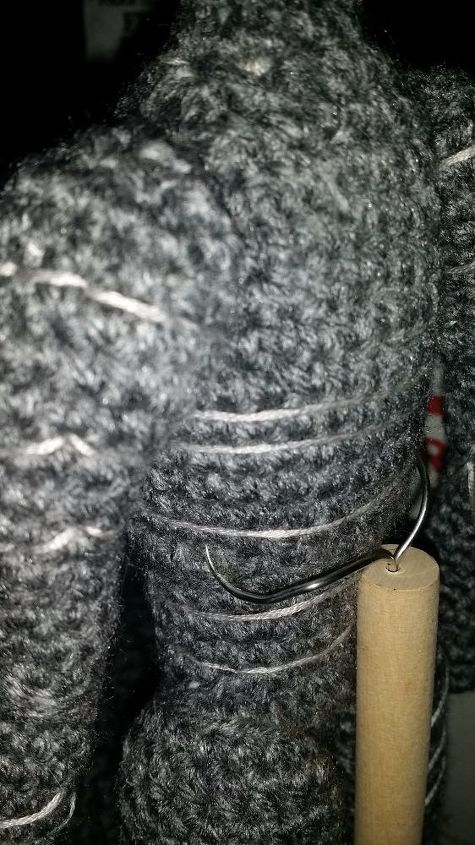
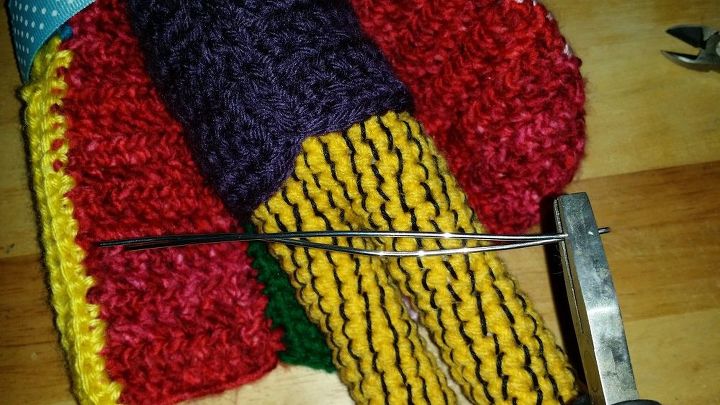
some of the dolls their jacket will hide the wire so I wrapped the wire around the waist. Some of the dolls don't have clothes to hide the wire. This one is a Cyberman, (no clothes) so I bent the wire and poked him in the side with it.
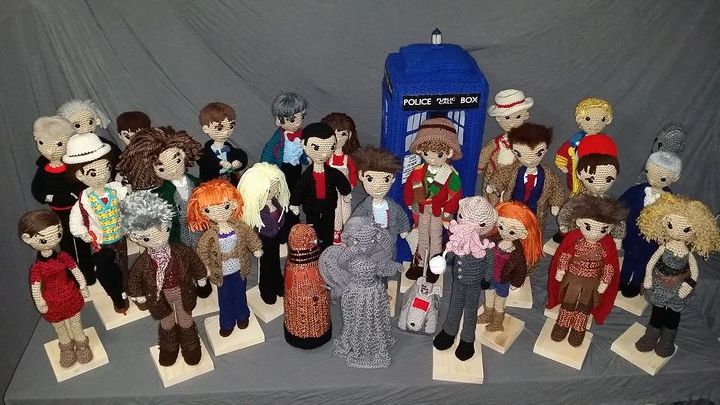
Here is the finished result. They are now all boxed up and when I go see my grandmother in a few months I will deliver them to my aunt. She is going to love them. Once the stands are done you could paint them but I chose to leave them plain my aunt may decide to put the names of the dolls on them so I didn't want to do anything that would prevent that. Or she may just leave them as they are. She doesn't know that I made stands for them.
Comments
Join the conversation
2 of 7 comments
-
Thank you.
-
Great. Thank you plan to make some.


Frequently asked questions
Have a question about this project?