


Chimney Breast Extension

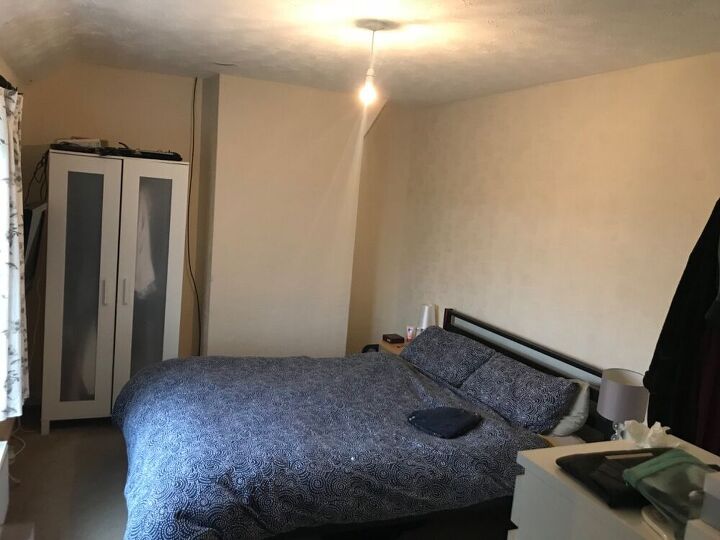
Anyone who has a chimney breast in their house is likely to know how much of a pain they are and just generally get in the way. But the cost of removing them to gain only a small amount of floor space often isn’t worth it!
So when we decorated the main bedroom and got a larger size bed, the chimney breast was actually to narrow to look good with a bed against it. So I set about making it wider and we are so pleased how it turned out.
As you can see its a pretty narrow breast, so once we cleared the room out I was able to start to work on building a frame.

As you can see in the picture the chimney breast isn’t central to room however this did mean I only had to build out one side of it. So on the right side I built a simple box to place things on, as this point we were unsure if we wanted bedside tables
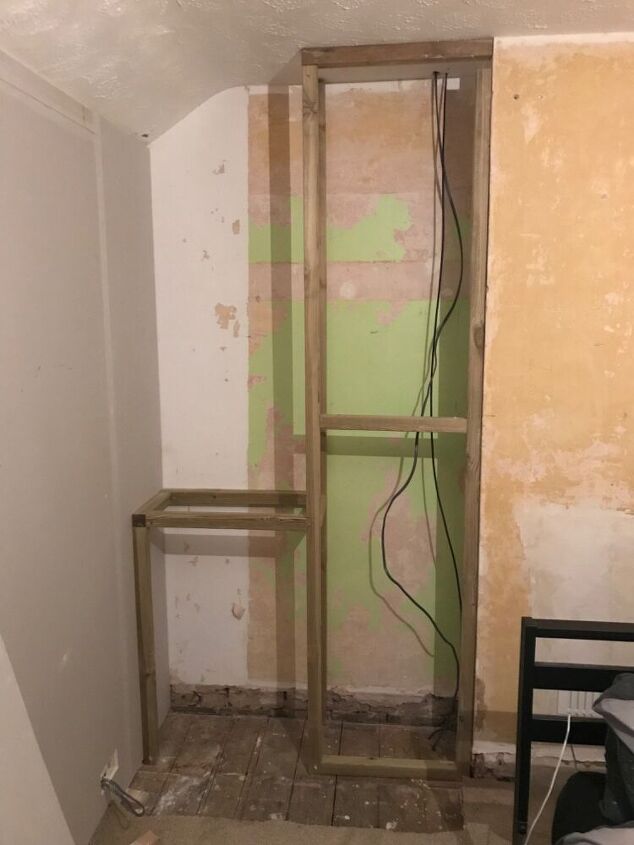
This is where it got a little more difficult. Continuing to use 1x1 lengths i worked out original spacing on the right between the wall and the breast and then copied this on the left hand side to make it central to the room.
I was then able to extend to the full height of the ceiling. Screwing the lengths of wood to both the walls and the floor. Of course ensuring its was level as I went.
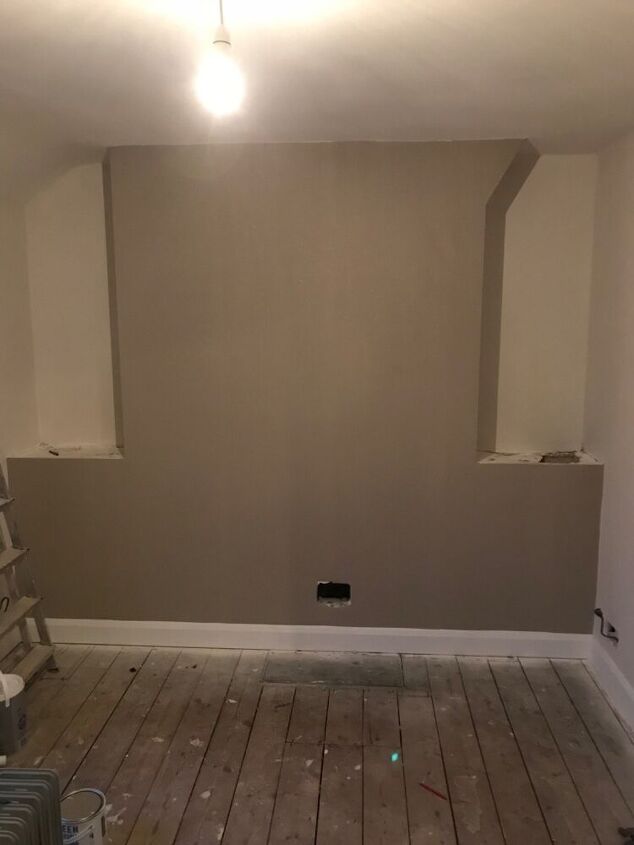
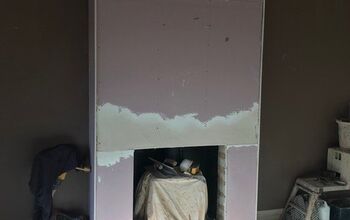
Now sadly, I have somehow managed to delete some photos. This was applying the sheet rock to the framing and then plastering it at the same time as doing the whole room.
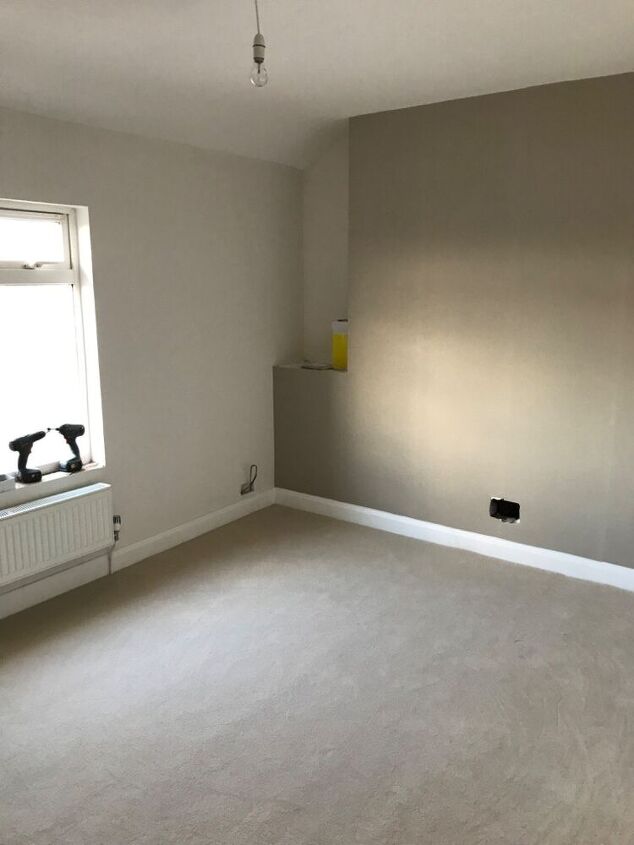
Nevertheless I am sure you can picture how it looks. So now once the plaster had dried I was able to wallpaper it and start to tie the style in with how we wanted the room.
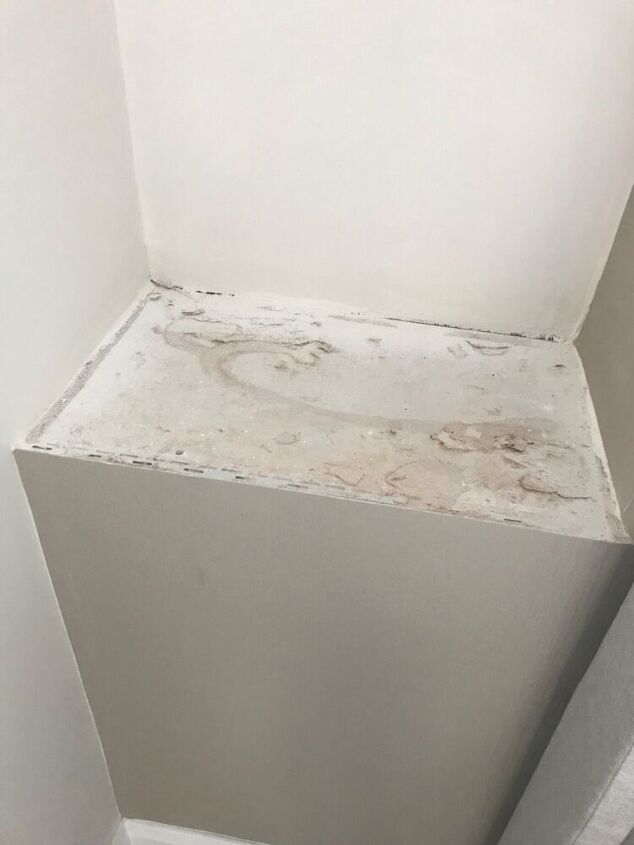
As you can tell the plasterers left a bit of a messy job on top of the sideboards so I needed to do something to tidy this up!
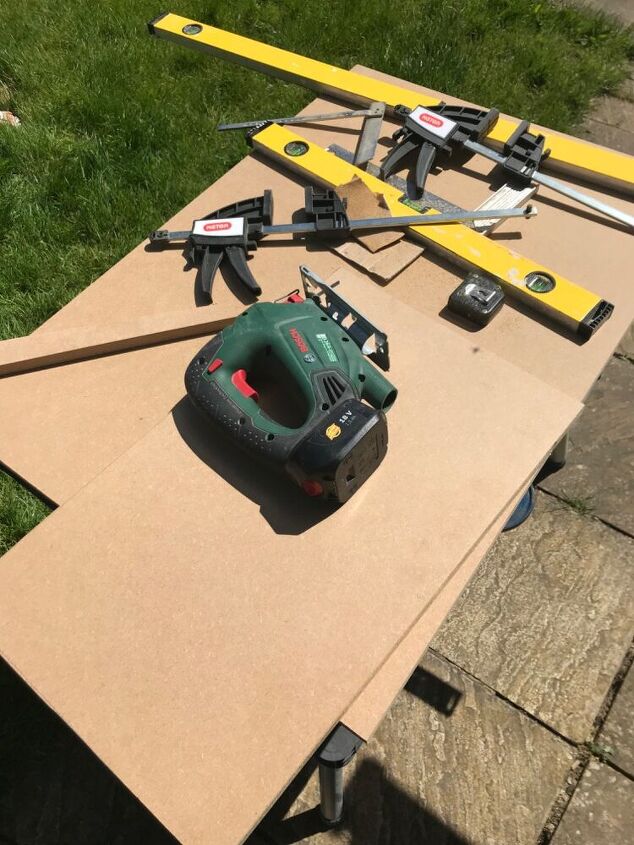
I used some left over MDF sheets to create a simple rectangle tops to place over the previous mess.
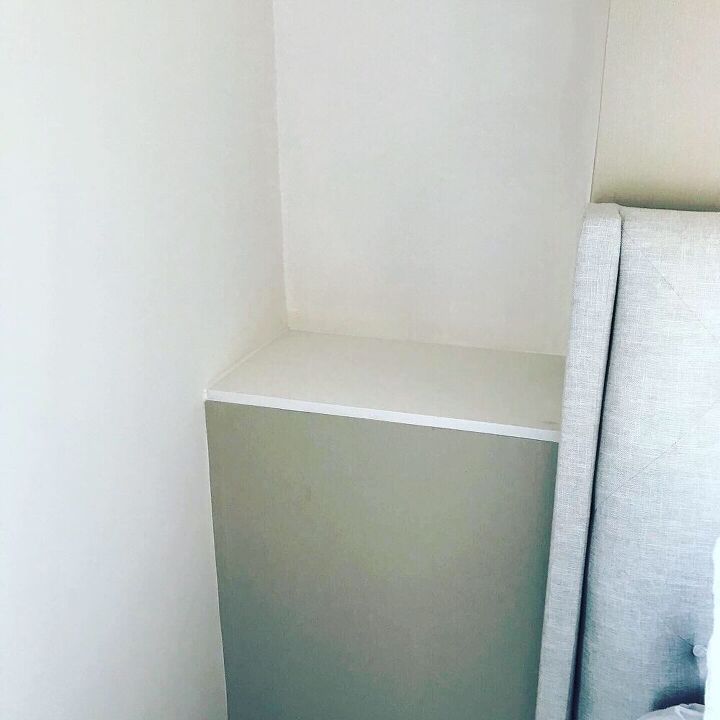
I fave the wood tops a lick of paint in the same colour as the wall to tie this in together. As you can see it was pretty much the last task.
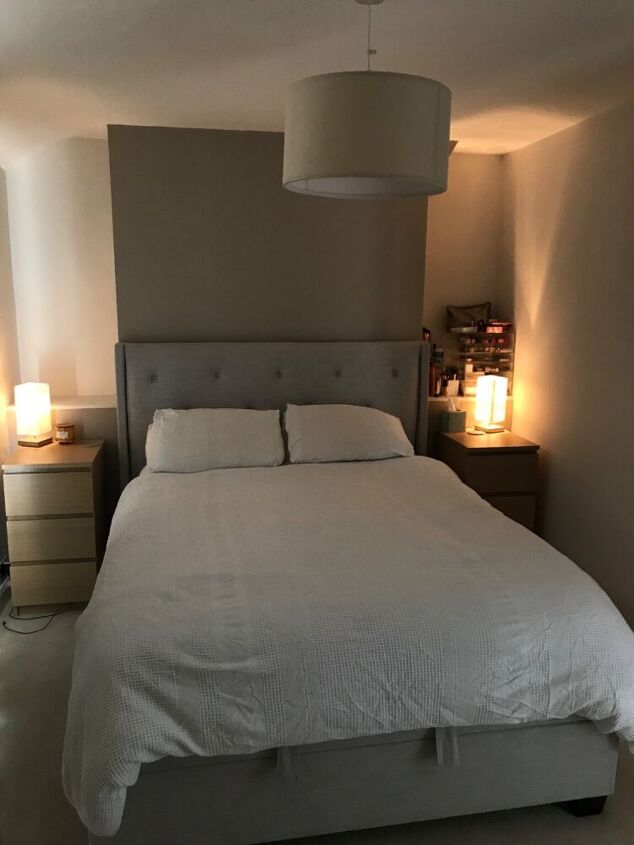
Now that was done, we could put in the new bed and dress the side boards (we also opted for bedside tables in the end) but hopefully you can see how much neater this now looks and keeps everything even and central to the room.
Comments
Join the conversation
-
Very nice! Good job.
 I didn’t know what a chimney breast was either!


Frequently asked questions
Have a question about this project?