


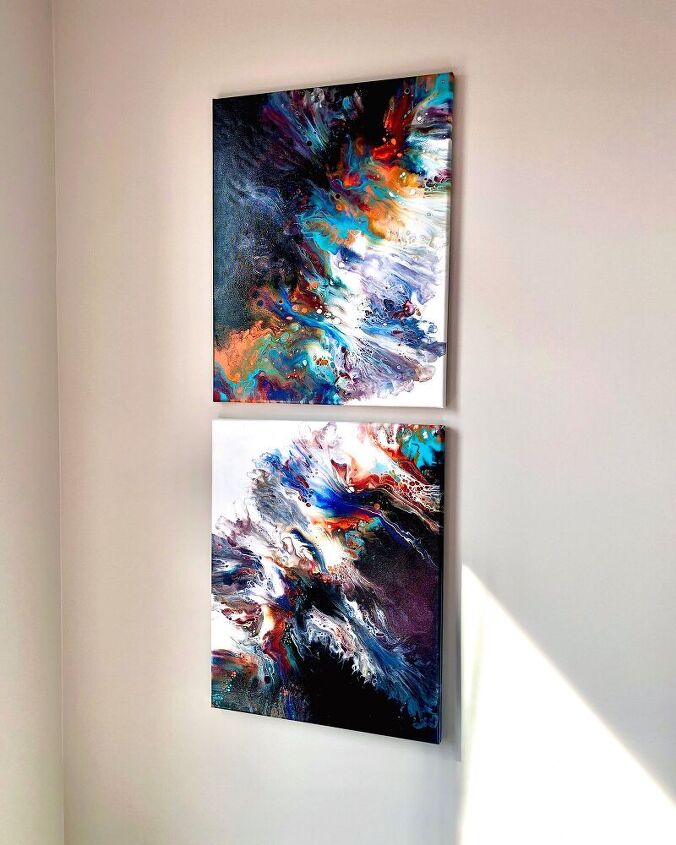
How to Do the Dutch Pour Painting Technique For Beginners

Have you ever seen those cool pour paintings on Instagram and thought “How do they do that?”. Well, if you have, then you’ll hopefully enjoy this project.
I’ll show you how to do a Dutch Pour which is one of the most fun and potentially messy pours out there!
YouTube!
Click play above to watch my YouTube video of this project.
Please also visit my channel and subscribe for future tutorials 
If you have time, please also check out my Etsy store where I sell my work along with many other handmade pieces.
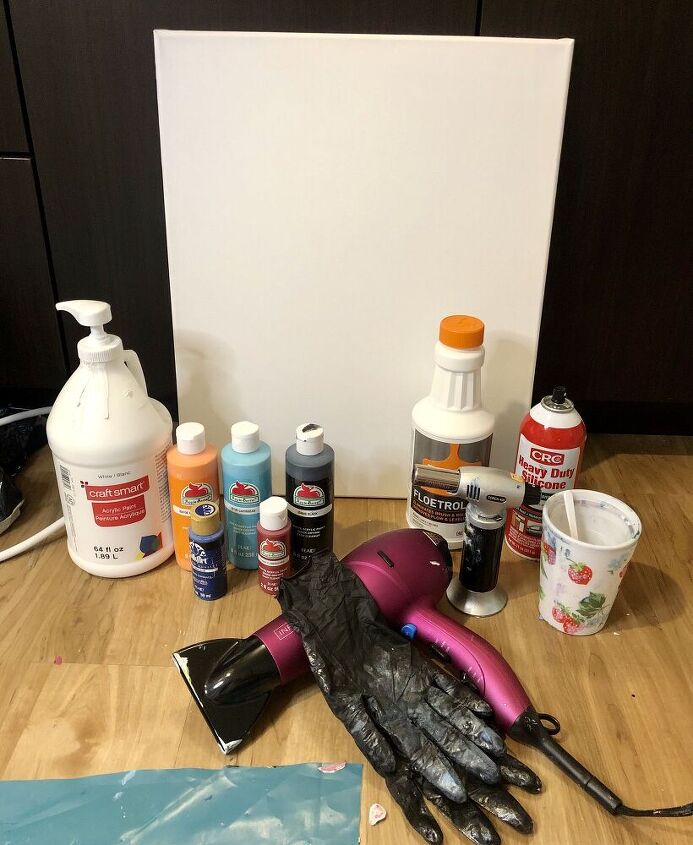
Tools and materials:
- A canvas (16” x 20”)
- Acrylic paints, accent, and background colors
- Floetrol
- Silicone spray
- Water
- Mixing cups
- Mixing sticks
- Hair dryer and flat nozzle
- Gloves
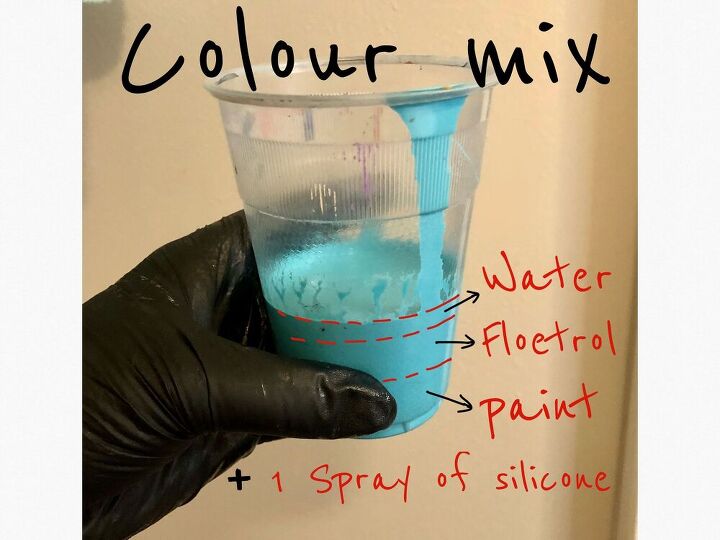
1. Mixing the paints
I originally got my recipe online but since then I’ve tweaked it until I found the perfect mix for me.
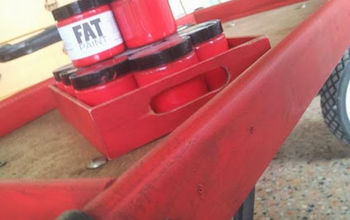
Recipe: 1 part paint, a splash of water and 1 part floetrol. Mixed together in that order followed by a quick spray of silicone.
Process: Add a splash of water to your paint and mix well until you achieve a warm honey-like texture. If your paint is too gloopy, add a touch more water. Once the warm honey texture is achieved, add the floetrol. Mix fully until the consistency is still that of warm honey. Do this with all your colours, accent and background.
Then set your background colours aside. Add a quick spray of silicone to your accent colours only and mix in gently.
My accent colours are orange, turquoise, red and navy and my background colours are black and white.
Now you’re good to go!
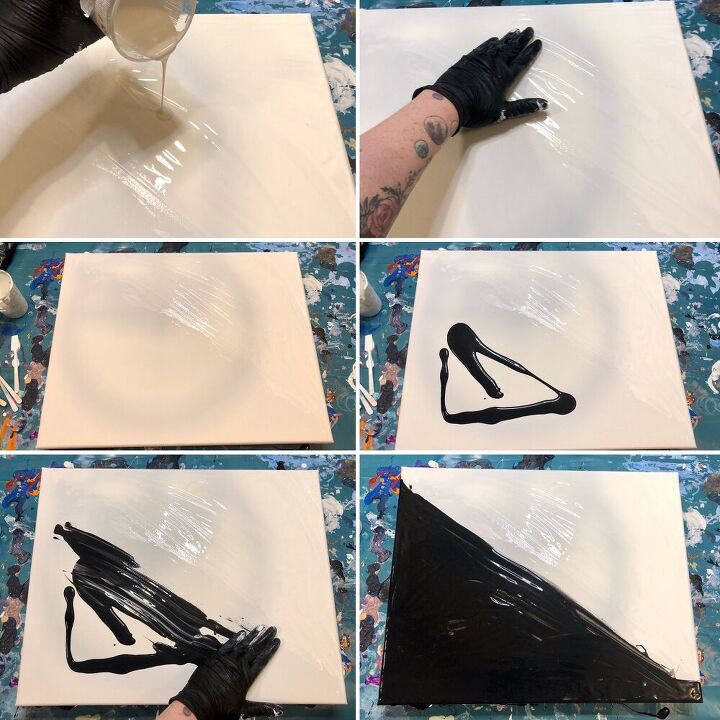
2. Preparing the canvas
You can choose to have your background however you want, I decided to divide my canvas in half diagonally and cover 1 half in white and the other half in black.
Use a generous amount of paint to cover the canvas but keep some back for a later step. If you don’t use enough paint at this stage, your pour won’t ‘blow out’ as well later on.
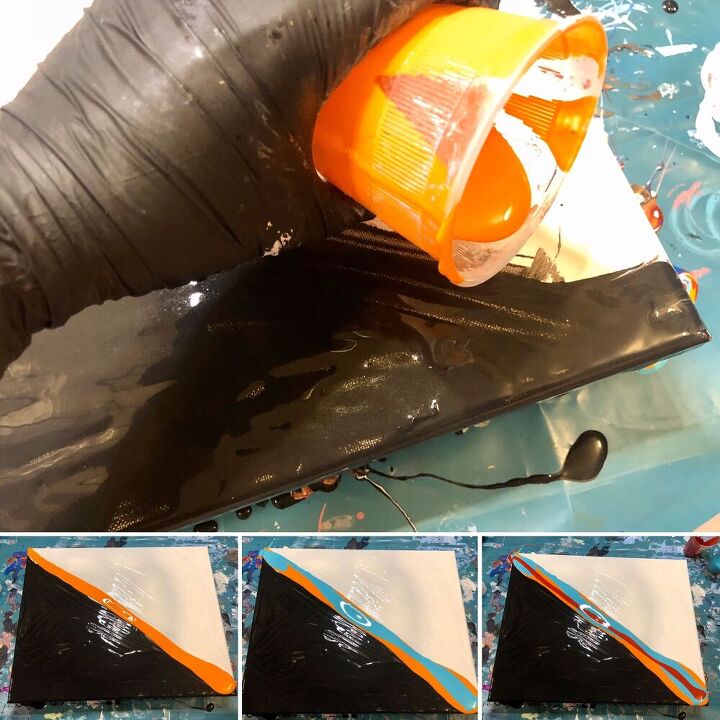
3. Adding accent colors
One by one, pour a line of each accent color across your canvas along the divide between the black and white, one on top of the other.
Again, be liberal with your paint. This is the last time you should need your accent colours so don’t worry about using them up.
Remember, you can watch how I do this in my YouTube video above.
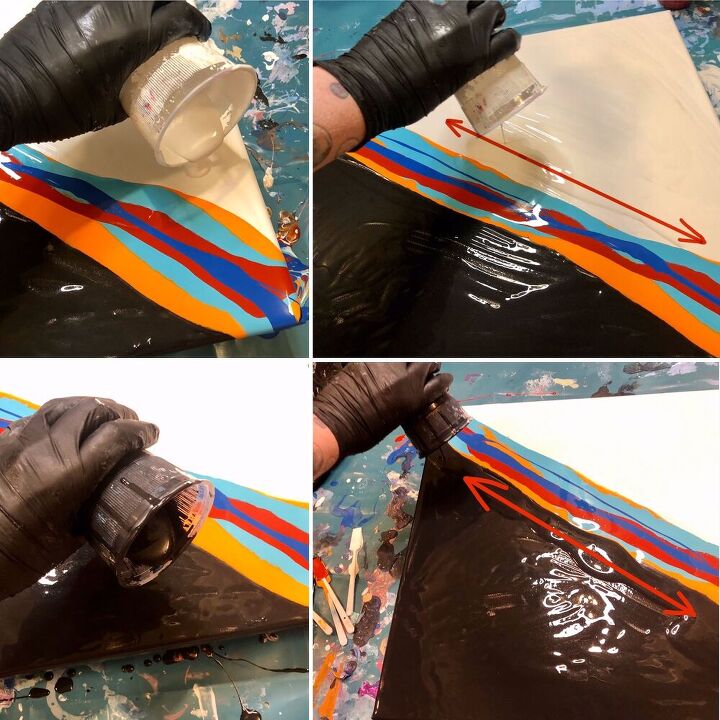
4. Create barriers
Grab your leftover black and white paint from earlier and create thick ‘barriers’ on both sides of your accent color dividing line.
Do this by pouring the rest of your background paints along the edge of the divide but still on their corresponding color side.
5. Cover up
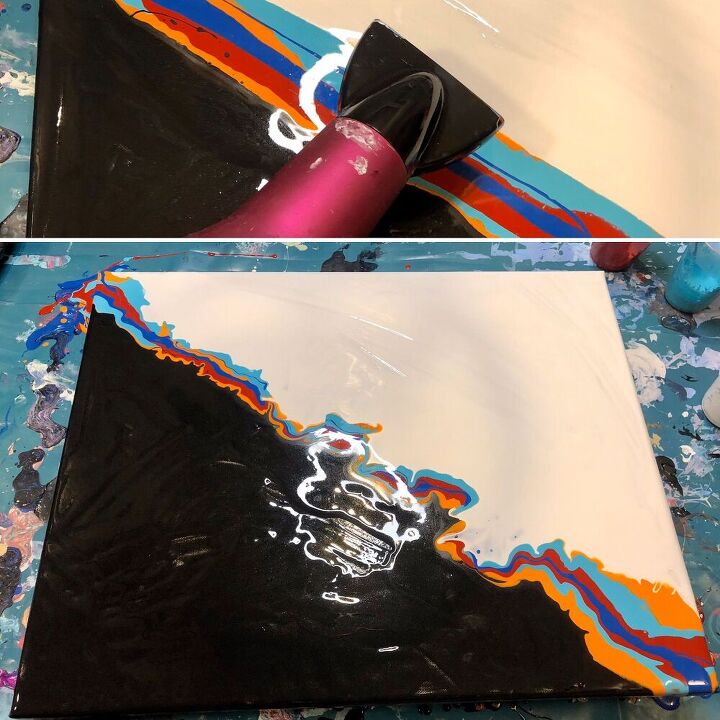
Using your hair dryer and holding it low and flat, blow the black and white ‘barriers’ towards each other so that they meet in the middle of your canvas.
The aim is to blow the black and white over the accent colour line creating a mix in the middle that is ready to be blown outwards, Dutch-pour-style.
6. Blow out
Don’t worry if the black and white paint hasn’t completely covered your accent colors, this is tricky to do and there is usually always some color left poking out, this isn’t a problem.
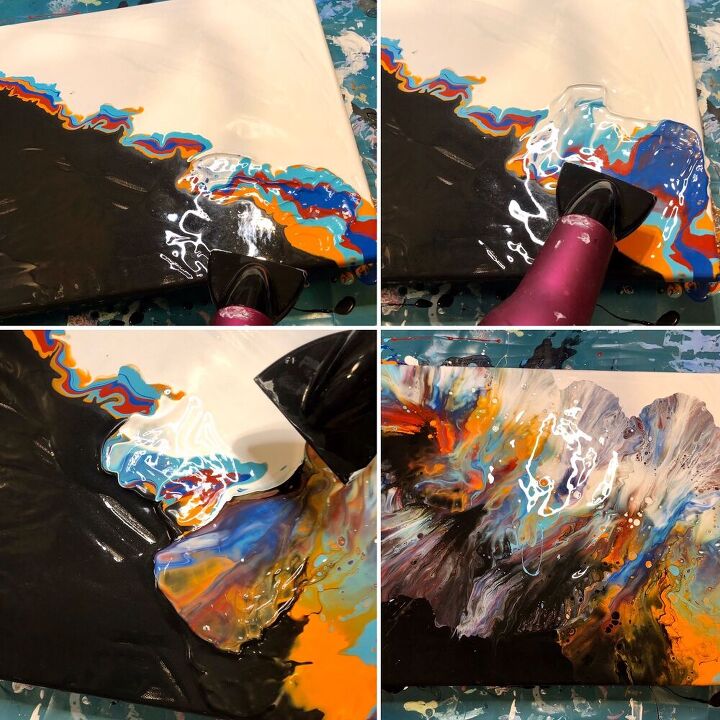
Once you’ve prepped your mix and it’s sitting in the middle of your canvas, use your hair dryer in a zig-zag motion to blow all the paint out from the middle across the blank parts of your canvas.
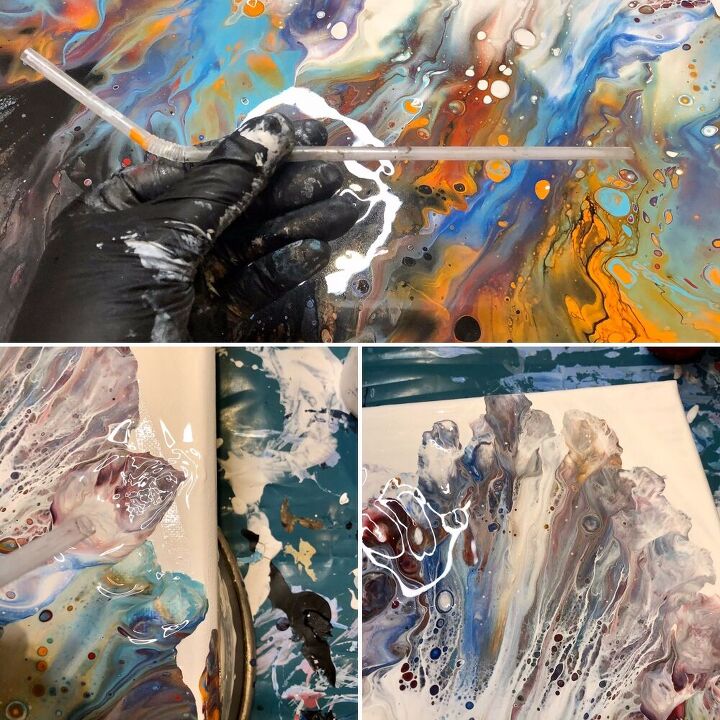
7. Soften the edges
Using a straw, blow out any harsh edges to add soft feathery detail.
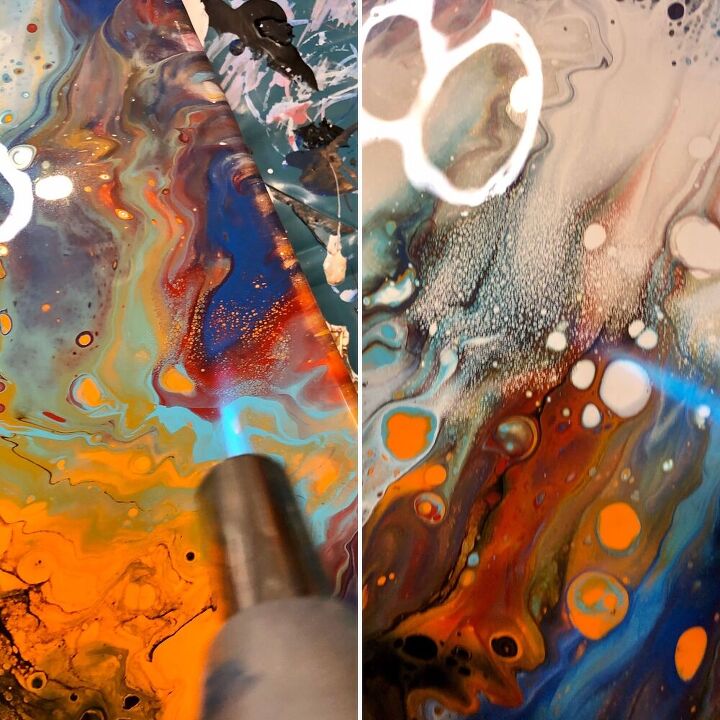
Lastly, you can add further detail using a blow torch by creating more cells.
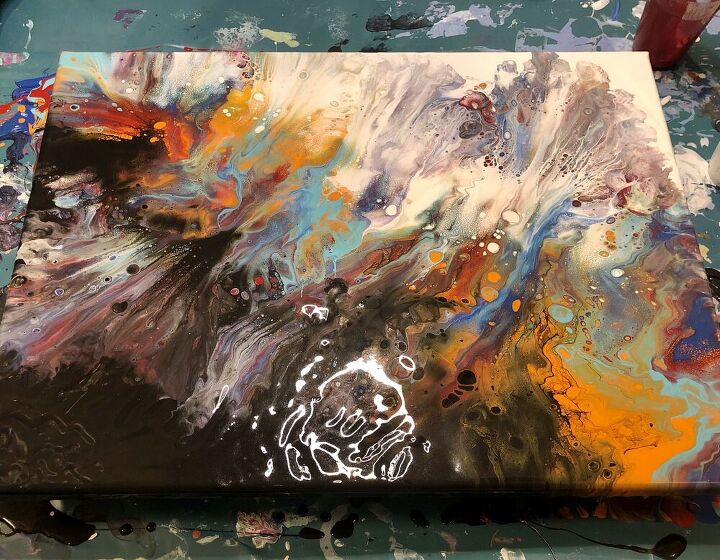
How to do a Dutch pour
That’s all there is to a Dutch pour.
I think it might sound more complicated than it actually is, so it may be easier to watch my YouTube video above which hopefully shows how to do this a whole lot better.
Please remember to check out my Etsy store for lots of handmade bits.
Thanks for taking the time to check out my project. If you have any questions, drop them below and I’ll happily get back to you.
Happy crafting x
Resources for this project:
See all materials


Comments
Join the conversation
-
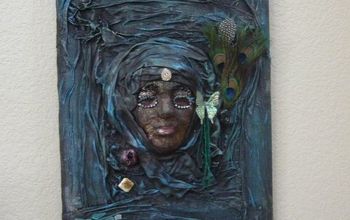
These are breathtaking!!! Total works of art! nicely done!!!
-
I've been collecting supplies to try pour painting for quite awhile. I just needed inspiration for a piece that had bright vibrant primary colors........thanks!
 Thank you!!!


Frequently asked questions
Have a question about this project?
This is the first time I've seen this type of project mention silicone. What's its purpose? Also the instructions say to use a "quick spray" of it but the materials list shows the type that comes in a a tube so how does that work?