


Faux Brick Wall Step-By-Step Tutorial for Under $30
5 Materials
$28
3 Hours
Easy
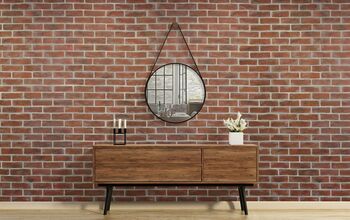
I did it! I created another faux brick wall in our house and I love it even more than the first! I took this opportunity to create a detailed step by step post because I had SO many inquiries on just how I did this on that small of a budget! Watch and learn young hometalkers!
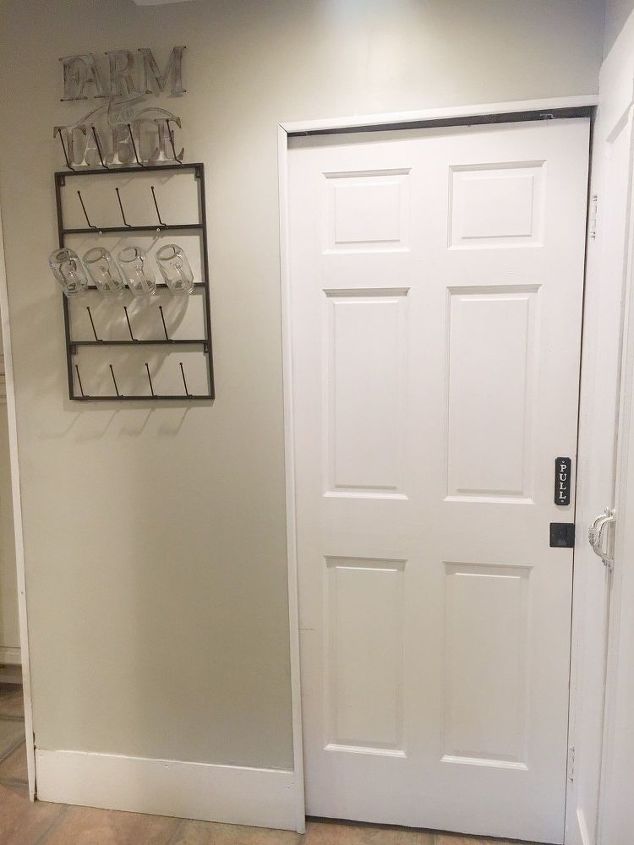
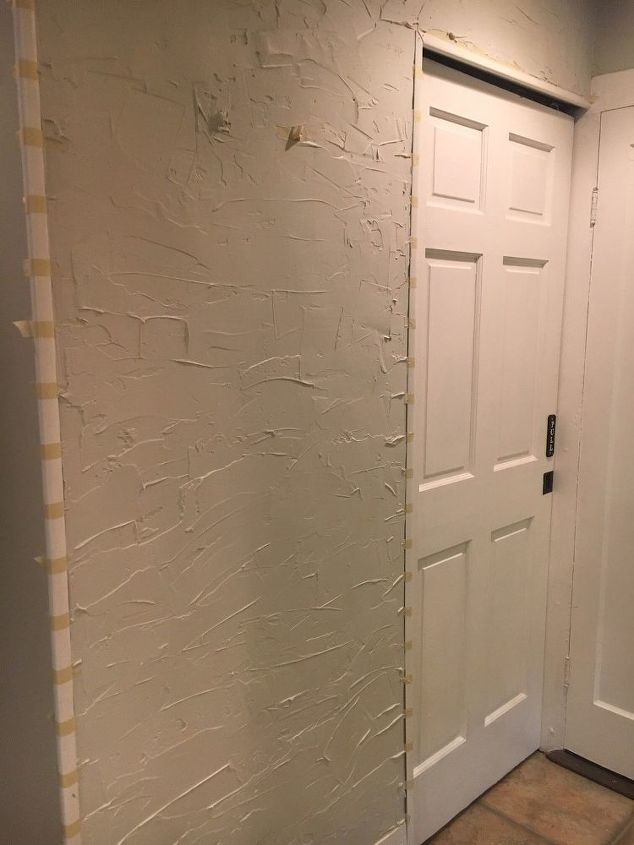
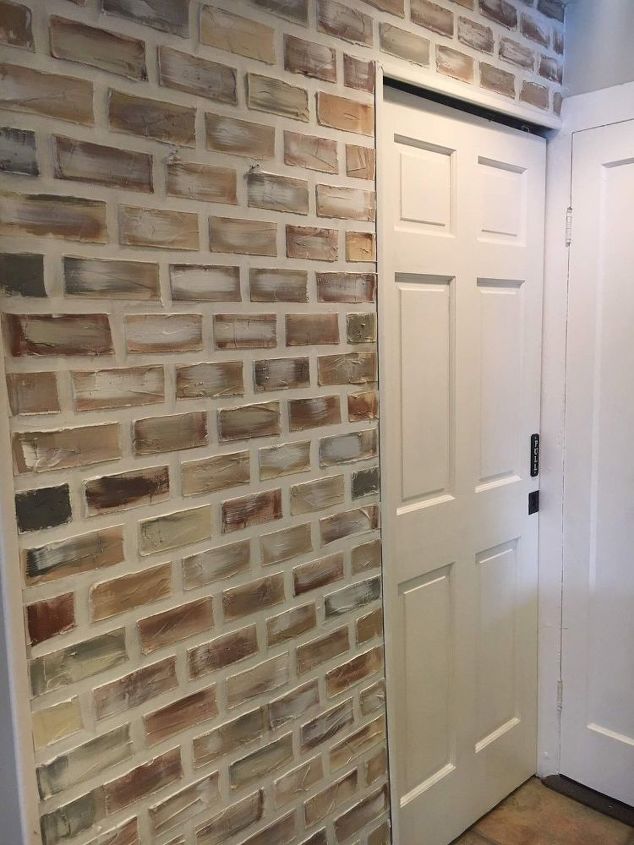
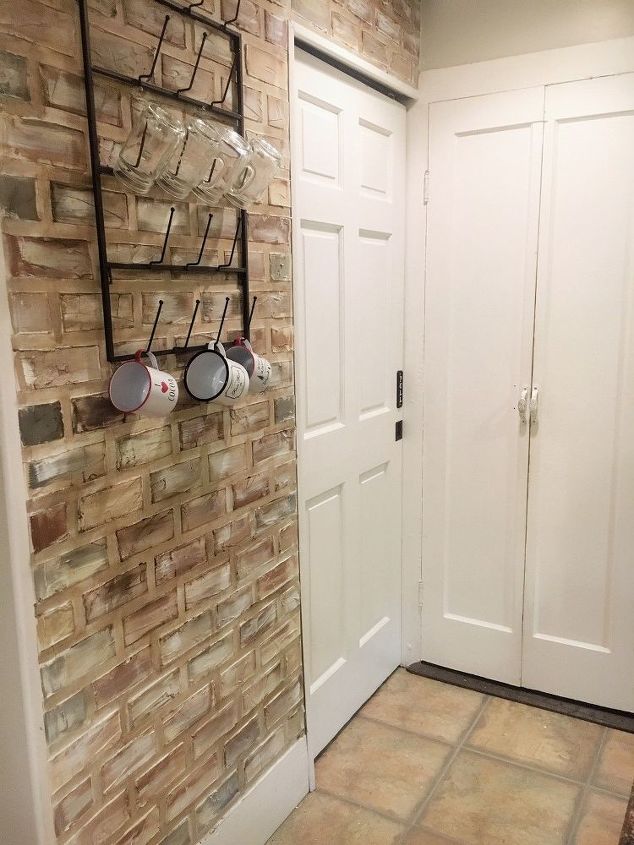
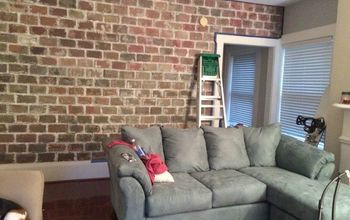
Before: Simple & Boring
I knew this wall was just too simple and plain for me but I really didn't want to clutter it up with more wall decor. Instead I created an accent wall using joint compound and painter's tape to create a 3-D brick look. In fact, we love it so much we'll be faux bricking this entire hallway soon!
The supplies you'll need for this project are:
- Joint Compound
- Roll of Tape
- Putty Knife
- Paint Brush
- Acrylic Paint(s)
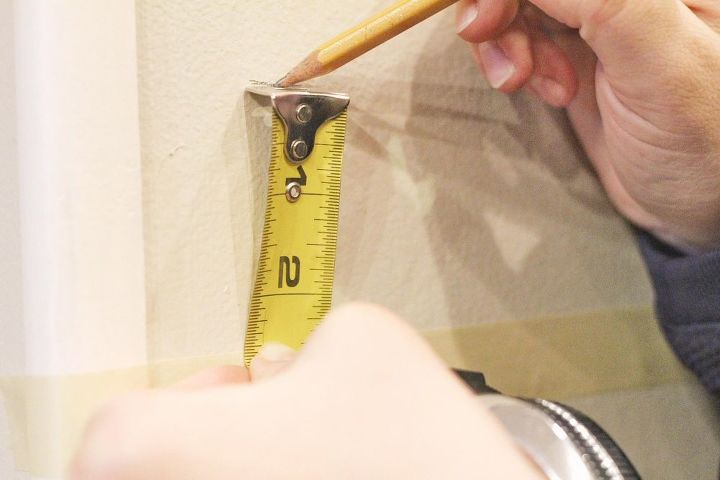
Step one is taping your "mortar" lines. This is the most grueling part of the project as it takes the longest and requires lots of measuring. Just keep in mind that brick isn't perfect so your measuring doesn't need to be either. I started by laying my horizontal "mortar" lines first and measuring 2.5" between each horizontal piece of tape.
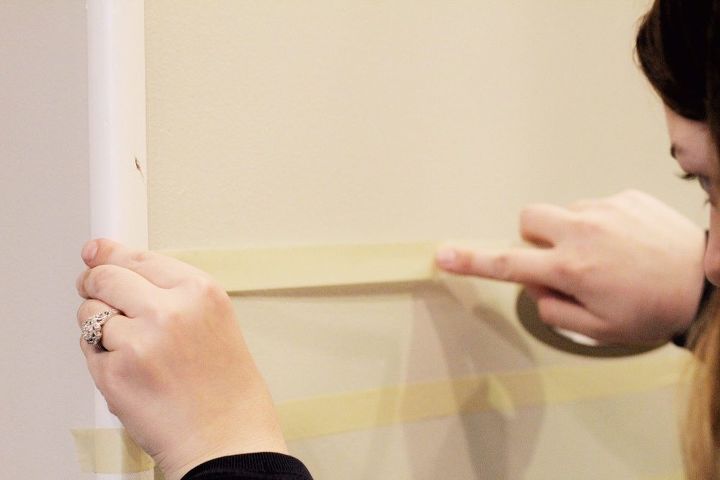
Once your horizontal mortar lines are taped, start taping your vertical mortar lines. Once you have one row done, the rest is super easy to finish as each row starts in the middle of the brick below it.
For more detailed steps and photos, visit my blog post here.

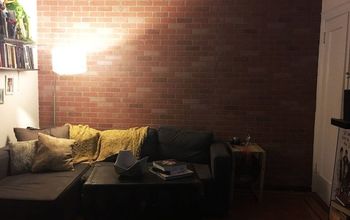
This is what your wall will look like when your taping is all done. On to the fun part!
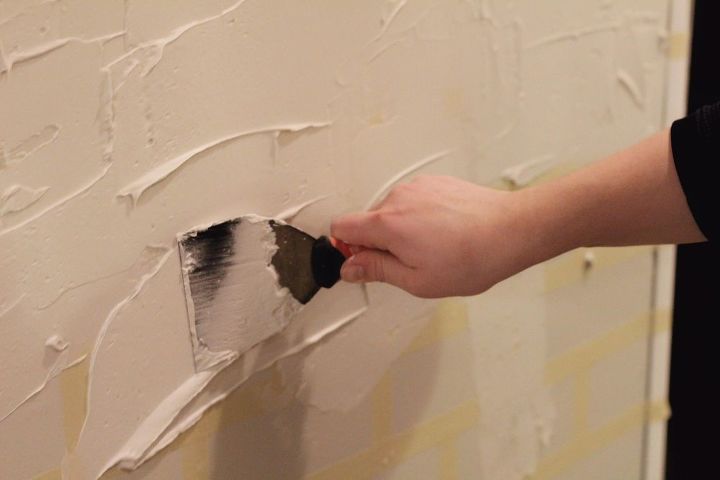
Get your joint compound and putty knife out and start slapping joint compound all over your wall! There is no rhyme or reason to doing this, just make sure you add enough joint compound to give your bricks a 3-D detailed look.
Once you have all your joint compound up on the wall, IMMEDIATELY start removing your tape before the joint compound has a chance to dry. This is a messy step, so wear gloves and have a trash bag handy to throw your tape into.
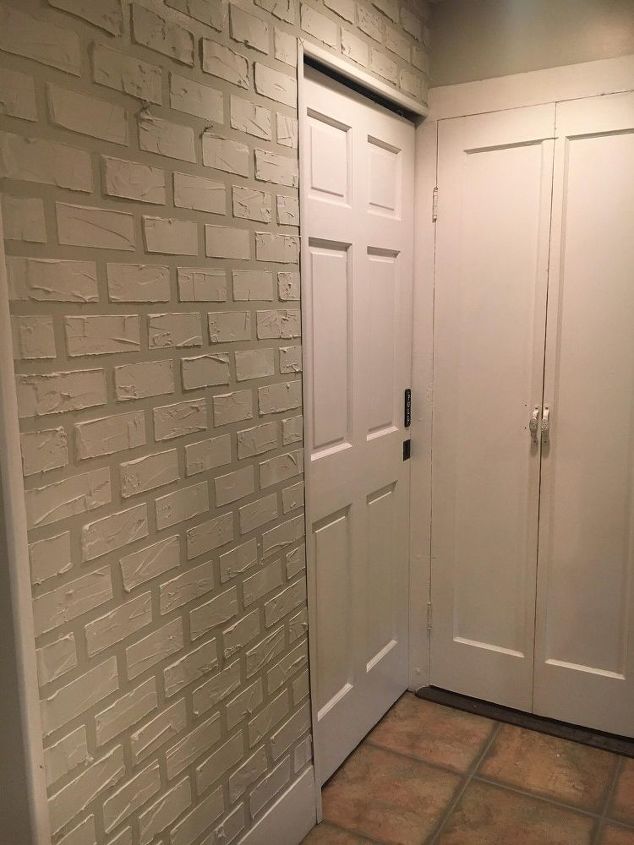
This is what your brick will look like with the tape removed. Let the joint compound dry overnight before you start the painting process.
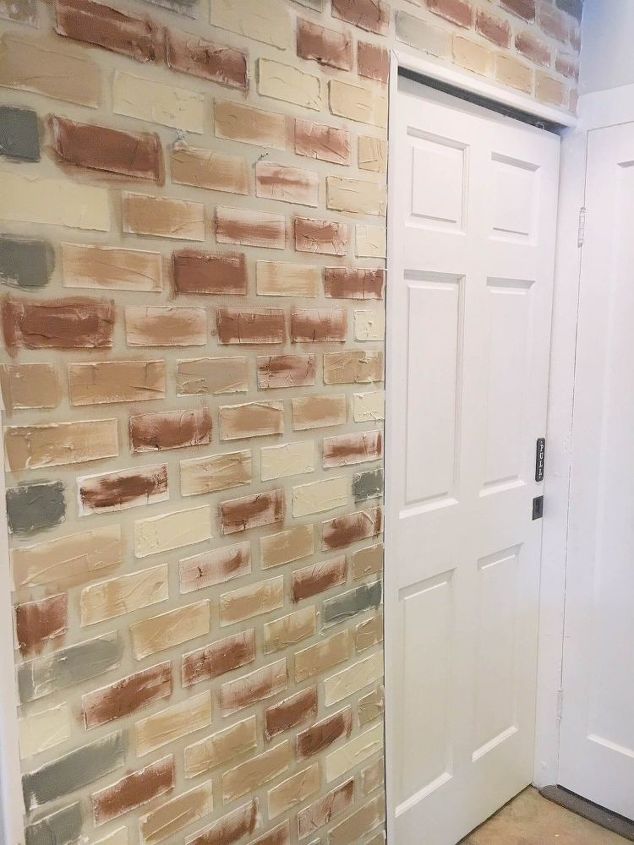
Start by gathering 5-6 different colors of acrylic paint. This will depend on how you want your wall color to turn out. I chose a dark brown, brown, grey, two beiges, and a white.
I started by adding one base color on each brick. This should be completely random in placement.
Next, you'll want to randomly use different colors and randomly layer them on each brick. Some bricks I used a lot of paint for and some I just barely stippled my brush in. I finished by using my white paint to whitewash a few bricks as I knew I would be dark waxing over them and white shows dark wax better.
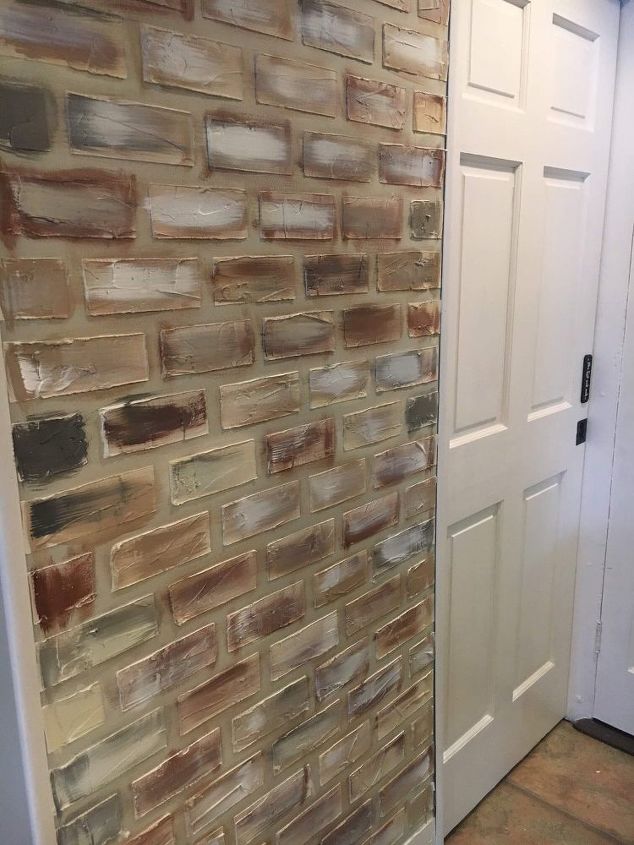
I then cut in with my paint brush and painted all the "mortar lines" in white. I do this after I paint the bricks because then I can be as sloppy as I want when painting the bricks and make sure that the entire surface area of the brick is painted.
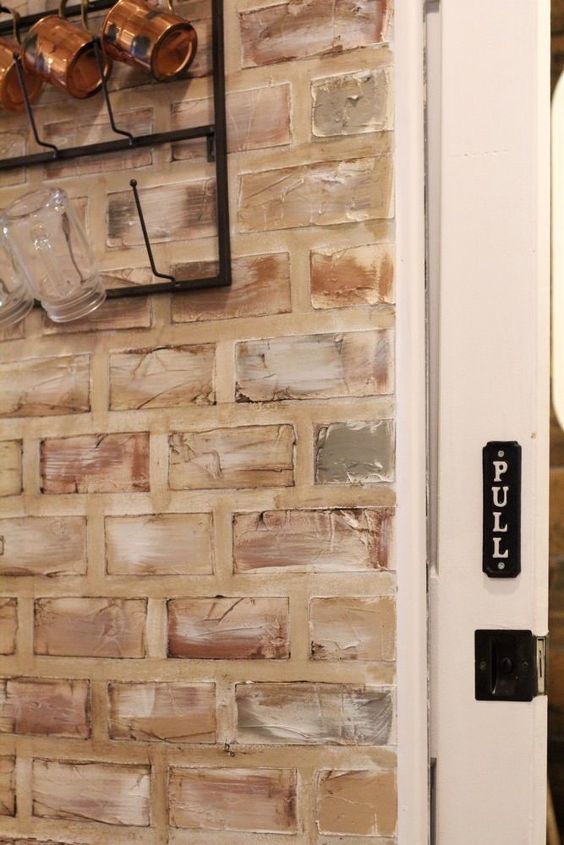
The final step was to use dark wax and apply with a sock all over the entire wall. I made sure to apply heaving on the mortar lines because the white was too bold for my kitchen. I also applied dark wax randomly on the bricks to give them an aged look.
Don't forget to stop by my blog post for more pictures and a few more detailed steps!
Resources for this project:
See all materials


Any price and availability information displayed on [relevant Amazon Site(s), as applicable] at the time of purchase will apply to the purchase of this product.
Hometalk may collect a small share of sales from the links on this page.More info

Want more details about this and other DIY projects? Check out my blog post!
Comments
Join the conversation
2 of 332 comments
-
I am going to try this, you did an amazing job!!!
-
I've been looking for an easy, inexpensive way to cover my pegboard walls in my laundry room behind my washer & dryer. This is a brilliant idea!!!
Since it's in my laundry room, I will need to waterproof the mortar and there are products available to add to the mortar for this purpose.
After a coat of primer on the mortared wall (a darker color), I plan on painting the mortared walls all white in satin acrylic paint.
I'm not sure why you would "seal" the mortar. I just painted my fireplace (brick & mortar) and didn't "seal" it. It's easy to clean with a spray cleaner and a rag.
Thanks for this great idea!!!


Frequently asked questions
Have a question about this project?
Hayden, do you think this is something that can be achieved on an exterior porch wall (roof over top) with mortar mix instead of joint compound? 🥰
What size masking tape (width) did you use?
What kind of “wax” did you use?