


How to Use Contact Paper to Make a Beautiful Privacy Window!

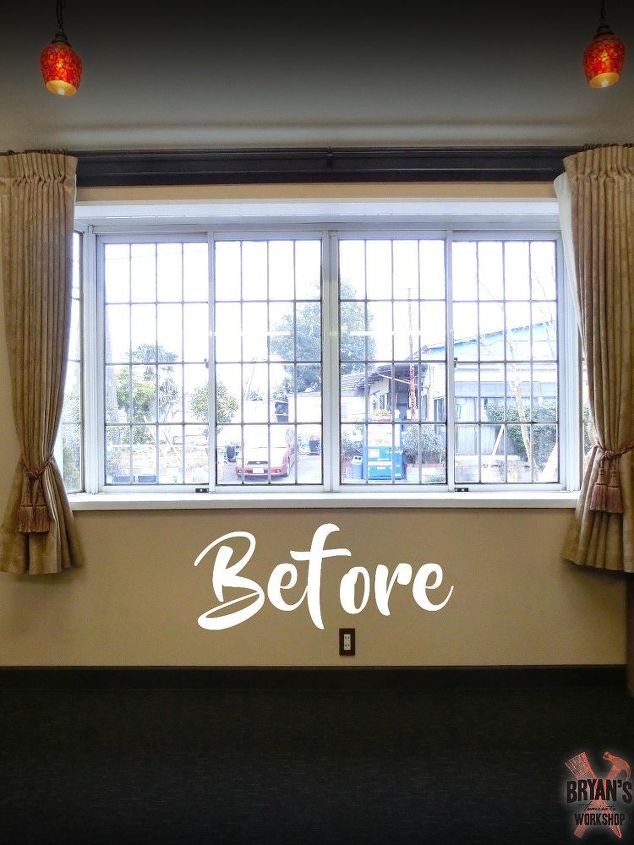
It was time to do something about these windows. We live at the top of a busy neighborhood and my bay windows offer a front row seat to everything going on inside my house. No more eye contact with the joggers, dog walkers, and school kids.
Best frosted privacy film!
I have three of these bay windows on the front of my house! THREE!
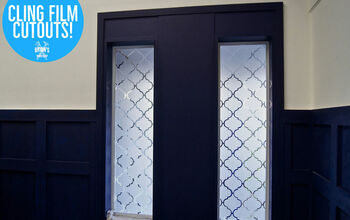
With time and patience, you can create an awesome privacy window with contact paper and a stencil.
This project is very time consuming! My wife Mariko and I do everything custom. We have all sorts of the precut, easy to install cling films available over here in Japan too. They look great!
This is an art project and we have all the time and patience in the world for art.
EDIT: This is adhesive contact paper
Adhesive contact paper: extremely difficult to get off of a window. It feels almost impossible! I wouldn't do this to a window still under warranty either. The stickers might void that warranty. The window cleans the same too. Just spray and wipe.
Self-adhesive (cling film): pulls off effortlessly and is reusable. Cleans effortlessly. Some cling films have lovely designs on them, so you don't need to cut out shapes. I don't recommend cutting shapes out of cling film, because they will move or fall off. Static holds cling film to the window where adhesive is help up by glue.
Let's start!
You'll need:
- A spray bottle full of water and one drop of dish soap
- Patience
- A small squeegee
- Patience
- Paper towels. (I used newspaper as paper towels. It's actually common here in Japan on windows. No, the ink doesn't come off )
- Ruler
- Boxcutter or exacto knife
- Did I mention patience..?
Decide on a Pattern
My wife did this entire project by herself. Here's what she did:
First decide on a pattern. I made this pattern in Photoshop and created my stencil on cardboard. The worst part of this job is tracing and cutting. Figure out how many stickers you'll need and get them all cutout before you start. It'll make this job easier.
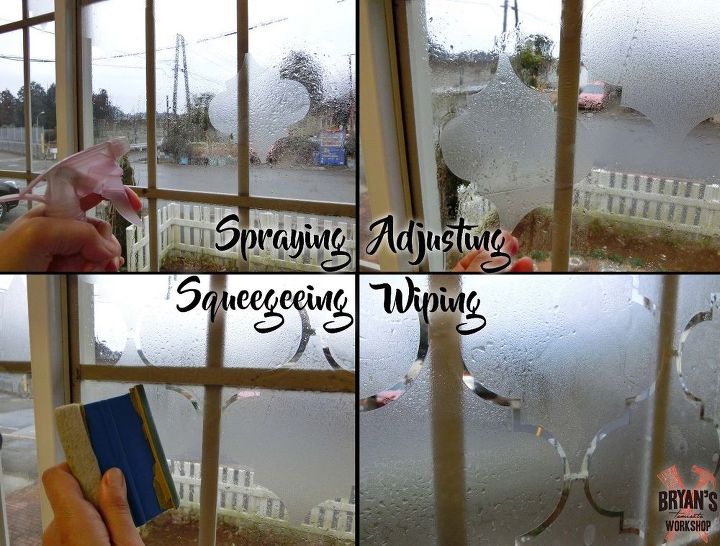
Spray the window well with the spray bottle and then put up your sticker. They're easy to move around on top of the water and dish soap solution. Adjust them into position and then squeegee out the water and bubbles. The stickers might still move a little, but will adhere stronger after a couple minutes. Keep wiping the window down and keep extra towels on hand for the mess. It's easier to see air bubbles when it's dark outside too.
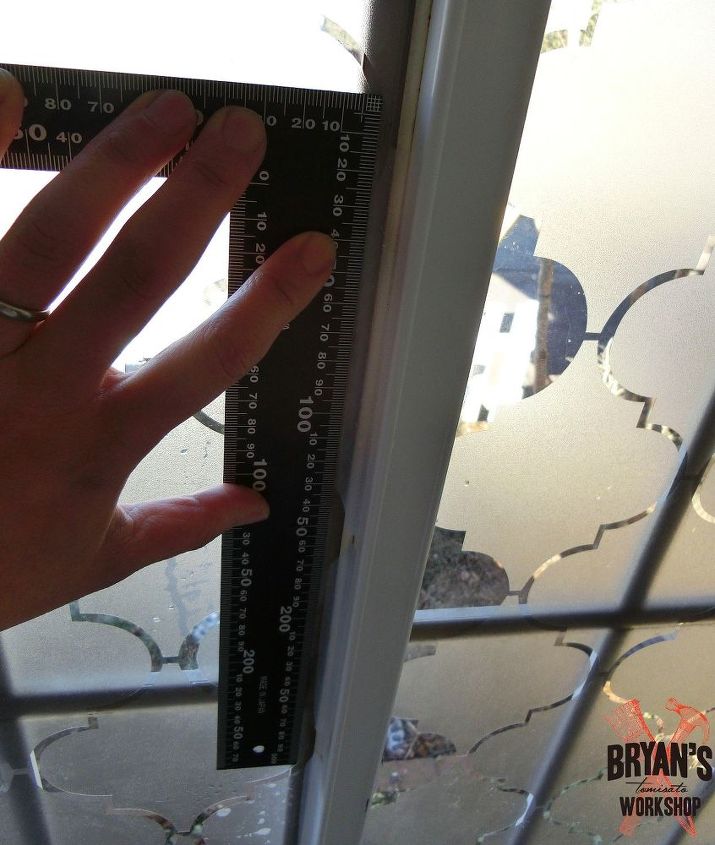
Measure and Cut the Stickers
Some of the stickers you'll need to cut. Use a good ruler and boxcutter for this. Be careful not to scratch the window or window seal/caulking.
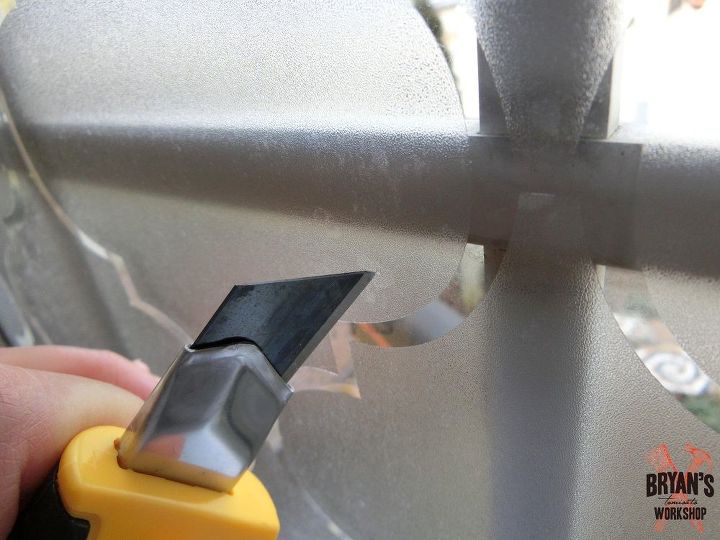
If you get a stubborn air bubble that you can't get out, make a little cut on it. This should work and be unnoticeable most of the time.
*In my experience, contact paper is extremely difficult to get off of windows when its dry. We did this on a window as practice and spent a lot of time getting them off. Don't use a heat gun on a window, because it might crack the glass. Hair dryers work well though. You can also use sticker remover spray for the stubborn sticker residue.
Try to squeegee out every single little bubble. There will be a lot!
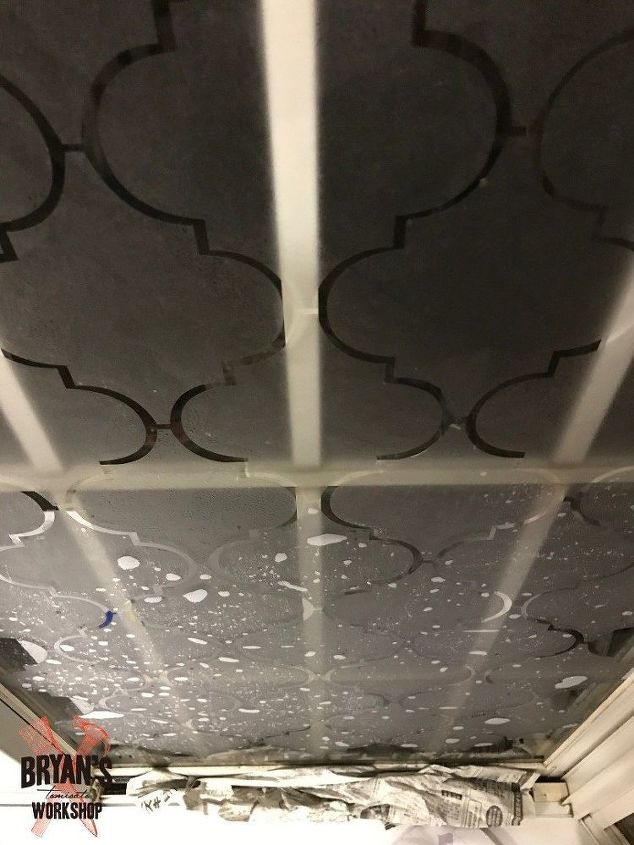
Here are those pesky bubbles! We put down newspaper to catch all of the run off.
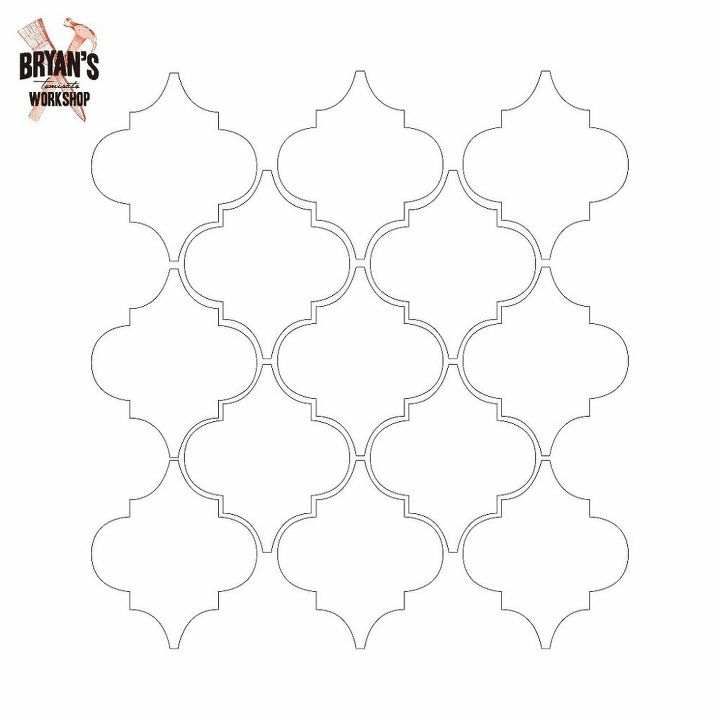
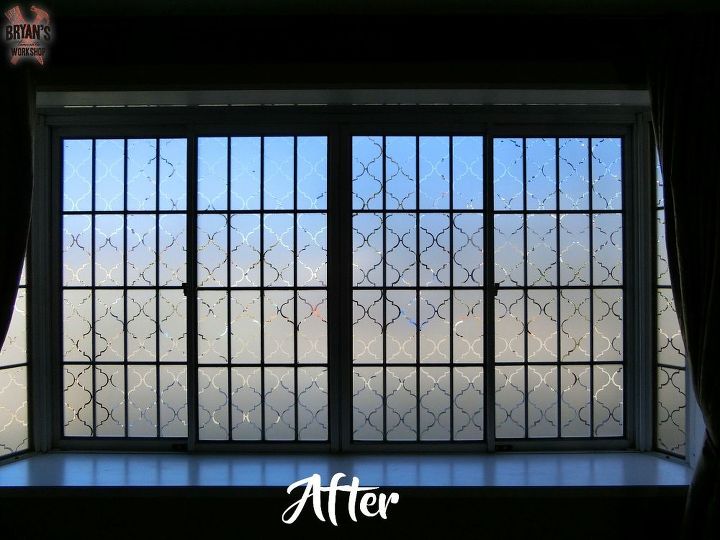
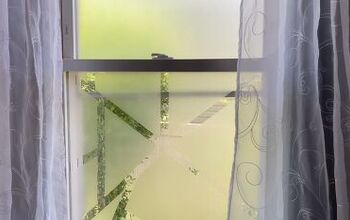
We went with this pattern. We made this in illustrator to fit our window.
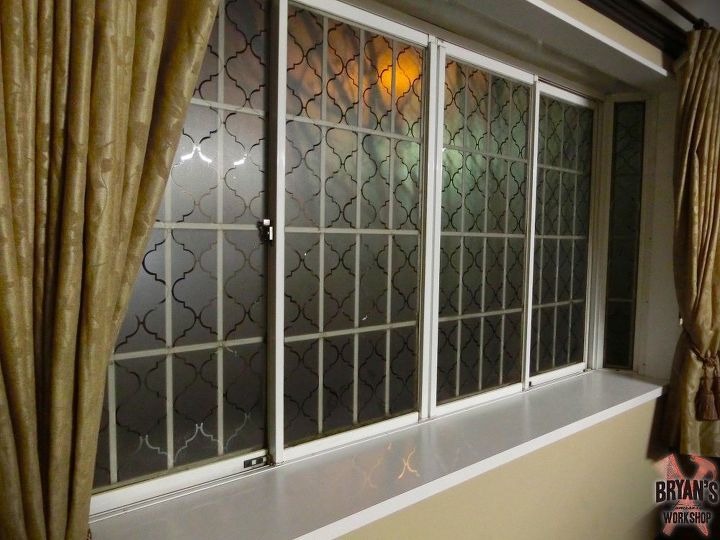
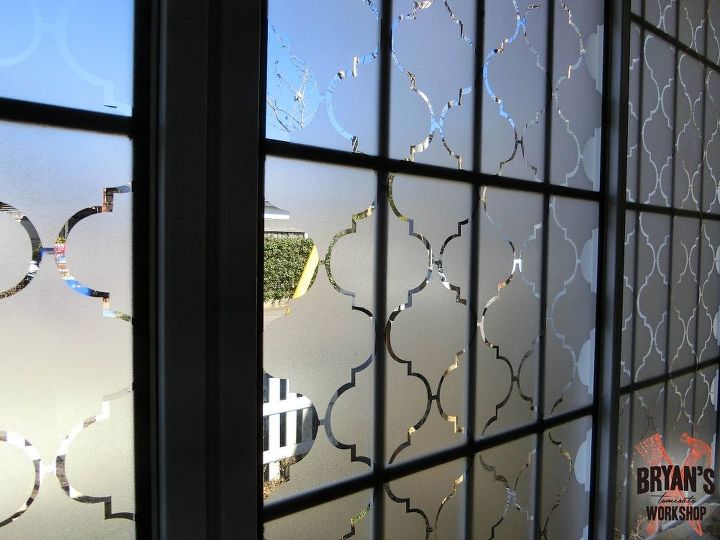
Finished picture from the inside!

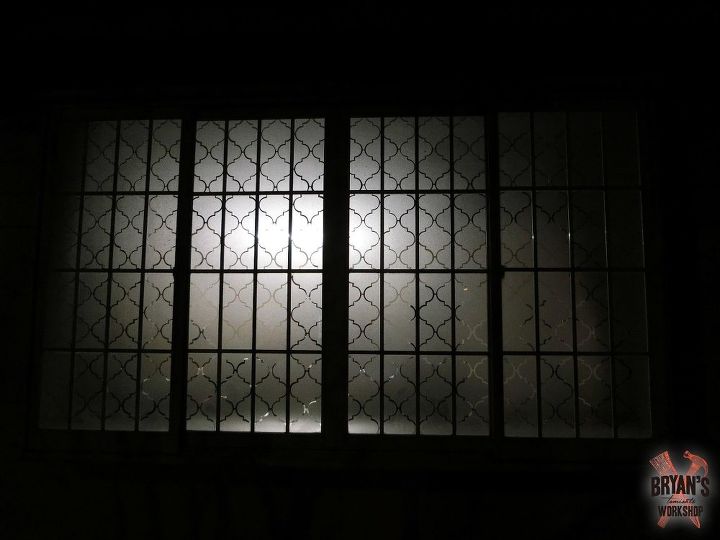
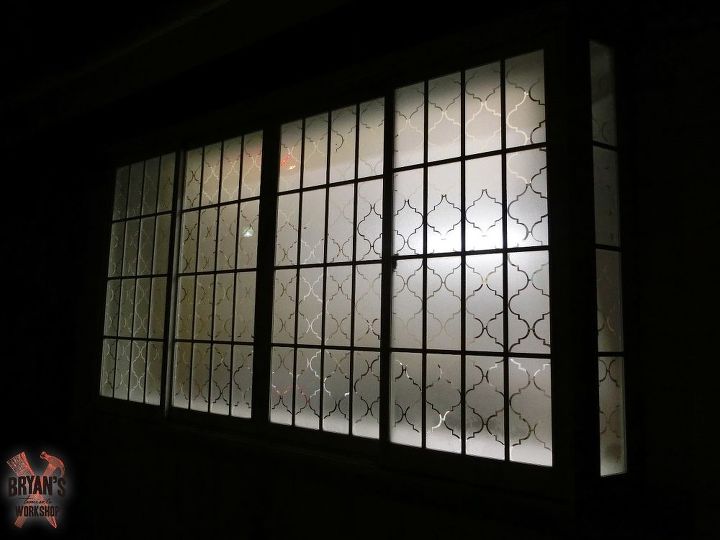
Finished picture from the outside!
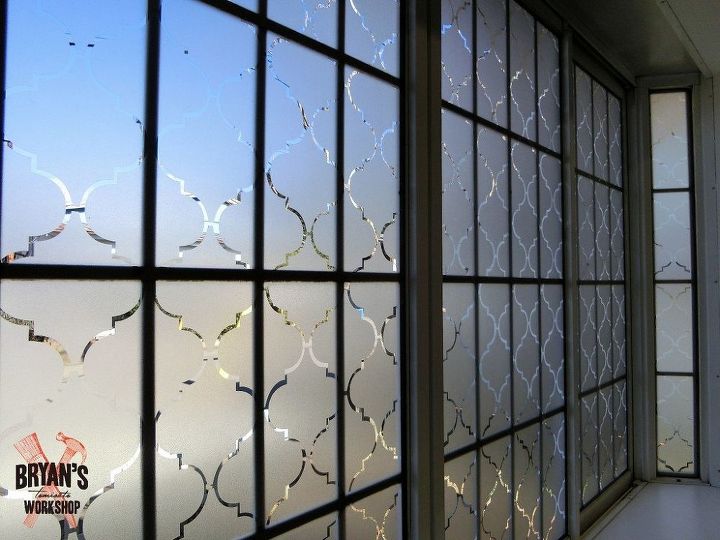
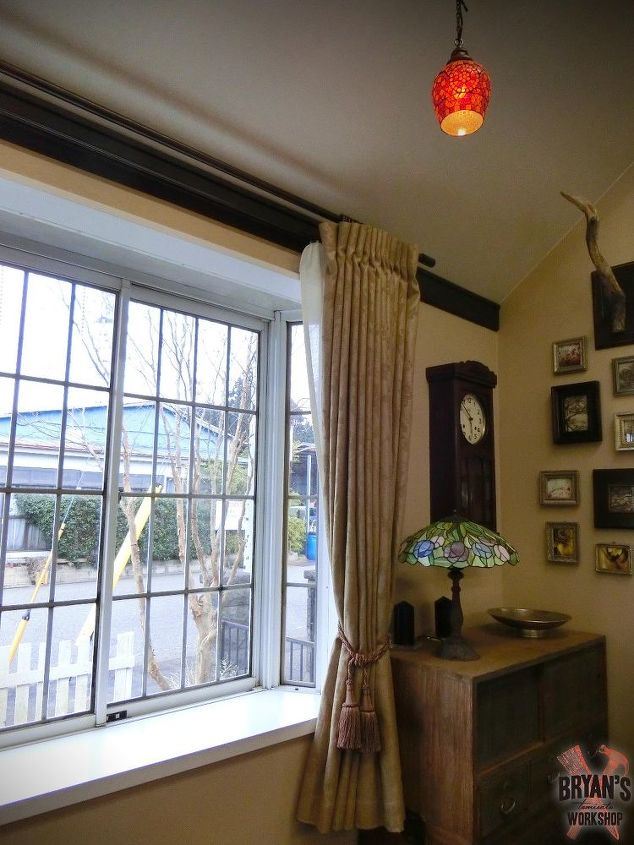
Here's a shot from the inside in the morning.
We love this window and would love to see your privacy window creations!
If you're interested in crafting, building, antiques and themed parties stop by Bryan's Workshop Facebook and Instagram page!
Resources for this project:
See all materials


Comments
Join the conversation
-
You're welcome! So, so beautiful!
-
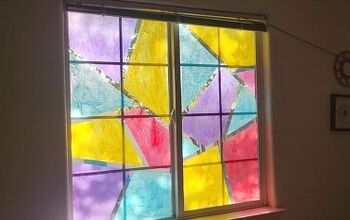
I love this idea but I would have left the top clear so I could still see out


Frequently asked questions
Have a question about this project?
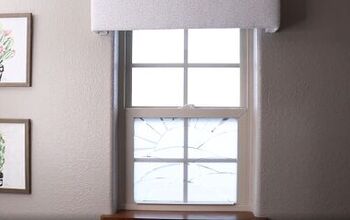
Do you feel you lost a lot of light doing this? I’m afraid my space may get too dark
Your window looks absolutely gorgeous! Beautiful work!!!! Wonderful idea!!!
Why would you want to block suns rays? You get vitamin D by the sun.